It’s bathroom reveal day! Today I’m sharing the results of our Jack and Jill bathroom remodel and I couldn’t be more excited today is finally here. If you’ve read my blog over the years, you know this project has been a long time coming and has been on my “to-do list” for as long as I can remember. Needless to say, I couldn’t be happier to finally see my plans come to life and share it with you today!
This post contains affiliate links for your shopping convenience. Click here to read my full disclosure policy.
Jack & Jill Bathroom Remodel: Before & After
If you’re new around here and want to get caught up on the project, I’ve linked the three main articles and background details and in-progress photos below.
- Guest Bathroom Renovation: Current Situation & General Ideas
- Jack & Jill Bathroom Design Plans
- Bathroom Remodel Progress & Tips
The bathrooms in our home have continued to be the most outdated spaces we have. Other projects took priority over the years, so even after living in our home for over eight years now, the only changes I had made to any of them was with paint. But the time finally came to fully renovate our Jack & Jill bathroom and I couldn’t be happier with the results.
Let’s jump into the reveal! I’ll be sharing some of the sources along the way, but have a full sources list at the bottom of the post.
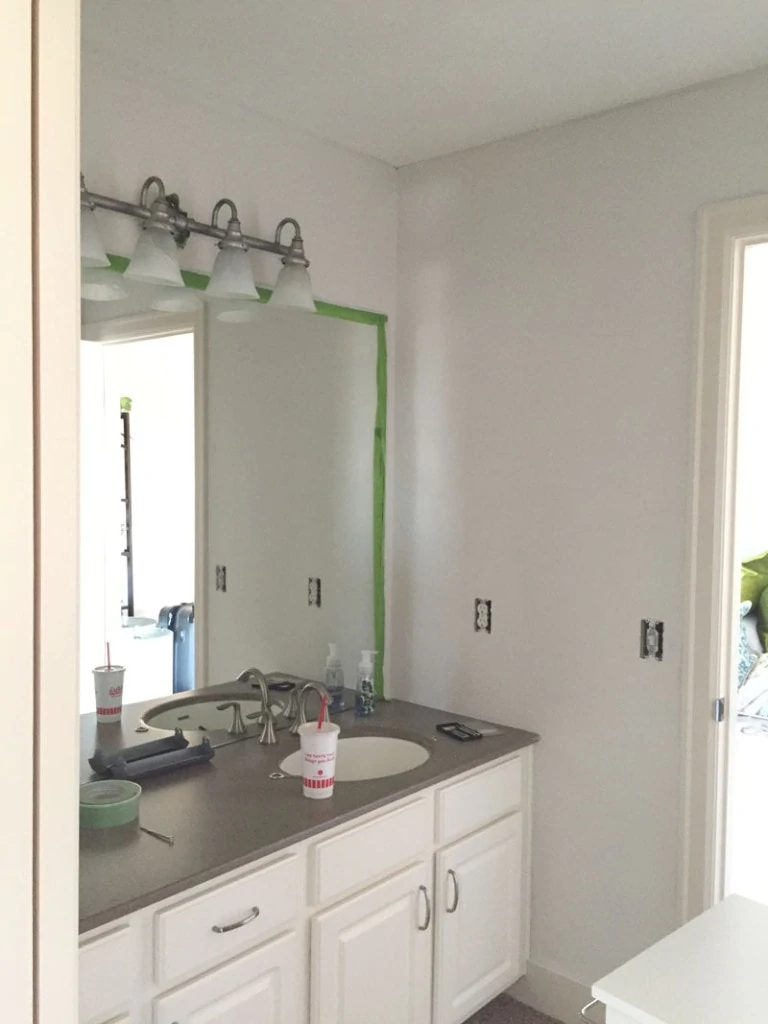
As reminder, here is how the vanity area of the Jack and Jill bathroom looked when we first moved in. Not shown – the carpet on the floors in this area.
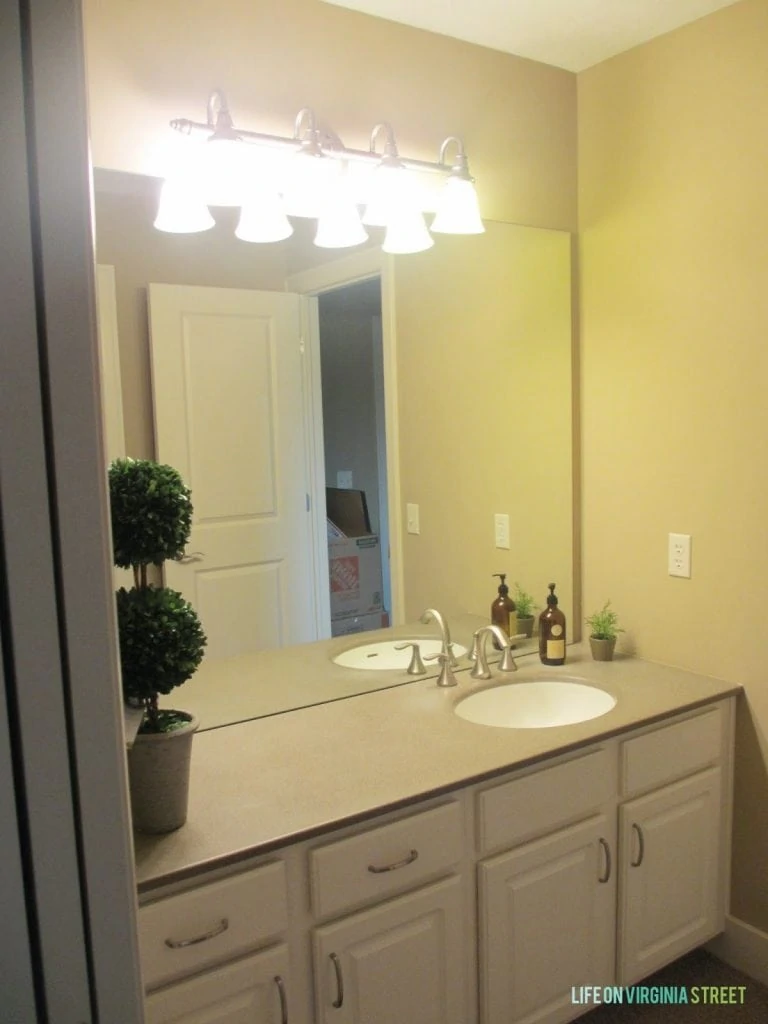
Shortly after, when I was on a painting spree, I painted the bathroom BM Classic Gray. I only got one coat done and then it sat like this (Frog Tape and all) for four or five years. This is our most frequently used guest bathroom, and clearly, I kept it really fancy 😉
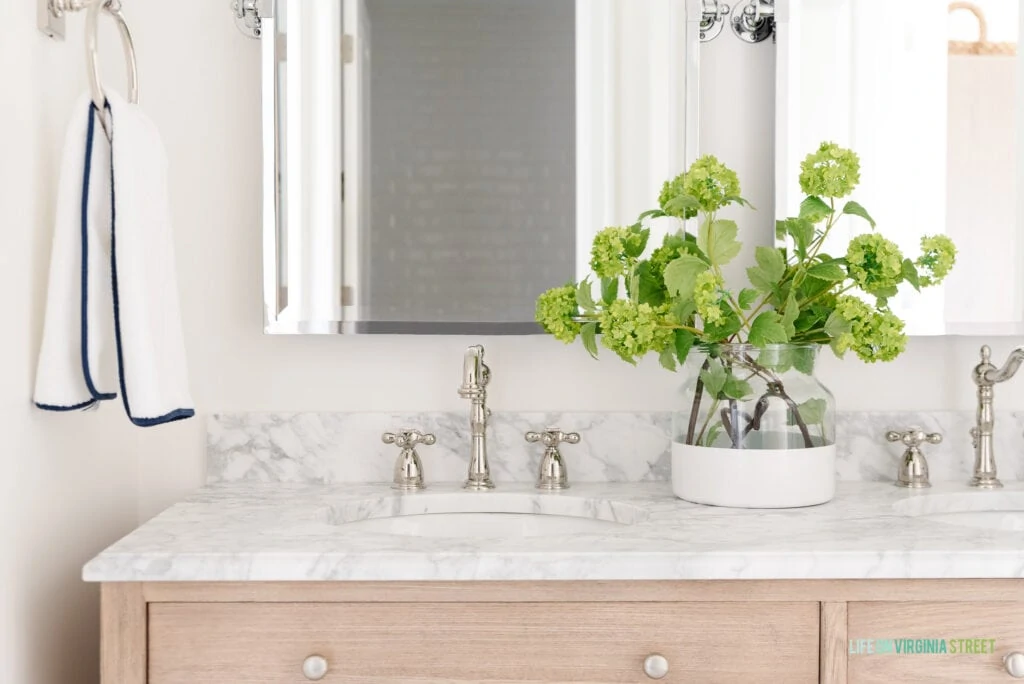
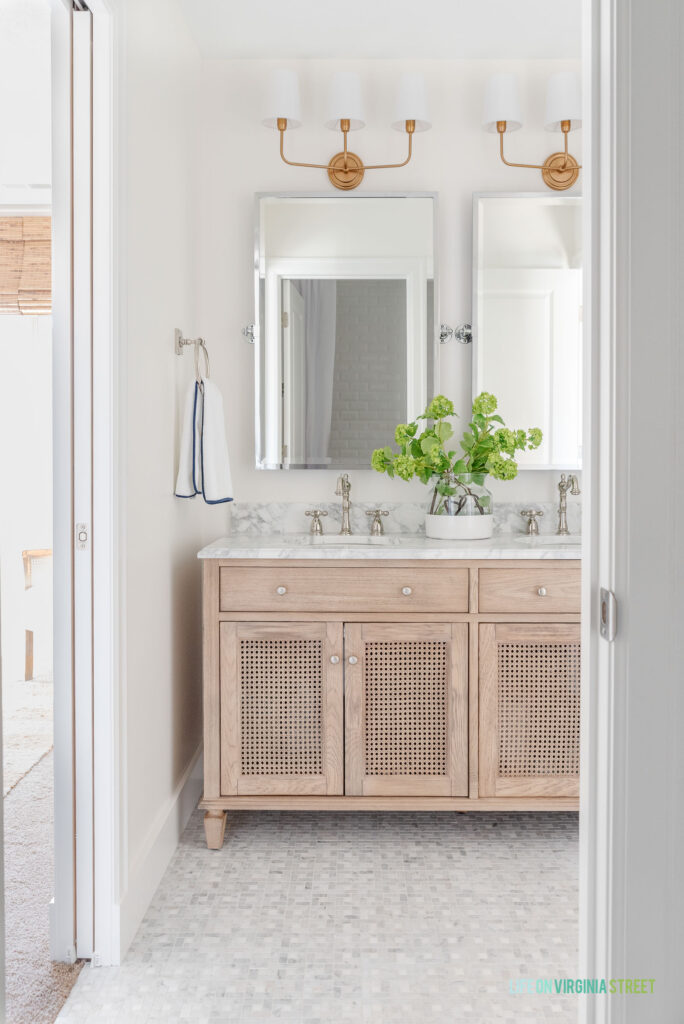
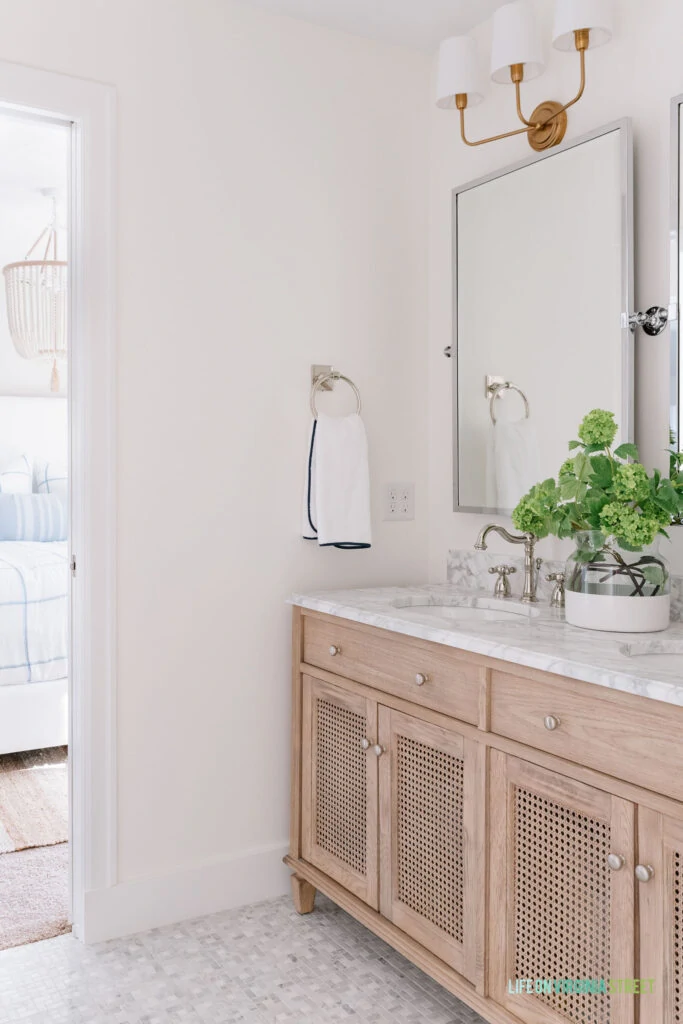
And here is how that same angle looks now! It still doesn’t feel real or that this bathroom actually exists in our home! My overall goal for this particular bathroom was to keep the finishes classic and timeless, with a tiny bit of coastal spin. I basically envisioned old-school Restoration Hardware vibes when I first created my mood board and selected the tile and bath fixtures. I wanted our guests to feel like they were visiting a fancy hotel, but wanted to ensure whatever I selected would have to be replaced for many, many years (or ever). With the vanity being viewable from both our den and larger guest bedroom, I went with this cane vanity that has more of a furniture vibe to it. It also helped to add a bit of the coastal vibe I love so much!
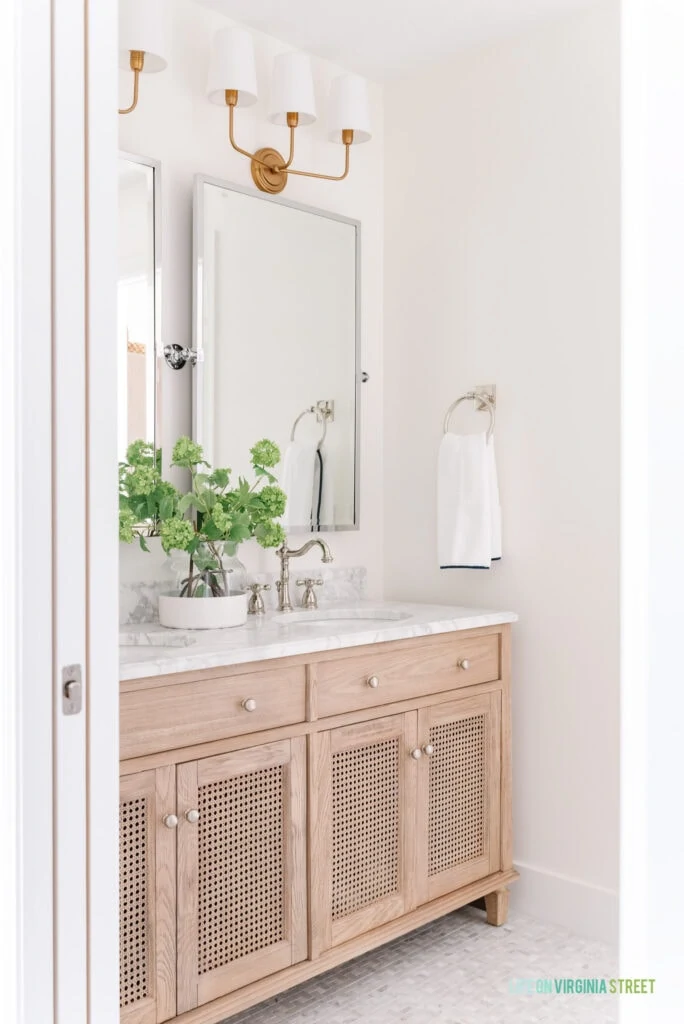
GUEST BATHROOM SOURCES: Cane Vanity | Pinwheel Carrara Marble Floor Tile | Sconce Lights | Pivot Mirrors | Faucets | Towel Bar | Towels | Paint Dipped Vase | Faux Viburnum Stems
The bathroom is divided into two main spaces. Here was how the shower/tub/toilet area looked before.
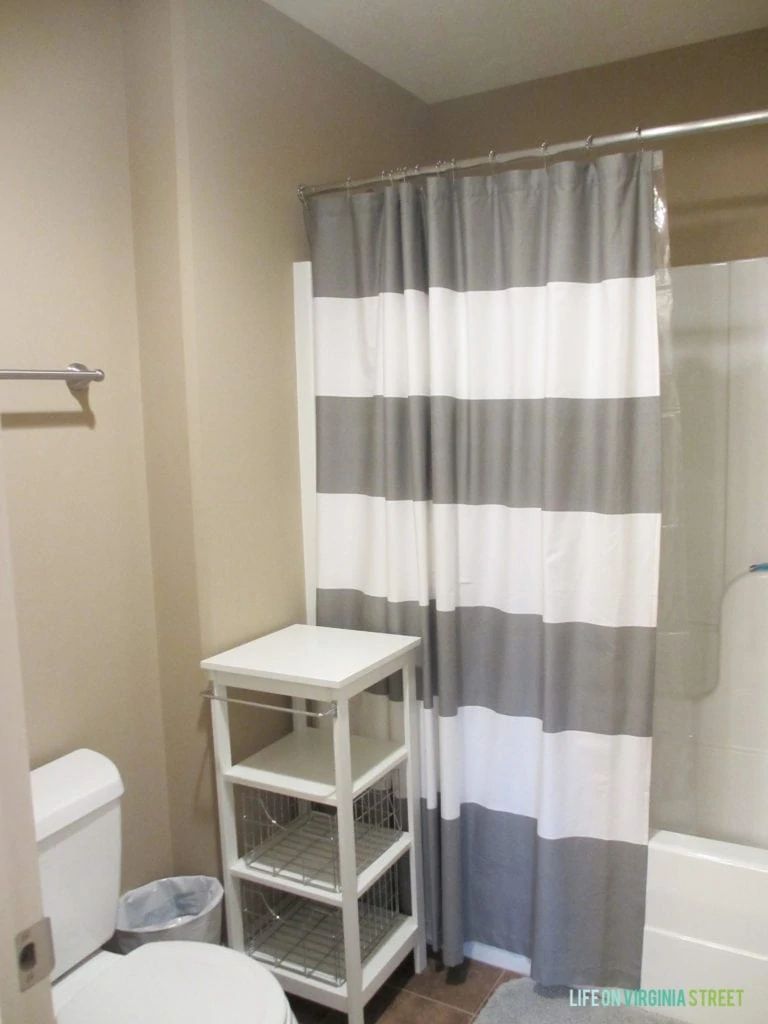
And here is how it looks today! By removing the shower/tub insert and extending the beveled subway tiles up the wall, the room seems twice as large and tall!
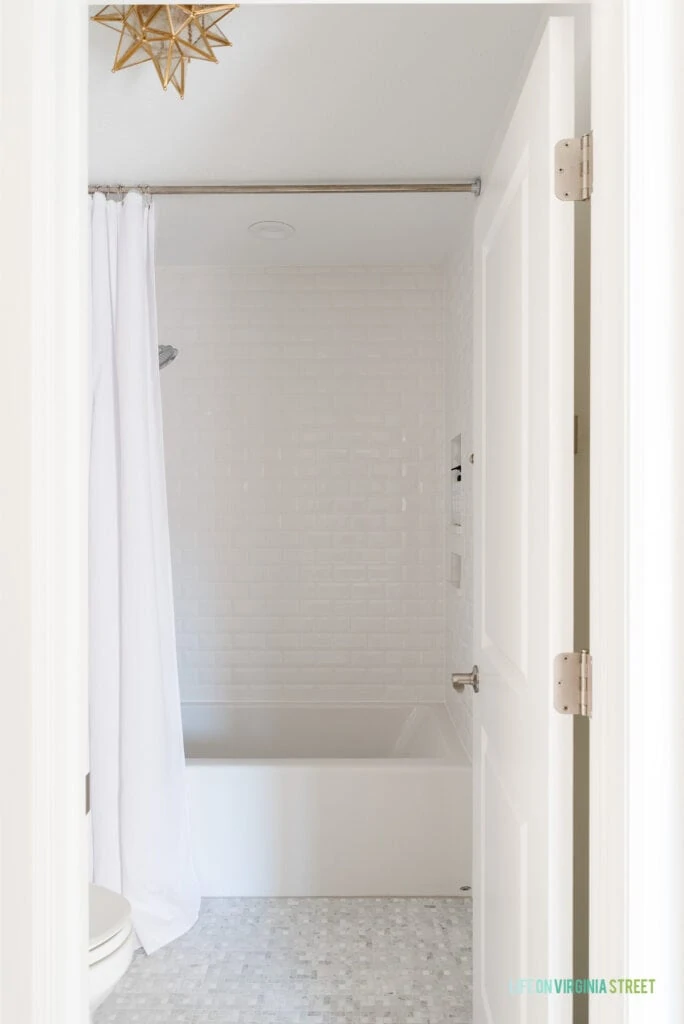
SHOWER/TUB ROOM SOURCES: Pinwheel Carrara Marble Floor Tile | Beveled Subway Tile |Moravian Star Light Fixture | Toilet | Bath Tub | Shower Curtain (white) | Shower Curtain Liner (clear) | Shower Curtain Rod & Rings
Bathroom Makeover Finishes and Details
Let’s take a closer look at some of the finishes and details in the space.
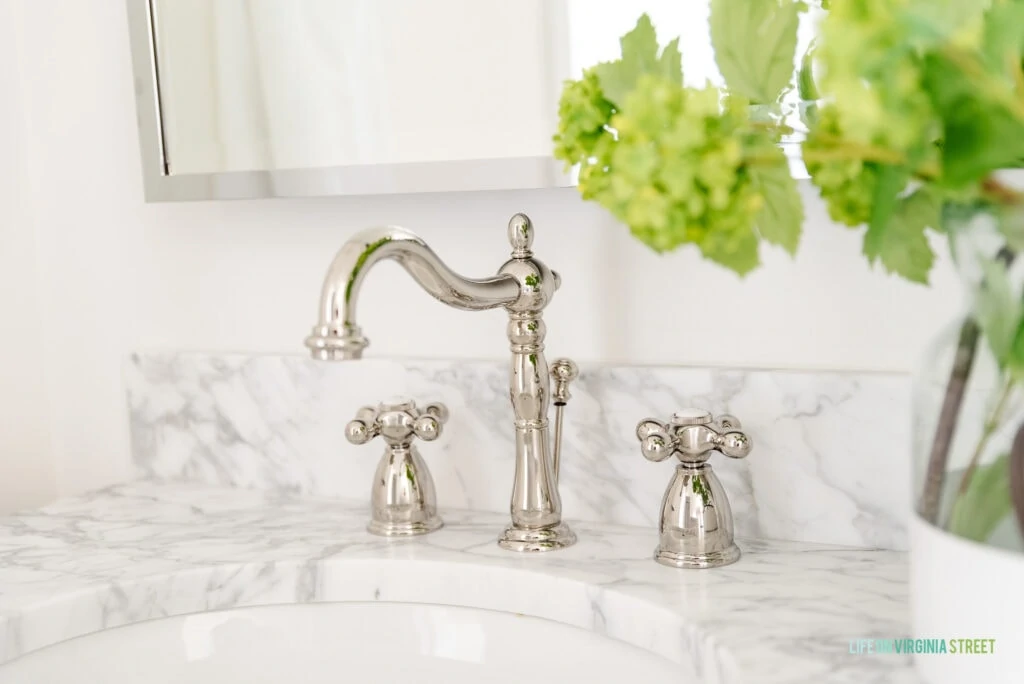
One of my favorite finds was these designer look for less faucets. I ordered them first for this bathroom (in polished nickel) and loved them so much I used the same one in the other bathroom (in chrome)! They have that gorgeous, timeless quality I was looking for and I love that they are substantial (so heavy!) and the necks actually pivot.
The pivot mirrors were a splurge, but the last few mirrors I’ve ordered from Pottery Barn have been worth every single penny. And these were definitely no exception. The quality is impeccable and they are absolutely beautiful in person. The pivots are functioning, as well, so you can tilt the mirrors downwards if needed. Since we’re both rather tall, we keep them straight, but it’s nice to have the tilt option, particularly in a Jack & Jill bath if kids are using them. I immediately fell in love with these sconce lights and thought they were a great way to add in some more warmth to complement the vanity, but when they arrived they were really warm. Borderline orange. So, I used some Rub N’ Buff in the European Gold finish to tone it down a bit. I had never used it before, and it probably needs another coat, but it was so easy and quick to use and it definitely helped change the tone.

The countertop is Carrara marble and ties in perfectly with the floors. It, along with the sinks, is included with the vanity which is nice.
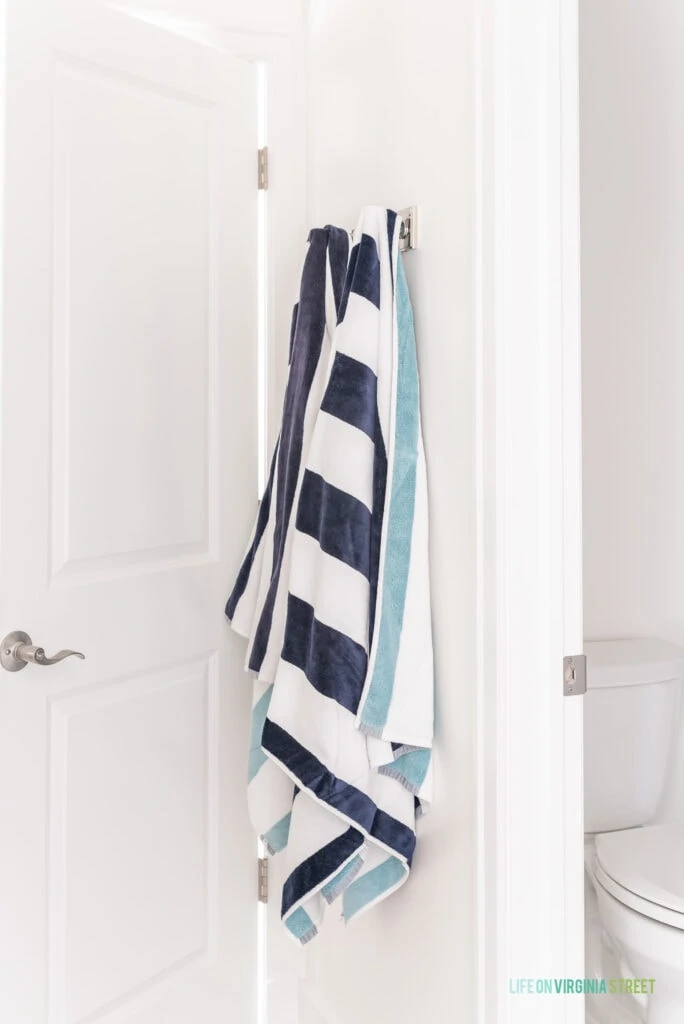
Here’s the view looking into our den. Behind the door, I added two robe hooks for extra hanging space.
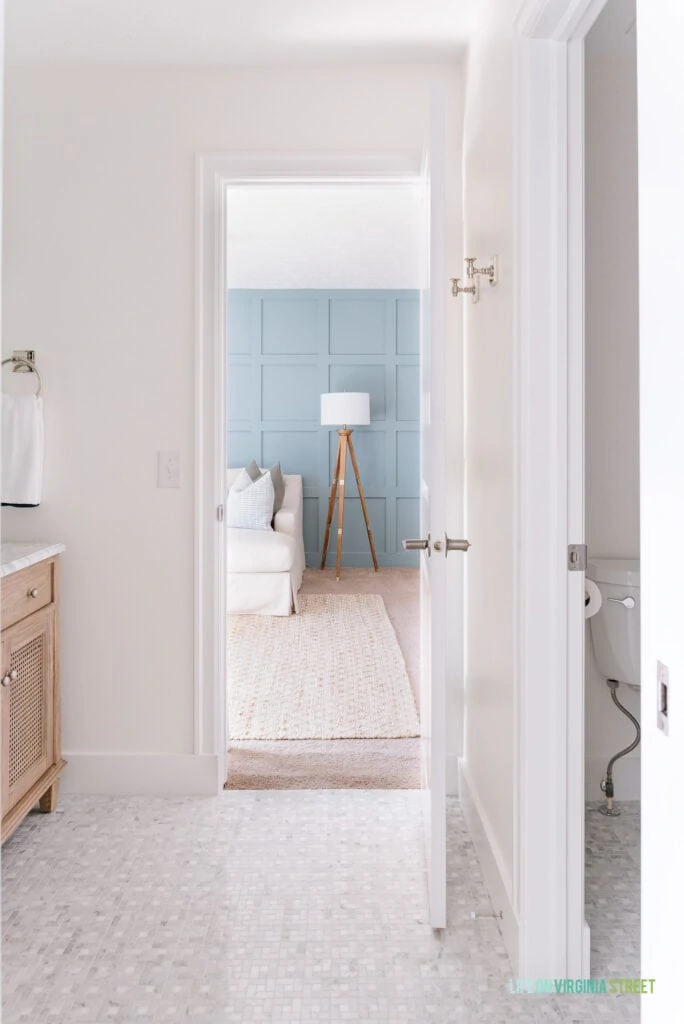
Since most of our guests are here in the summer months to use the pool, they usually have double the towels. So I love the extra hooks for pool towels or wet bathing suits. We also have a long towel bar behind the door in the tub/shower area, removing the prior one that was above the toilet. This bathroom hardware is so substantial and so stunning in person. And it was about half the cost of the sets that matched our shower hardware. I bought it in polished nickel in this room and chrome for the other bathroom and love them in both spaces.
We no longer have carpet under the vanity! I think that was one of the biggest changes in terms of making the overall space flow better and feel so much bigger! If you ever use this tile, it’s best to order extra, as it’s clear different boxes were quarried at different times. I had the guys lay everything out before setting it so that I could pull out the 12″x12″ sheets that were too light or two dark. There were also a handful of orange-ish tiles mixed in (since it is a natural product), and they were great about just popping out that square and replacing it with a more natural option.
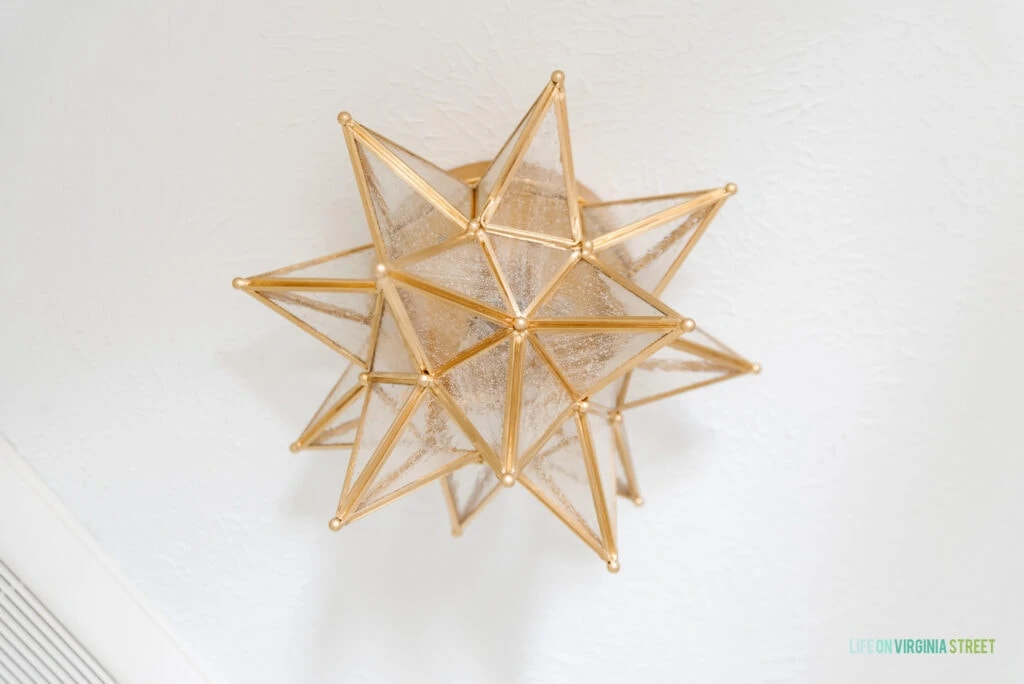
Moving into the room with the shower and tub, we added this Moravian star light fixture where the existing can light was. We then added a new can light over the shower to allow for an extra long shower curtain, further making the space feel brighter and taller! The star light helped carry a touch of the gold and warmer tones into this space.
I absolutely love the shower hardware we used! The cross shape on the faucet knob is one of my favorite features! And I will never get tired of classic white beveled subway tile – especially when it is so affordable! I know there are people that think it’s overdone, but that’s not a reason to not using something you love. Craig and Matt at Gitt Construction were meticulous with their tile work (one of the main reasons I hired them) and I’m so incredibly happy with the work they did.

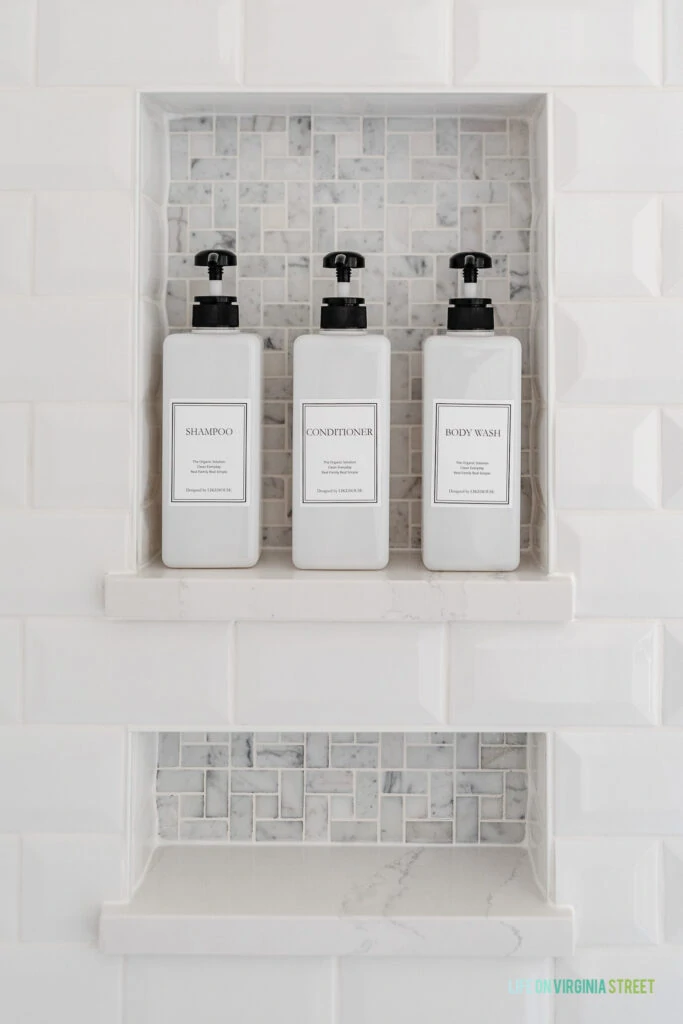
We added this set of niches into the wall at the end of the shower. The general contractor, Tim at Gitt Construction, actually recommended the second, smaller niche for bar soap and razors, etc. So, so happy with the suggestions and that we opted to go for it! This is one area where the tile work and attention to detail particularly shines. Not only is the subway tile all centered when looking at the shower head on, but the niche is perfectly centered and built to the exact dimension of full pieces of tile to avoid odd-looking cuts and angles. My choice of beveled subway tile definitely complicated matters but it looks so good! There is a white schluter around the edge and then the shelf is Silestone Eternal Calacatta Gold. I wanted something that looked like the marble, without actually being marble so this quartz was a great option! I used these shampoo, conditioner, and body wash bottles that I bought years ago when I thought we were tackling this makeover, and I’m so glad I got to finally put them to use!
One final view looking out towards the guest bedroom.
I can’t thank the crew at Gitt Construction enough for all their hard work on this project. A big thank you also goes out to my friend Mandy McGregor Photography for all the beautiful photos!
I hope you all enjoyed following along on this makeover journey! I know some of you have been waiting for it for 7+ years so I’m so happy the day is finally here! If you have any questions on the process, feel free to let me know in the comments. Our shower door in the other bathroom had to be re-ordered again, so it may be another week or two before I can share that reveal but we’re getting close! And we’re both so happy to have these projects completed!
Jack & Jill Bathroom Makeover Sources & Vendors
Following is the full list of sources and vendors used for our Jack and Jill bathroom remodel project.
General Contractor: Gitt Construction
Photography: Mandy McGregor Photography
Paint Color: Benjamin Moore Simply White; Eggshell finish on walls, Semi-gloss on trim
Wood & Cane Vanity
Sink Faucets (polished nickel)
Shower Fixtures (polished nickel)
Bath Tub
Toilet
Floor Tile (also used in the shower niches)
Floor Grout: Silverado
Beveled Subway Tile
Shower Grout: Bright White
Shower niche ledges: Silestone Eternal Calacatta Gold
Pivot Mirrors (polished nickel, 28.5″ x 36″)
Towel Bars, Rings, Toilet Paper Holder & Hooks (polished nickel)
Vanity Light Fixtures
Moravian Star Light Fixture
Banded Towels
Faux Viburnum Stems
Paint Dipped Vase
Reversible Striped Pool Towels
Shower Curtain (white)
Shower Curtain Liner (clear)
Shower Curtain Rod & Rings
Shampoo, Conditioner, and Body Wash Bottles
Additional Bathroom Inspiration
Looking for additional bathroom inspiration? Be sure to check out the following posts. Click any of the titles below to be taken directly to the article.
- Bathroom Remodel Progress & Tips
- Jack & Jill Bathroom Design Plans
- Small Guest Bathroom Design Plans
- Bathroom Sconces
- Small Bathroom Ideas & Makeover Inspiration
- 48″ Bathroom Vanity Ideas
- Stylish & Affordable Bathroom Vanity Lights
- Classic Coastal Bathroom Vanities
- Guest Bathroom Renovation: Current Situation & General Ideas
- How To Make Your Bathroom Feel Like A Spa
- An Under $200 Coastal Bathroom Makeover
- How To Paint Thermofoil Cabinets
- Powder Bath Reveal
If you would like to follow along on more of my home decor, DIY, lifestyle, travel and other posts, I’d love to have you follow me on any of the following:
Pinterest | Instagram | Facebook | Twitter
disclosure: some affiliate links used
Absolutely beautiful!!!
Beautiful and classic bathroom. Absolutely love the hardware and fixture selections. Well done!
LOVE, LOVE LOVE everything about this bath!! So well done Sarah! I’m getting ready to start our cabana bath demo and I’m finalizing selections. Would love to know color of bathtub and dimensions of the niches.
Can’t wait to see the second bath now!
I love everything you chose in this bathroom! Well worth the wait.
Looks gorgeous! Great job!
Congrats Sarah&Kurtis! I think you’ll have to hold a lotto With your family and friends to see who the first guest to visit will be!
Thanks for starting my day with beautiful eye candy!
This space is stunning! Well done! I totally respect if you don’t want to share, but I would love to know the budget for this project!!!
Beautiful and classic.
Excellent! It turned out beautifully!!
Wow, this looks amazing. Such a beautiful makeover. I love it all. Your choices are perfect. That vanity is killer for sure.
That looks fantastic! Now, that was a lot of work but very worth it! Great choices