I’ve been a long time advocate for the power of paint. It is one of the most dramatic and affordable changes you can make to a space! It’s hard to believe, but tomorrow marks the six-year anniversary of moving into our home, and over the years I’ve worked to paint the walls in nearly every room.
Today, I’m going to share a space that was one of the few remaining areas that had the original flat paint the builder used over ten years ago. You probably don’t even remember this room exists because I have only shared it a time or two over the past six years. But today, I’m sharing an under $200 coastal bathroom makeover that shows just how powerful paint and a few affordable accessories can be to completely change a space!
This post is sponsored by True Value and EasyCare Ultra Premium Paint and contains affiliate links. As always, all thoughts and opinions are my own. Click here to read my full disclosure policy.
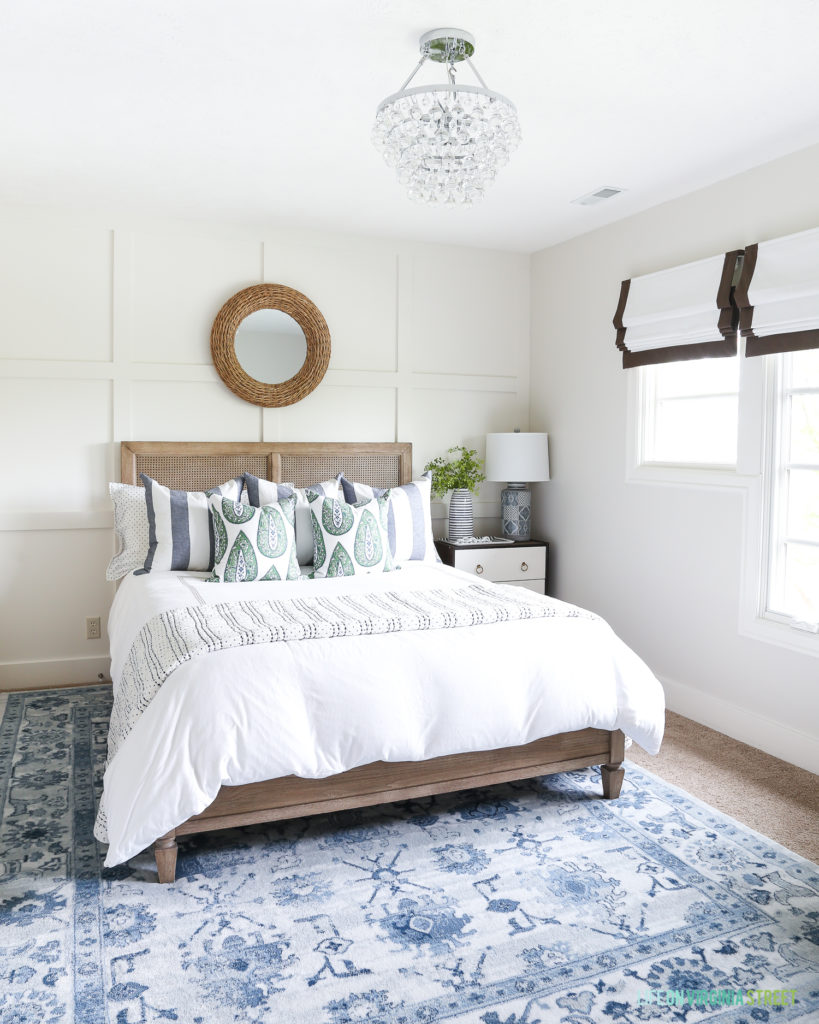
When True Value reached out to me to offer paint from their EasyCare Ultra Premium Paint line for a room makeover, I immediately thought of our smaller guest bathroom. It’s likely the least used bathroom in our home, which is probably why I’ve neglected it for so long. But, over the last year or two, we’ve had an increasing number of guests using it and to be honest, it was an embarrassment. To refresh your memory, the bathroom connects to this bedroom. You enter the bathroom through a door on the left-hand side of the room.
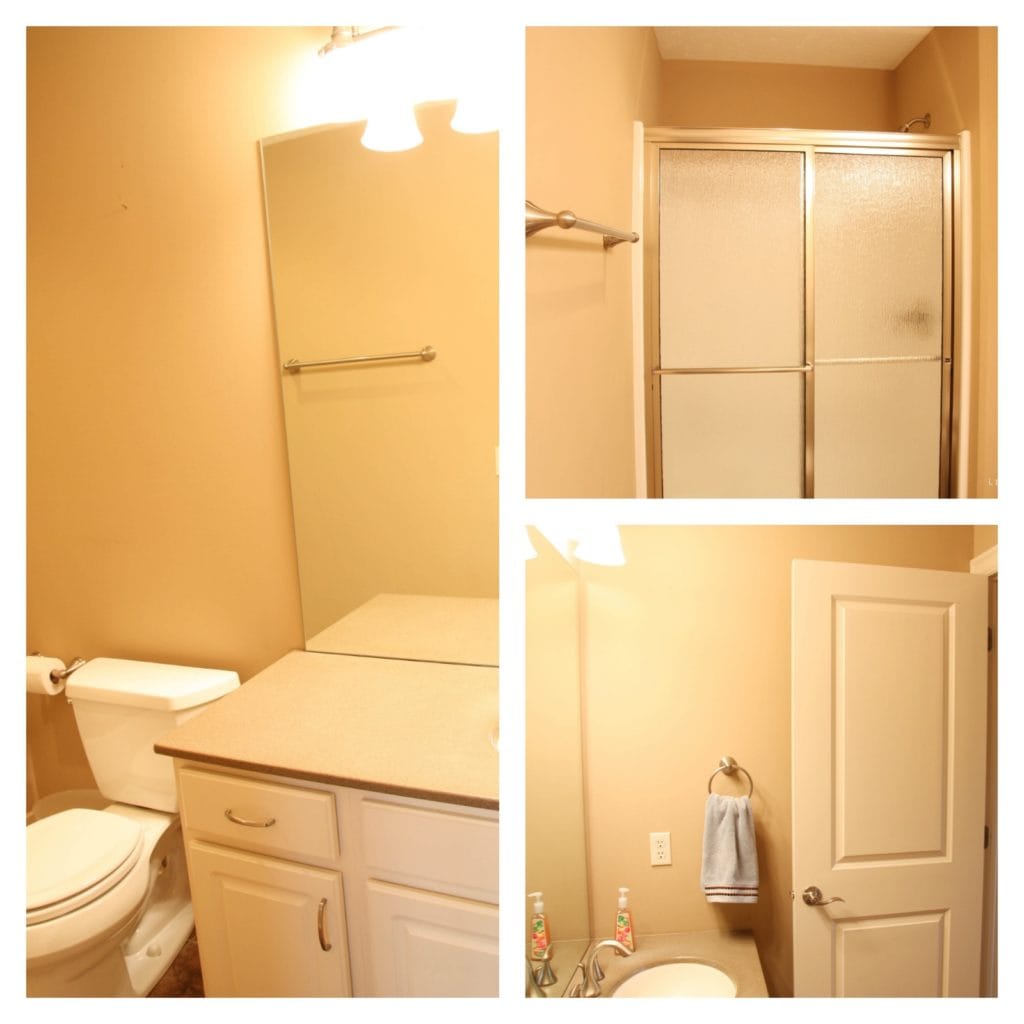
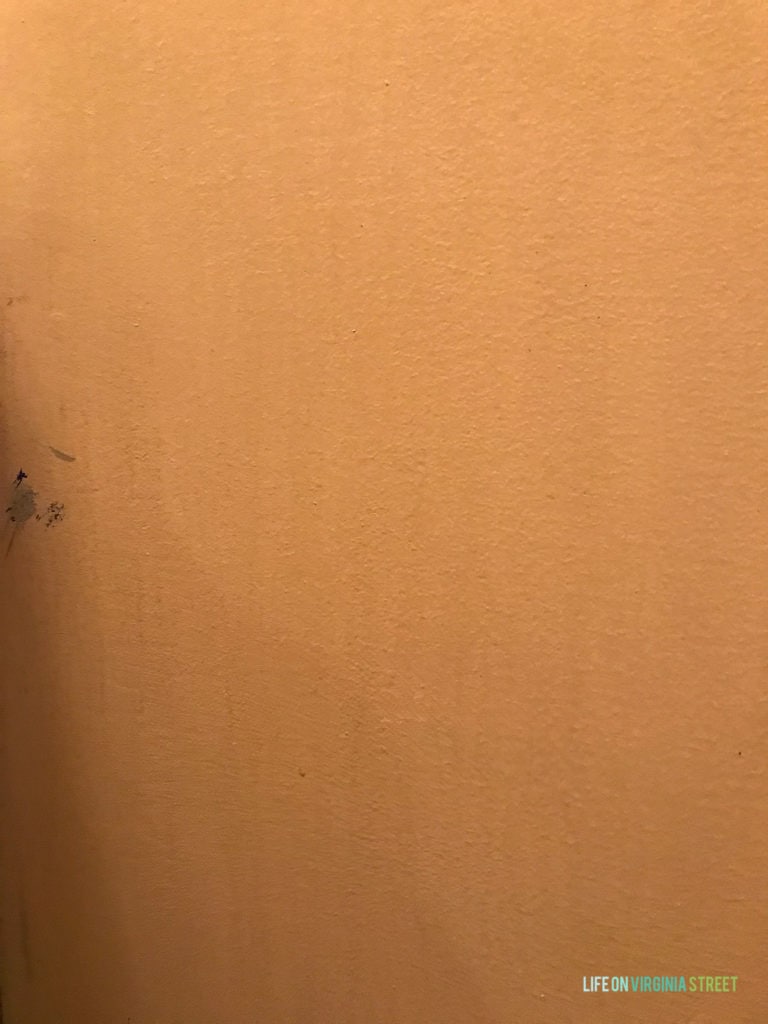
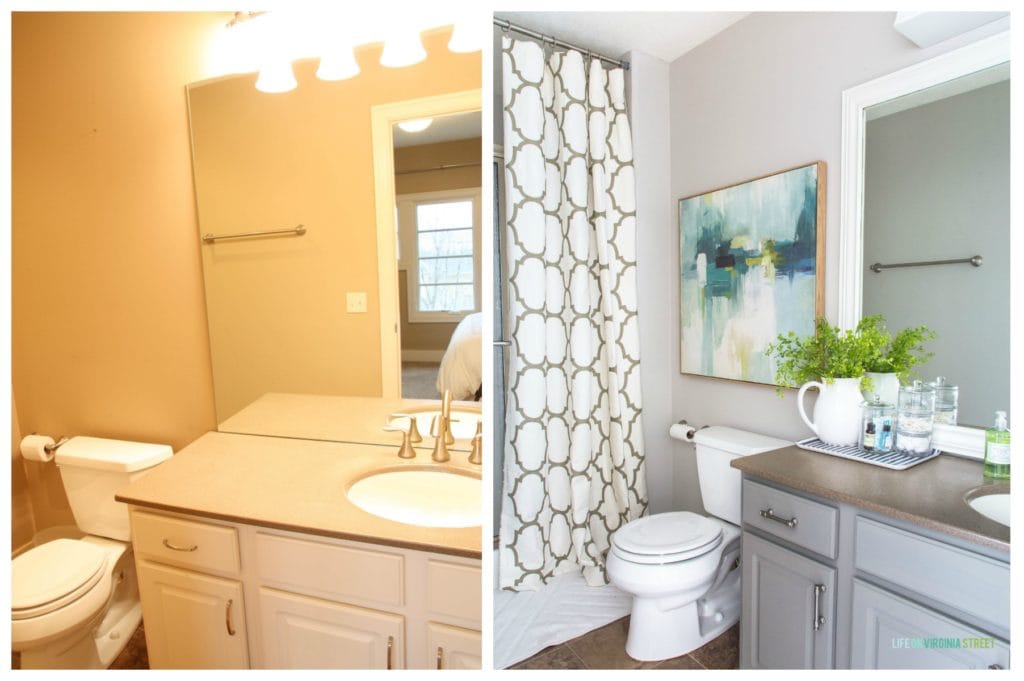
And here’s how the bathroom looked after we moved in. We were focused on other spaces so it was bland city for many months. The paint was flat and flesh toned and ten years later, it was in bad shape!
 And then, because it was so bland before, a color explosion happened when I decided to paint the vanity dark blue (which really turned out more like cobalt blue) a few years ago.
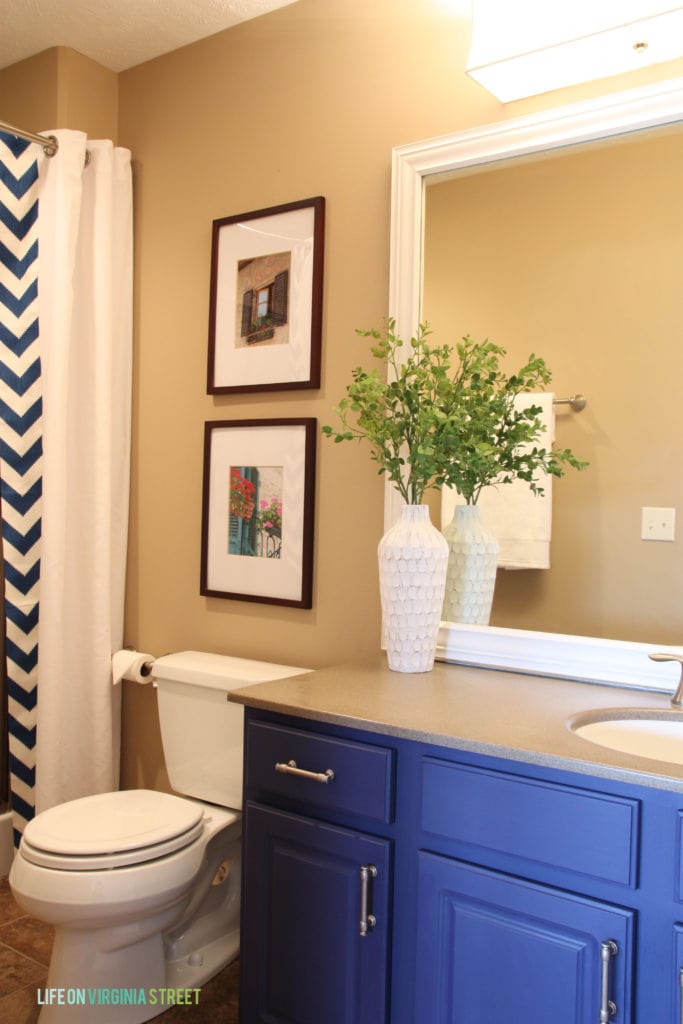
Whose house is this anyway? It certainly didn’t flow well with the beachy vibe of the connecting bedroom (or really anywhere else in our house for that matter)!
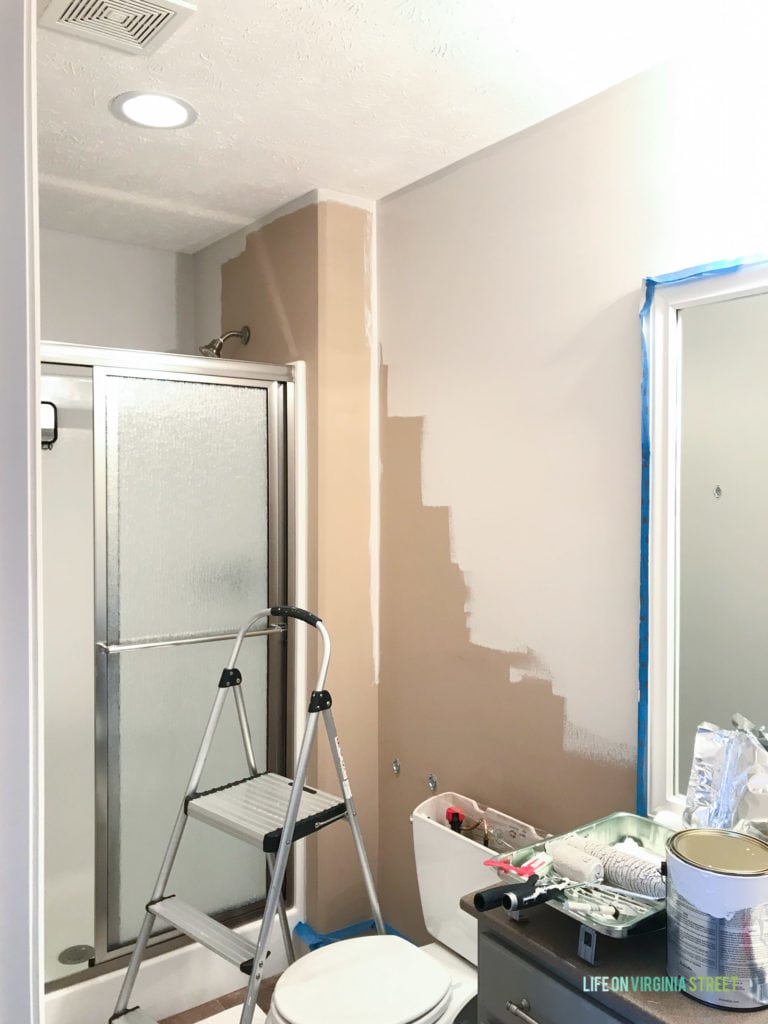
I painted the vanity gray a year or two back, but otherwise, it basically sat like this for years. And although I had every intention of painting the walls shortly after (hence the blue cabinet paint on the walls), it never happened. Our walls are ten years old and the original paint was still intact. You can see what looks like drip marks all over (likely from moisture in the room). Flat paint in bathrooms weirds me out almost as much as carpet in bathrooms! It’s clear these walls needed to be painted badly!
Down the road, we’d love to fully remodel this bathroom with a new vanity, new flooring, replace the Corian countertops and possibly add some tile. But, the reality is that likely won’t be in the budget for many years as it really isn’t a top priority. But, that also doesn’t mean it has to be ugly until that time! I set myself a max budget of $200 to freshen up the space to make it feel like it fits better with our home!
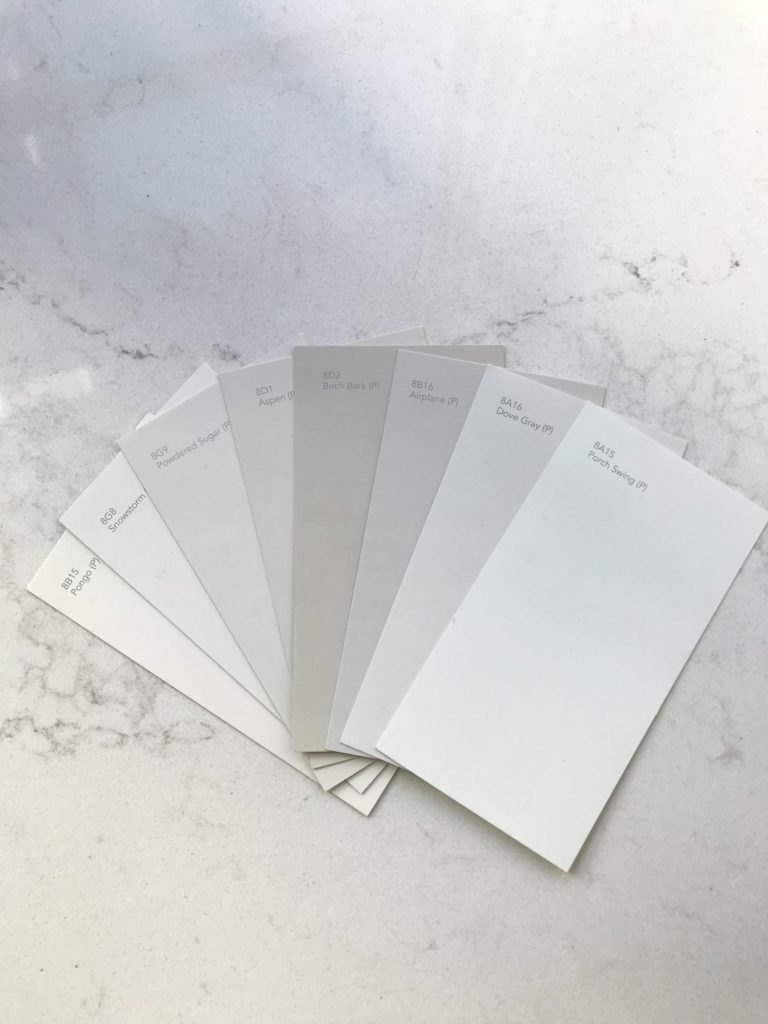
Since this bathroom is mainly used by Kurtis in the mornings (when he changes to work out but doesn’t want to wake me) or our guests, I let him have some guidance on the paint color. I say some, because let’s be honest – he’d pick the wrong color if I left it entirely up to him 😉 I ordered a handful of paint chips I thought would work in the space, and came up with the below options. I ended up going with the darkest one – EasyCare Paint Birch Bark – in an eggshell finish. The color a beautiful warm gray-ish color and exactly what Kurtis and I had jointly envisioned! You can explore the full EasyCare Paint color line here.
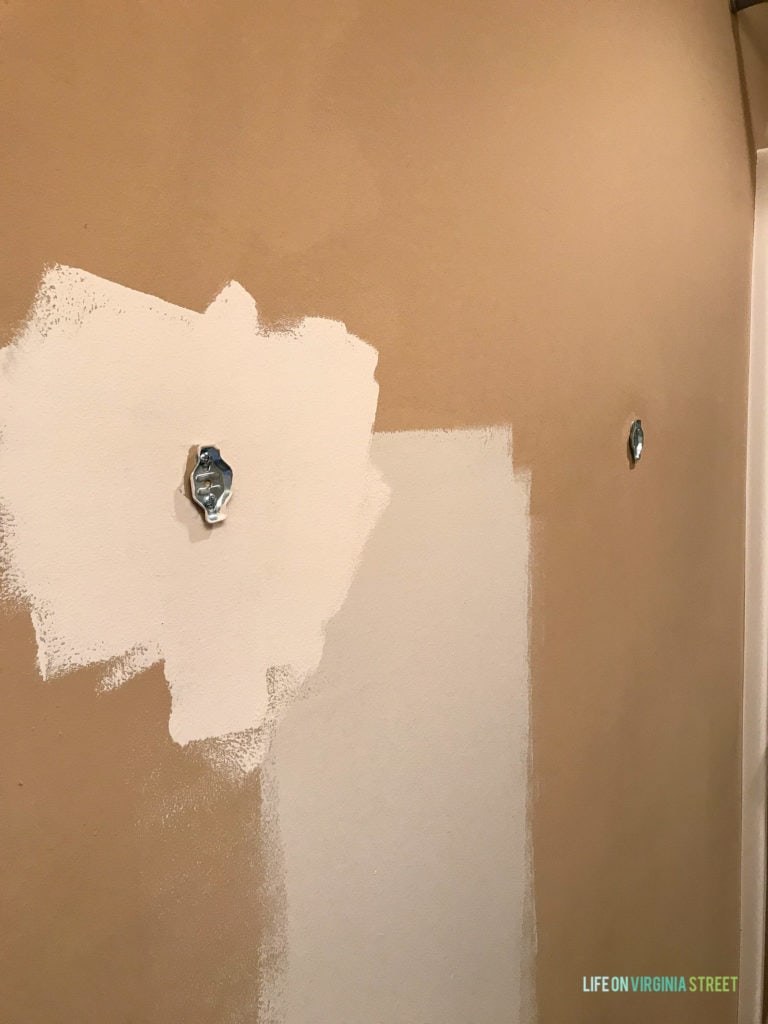
I painted a little sample on the walls to make sure I liked the color, and I loved it! You can see here how when the paint first goes on it’s lighter and then dries to the true color. It was perfect!
When I had about half of the room painted, I couldn’t believe how much brighter and larger the room felt!

The new reflection in the mirror really showed the difference in paint colors! I loved the cooler tone of Birch Bark (even though it’s very much still a warm color). The old color was just so brown and warm!
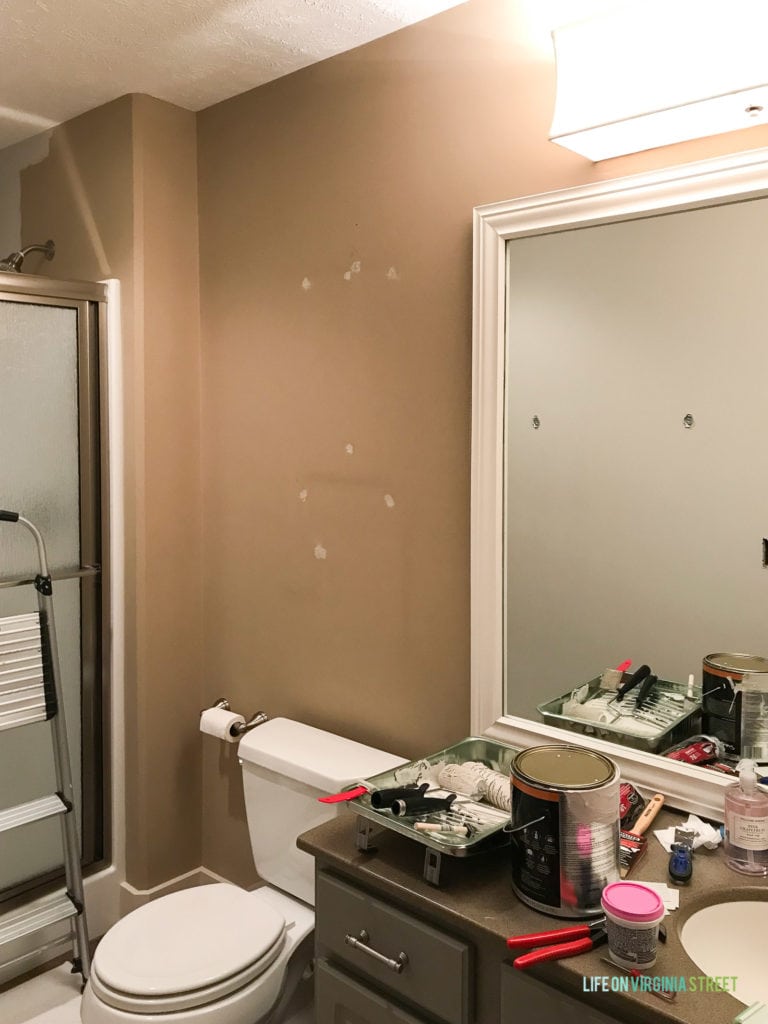
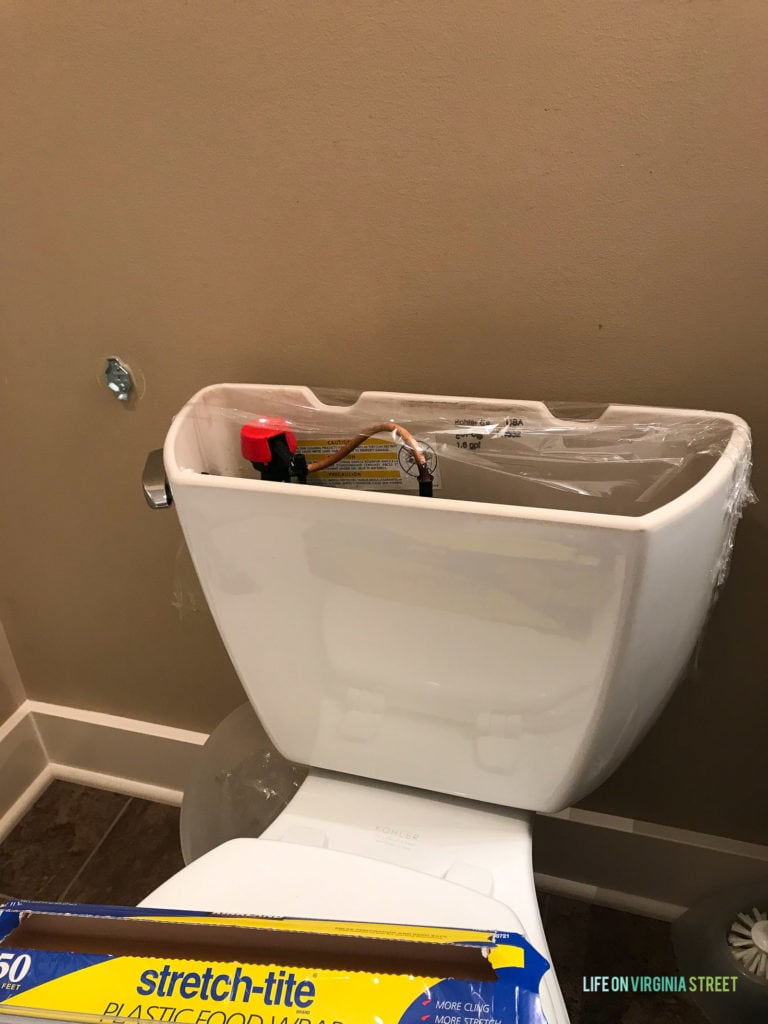
Also, here’s a little painting hack for you. I used to try to use painter’s tape and paper to cover the toilet. Now I just take the lid off and use plastic wrap around the back about three times to fully cover it. It works like a dream and so much quicker and easier – on both the prep side and clean-up side!
As I neared the finish line, the room was starting to glow!
So here’s the deal. Over the years, I’ve used a lot of paint brands. Maybe all of them 😉 And the reality is, I don’t really LOVE any particular brand and I tend to just buy based upon the color I want to use (because I haven’t had great luck with color matching). I’ve also used a lot of paints that claim to be one coat and I’ve literally never had that work for me. Ever. Until now. I was blown away by the smooth and full coverage on this paint – especially with our flat, sponge-like walls in here. I made Kurtis come look at least three times. This is by far the best coverage I’ve ever gotten out of a paint. I only had to do one coat and then a few touch ups around the ceiling (because I trim out a weird way). Let’s just say I was beyond thrilled at how quick this project went!
Not only that, I used so little paint! I actually ordered two gallons thinking I would need that much based upon prior experience with other paints (and our walls). I was shocked I only used about a third of the gallon even with our super absorbent walls! The paint is also certified by the Asthma and Allergy Foundation of America (AAFA), and minimizes irritants and pollutants in the air, creating a healthier indoor environment.
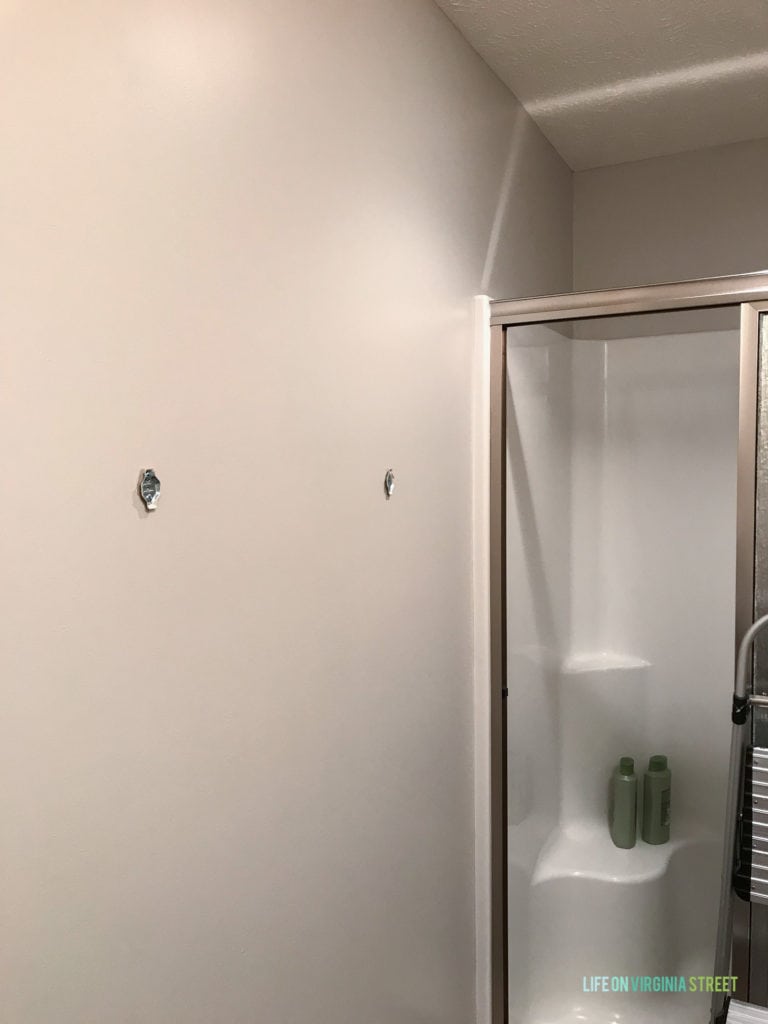
And now for the reveal! The hardest part of this entire project was taking decent photos of this bathroom since it gets zero natural light!
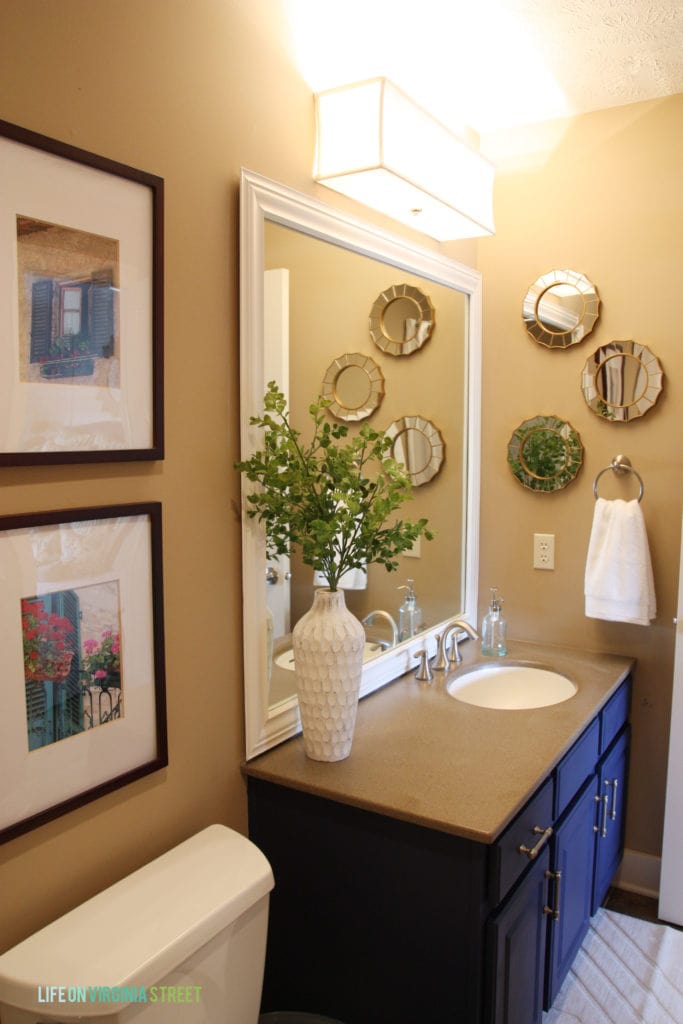
Here we are five years and three hundred and sixty four days after we moved in (sounds better than the actual six years it will be tomorrow), I finally have painted our ten year old flat paint! Below is how my under $200 budget bathroom makeover turned out! Doesn’t it flow so much better with the adjoining bedroom now? The new Birch Bark paint color laid the foundation for a dramatic change. And I actually came in under budget!
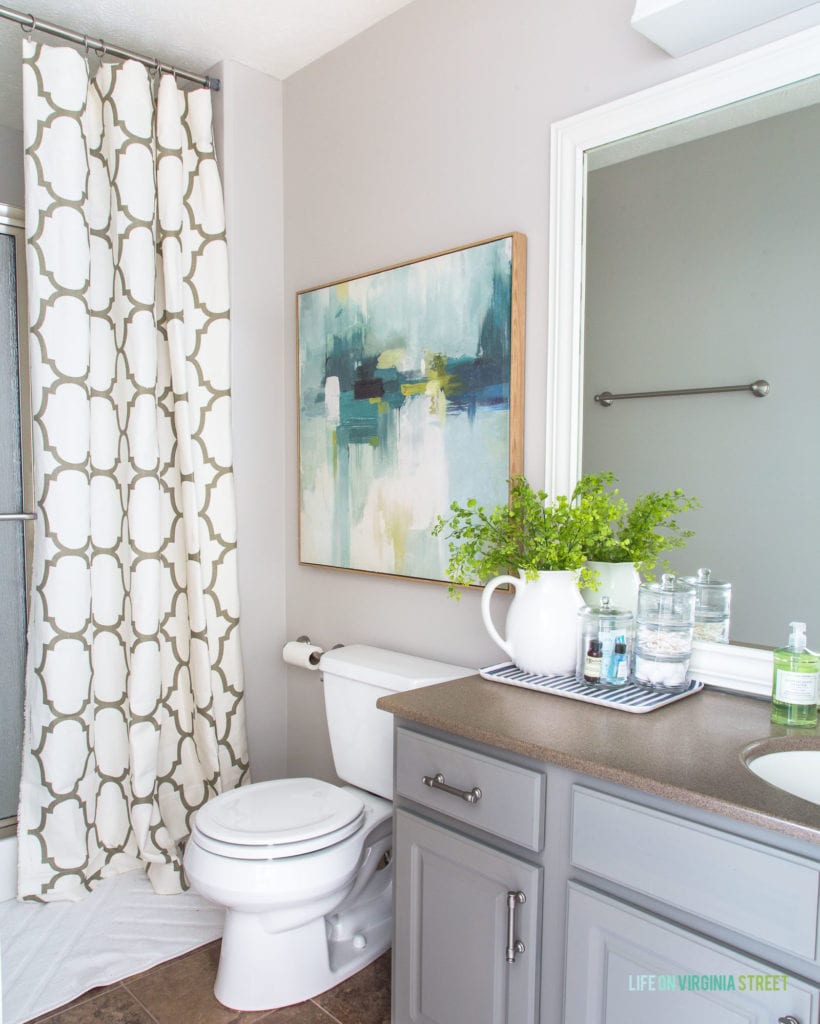
I love that Birch Bark is one of those colors that looks like it has beige tones in some lights and gray in others. It’s the perfect greige!
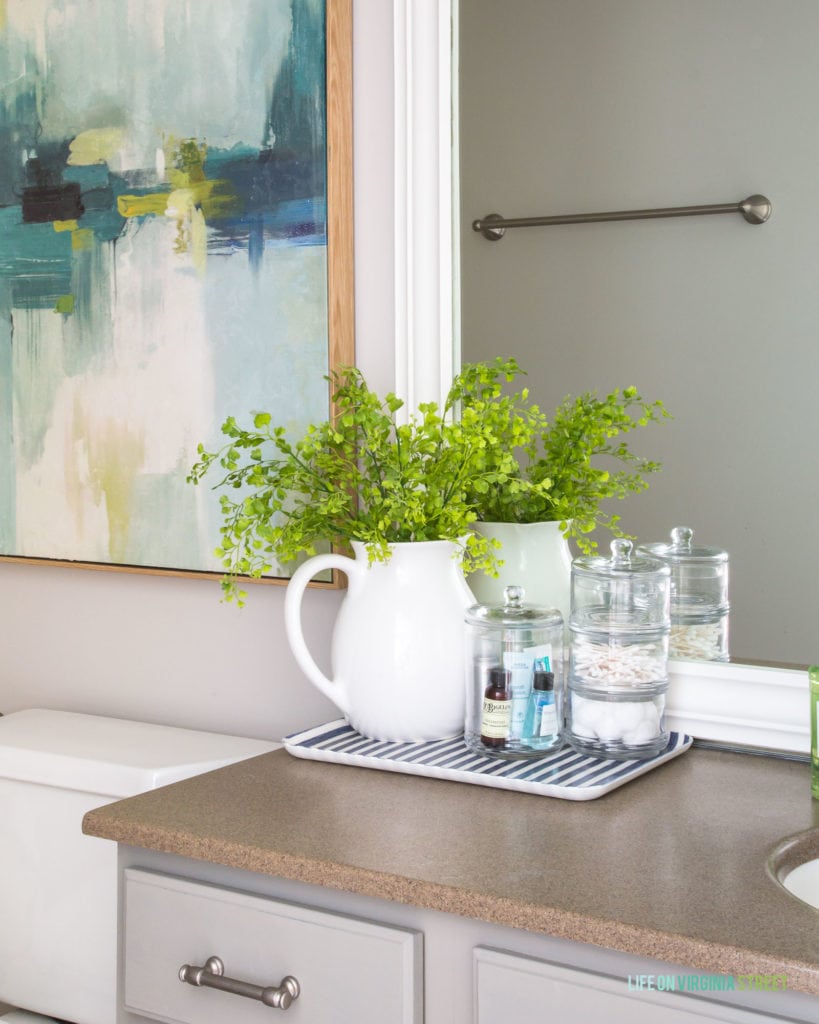
Since this is a temporary makeover until we upgrade the vanity and flooring, I didn’t want to put a lot of money into the accessories in the space. I basically shopped our house and brought in some new artwork. The “shower curtain” is actually a fabric remnant I had on hand but I loved that I could make it longer than a traditional shower curtain! The changes still feel dramatic even on a super tight budget! It now has that beachy vibe I love and looks so good with the adjoining bedroom!
It makes for a pretty fun before & after!


I hope you enjoyed this budget coastal bathroom makeover! If you’re wanting to try the EasyCare Ultra Premium Paint line, it’s available at True Value stores nationwide and many
independent paint and hardware retailers. You can visit the Store Locator on www.TrueValue.com to find a retailer near you!
If you would like to follow along on more of my home decor, DIY, lifestyle, travel and other posts, I’d love to have you follow me on any of the following:
Pinterest / Instagram / Facebook / Twitter / Google+
disclosure: some affiliate links used
Love, love how it turned out. Brightens up the room so much.
Thank you! The new color is definitely brighter and we love it so much!
It really does look amazing Great color choice.
Thank you Marty! We really love the color too!
What a huge difference! The final reveal looks so much softer and relaxing. Never underestimate the power of paint.
Thank you Elizabeth! And I agree – paint is one of the easiest and best updates you can make to a room!
What a beautiful update, so fresh a bright now! Love your tip about the plastic wrap behind the toilet — a trash bag works great too. Just put it over the tank and pull the excess bag forward, paint behind the tank then just remove the bag when finished. Love these types of hacks!!
Karen
Thanks so much Karen! And I love the trash bag idea – that even sounds easier than plastic wrap!
Boy, what a good change, good choice on the paint color and everything else you did. Going to try that paint brand. Very good job! Thanks
Thanks Shelly! I can’t believe how much more fresh it feels in here. And I think you’ll love the paint – I was super impressed!
Really nice! Great paint color. Looks terrific!
Thanks for the plastic wrap tip-genius!
P.S…… I hope that Bearcat is continuing to improve!
Thanks Linda! We love how it turned out. The color is so pretty in person!
I love the transformation! So fresh! Do you mind sharing the cabinet color? Maybe I missed it…it works so well with the Birch Bark. Thanks!
I *think* it’s Annie Sloan chalk paint in the French linen color. I actually used a leftover can from another project (I painted it about a year ago). I’m pretty sure that was it though!
When you did your cabinets did you sand them back? We have a guest bathroom with a white countertop and white cabinets and creamy beige walls. I want to break it up a little by painting the cabinets. I am just wondering how difficult it is and what process you used.
Thank you.
Yes, I did sand them first just to rough them up a bit. You can see my original tutorial here: https://lifeonvirginiastreet.com/2014/04/bathroom-vanity-makeover-using-country-html. It was with the original blue color, but it was also a chalk paint like the gray color I used so the process is the same. I hope that helps!
Beautiful bathroom Sarah!
Thank you, Monica!
The changes look great! When I paint around toilets, I use a plastic trash bag, it slips right over. Easy on and off, turn it inside out when finished and put all your painting trash into it.
I’m definitely trying that next time! It sounds even easier than plastic wrap!
It really turned out great! I love the new color palette. Amazing how a change in paint color can transform the space.
Thank you Kimberley! Isn’t paint amazing?!
It looks great and so put together now that I wouldn’t be in any rush for a more extensive remodel any time soon! Question about the shower curtain…I, too, like the look of the long curtain as it makes the room feel taller and have in the past bout two curtains and sewed part of one into the other for added length. I’ve never made one myself and always wonder about the seam? Do you have a seam down the center? Thanks!
Thanks Kris! On the shower curtain: since this is just a shower, and not a shower/bath combo, the width of the bolt of fabric is enough to cover the shower doors. However, I have done similar with baths in the past, and I just use two separate curtains. I’m not confident enough in my sewing abilities to seam two panels together, and I do like the look of a curtain on either side of bath/shower. In those situations though, I tend to use a solid liner (I didn’t even use one here at all, since the doors actually stop the spray) so that guests don’t feel the need to pull both curtains for privacy. Hopefully that all makes sense!