A step-by-step tutorial on how to paint thermofoil cabinets to ensure the paint adheres!
Today I’m headed to Haven Conference to spend time with all my blogging friends and hopefully come away with some really great information! I’m also there as Delta Faucet’s correspondent and I’ll be interviewing HGTV’s Brian Patrick Flynn as part of the gig! Although this post isn’t sponsored by Delta and really has nothing to do with the conference, it reminded me I never shared my tutorial for painting thermofoil cabinets. Now that it has been nearly eight months without any issues with the cabinets, I decided it was time to share how to paint thermofoil cabinets!
This post contains affiliate links for your shopping convenience. You can read my full disclosure policy here.
If you have thermofoil cabinets and have ever contemplated painting them, you likely know this is a widely debated topic. But, this winter, I took the plunge and gave painting a try when I redid our powder bathroom. Today, I’m going to share with you how to paint thermofoil cabinets to make it last so you don’t have any peeling or chipping! This same process can be used on many other types like MDF cabinets, melamine cabinets, and more.
What Are Thermofoil Cabinets?
But first, a little backstory and info on thermofoil cabinets. With the exception of our master bathroom, all of the cabinets in our home are either thermofoil or melamine/laminate. Thermofoil cabinets have their advantages, including a flawless smooth finish and they’re easy to clean and wipe off. Thermofoil is essentially a thin layer of vinyl that is applied to MDF via an intense heat and pressure-bonding process. The end result is durable and super easy to clean. But because of that smooth finish and vinyl-like surface, it is widely known that they are extremely difficult to paint. Not only that, if you have a portion of the thermofoil that chips or peels, it’s nearly impossible to get the same look back on that section of the cabinet.
The Condition of our Thermofoil Cabinets
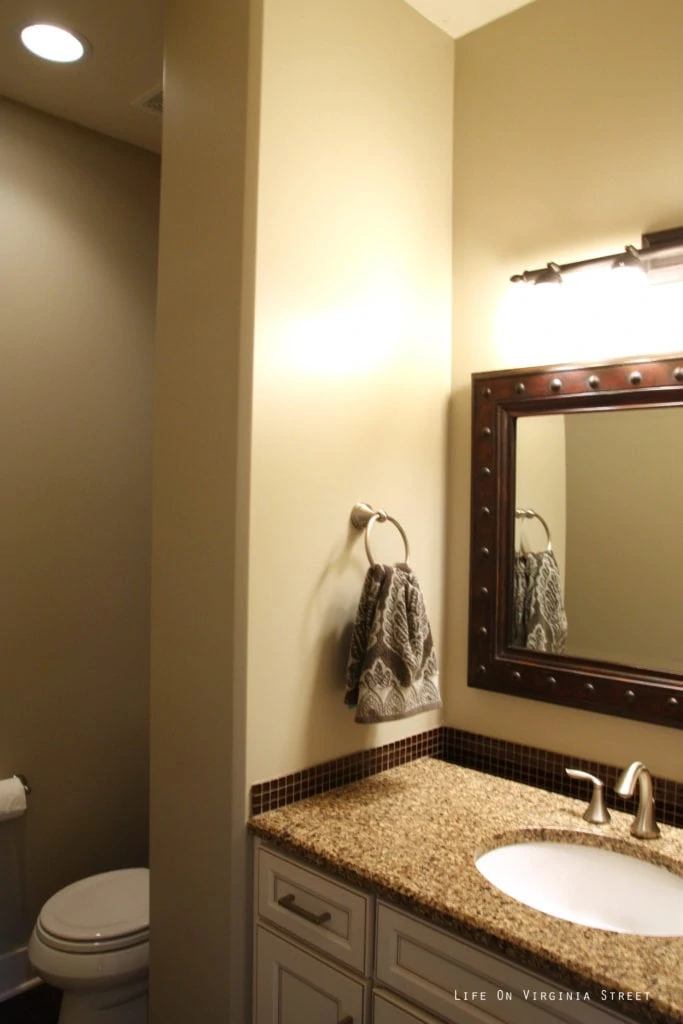
Here’s how our powder bathroom looked before the makeover. Definitely not horrible by any stretch of the imagination, but it wasn’t our style.
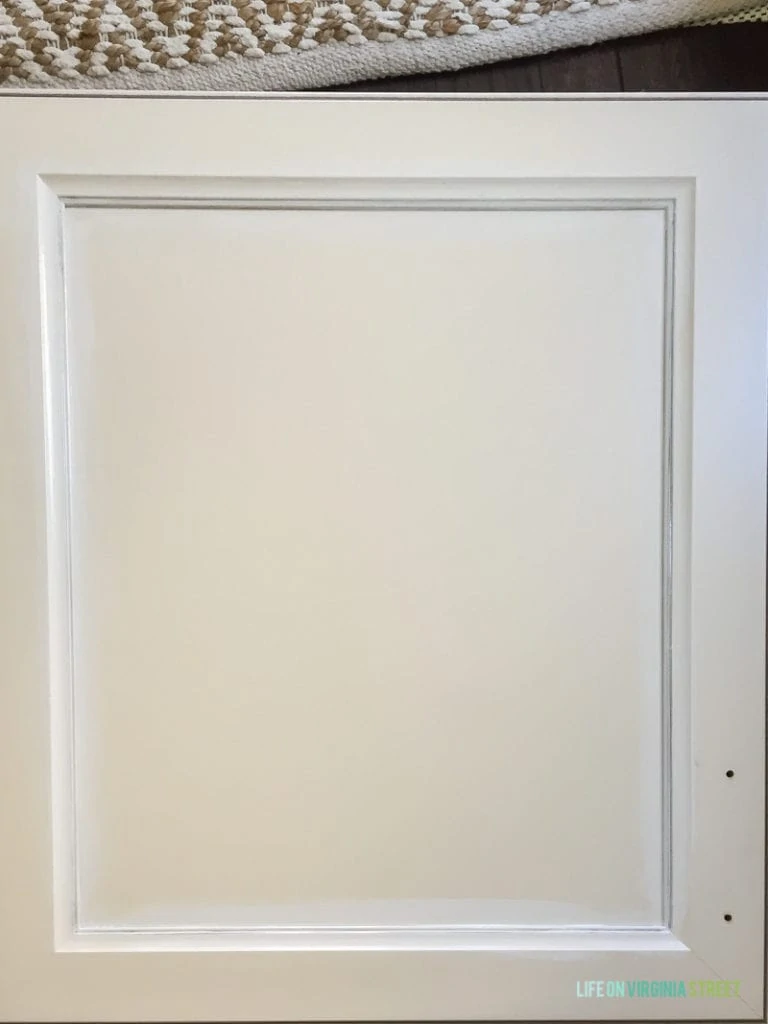
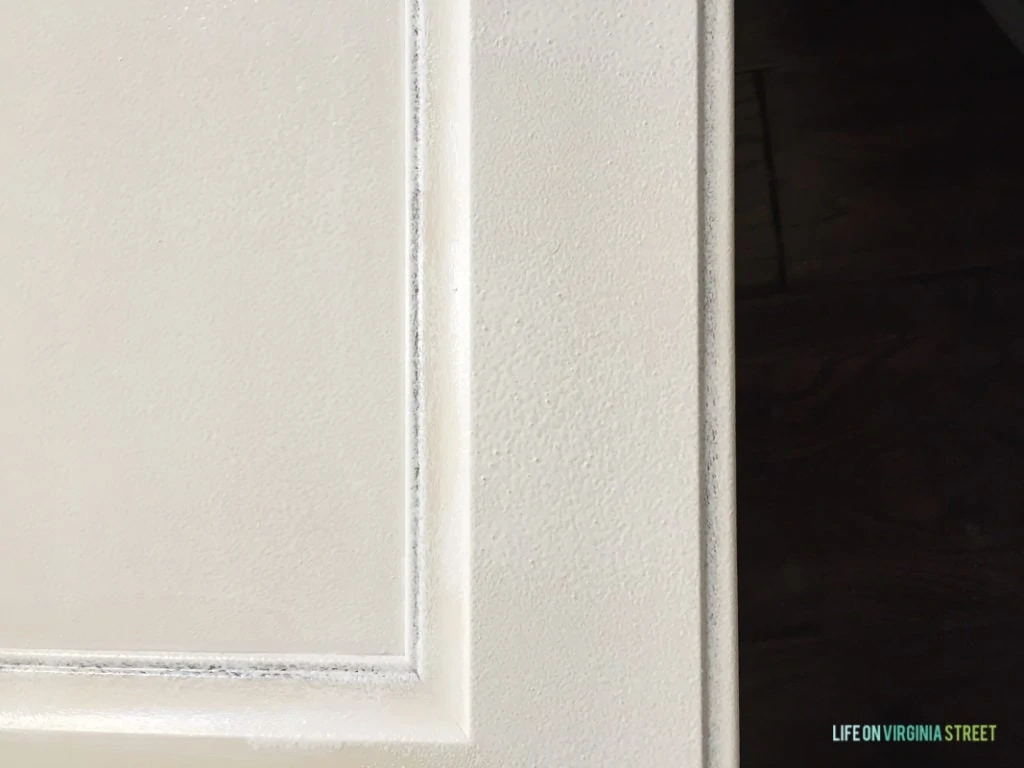
Here’s a close-up of the thermofoil cabinets that were in our kitchen, mudroom and powder bathroom.
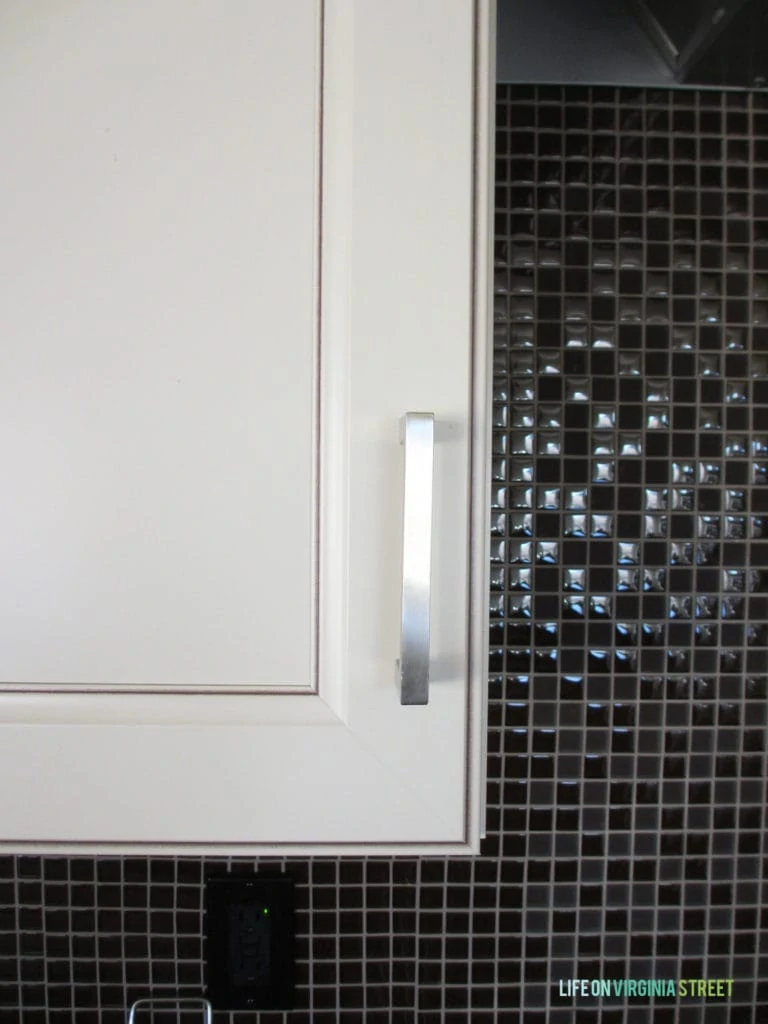
At first-glance, they appear white with some glazing. The reality is they are very cream and when there is an even remotely white item next to them, the coloring is very obvious, making them look peach, pink or yellow. It’s not an issue if you never use pure white in your decor, but in my house that wasn’t going to be an option.
I began my search as to whether or not you can paint thermofoil cabinets when we talked about renovating our kitchen.
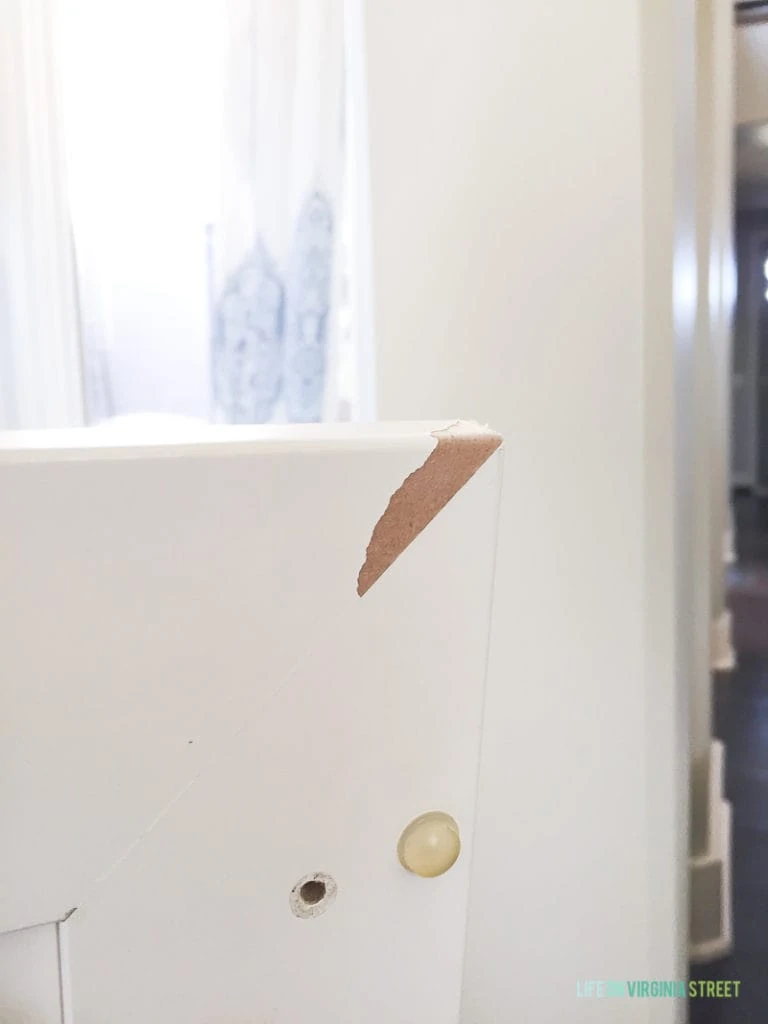
Besides the fact that I didn’t love the color, one of the cabinet doors in our powder bath was peeling and we’ve also had issues with a few bubbling in our kitchen due to heat exposure. The bathroom cabinet was peeling when we bought the house, and I figured it was finally time to address it. With the makeover in the powder bath with Delta, it was the perfect time to address the cabinet situation.
So, let’s get onto the tutorial!
Supplies Needed to Paint Thermofoil Cabinets
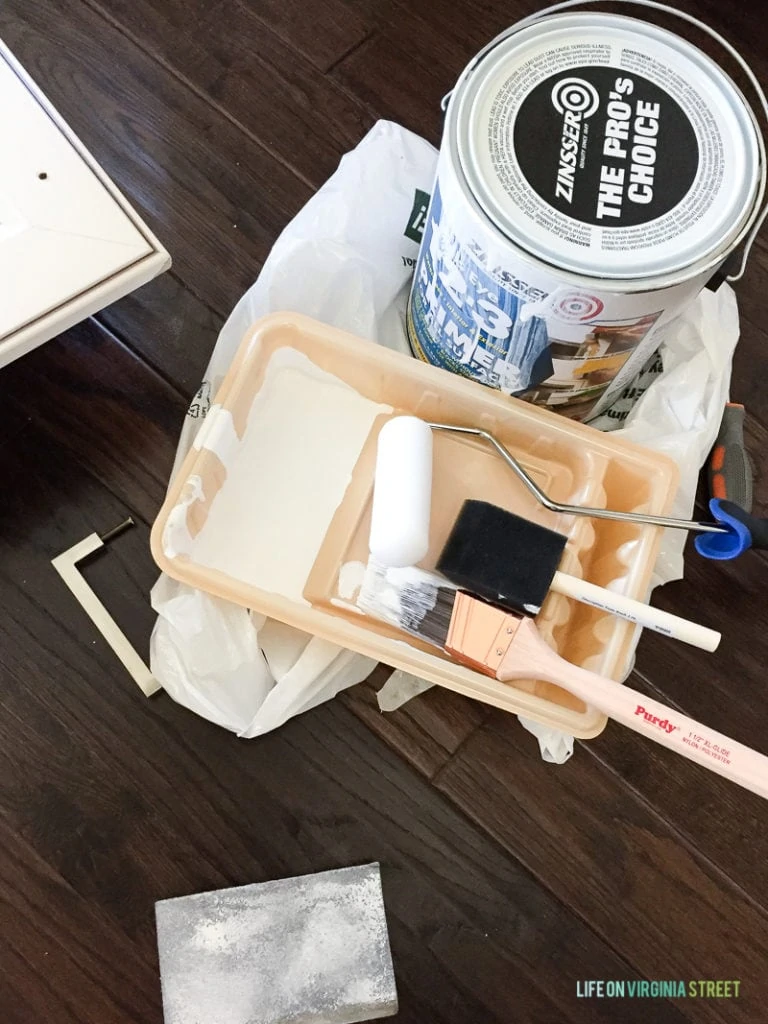
There are a limited number of supplies your need in order to paint your thermofoil cabinets! But, each of the items listed below will help ensure you get the best and post durable finish possible on your thermofoil cabinets!
- Zinsser 1-2-3 Primer. I used this primer when painting the laminate cabinets on the island in our last home and it worked like a charm and works just as well with thermofoil cabinets!
- A small plastic paint tray
- A 4″ foam roller
- A foam brush. I buy these in bulk and use them for virtually every paint project I do.
- Painter’s tape if you need to tape off your walls and/or countertop next to the vanity.
- A high quality paint brush. High-quality paint brushes make all the difference in getting a smooth finish! I used the Picasso Latex/Oil 2″ brush for the cabinets (I found this at the Benjamin Moore store) and a Purdy 1 1/2″ brush for the primer.
- A sanding block. I used a medium grit block I already had on hand.
- Benjamin Moore Advance Waterborne Interior Alkyd Paint. You can use any paint you want, but I was super happy with the finish on this one. It has excellent self-leveling, extended open time, and hardens more like an enamel. The finish is durable and beautiful!
How to Prep Thermofoil Cabinets for Paint
First, I lightly sanded all of the cabinet doors, drawer fronts and vanity frame with sand paper. I paid special attention to the cabinet door that had peeled. This is a good example of the thin layer of thermofoil coating, and what the cabinet looks like below that layer.
I then wiped everything off with a paper towel to remove the dust before washing all the cabinet doors and drawer fronts with a mix of Dawn soap and water. This helped to ensure that any remaining grease and dirt on the cabinets was removed and so that paint would adhere properly.
After the cabinet doors were fully dried, I set up my painting station and got to work. I started by using the brush to get the primer in all the grooves and details of the cabinet. Then I used a fairly light handed and feathered stroke as I went along.
I quickly followed that up by rolling primer, first into the inset, and then on the outer edges.
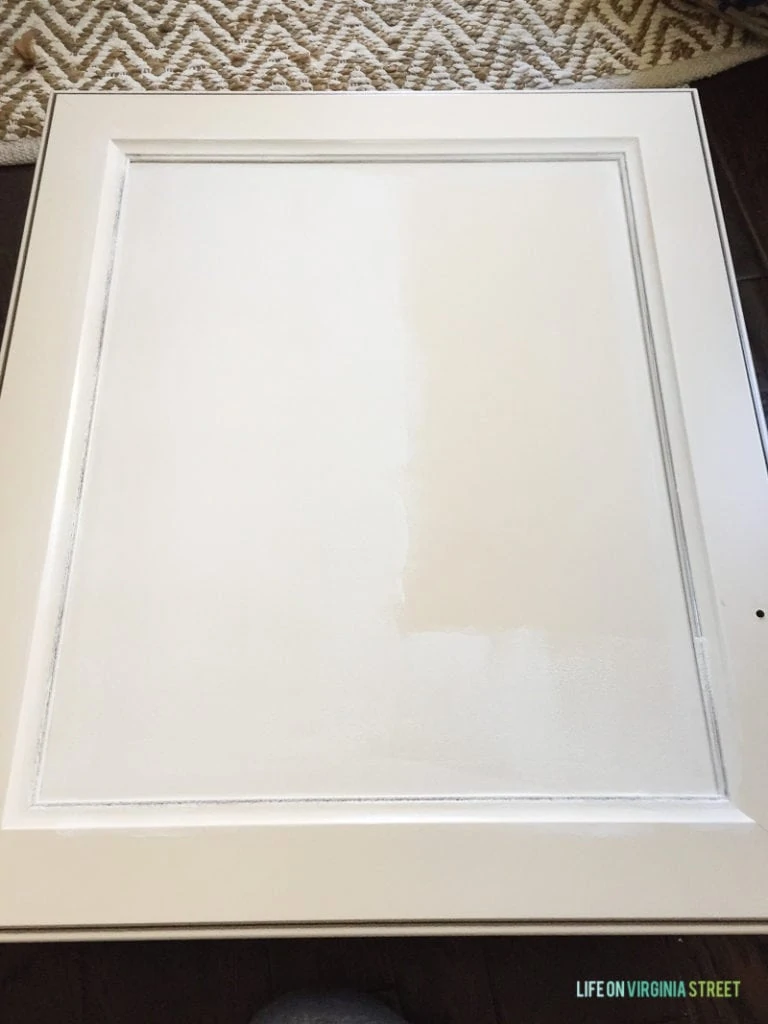
With the foam rollers, you can sometimes get air bubbles (shown below). I would just lightly roll over them again to pop them and ensure the surface flattened out.
I then repeated the same process in the bathroom on the vanity frame and stationary drawer front.
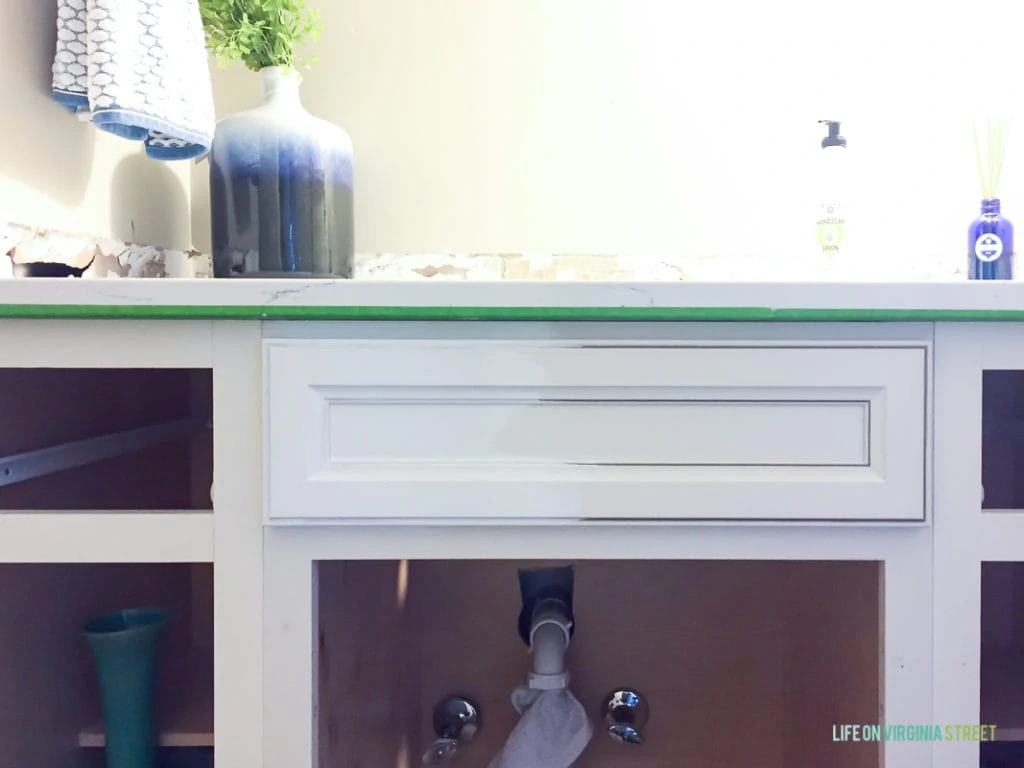
The key to the entire process (both painting and priming) is to move fairly quickly. You don’t want either the primer or the paint to start drying while you’re still messing with it, or the strokes and roll marks will show up on the surface.
Once the primed faces are fully dry, run your hand over the surface to ensure it is fairly smooth. Very lightly sand any areas that may need some help (and then be sure to fully clear the dust before moving to the next step). I only did one coat of primer, but you may opt to do two, if you feel adhesion wasn’t great. Since I was going with a dark paint color, I wasn’t concerned about the brown lines in the insets being fully covered, more that primer was on the entire surface (even if a bit transparent). If I were painting the doors white, I likely would have done a second coat to ensure the primer was fully opaque.
Remember, the primer doesn’t have to look perfect, but the smoother/cleaner the surface, the better your paint will adhere. Here is one of my fully primed doors after it was dry.
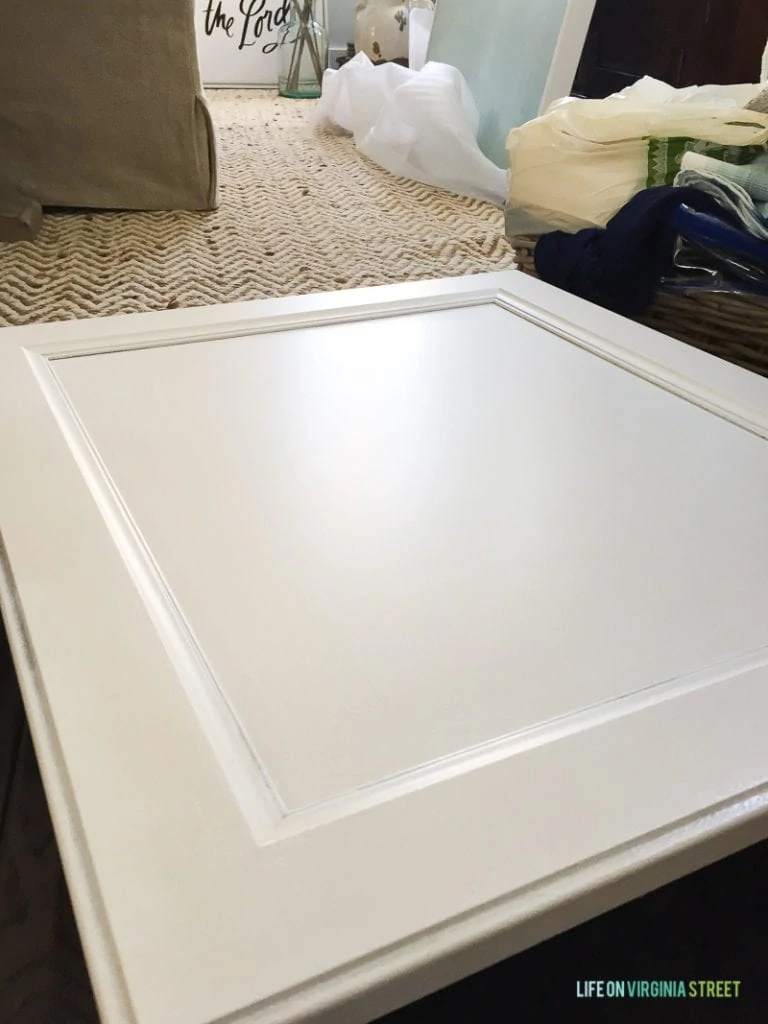
How to Paint Thermofoil Cabinets
I knew I wanted to use Benjamin Moore Hale Navy on the cabinets because we’ve had such great luck using the color on other projects in our home. However, I wanted a smooth and slightly glossy finish. I chatted with a rep at our local Benjamin Moore store and he strongly recommended the BM Advance paint line. The paint has self-leveling features and has a slightly extended open time (meaning it doesn’t dry super fast which is great when you’re painting cabinets). I went with a semi-gloss finish. The rep also recommended the Picasso Latex/Oil brush for the smoothest finish.
I got to work. You’ll note that immediately after I brushed the paint on (moving in the same order I did for the primer), there are light brush strokes. However, if you lightly feather as you go along (don’t allow the paint to dry very long if you do this), the lines self-level! I realize the following picture is horrible, but I had to quickly snap it as soon as I had the paint on. This was my first door, and I was still getting the hang of the paint so it wasn’t perfect (but most of this did level out on it’s own). Remember, you can sand between coats of paint if you have any paint brush ridges!
My biggest piece of advice is this: If it’s been more than a few minutes, do not go back over any painted areas with your brush. This is when you’ll get ridges and brush marks that likely won’t go away. Move quickly and with a light hand!
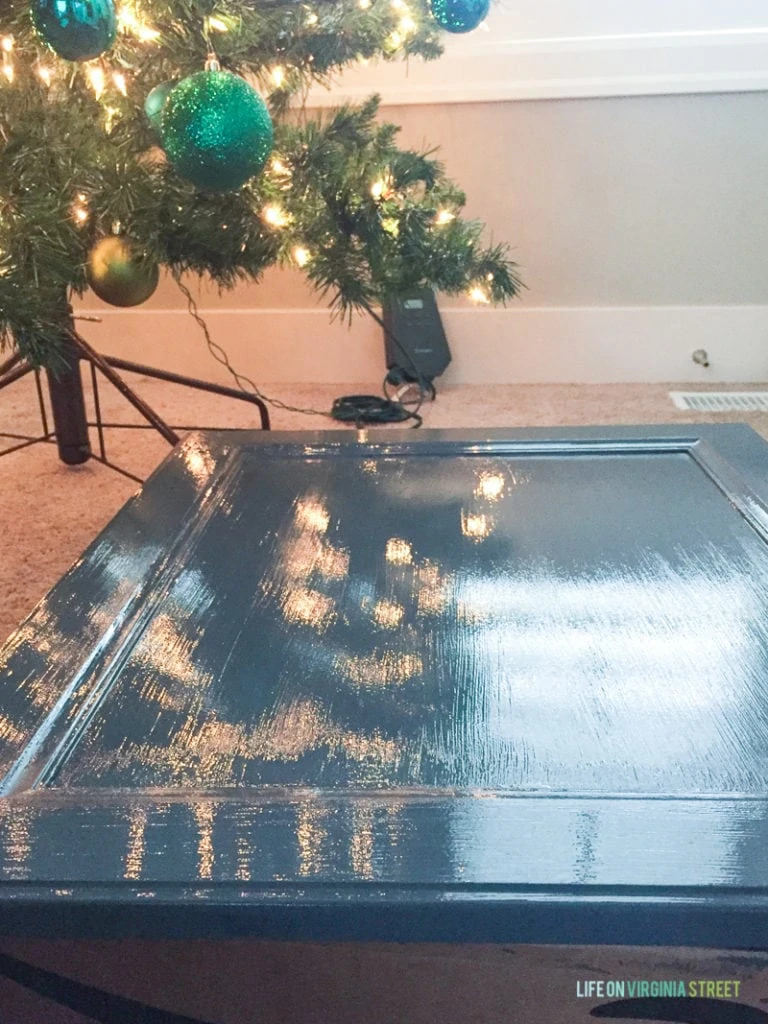
I did the same process on the vanity frame as well. I was working with one light bulb dangling from the wall at this point.
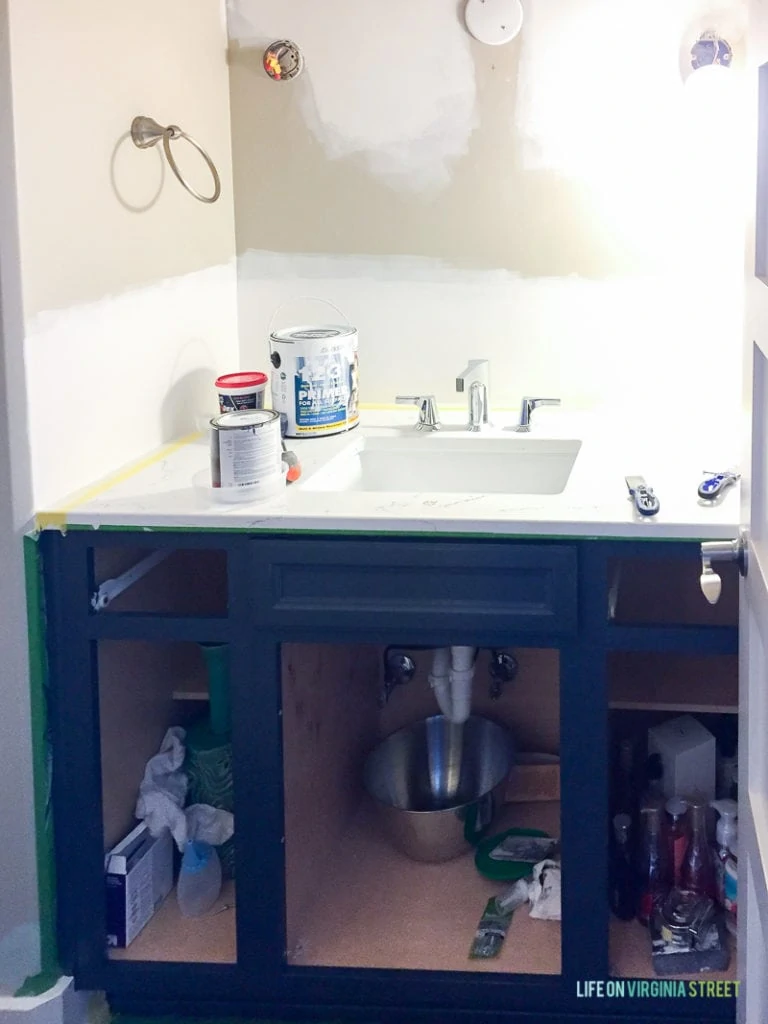
Once the doors are fully dry, apply your second coat. I would highly recommend not re-hanging the doors for several days beyond the drying time recommended on the can. I know it’s tough to be patient, but you don’t want any areas to scratch or get chipped when you’re trying to get the doors back up. The extra time will be worth the wait!
Painted Thermofoil Cabinet Results
I couldn’t be happier with the results! I won’t say 100% that it looks like a factory finish, but I would say it’s 95% of the way there. And to be fair, I’m likely the only one that notices any flaws because most people don’t put their nose right up to cabinets at a 45 degree angle to inspect paint lines, right? 😉
I loved the paint line so much (and it’s self-leveling properties) that I’m using it now to paint all the trim in our office.

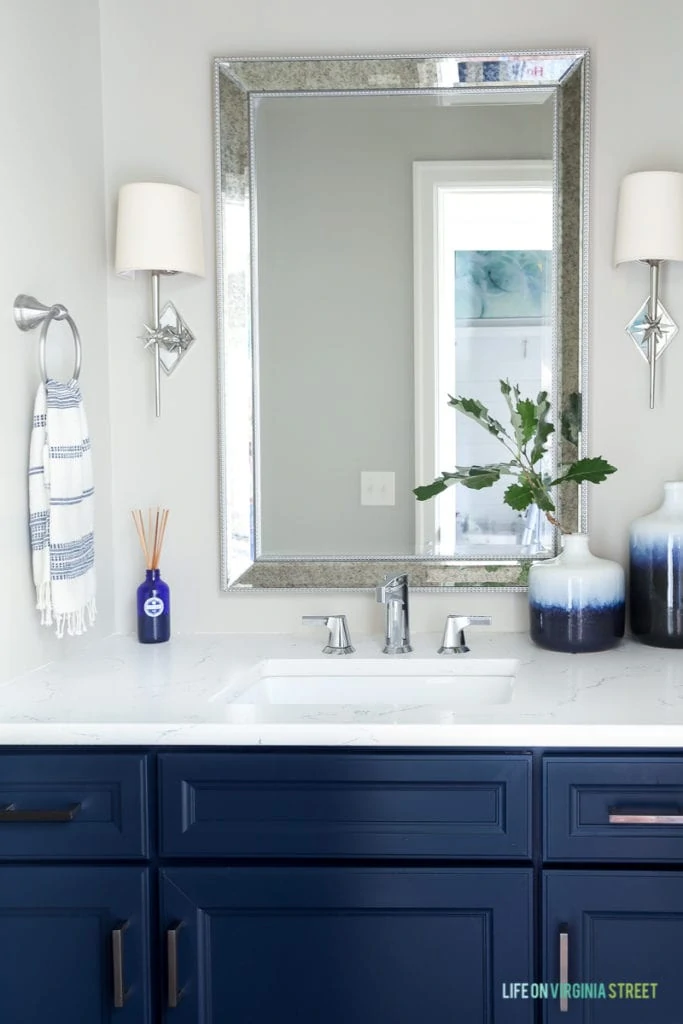
POWDER BATH SOURCES: Sconces | Similar Mirror | Faucet | Hand Towel | Capri Blue Diffuser
I absolutely love the soft velvety sheen of the paint!
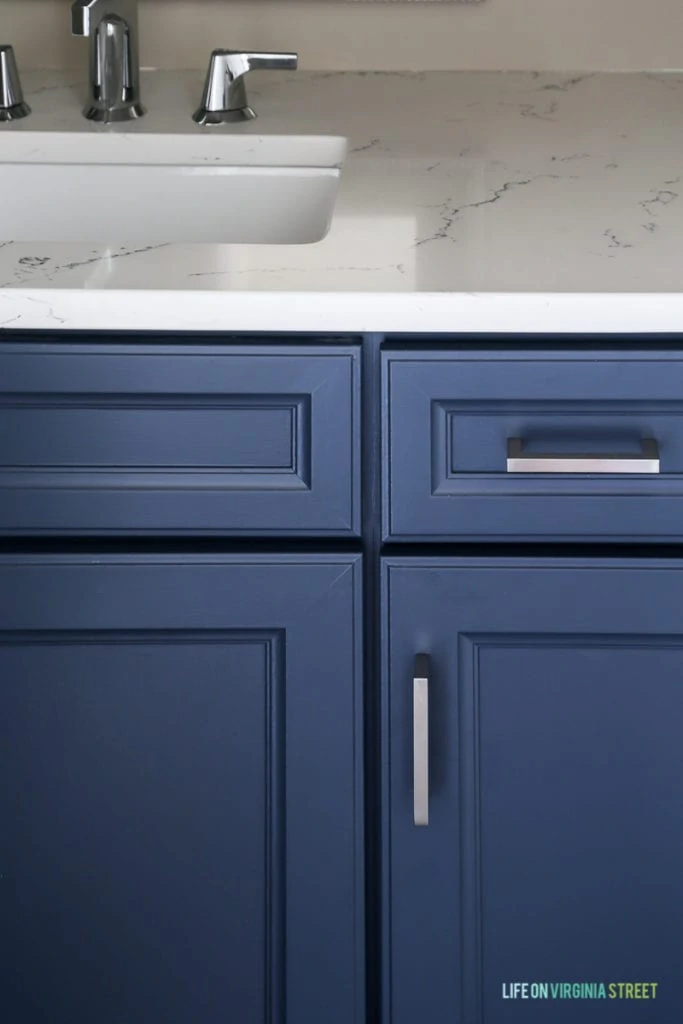
After nearly eight months, the finish is just as good as the day I painted them! We use this powder bathroom daily (I even brush my teeth and do my make-up in here before I head out the door). We haven’t had any issues with chips, scratches, etc. so at this point, I think it is holding up really well!
So, do you think you’d try painting your own thermofoil cabinets? Have you had success doing so in the past? I’d love to hear!
If you would like to follow along on more of my home decor, DIY, lifestyle, travel and other posts, I’d love to have you join me on any of the below channels:

On the chipped cabinet, did you just sand down the edges of the chipped area then prime and paint…did it blend in pretty well?
I was curious about this also!
Yes, I just sanded as well as possible and then primed over everything. It isn’t perfect, but it definitely blends in now!
The cabinet and powder room makeover look beautiful! And of course……you had me at Hale Navy! 🙂 For the past year I have been debating (agonizing) over painting the thermofoil cabinets in my kitchen. I finally found the Ben Moore Advanced product line that specifies for thermofoil cabinetry on the label. What is frustrating is that I called three leading paint stores in my area and not one of them had even heard of thermofoil, including the Benjamin Moore dealer! I have a small bathroom similar to yours and I’m anxious to give this a try. I feel like I need to get a professional painter for the kitchen cabinets and hoping I can find one who is willing to take on the thermofoil. Thank you so much for this tutorial. I love your blog and your style!!
For those thinking about doing this I would highly suggest easily removing the thermofoil from the doors and drawers! Just hold a blow dryer on a seam for a few seconds and you will be able to break the seal and then often the entire thing comes off in one big piece. Where it sticks just warm with blow dryer. The MSG is a Great surface to paint! I removed thermofoil alarge vanity in 10 mins.
Auro correct!! The surface under thermofoil is MDF!!! Noy msg, lol!
That’s great to know! I was wondering how easy it would be to remove, but didn’t really want to go down that path in case it was a total nightmare to get off!
I’ve removed thermofoil from 3 vanities, all were super easy.. The cracked ones were usually the easiest as I didn’t have to warm a seam to get startec. I just pulled at the cracked area and only used blow dryer in places I felt a little resistance. In this case older might be easier. Ours were about 18 years old so the glue had given out. It was so satisfying to peel it off in big swathes!
I’m getting ready to tackle my thermofoil l cabinets & going to try removing it. Makes sense to me. One question…do you still have to use a primer after removing the thermofoil?
How is the paint holding up now? I’m wanting to do our kitchen cabinets but wanting this to be something that last for 5-10 years. I’ll also use a sprayer instead of a brush which I hope makes this process a little easier.
We moved out of this house in October 2022, but as of then, it had held up perfectly! No chipping at all, so we got more than five years out of it, and I’m guessing the buyers of our home will get many more years out of it!
Thanks for that suggestion. i was wondering if that would work. WE have lots of peeling and shrinkage around the bottom edges of our kitchen cabinet doors that were “refaced” about 15 years ago.
Be careful with removing the thermafoil and expecting durability – it is very cheap, flimsy particle bord used, I would say either give painting thermafoil a crack to save money or just replace the doors all together with a stronger wood option
That navy color is beautiful! The paint job looks flawless!
Fariha | http://blog.farihawajid.com
Question about the McGee and Co. jars in this post. What size are they? I think the smaller one is the small jar but what about the bigger jar…medium or large? Thanks
I have the small and the medium sizes. Also, not sure if you saw, but they are doing 20% off decor through the end of the day with code STYLE20. Wanted to make sure you didn’t miss out on that 🙂
Beautiful makeover and I absolutely love the color. After reading this, I think Hale Navy is the color to go for our small guest bath, as well. I was debating between a dark color like this and a white. Knowing that darker colors usually make the small room look even smaller, I was hesitant. 😬 But you’ve sold me on the navy, for sure! Love it! And thank you for the tutorial.
It’s definitely one of my favorite colors ever! 🙂
Hello. I just want to make sure thermafoil is what I have. My cabinets have a thin layer of smooth “plastic” covering my cabinets. When they peel around the edges they can create pretty sharp edges. Also, when we are sanding, do we sand the peeled areas flush with the cabinet door.
Also I wanted to know if you painted the inside of your cabinets.
It sounds like that’s what you may have, but I know there are other similar finishes out there. When I sanded, I didn’t sand it totally flush – I tried to slope it down, if that makes, sense, so it blended better between the various heights. In this room I did not paint the inside of the cabinets (since these rarely get opened). But, if it were in a kitchen or a higher traffic area, I definitely would have!
The bathroom looks beautiful. We are getting ready to paint our boys bathroom (cabinets and walls) and had come up with similar color scheme. For the cabinet paint, did you get a quart or gallon? Would the foam roller be ok to use for the navy paint?
Thank you!
Thank you! We only used a quart (and honestly used less than half of it). I tried a foam roller at first, and I felt like it left little air bubbles on the finish which I didn’t like. It may have been my roller or technique so it may be worth trying. However, I would probably have a nice brush on hand just in case you need to quickly swipe over it!
I tried your method on my kitchen cabinets which were in horrible shape, all peeling. Big job, vet time consuming waiting for them to dry between coats. But they turned out amazing. Can hardly see any imperfections at all. I did use a little spackle after the primer coat on a couple of really bad spots then sanded it down and it worked great. Very happy with how they turned out. Thanks so much!
I’m so happy to hear that! Thanks so much for sharing!
Beautiful job. I’m not sure what kind of cabinets I have – thermafoil, MDF, laminate. Do you think this will work on any of the above? Thank you.
HI there, your cabinets are beautiful! I have a whole house of these cabinets and want to give them a makeover.
Did you use semi-gloss or gloss for the BM Advance paint? Do you know if you can use that paint in a paint sprayer?
thanks,
Margaret
Thank you! I used the semi-gloss. I’m not sure if you can use it in a sprayer or not, but I’m guessing so. I would just confirm with the BM store before purchasing. I’ve been using the Advance paint on our trim and it has been great to work with!
I did this in my boys bathroom 4 years ago. I used XIM UMA bonder primer and BM Advance. The finish has held up remarkably well. I am the only one who has chipped it and I was able to easily cover it up with out to much fuss. The BM dealer did warn me that BM Advance takes quite a bit of time to dry between coats, self levels, not fuss with it too much, use quality brushes and allow plenty of cure time before rehanging doors. I waited 30 days because this was going in the boys bathroom.
I think I have your same cabinets! How did you address the seams of thermalfoil on the cabinet base? Thx
I just sanded those as well. If they were in a brighter area, I may have tried to fill them a bit as well and then re-sand, but with them being in our dark powder bath, I didn’t worry about it too much!
Is the primer oil or latex based? Same question for theBen Moore Hale Navy?
Almost 2 years later how have these held up?
They’ve held up great! No issues with chipping or peeling 🙂
My husband and I are renovating a 1997 home with Thermofoil cabinets, white, throughout. They are in good shape, just a few minor cuts in the surface. We are currently working on the master bath, and we are probably going to remove the thermofoil and paint the vanity. It will be a good test to see if we want to take on the kitchen. Your story and the comments here were very informative and helpful. Can we post before after pics here?
Hi Sarah really informative article on your painting experience over Thermofoil cupboards in your bathroom. I am planning to do the same for my kitchen. I have an important question. You mentioned you had one door were the thermofoil had peeled of on the edge. When you finished painting it did the paint on that section (i.e. the area without thermofoil) blend properly with the area of the door that still had thermofoil on it.
I am contemplating removing thermofoil just from one cabinet door as it is 50% peeled off but leaving it on the other 6 or 8 doors and drawers. After the 2 coats of primer and 2 coats of paint I am planning, do you think the door without the thermofoil will blend with the doors that have thermofoil on them and look more or less same/similar.
Your feedback will be highly appreciated.
Glad to hear you found it helpful! It blended for the most part! I probably could have done a bit better sanding it to make it truly seamless but I’m still happy with how it turned out. The paint has adhered just as well to that section as well, so no issues there! In terms of any entire door, I’m not 100% sure how it would blend with doors where the wrap remains. I can’t see any issues, but it may also depend upon how thick your wrap is and if the underneath layer is 100% identical in terms of shape. I hope that helps!
I found your bathroom to be such an inspiration for my boys bathroom. I’m wondering what wall color you used? I have a similar scheme with Navy Hale vanity and similar counter. Thanks!
Thank you so much! We have Behr Castle Path on the walls. It’s a good mid-tone greige color (depending on light it looks gray or beige). I hope that helps!
May I inquire about the off white color you used? Thinking of doing white ~ish on top and the Navy on the bottom in the kitchen
The walls are Behr Castle Path if that’s the color you were asking about 🙂
Hi Sarah, very helpful article and beautiful result. I currently have two sinks and just want one sink for more counter space. Was your top installed before or after you painted the cabinet? Is it a marble countertop?
Thanks!
Thank you! The countertop was installed before I painted. I didn’t want to have a nice finish ruined by the removal of the old top 🙂 And our new one is quartz. You can read more about it here: https://lifeonvirginiastreet.com/powder-bath-reveal/
Hi Sarah,
Getting inspired to paint the kitchen. How about the wall covered with Thermofoil next to the fridge or the frame of the cabinet? Any ideas? Thank you
I would maybe try the same process? You’ll definitely want to sand it a bit to get the primer to adhere. I hope that helps!
Hi, you worked in the bathroom. Looks great, but we need to do the kitchen cabinets and we cook a lot and don’t have a hood that vents outside, and need to be able to really clean the doors. Any additional thoughts on the work standing up to tougher cleaning?
Thanks!
Hi there! Your room looks so nice. We are re-doing our kitchen that had been painted over with oil paint by the previous owners. We have a couple of areas where the laminate bubbled. I see some people were recommending peeling all the laminate off. What would you recommend? I am wondering if it is truly necessary…perhaps only in the areas where it is peeling, and, then, would the cabinets (once re-painted) that have the laminate look different from those that don’t? Thanks in advance!
How did the peeled door look after being painted? Would love to see if you could see the peeled spot at all.
Hi
Love your tutorial about painting a peeling foul cabinet door.
I’ve seen tutorials where they used a heat gun to remove all the foil and then prime and paint.
It looks like you just cleaned and sanded and painted right over the peeled part. How do you blend in that area? You really can’t feather the peeled foil?
Thanks for sharing your opinion, it sure will help me a lot.
Thank you so much for this-I’m going to try it Sunday. I did have a question. Did you do anything about seams? On a few of our cabinets you can see the seam between the two cabinets. It’s not really a crack or space between the cabinets…just the seam. I read you can use caulk and wasn’t sure what your experience was. Thanks so much.
I removed the thermo foill with a heat gun and painted/sealed with oil base paint a used 4 layers of sherwin williams latex and was highly satisfied
How did it hold up over the years?
Worked great! Still no chipping!
Hi 👋 I am wondering if your thermofoil cabinets have lasted? I am considering painting mine. I am just wondering if they have chipped or peeled since
You painted them? Thank you
They’ve held up great! We actually moved out of that house October 2022, but at that point, they hadn’t chipped or peeled at all 🙂
Loved this blog! So well explained. It may have given the confidence to tackle my laundry room. Thank you