Several months back, I shared our dream of building a pool house attached to our home along with ideas and tentative plans. And now it’s officially becoming a reality! I’m excited to announce that our next big project is building out the pool house, along with one other bonus space I’ll share below!
This post contains affiliate links for your shopping convenience. Click here to read my full disclosure policy.
The pool house project has been off and on for nearly two years now. But, I think it’s safe to say it’s officially back on – subject to city and HOA approvals! While it may feel like this project is a bit sudden, the wheels have actually been in motion for over five years now. Kurtis and I are both planners, so even while the pool was being built, we knew a pool house was in our future plans. We ultimately felt like five years was the appropriate time to wait, plan and save. And here we are five years later!
It’s always difficult to know when to bring you guys in the loop on projects. I never want to jump the gun, especially if plans fall through. I also know it can be boring to wait for a project to be completed over a year or two if you’re included too soon! So, hopefully this will be a good mix since we hope to start construction the end of this month! There has been a lot of background work going on these past few months but a lot of it is the details nobody probably cares about. We’ve also experienced a lot of waiting as things in general are so delayed in the housing industry right now. But, we’re ready to share and can’t wait to take you guys along for the ride!
In an effort to not be redundant, you can read this post to see the current space and what our initial goals were for the pool house build. I’m going to start today’s post right from where that post left off, to share where we are currently today and the progress that’s been made since!
Exterior Pool House Renderings
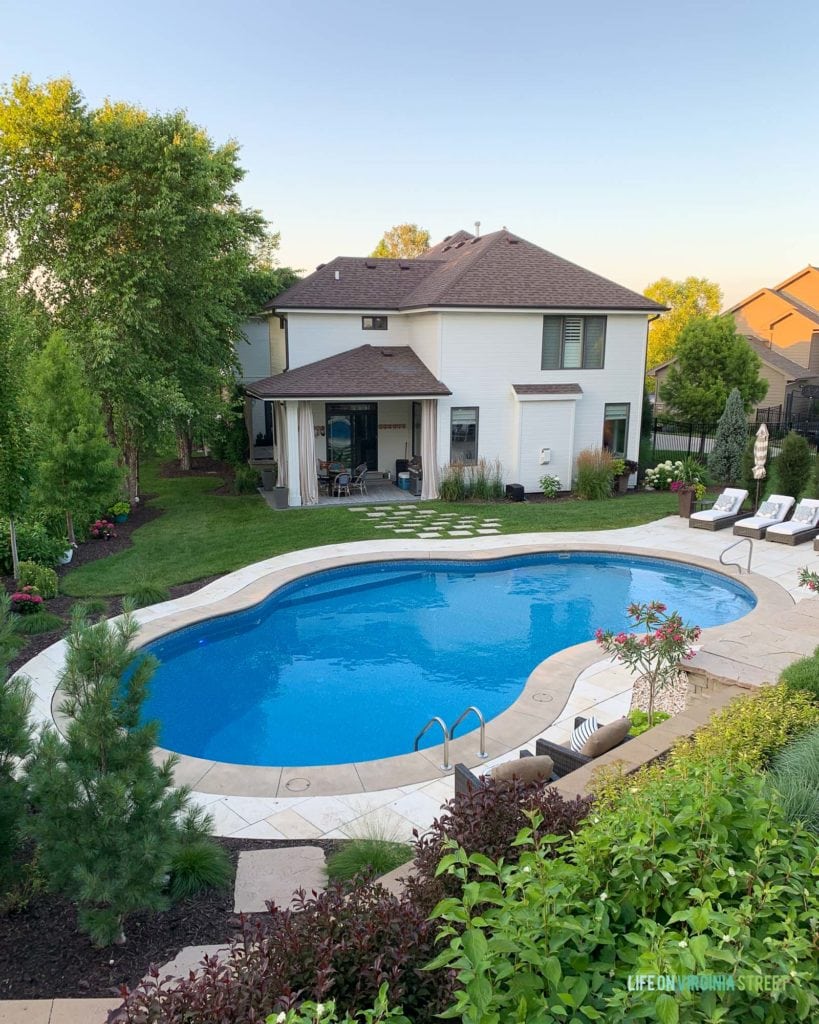
Although we’re calling this a pool house, the name may be a bit misleading. This won’t be a standalone structure, but rather, an addition attached to our home with access from our dining room door (where the covered patio currently sits). We will then build out towards the pool and the fence/side yard.
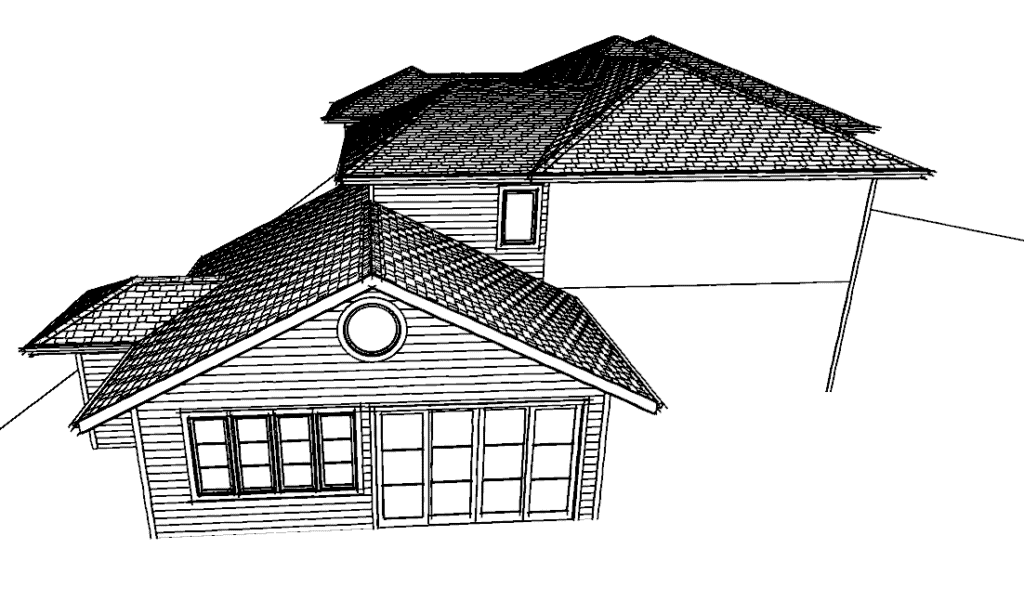
Below is a 3D rendering of the new addition from Structr Design. Everything that is “striped” is new. Let’s dig into the details a bit.
The rendering below is basically from the same view you see above, but the new addition will take over the grass space between the pool and house on the left. For reference, none of the existing windows and doors are shown on the “old” version of the drawing so I didn’t want that to confuse you!
We’re really tight along our lot line so we had to make a few decisions to best fit the space. At the end of the day, we had to ultimately pick between a storage closet or a bathroom with a small linen closet. We opted to add the bathroom, since the main room itself can serve as storage during storms, etc. Plus, we’ll still have plenty of space to store towels, sunscreen, pool water testing strips, etc. The more we thought about a storage closet, the more we realized pool floats wouldn’t fit regardless without deflating them, which didn’t help that much. Ultimately, a bathroom seemed much more useful and practical. We then had to decide on whether to access the bathroom from outside or inside. Since we plan to use this space year round, and we didn’t have room for two access points, we opted to access from inside the pool house. Yes, wet feet and bodies will be running through, but all of our finishes will be chosen to accommodate that. At the end of the day, it’s much better than guests (and us) running through the length of our house on our dark hardwood floors to access the powder bath 😉
You may recall, one of my biggest goals for the space is to make it feel outdoors, while still being fully enclosed and usable in the winter months. So, that required a lot of windows and sliding doors. I’m actually meeting the builders, BlueStone Custom Builders, today to look at some window and door alternatives, because, to the surprise of nobody, my initial selections are way over budget. I also have a few window swaps I already want to make after seeing the 3D renderings.
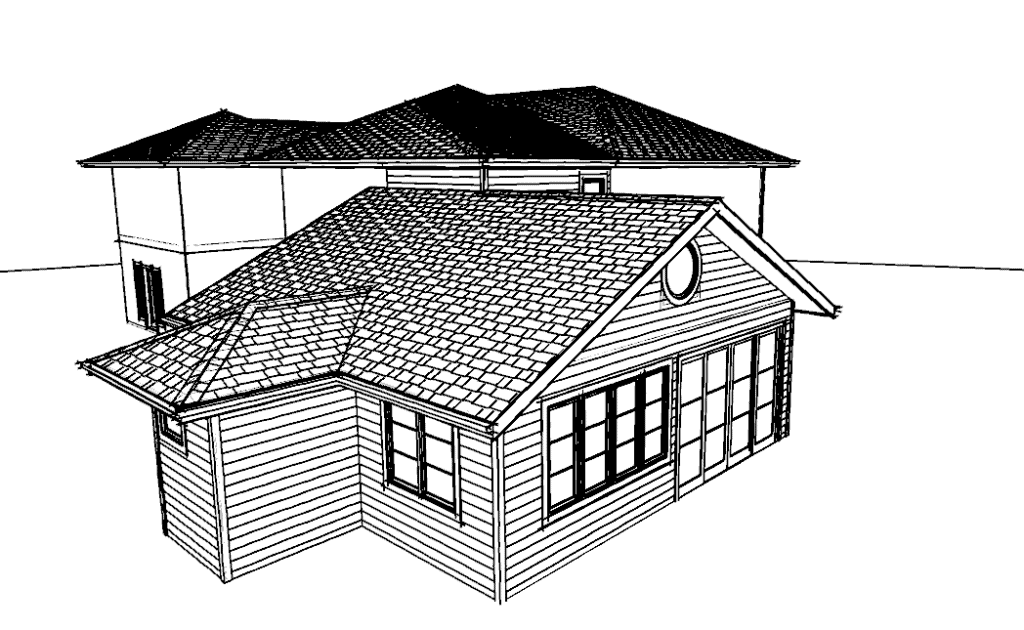
Since we’re dealing with so much siding back here, we plan to make the lower level extension unique with a vertical board and batten finish. It will be similar to the exterior of our garage and a section of the front of our house, so I think it will be a great tie-in and help make the space feel even more special!
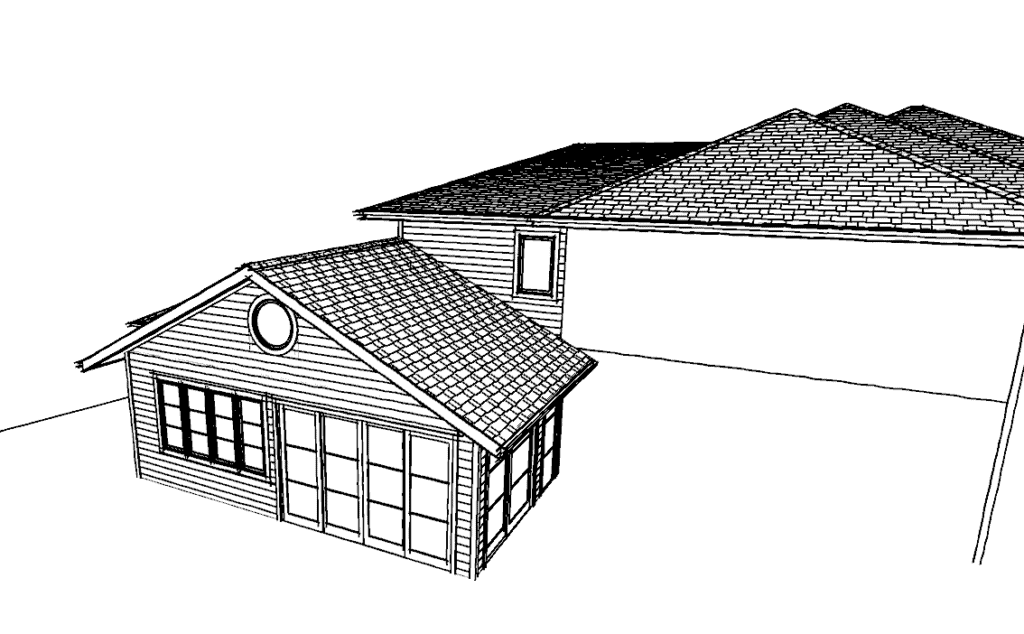
As I mentioned above, everything new is “striped”. So if you look closely, you’ll notice there’s a striped section on the second level. Since this project required a roof rebuild regardless, we have decided to expand our master closet. We know down the road, our existing closet could be the major deterrent for anyone buying our house (it’s currently 6’x10′ wall-to-wall). And, once this pool house gets built, there won’t be another opportunity to expand it down the road. Since closets aren’t much more than drywall and some shelving, it didn’t add much to the overall cost. So we’re taking the leap with that too as our “bonus” project. Kurtis thinks it means we’re getting custom his/hers closets while we’re at it, but I’m still on the fence about whether or not we just wait on that for a later date (and just build an empty shell for now). I already have too many decisions ahead of me 😉 But we both felt this is a much better use of this space than the little balcony we had also considered.
I had several conversations with our realtor prior to us moving forward with anything. We had originally planned to make the lower space a three seasons room (and not add the master closet at all). But, the project was essentially turning into a very expensive covered patio that could be closed off but not necessarily usable in the winter months. After talking it over with her, we ultimately decided to spend a little more to have much higher payoffs in the future. That meant adding the closet, HVAC to the lower level, and the bathroom. This adds actual square footage to our home, a bathroom, and solves the closet issue that we knew could impact resale down the road.
The main lower structure will be 26’x26′ (about the size of our kitchen and living room space right now) plus the bathroom, adding 705 square feet to the main level and 123 square feet to our closet. Although we’re not concerned about getting all of our money back out of the pool house down the road, this helps ensure we recoup as much of it as possible. But, much like our pool, we know we’ll get immeasurable enjoyment out of it, and that’s what’s really important at the end of the day!
3-D Interior Renderings
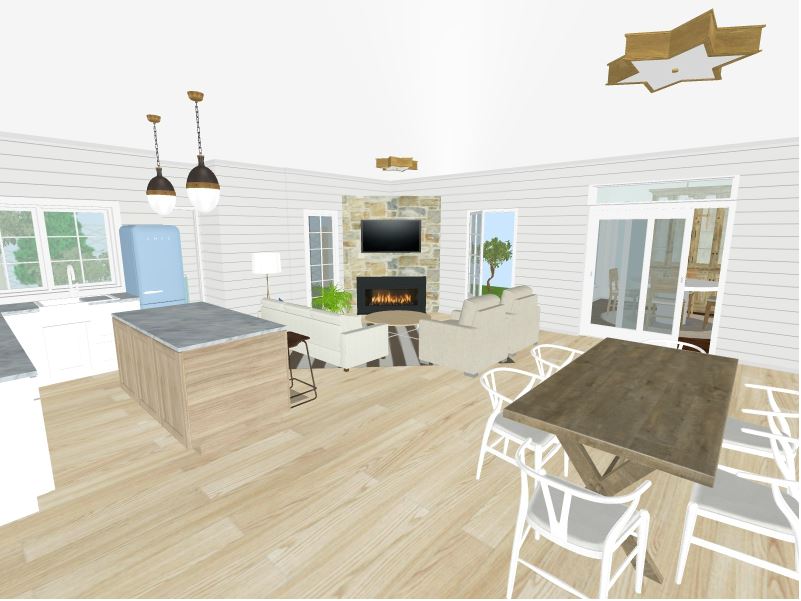
Now I’m going to share my super non-professional interior renderings of the space. I used RoomSketcher software (it’s free!) along the way to build out 3D visuals for Kurtis and I could look at throughout the past several months. I’m sharing a few snapshots of what the interior floorplan will look like below. It’s not 100% to scale and definitely doesn’t utilize the proper finishes, furniture, etc. I was limited to the software’s furnishings and finishes, but hopefully these images still help to give an overall feel for the space! All known furniture and finishes at this time will be shown in the next section below. We will also be vaulting the ceiling in the areas that are not under the closet, but I couldn’t figure out how to make that happen in the sofware.
We’ll be doing a small kitchen with a sink/disposal and a beverage fridge. We’ll also possibly include an ice maker and keg dispenser (would love your thoughts on both!). But other than that, with our main kitchen so close, we didn’t want the added expense of additional appliances and cabinets. We ended up opting out of a built-in grill after hearing from many of you, particularly now that the room will function year-round. We were worried about smoke and ventilation and how much we’d actually use an indoor grill/kitchen. Ultimately, we decided we’re just going to tuck our grill into the jog by the bathroom outside. The window above the kitchen countertop will be an accordion style window (or more affordable alternative) but will open up fully to the outside so we can have an exterior bar seating area. That was one of our must-haves, so it dictated placement of a lot of other areas in the space.

We originally thought we wanted glass garage style doors to go outside, but we decided we didn’t want to deal with an overhead track. Double sliding doors were much more economical in terms of price and still provide all the natural light we wanted to preserve! We’ll be adding grids to the doors though, to still give that garage door style vibe that Kurtis loves so much!
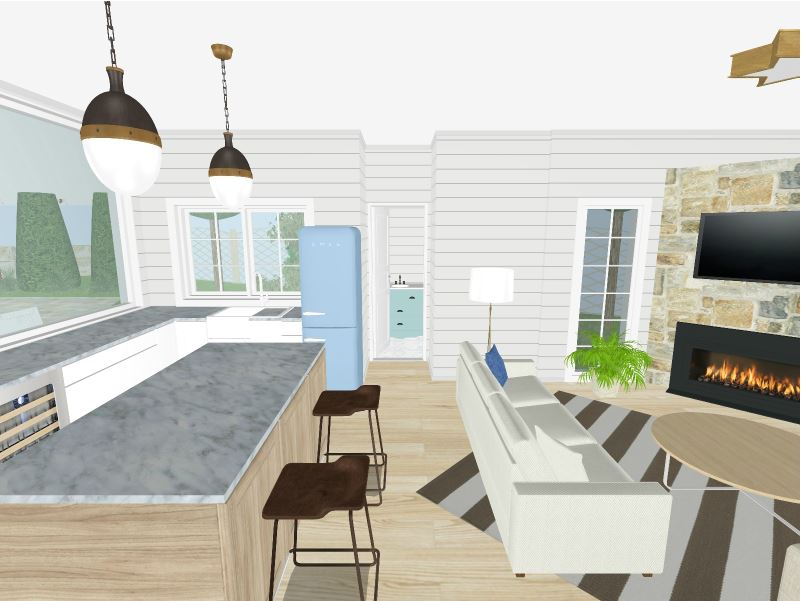
Here’s a look from the other direction. Again, ignore the finishes and mostly just focus on layout. The door by the fireplace will likely now be a slider to save on furniture clearance. We need to be able to access that side of the yard and to get to the courtyard so a door of some sort is a must.
The bathroom placement was tricky. Since I’m so concerned about blocking natural light, we decided to center bathroom access in the room. But, I also didn’t want the door directly off the main space. So, we decided on a little 2′ bump back, which then also allowed for a linen closet on the bathroom side. I think it will work well, and not feel too in the main space. The bathroom will be super simple with a small sink, toilet, and linen closet and just enough floor space for our guests to change.
Pool House Decor & Aesthetic
Earlier this spring, when the Serena & Lily summer catalog arrived, their pages were chock full of inspiration! For years I knew they’d be the dream partner for this space, as their offerings are the exact aesthetic we were looking for! I reached out to them early on in the process to see if they’d be interested in partnering on this project. They graciously agreed, and I’m beyond excited for all the pieces we selected. We may not even have building approval back from the city, but some of the decor and furniture has started to arrive and it’s all so good! Let’s jump into the design plans a little further. These are fairly rough renderings but show how all the furniture and decor will tie together.
Although the pool house is one large room, we’re going to try and section off various areas to make other mini rooms.
We’ll have a small living area with a fireplace and TV, a mini kitchen, and a dining area. The fireplace below is much fancier than the route we’ll go. We essentially just want a shiplap wall with a gas insert and a super simple mantle with the TV above it. I plan to use this indoor/outdoor rug that used to live in our living room in the space. And the coffee table we have in our den is perfect for this space (we love the storage it adds) so we’ll be moving it down and I’ll start looking for something new for the den. Some of the other items shown below are placeholders for now, but this is the overall vibe we’re going for!
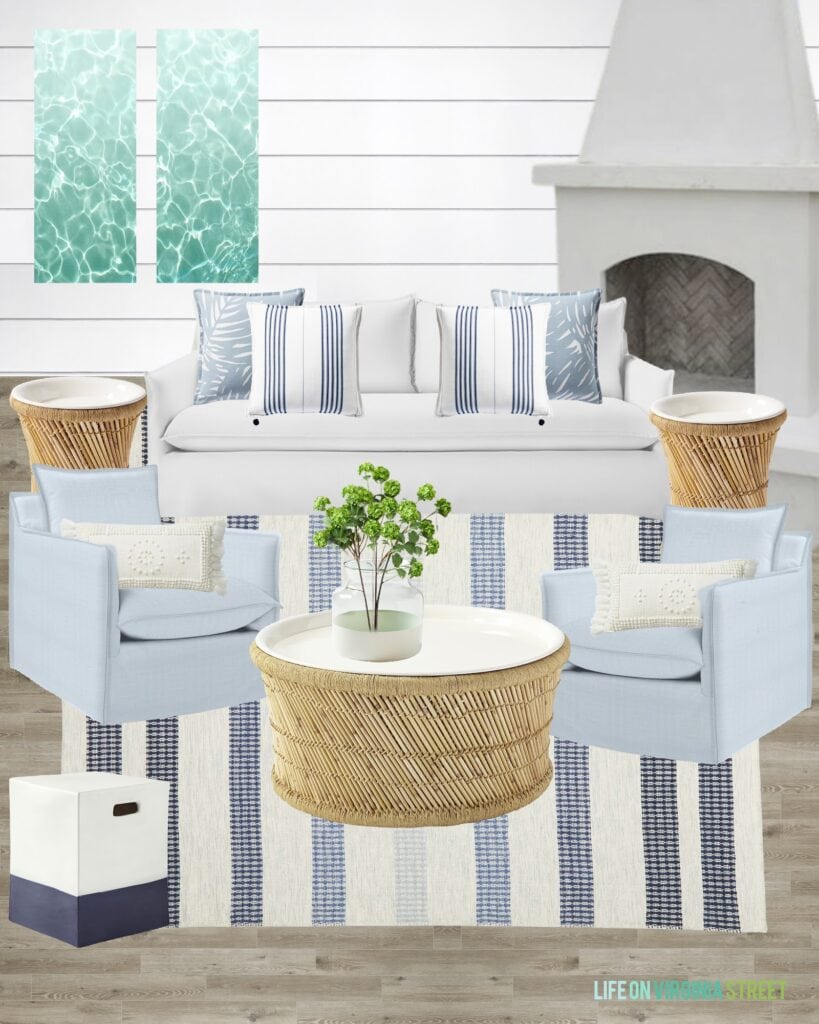
SOURCES: Pool Water Art | Upholstered Outdoor Sofa | Striped Rug | Upholstered Swivel Chairs | Coffee Table | Side Tables | Colorblock Stool | Palm Print Pillow Cover | Striped Pillow Cover | Embroidered Lumbar Pillow Cover | Paint Dipped Vase | Faux Viburnum Stems
On the floors, we’re thinking about using a luxury plank vinyl, but we haven’t made any selections. We’d love for it to look like a sun-bleached hardwood floor so if you have any suggestions for brands or styles you love, we more than welcome your input and feedback! We’re essentially just wanting to ensure it’s durable, waterproof and as slip-proof as possible.
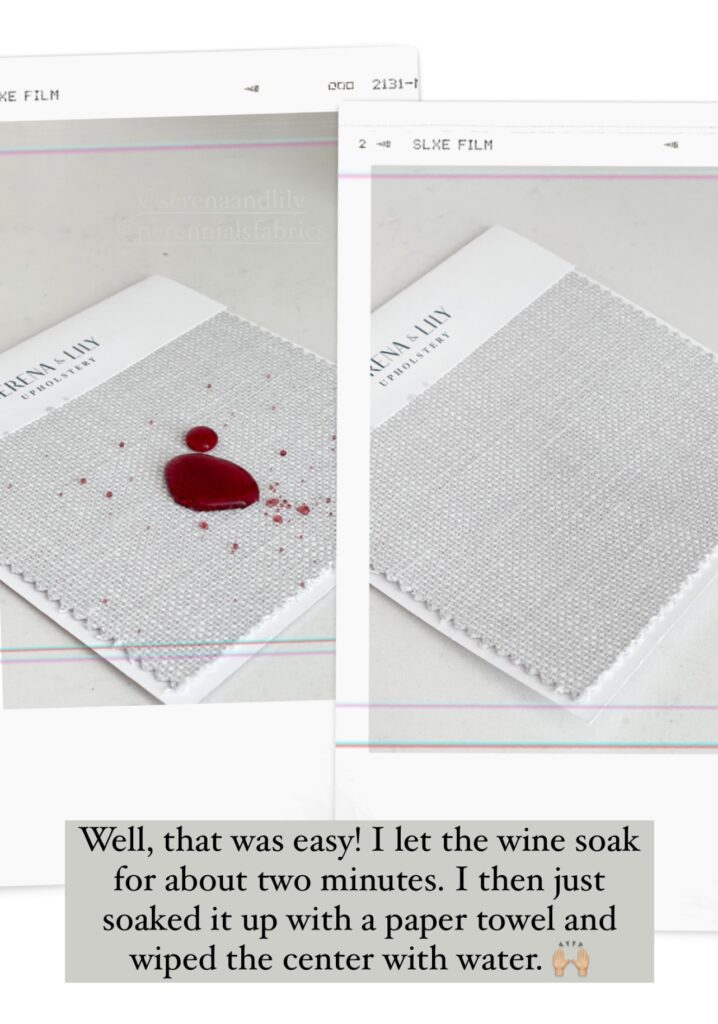
Kurtis dreams of watching football out here in the fall and this will essentially be his man cave during those months. So we knew we needed comfy furnishings and not your basic outdoor furniture! You all know I’m a huge advocate for performance fabrics after having such good luck with our sofas. You may remember back in early April I was testing fabric samples with red wine. Now you know why 😉 The Serena & Lily outdoor Perennials fabric was amazing and I was so impressed with how easy it was to clean. It’s still softer to the touch than most outdoor fabrics, too! So if you panicked a bit when you saw the light sofa and chairs in the image above, rest assured that the fabric is virtually indestructible! I tested with the Perennials Basketweave “Fog” fabric below, but we’ll be using the “Chalk” on the sofa and the “Coastal Blue” on the chairs. They’ll be perfect for wet bathing suits as well as food and drink spills!
The kitchen and dining area were the hardest to mock up, and are probably the least like what the space will actually look like. But, here’s a general sense of what we envision for the space. We’ll likely be partnering with CKF on the cabinets, countertops and closet spaces. They have some really fun ideas for how to make each of these spaces unique.
We’ll probably have to play around with the floorplan for the dining section once we see it in person. I haven’t decided if we’ll go with a round or rectangular dining table. We want whatever will make the traffic flow the easiest around the doors and walkways. Over by the island, we’ll be using that mostly as storage but will have a countertop overhang for some backless counter stools. I opted for backless here since we’ll have full counter stools outside as well as dining chairs at the table, and I wanted these to be more discreet and easy to tuck away under the counter.
As I mentioned above, this kitchen area is more about counter space for serving and entertaining, and less about having all the appliances and a fully functioning kitchen. With our actual kitchen so close, we don’t necessarily need another fully loaded kitchen nearby. We feel good about having just a sink and disposal. I am on the hunt for a cool glass-front beverage fridge though, so if you have a brand you love, let me know! The one shown below is from True Residential. But we’re also considering a non-glass version like the matte white line from Café since I think that aesthetic would also work really well in the space!
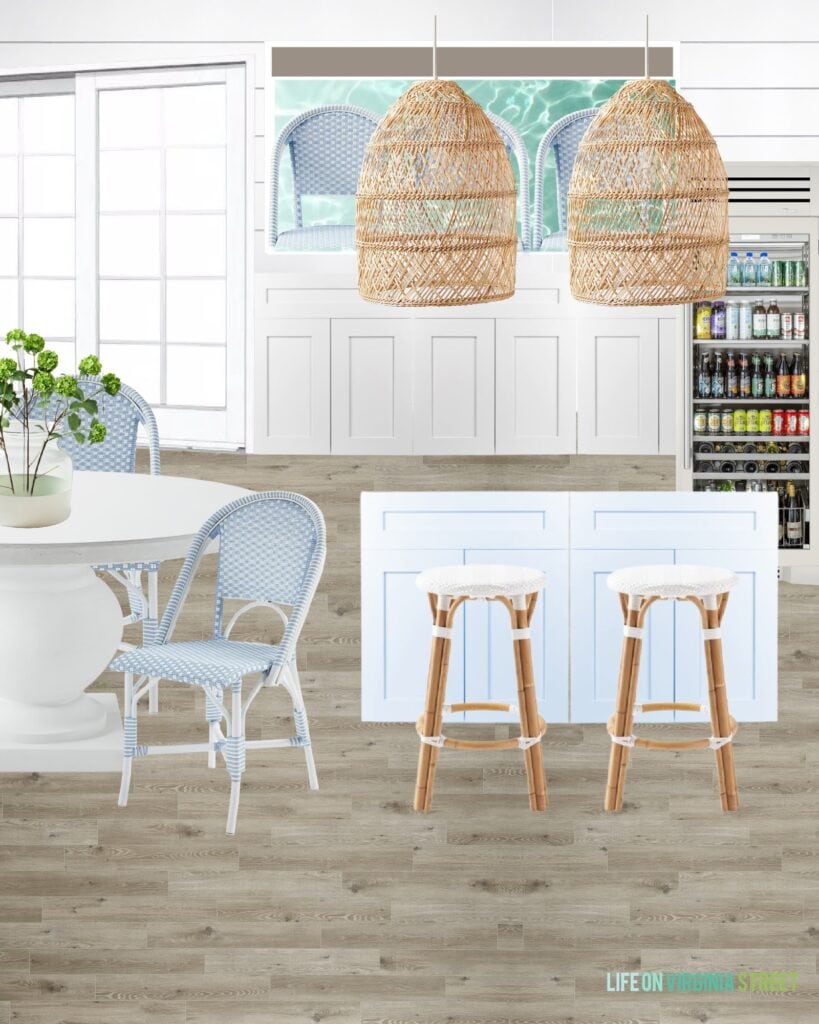
SOURCES: Round Dining Table | Paint Dipped Vase | Faux Viburnum Stems | Outdoor Dining Chairs | Outdoor Swivel Counter Stools | Basket Pendant Lights | Backless Counter Stools
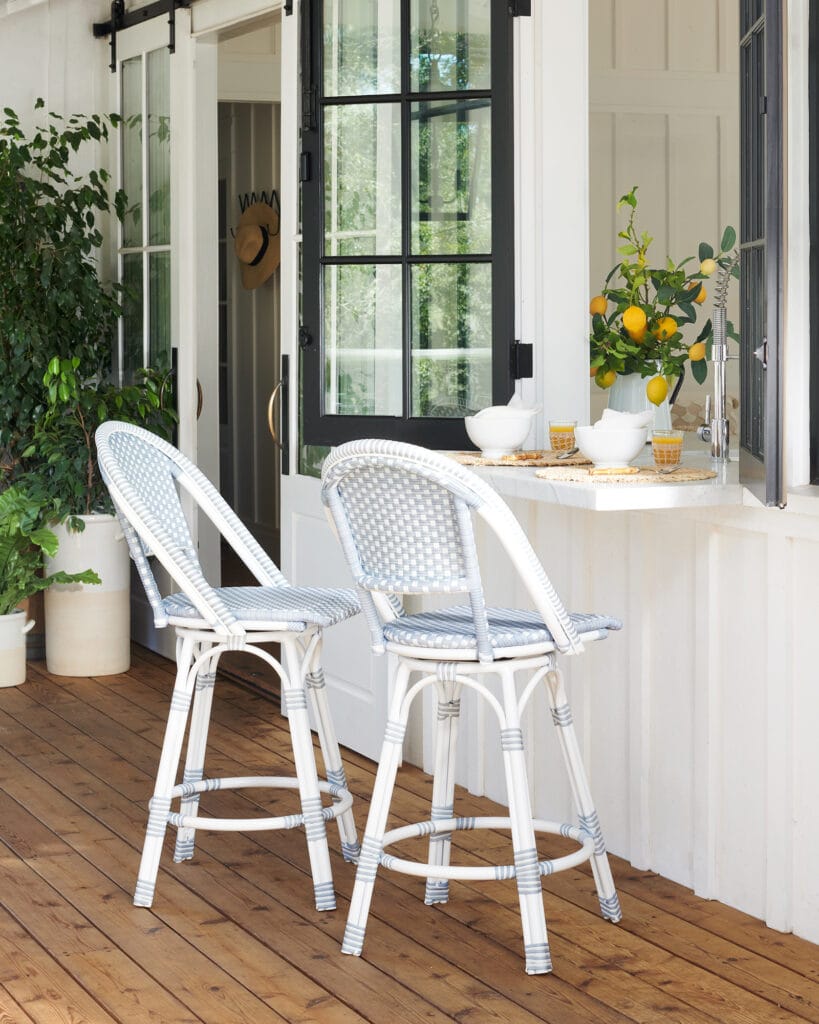
I went back and forth on colors for our chairs and counter stools at least 100 times. But when I saw this next image from Serena & Lily featuring their outdoor swivel counter stools, it kind of sealed the deal for me that the light blue version was the way to go! This exterior has so many similarities to what we had already selected so it helped provide even more clarity! We’ll have a similar opening door with countertop overhang for bar seating outside. We may put an awning over it, but unfortunately, since this is the south side of our house, there really isn’t much we can do to shade the seats. But that’s also why we’ll have indoor bar seating inside!
Okay, I think I need to stop myself there for today as this post as already gotten very wordy and that about wraps up the overall plan.
If all goes according to plan, we’re hoping to start digging by the end of this month! Our builders estimate it will take about 60 days, assuming perfect weather and no delays with product and material. So, we’re basically hoping it’s finished by August or September based upon the delays so far 😉 It should be a lot of fun along the way though and I’ll be sure to share all the details as we go! I’m excited to get started!
If you would like to follow along on more of my home decor, DIY, lifestyle, travel and other posts, I’d love to have you follow me on any of the following:
Pinterest | Instagram | Facebook | Twitter
disclosure: some affiliate links used
This looks amazing! Will this replace your dining room?
Thank you, Miriam! The dining room will stay. It will start where our covered patio currently is and will be accessed through the dining room 🙂
It looks like a great plan. I am sure that it will be beautiful and so worth it once all complete. Good luck with the process!
Susan
Thank you Susan!
Jenny Komenda used Lifeproof vinyl flooring from Home Depot for her office renovation and it looked great.
Thanks for the recommendation! I’ll check hers out! I actually ordered some samples of that flooring last night after seeing Pinteresting Plans using it in a home! I’m even more excited to see the samples now 🙂
I love seeing the plans for this project and am so excited to follow along as it comes to life! I can tell you have put so much thought into every detail. It’s going to be amazing!
Thank you so much, Valerie!
Hi Sarah!
Congrats! This is the ultimate project..so happy for you😍 Your plans, design and finishes are perfection per the usual!!
All I can suggest is..have you considered a gas strut opening window ( it would be hinged horizontally across the top) for the kitchen/ outdoor bar & swivel stools? Not sure how the cost compares to accordion style …but would provide a seamless countertop transition.
Looking forward to the ride!🥳
Thank you Lori! And thank you for your suggestion. Perfect timing! I got it right before my window meeting. I had seen those windows before but didn’t know what they were called. I was able to talk through it as an option at our meeting. It sounds like that can’t be quite as large, but it may actually work out for our space (and is about 25% less expensive)! Thanks again!
This looks amazing! A little vacation spot attached to your home! We purchased an under cabinet ice maker last summer and it’s been SO handy. Love it. We entertain, use coolers quite a bit on the go, and have 3 kids here in the summers. We were always running out of ice but no more.
Thank you Susan! And that’s so good to know. Those ice makers are so expensive, but I think at the end of the day, we’d get a lot of use out of it and may regret it if we don’t add one.
Love love love the Project! =))
Oh wow! I haven’t really been keeping up lately… we’re just finishing up our kitchen remodel, etc. A fun surprise to see you’re going to be doing the pool house soon! It is going to be amazing!! Excited to follow along.
I can’t wait to follow along! Good memories and fun times will happen in this new addition. I see some new fun Holiday decor locations!