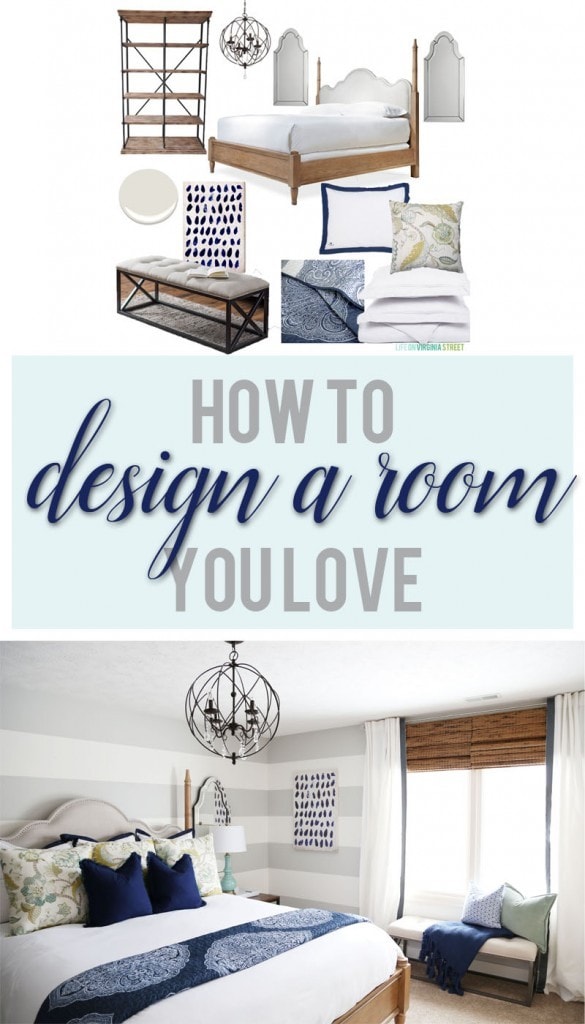
A step-by-step guide to learn how to design a room you love. These tips can also be used to refresh a space keeping most of your core components, and regardless of budget size!
A common question I receive is how I start designing a room. I thought I would take my serene blue guest bedroom makeover example and walk you through my process step-by-step and show you how to design a room you love. I’ll also be sharing all of the sources along the way for this particular room makeover.
This post contains affiliate links for your shopping convenience. You can read my full disclosure policy here.
A Real-Life Design Example
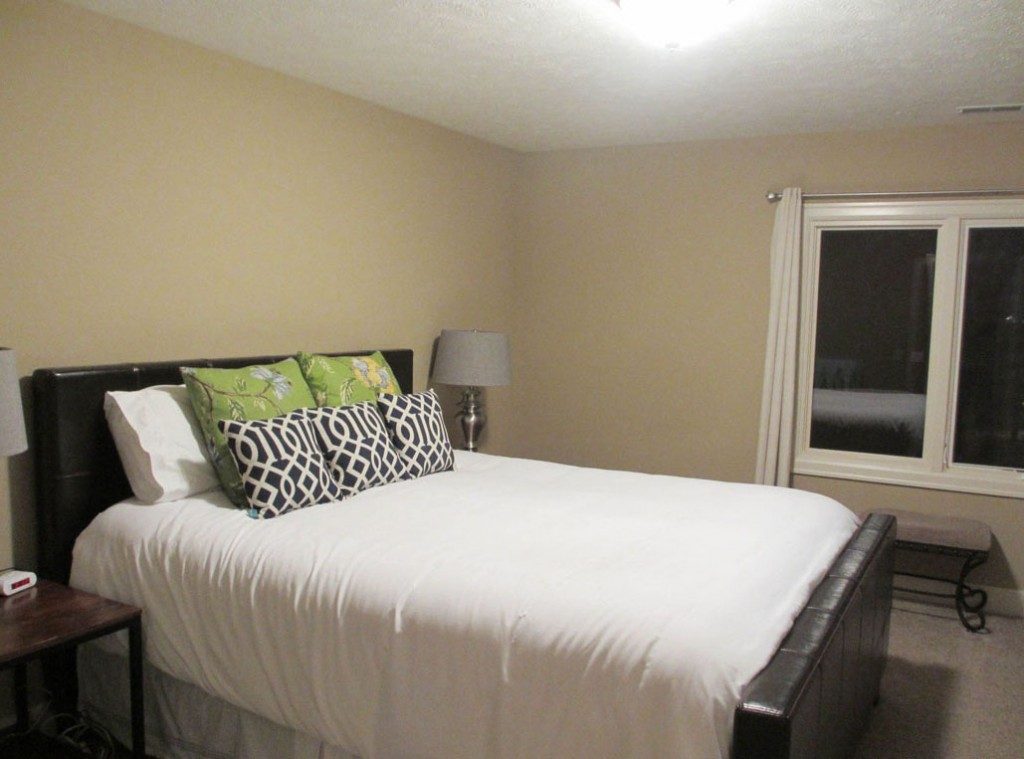
Before we jump to the steps, lets take a look at our simple guest bedroom as an example. Our guest room looked like this shortly after we first moved in:
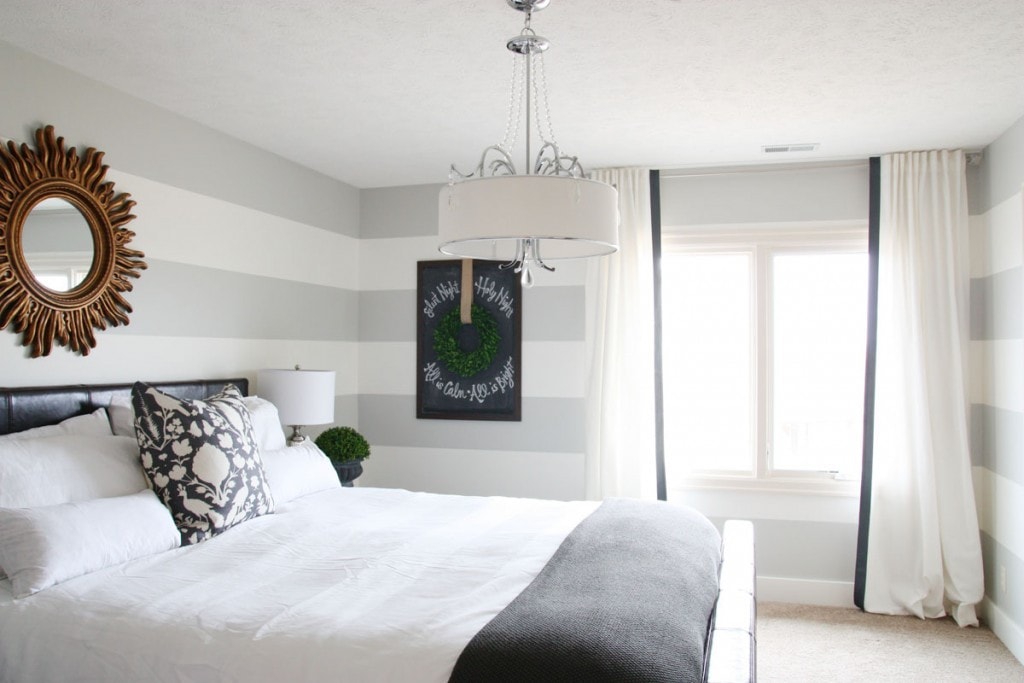
After some fresh paint and accessory swaps, I turned it into the bright space you see below. But it wasn’t a space that really felt like it belonged in our home.
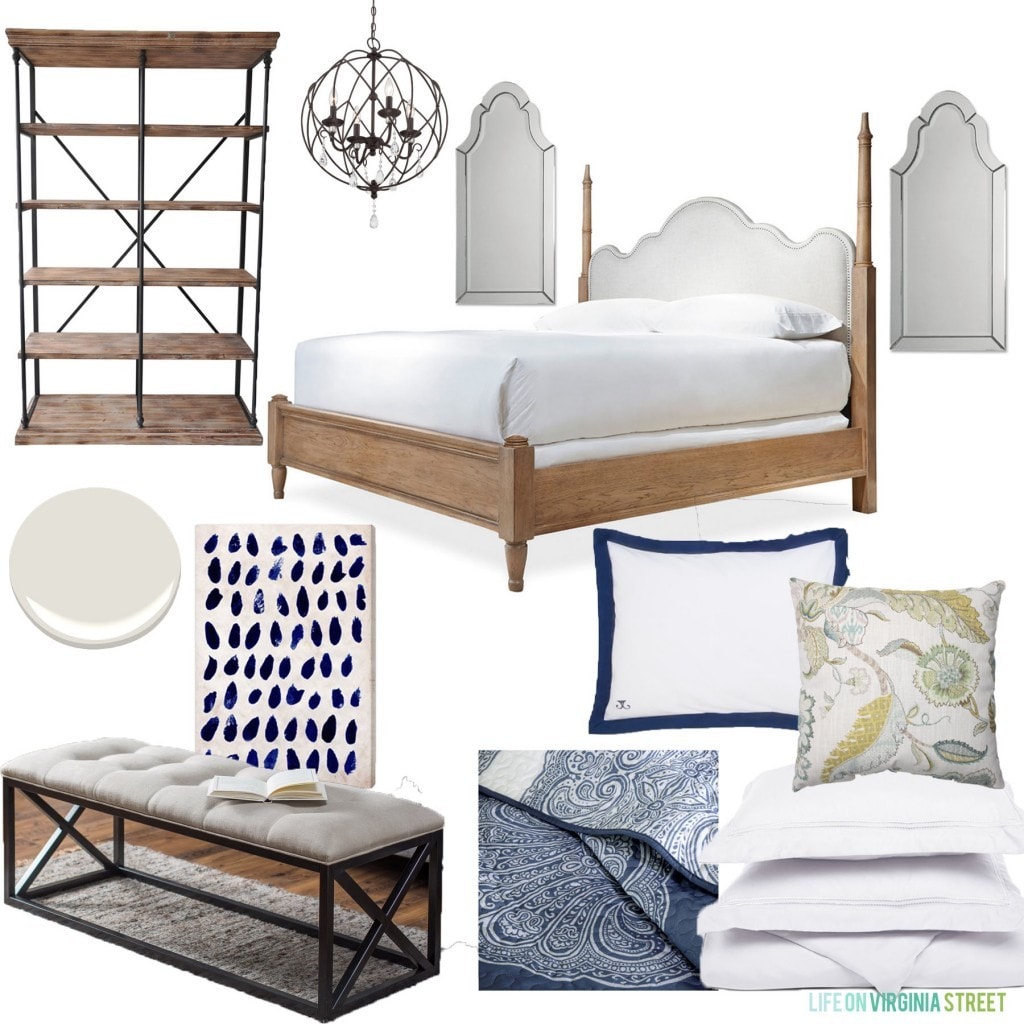
My design plans for the new space started on “paper” as the image below.
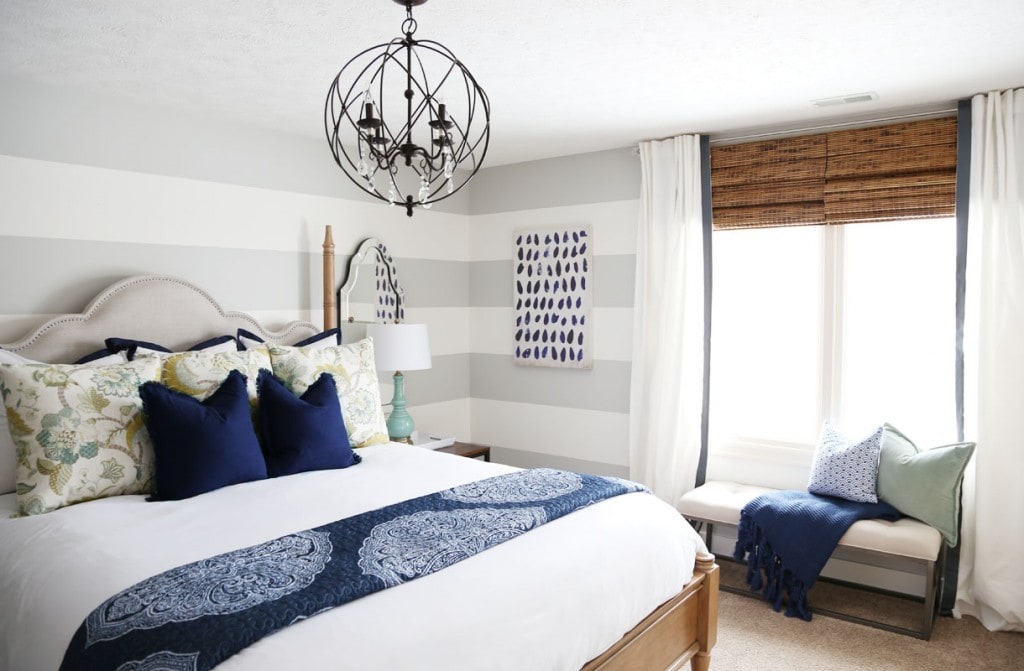
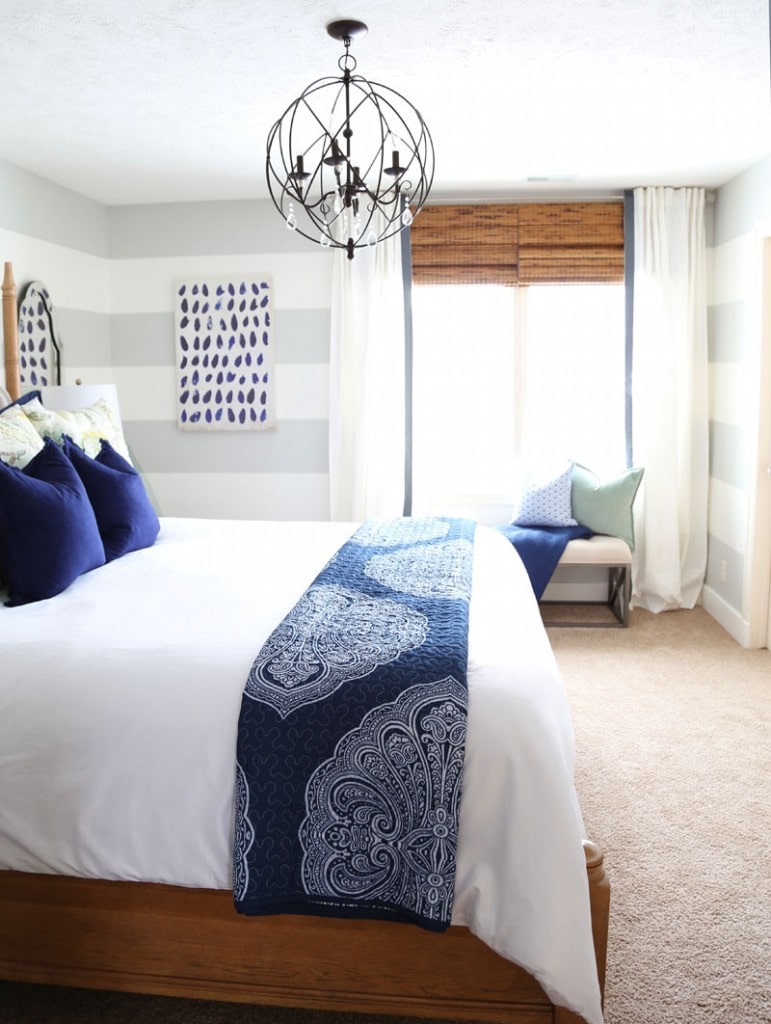
By following the steps below, the room evolved into the fresh design space you see below!
This post contains affiliate links for your shopping convenience. Click here to read my full disclosure policy.
How to Design a Room You Love
Following are some simple steps I take to help me design a room I love! You’ll want to be sure to spend adequate time on each of these steps so that you get it right the first time around!
- Identify how you want the room to function
- Set a budget
- Create a mood board
Identify How You Want the Room To Function
Without identifying how you want the room to function, flow, and how much you want to spend, you shouldn’t start looking for items. Take a few minutes to clearly articulate (either verbally or on paper) to each of those three questions, as they are critical components to ensuring you love your finished room. It doesn’t matter how beautiful the room looks in the end if it doesn’t function for you properly on a day-to-day basis.
Set A Budget
Nailing down your budget is a critical step before you start selecting pieces for your room. It can be so easy to buy one big splurge item and then have no money left for other cohesive elements in your space. Which is okay if you aren’t under any time constraints and want to take your time designing your room! But, if you are trying to complete a space from beginning to end, it will be important to lay out budget allocations for each piece you plan to replace in your room. I always add a 5-10% buffer as well for unexpected pieces I may find and want a long the way!
Create A Mood Board
I’m a very visual person, so I am a big fan of mood boards (which you know if you’re a long time reader). I’ve found in the past, if I skip creating a mood board, my decisions tend to be rushed and I end up with a space I don’t love in the end. A great example of this mistake is this space previously, in the first image above. It turned out to be a beautiful room, but not at all my style in the end. It had morphed into a Pinterest hybrid of spaces I loved but overall, felt too cold and stark for my liking. Not the feeling I wanted in our main guest room!
You can see my step-by-step tutorial on how to make a mood board for interior design for all the specifics on digital design boards!
I’ll share a bit more on my thought process on design boards below.
Starting Your Search For the Perfect Design Elements
At the onset of starting to search for items, I jot down a few words for how I want the space to feel. Going back to our guest bedroom makeover, words that came to mind for this particular space were beachy, polished, warmer, blues, cozy. Do the same with the room you’re envisioning for your own home. Sometimes it helps to pull up your favorite five or so images on Pinterest (more may give you analysis paralysis) and see what they all have in common. Write down the feelings, colors, elements, etc. you consistently see in all/most of the photos you love.
As I start finding items I love I make sure everything I pick can satisfy at least two of the words on my list. If not, I move on. I try to start with some of the bigger pieces (unless I find a small statement item that 100% has to be the focus/inspiration like a piece of art), and then work down from there.
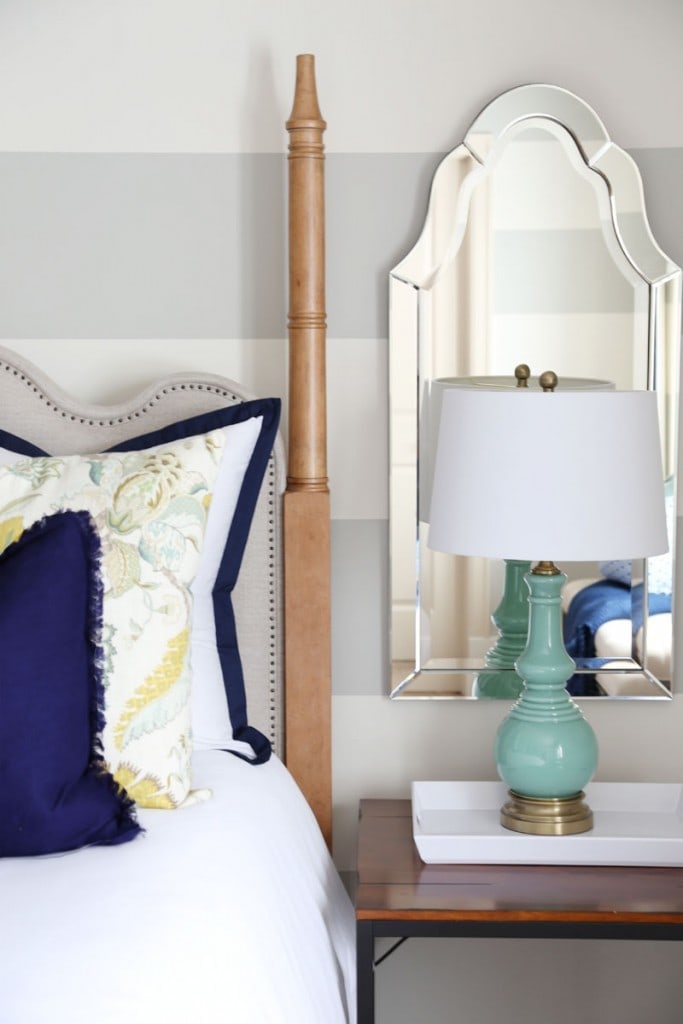
When starting on the design in a space, I typically start with one piece to start my inspiration. In this case, it was the gorgeous wood, linen and nailhead bed!
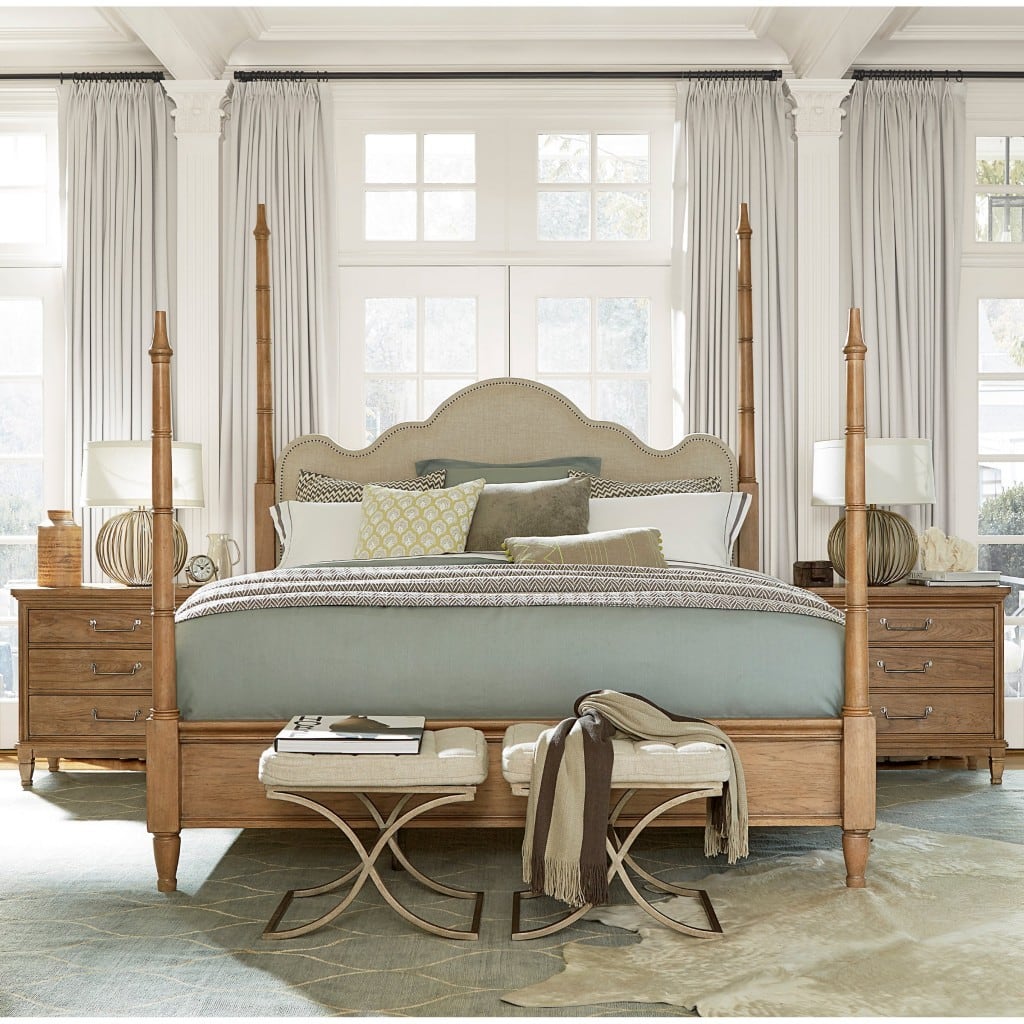
I knew it was a keeper! So, from there, I started to build out my design board around it.
The key to making your design board look as accurate as possible is trying to find the stripped-down product shots. So, for example, in the photo above, the bed looks gorgeous! But, say for example I wanted red bedding, the photo isn’t going to help me get that look and may just confuse the mood board. Always search on a brand’s website for the ‘unstyled’ version of the product and use that, if available. It also helps if the product has a white background! In this case, I pulled the image below.

See how this image serves as a much cleaner slate to build the design board? You’re now ready to use it in your mood board design and to begin adding other elements.
The reality is, we rarely can start from scratch and start over once when we makeover a space. I had several pieces I needed to keep, including the mattress (which dictated my bed size), the nightstands, the drapes, the striped walls and some of the pillows. When you have items you have to keep, try to photograph them in a neutral area so you can add them to your design board, as well (or find similar items online that you can add to the board to help you visualize everything together).
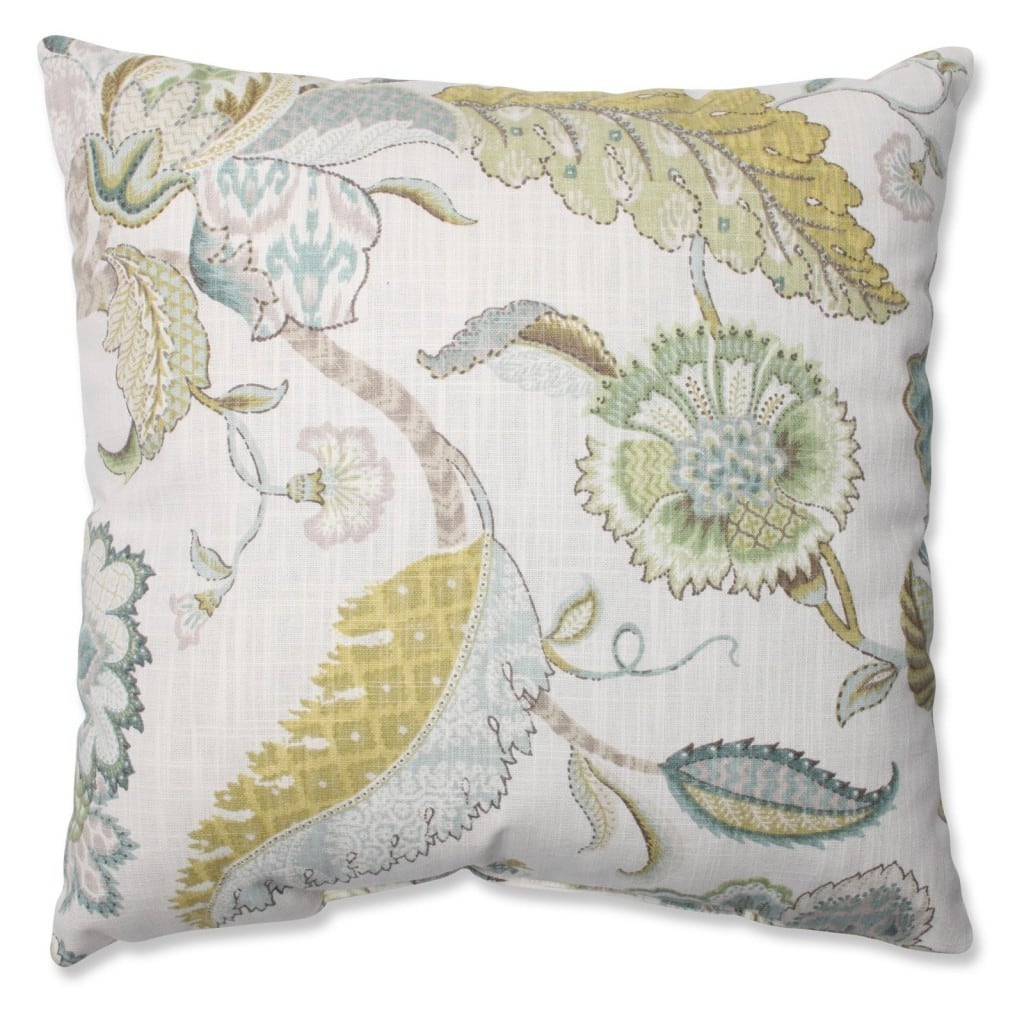
Next, I try to pick something that steers the palette. I first found the coverlet for the end of the bed, because sometimes bedding can be tricky. Knowing the route I was going with the coverlet helped steer some of my other difficult decisions. Another option would have been to start with the floral pillow. From there, find items that aren’t too matchy-matchy but coordinate well. I felt like the navy and white Euro shams perfectly tied everything together, and added a bit of a preppy vibe, without making the entire room feel like it was part of a set. If you have a hard time narrowing down patterns, be sure to check out my tips on perfect pillow pattern combinations.
I love that this floral pillow had all of my favorite colors and the ones I wanted to use in the space – blues, mossy greens, aquas, browns, and gray tones.
For the remainder of the bedding, I knew I wanted all white. Since I’m such a pillow junkie, I’ll likely never not do all-white bedding again. It is so much easier to vary your looks down the road, when you don’t feel the weight of also having to replace pricey bedding. I love being able to use seasonal throw pillows from our living room in our other rooms at later dates.
Continue adding in decorative pieces to the mood board, which will quickly help you to visualize if pieces will likely work together or not once they are in your room. When you see everything side-by-side in one image, you can quickly eliminate and add as necessary.
To create dimension in any space you design, try to vary the textures across your pieces. If you find you’re adding a lot of items with wood, for example, try to balance the look with polished metals, glass objects or cozy textiles. Woven elements mixed with smooth, soft fabrics. Hard lines with softer surfaces.
As a reminder, here was my final mood board.
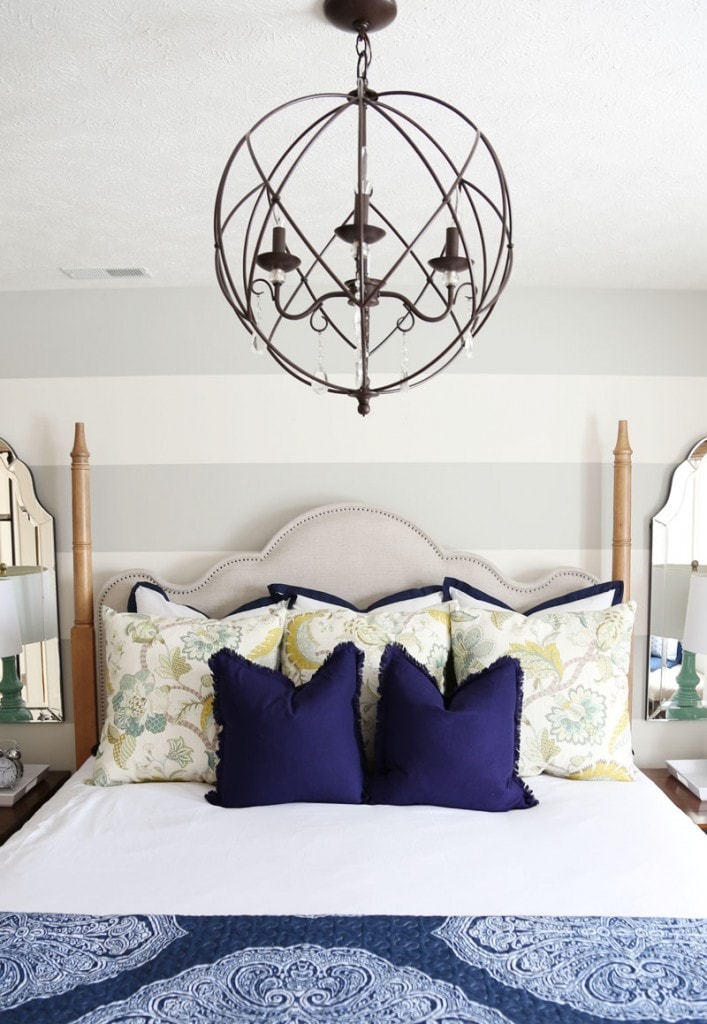
As much as I’m a believer in statement lighting, the orb chandelier (similar option available here) was one of the last items I added to my mood board. Sometimes, that’s the best route to go (unless you have a light fixture you’re designing an entire space around). I actually had a few options, but ultimately went with this one because the iron tied in well with the bookshelf, bench and my existing nightstands. The sparkly crystals added just a bit of bling and glam, and overall, I loved that the caged shape didn’t take up too much space visually. It still felt light and airy. Try and find something, again, that doesn’t feel matchy-matchy, but helps keep the overall look cohesive. Lighting can easily be eliminated or considered once you see it on your mood board.
The mirrors over the nightstands were added to help reflect the light and also add visual interest to the bed wall. The headboard was too high, in my opinion, to add a mirror or artwork over it. The curved frameless mirrors mimic the curves of the headboard, and also help to reflect so much more light in the space!
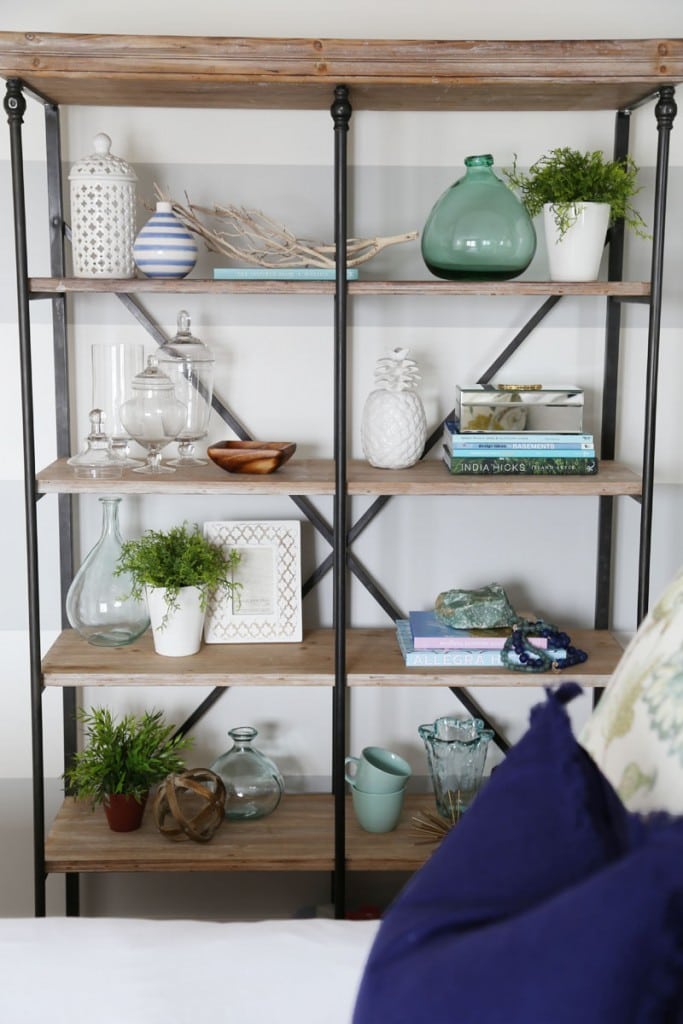
When it came to styling the bookshelf, I shopped my house, plus picked up a few affordable items at HomeGoods and Target. In this situation, if you have shelving like me, it’s a great way to add in pops of the accent colors you are going with. You can see I pulled out several soft colors from the floral pillow and used them in the pieces below. The bottom row (not shown in the photo) will hold baskets with additional linens for our guests. To keep the room sophisticated and polished, try not to add more than three or so colors (or tones of that color).
I believe greenery is always needed in any space, to help bring the room to life. The bookshelf just felt flat and a bit lifeless without it. So always remember, regardless of your color-scheme, try and add in greenery that goes with your style! It will make your space feel so much more finished!
I worked with the existing DIY no-sew ribbon drapes we already had, but that side of the room was starting to feel a bit stark again. After a quick trip to Lowe’s, I decided to add some in-stock bamboo shades. I couldn’t believe how easy they were to install and how well they coordinated with the bed and bookshelf! You may have also noticed that we installed them almost all the way up to the ceiling, making the room feel so much taller! The window doesn’t even start until almost the base of the blinds in the image below (don’t believe me? check out the very first pic), but the shades gives the appearance of a much larger window. The bamboo helps add so much more warmth and they are functionally so much easier to use than closing the drapes each night (we previously had to lift the rod to get the tabs to slide all the way over).
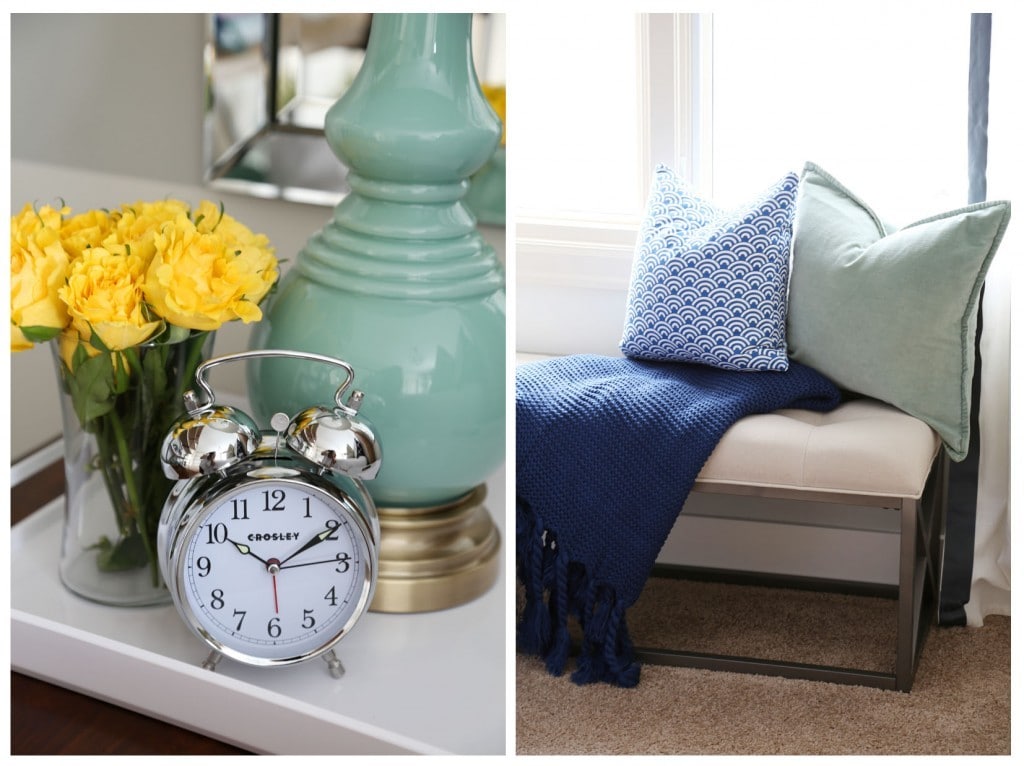
The throw on the bench helped balance the blue tones from the opposite side of the room. Without the addition of the shades and the throw and pillows, the room felt very heavy on the left and rather empty on the right. Be sure your room looks balanced when you step back and take a look at the whole. Sometimes, it can be as simple as snapping a picture and looking at it on your computer. You’ll see that something just looks “off” if the visual balance isn’t there. Simply add and subtract items until you achieve a look you love!
I hope you found all these steps helpful! If you have any further questions, feel free to leave a follow-up question in comments and I’ll formulate some responses for you!
SOURCES: Alarm Clock | White Trays on Nightstands | Lamps via HomeGoods | Bench | DIY Fabric Napkin Throw Pillow | Velvet Pillow via Pottery Barn (old)
If you would like to follow along on more of my home decor, DIY, lifestyle, travel and other posts, I’d love to have you join me on any of the below channels:
Being new to styling a bed I was wondering do your guests use one of these pillows to sleep at night or they just for show and you have others that match the sheets that they use? The bed looks great but I don’t think I have enough room in my bedroom to store all the pillows on the bed when it is in use.
That’s a really great question, Nadine! My guests sleep on white pillows that coordinate with the sheets. They are hard to see in the photos, but I typically lay them flat on the bed and then set the Euro pillows on top. My nightstands are actually open on the bottom so I have them (or I do it) stack the pillows on the base of each of the nightstands. Another option would be to reserve a section of the bookcase (or your closet, or something equivalent) to stack them all vertically. I hope that helps! Let me know if you have any other questions!
I really love what you’ve done with room from top to bottom! Thank you for an excellent post too! You’ve provided so much helpful information.
Awesome tips! Has me thinking about mirror possibilities to flank my headboard as well as it is a tall one too! Thanks for the inspiration!!! xx
I’m so in love with this space!!
What a useful and thorough post, Sarah! So helpful for those of us who have a hard time visualizing things ahead of time, too. Pinning!
Hi Sarah- What a great article! I quickly went out on a search for apps that I can create my own mood board and found one called Morpholio. It’s very easy to crop and paste from Pinterest , houzz and google images. Best of all it’s free!
Great to know! Thanks so much for sharing 🙂
I am in the middle of redecorating my master bedroom. I love the clover pattern. I also love any color gray there is. So, the majority of my walls are bright white, because my moodboard i had the ceiling black. And that was my bold accent. All furnitur is white trim is black, then on the bed is the fluffy grey and white cover. Now stairing into the master bath, aldo white n grey, im thinking I should put grey on the ceil and trim work. Then have the accent colors black and silver. What do you think?
That sounds beautiful! If you’re a black and white fan, I think the white walls with black ceiling could be amazing – especially in a bedroom. It would certainly add a glam factor with the black and silver accents too!
Thanks for the helpful tips! I have an odd question for you……I am looking to redo my master bedroom with a bed similar to what you have in your guest bedroom and we will be purchasing a new mattress as well (yay!). Do you think a low profile box spring/foundation will work better or should we stick to the traditional 9″ foundation with this type of bed? I hate to have a bunch of ugly box spring showing!
Ours has a traditional height box spring and I love the height it adds, but I think you could be good either way! We already had the mattress and box spring so I wasn’t interested in buying a new set. I have found if the box spring sticks up a bit, just buy an extra fitted sheet and it will totally help to blend in. I hope that helps!
Where did you get the navy and white coverlet? I have been looking for something just like it for a room I am redoing for a friend.
Where did you get the navy and white coverlet? I have been looking for something like that and cant seem to find anything like it.
Thank you! It’s from Hayneedle. It should actually be linked directly to the item too, if you’re interested 🙂
Is the cover on the bed a white comforter or another white coverlet? I find that we have to switch from comforter to coverlet depending on the season. A comforter gets too warm during summer and a coverlet isn’t enough warmth for the winter even if we have an extra coverlet folded at the foot of the bed.
This actually happens to be a duvet cover over a white comforter (because we no longer had an actual duvet). We love the duvet covers with our cats because we can easily remove them and throw them in the washing machine easily. I do love coverlets too, but I know in the colder months, they likely wouldn’t be heavy enough!
I love the brown window coverings that go with the curtains. (I’m not sure what that style is called!) Can you share where I might find them?
Thanks! I actually got them at Lowe’s right off the shelf 🙂
Thank you so much! I am trying to determine my style and decorate my home after being here for a year plus! This post has made it so simple and clear what I need to do. I’m actually excited to decorate, and that feeling has been absent for some time regarding decor. I will definitely be reading more from you in the future… again, my sincere appreciation! My house & hubby thank you too~
Thanks for the comment! I’m glad the tips are helpful! 🙂
Beautiful , what color is the gray paint?
Thank you! The gray is Behr Dolphin Fin!
I was just curious, where you would recommend the best place to buy a down comforter or comforter etc. to answer it into a divorce cover?I bought one from Tommy Hilfiger but it is extremely heavy I’m trying to find a lighter comforter for my duvet! Beautiful guestroom by the way!
Thank you,
Dawn
I’ve always bought ours from Overstock and have good luck with them. I am super thorough about reading the reviews before buying and I feel like that helps a lot (especially if there is quite a bit of feedback).
Where did you get your bookshelf from? Thank you!
I love the bed you used with the combination o light wood with a off white headboard in a natural material. I have a traditional four poster bed from ethan allen in the light wood finish and was wondering if you can think of an idea of how I could achieve a similar look. Possibly paint just the headboard or cover the headboard with a material? any thoughts would be so welcomed.
P.s. I am a very big fan of your instagram posts. Than you so much!!
I love the 4 poster bed you used in the guest bedroom with the light wood finish and off white headboard. I was wondering if you could think of how I could achieve a similar look with a four poster light wood bed that I purchased from ethan allen years ago. Perhaps I could paint just the headboard in a soft white or I could try to cover the headboard with a natural white material?
Just starting so I have a long way to go. I think my biggest issue is going to be working with what I have now…. replacing large items is out of the question at least for now, just wouldn’t fit into my budget. I’m thinking of looking through the magazines I’ve kept for years and do an actual board. I was never able to let go of them and still love looking thru them… the likes of Veranda, House Beautiful, BH&G and even Tuscan Style. I’m looking forward to this, I know it’s going to be fun. Thank you for your ideas.
What paint colors did you use & how wide are your stripes?
I have been looking for a bed frame JUST LIKE YOURS!! I am afraid I am too late to your post as that style is no longer available. Have you seen anything else similar to it?