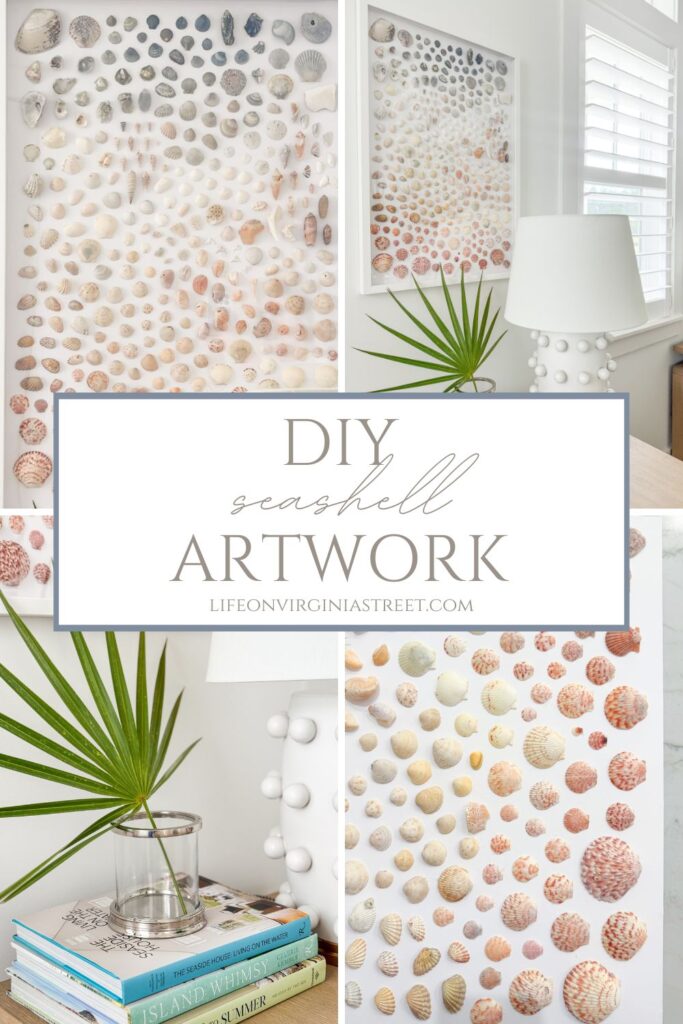
I’ve really enjoyed collecting seashells on my walks along the beach ever since we moved to Florida. It’s become an unexpected hobby that I really enjoy! But the collected shells were starting to pile up, so I began searching for creative ways to display my little treasures. Today I’m sharing some fun DIY seashell artwork ideas as well as a tutorial for the art I ultimately made.
Making art from seashells you’ve collected is a fun and rewarding way to get creative. Each shell brings a little piece of the beach with it, full of memories from your trips by the ocean. Turning those shells into something beautiful not only lets you hold on to those beach vibes but also gives you a chance to get hands-on with your creativity. Whether you’re decorating your home or making a unique gift for someone, working with seashells feels personal and relaxing. Plus, the process of handling each shell and figuring out how to turn it into art is a great way to unwind and enjoy some peace and quiet! Once complete, the art is a fun way to reminisce on time spent at the beach.
This post contains affiliate links for your shopping convenience. You can read my full disclosure policy here.
Creative Artwork Ideas You Can Make with Seashells
Here are some creative artwork ideas you can make with seashells you’ve collected:
- Seashell Wall Art: Arrange shells in intricate patterns or shapes like flowers, stars, or waves on a canvas or wooden board for a textured piece of coastal art. Or, simply apply them in a randomized pattern.
- Seashell Mosaic: Create a mosaic-style design by gluing shells onto a surface to form an image, such as a sunset, ocean waves, or a beach scene.
- Seashell Jewelry: Turn smaller seashells into necklaces, bracelets, or earrings by drilling small holes and adding beads or charms for a beachy accessory.
- Seashell Picture Frame: Decorate a photo frame by gluing shells around the edges, making it a perfect way to display your beach memories.
- Seashell Garland: String a variety of seashells together to create a whimsical garland for your Christmas tree!
- Seashell Candles: Hollow out larger seashells and fill them with wax to make unique, ocean-inspired candles for a decorative touch. This can also work well with larger oyster shells.
- Seashell Trivet or Coasters: Glue shells to a wooden or cork base to create a stylish, beachy trivet for your kitchen or dining area.
- Seashell Mirror: I’m seeing a lot of designer versions pop up recently, but you could easily make your own. We have this seashell mirror and I feel like something similar could easily be achieved by gluing seashells to a basic mirror frame.
I saved a bunch more ideas to this Pinterest board that may help inspire you! There are lots of creative ways to create seashell art included.
If you don’t have access to seashells, you can buy some online like here and here. I’m also sharing some premade seashell art that you can purchase further down in the post if you’re not much of a DIY-er!
DIY Shadow Box Seashell Art
After looking through so many possibilities, I ultimately decided to make shadow box seashell art for my office! The plan was to create two similar versions to hang above each desk in the space. But, it turns out the frames I ordered were so large, I only had enough shells on hand to create one.
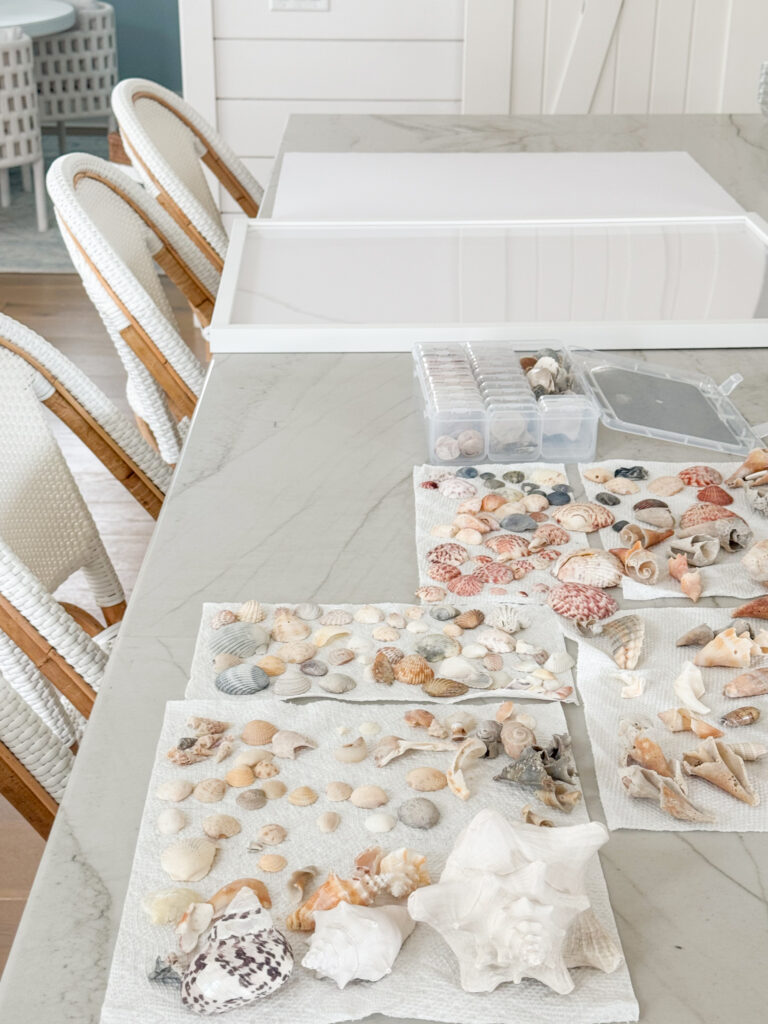
You’ll start by thoroughly washing and drying your shells. I let mine sit out a week or so before I started attaching them just to be safe. Some research I did involves brushing mineral oil onto the shells once cleaned and dried to bring out the original, natural color (it will make the colors more bold). But, since I was using a variety of colors, I opted to leave them as is.
Supplies Needed for DIY Seashell Shadow Box Art
To get started, you’ll the following:
- Seashells – any size will work. Ensure you have them thoroughly cleaned and fully dried. If you don’t have access to some you’ve collected, try something like these or these.
- Shadow Box Frames – I used this one but also ordered these as well for larger shells. Any should work, just be sure to measure your largest shell to ensure it will fit beneath the glass.
- Glue – I used this hot glue gun and think hot glue is preferred for applying most shells. But you could probably experiment with other (clear) types depending on your shell size.
- Fine-Tip Tweezers – Not mandatory, but I found a pair to be very helpful to have on hand.
Gather your cleaned/dried shells, shadowbox, glue of some sort. I found this cordless, rechargeable glue gun and it was very helpful for this project. The tip was precise and to my surprise, I didn’t get burned once despite handling such tiny objects. I also used a fine-tip pair of tweezers to help with any excess glue, to place smaller seashells, and to help remove the glue “cobwebs”.
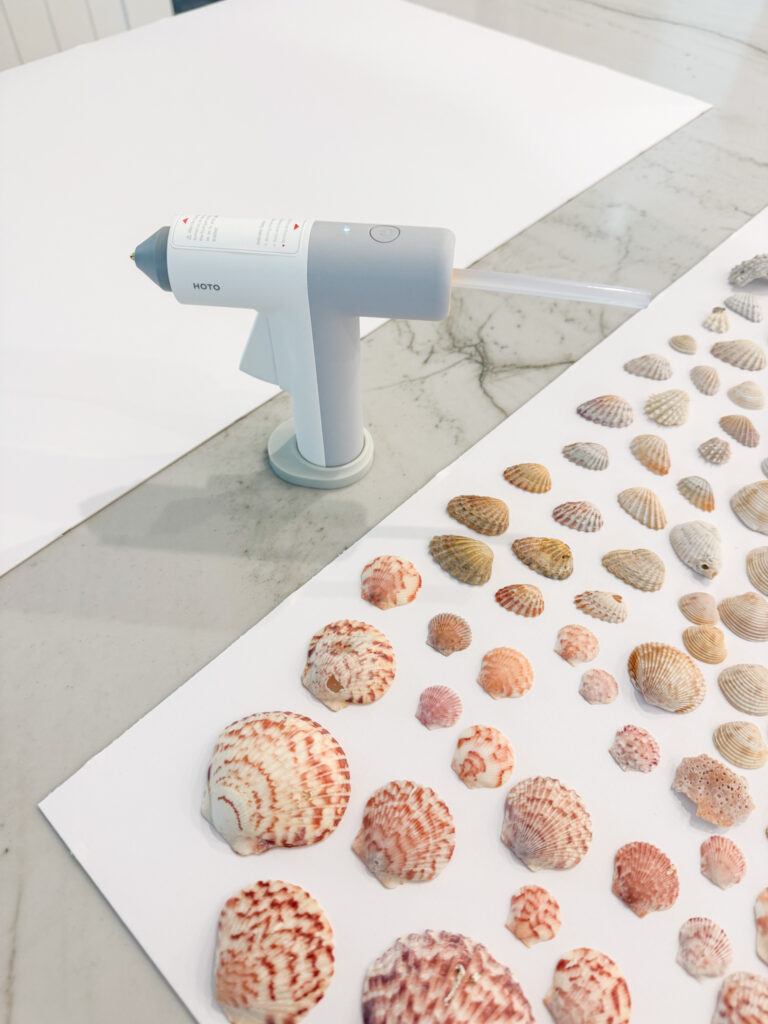
I first started by removing the frame from the backing and laid the “canvas” out on our countertop. From there I started sorting the shells by color and placing them in tentative spots on the board until I achieved a look I liked.
The next step is attaching the shells to the board. Even with the shells all laid out ahead of time, it was still time-consuming to glue on each shell. That was largely in part because our shells are fairly small here. Once you get into a routine it starts to go more quickly. But essentially, I eye-balled which parts of the shell touched the board and added a few drops of glue to those spots. Since I was going for a more organic look, I wasn’t too concerned if I placed the shell at a different angle or exact spot than I had planned. I simply adjusted those around it along the way.
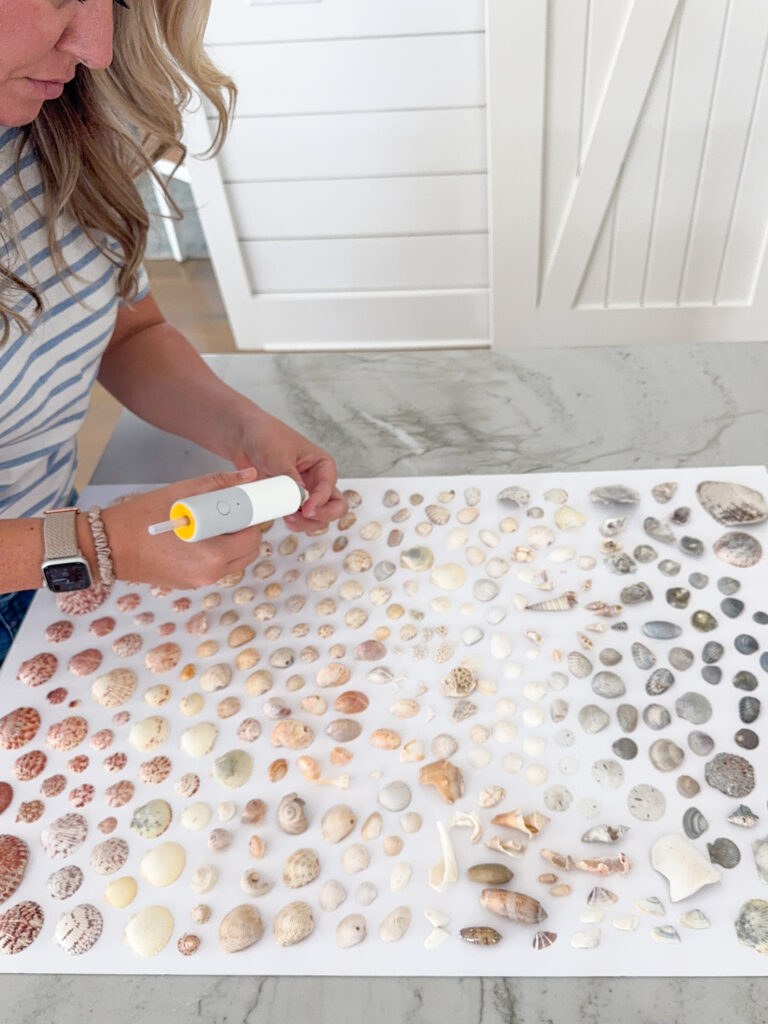
Once you’ve glued all of your shells to your board, you’ll want to go back with the fine-tip tweezer and remove any glue “cobwebs” you find. I had a lot, but tried to clean them up as I went along.
And here is how my artwork now looks once it was all glued down, attached to the frame, and hanging in my office!
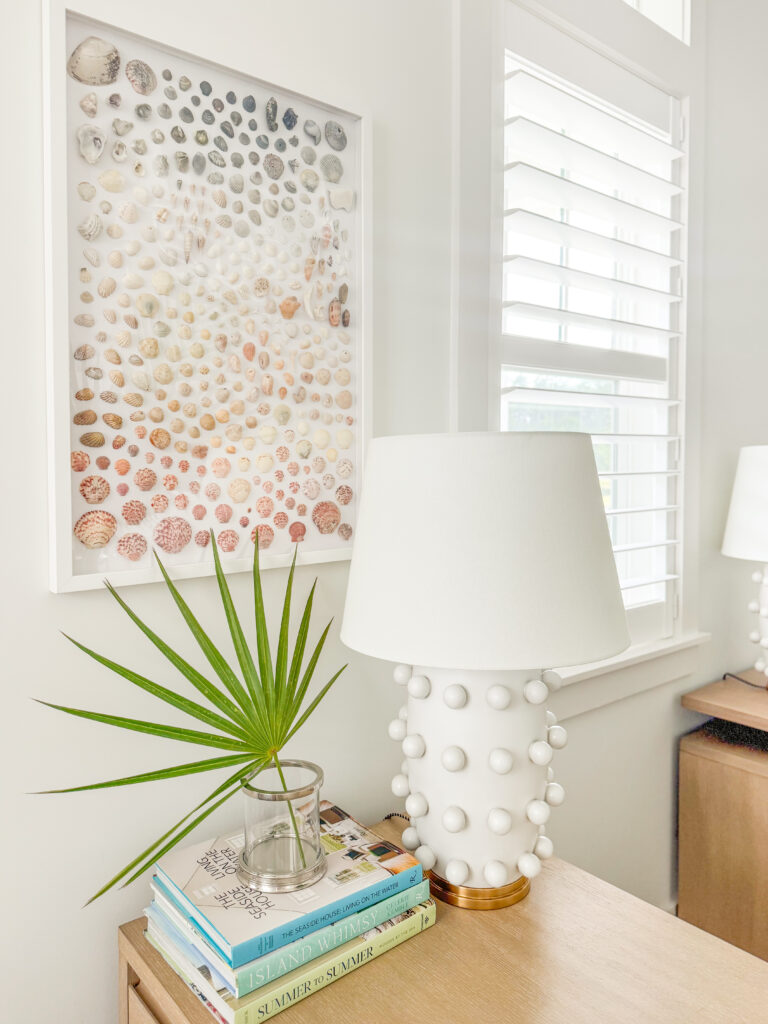
OFFICE SOURCES: Shadowbox Frame | Writing Desk | L-Shaped Desk | Hurricane Glass | Lamp (look for less here)| “The Seaside House” | “Island Whimsy” | “Summer to Summer”
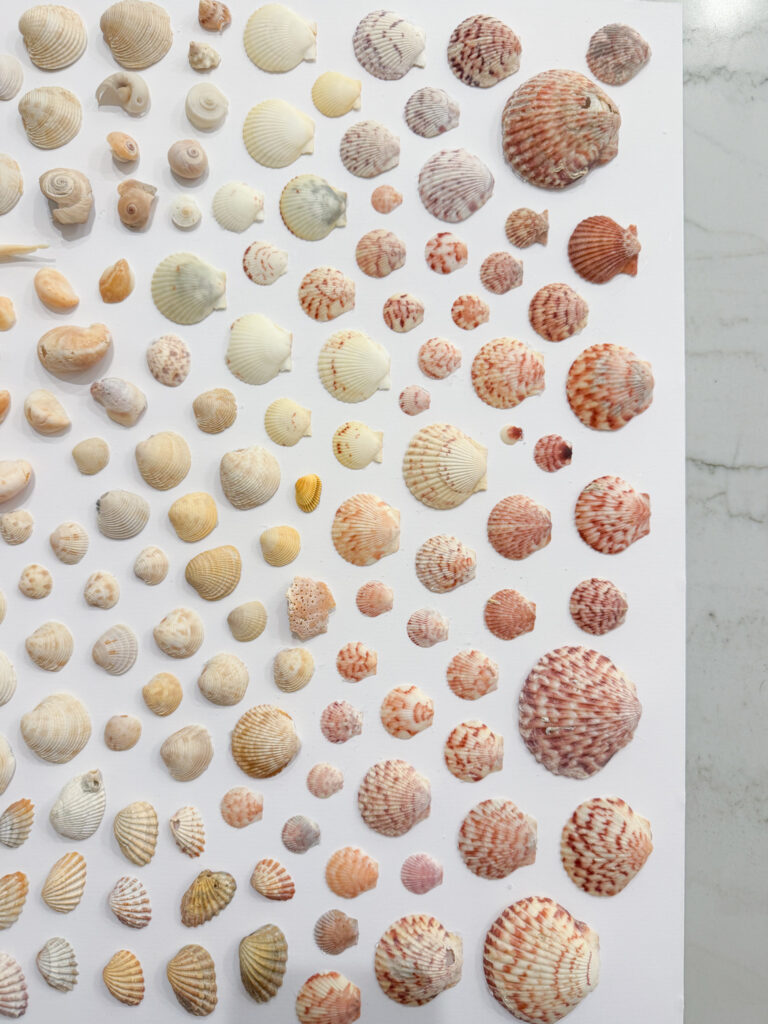
Here’s a closer look at some of the details and how I arranged everything. Admittedly, I likely would have gone with a more monochromatic look if I knew just how many shells I was going to need so it would ultimately be slightly less busy looking. But I love how it came together!
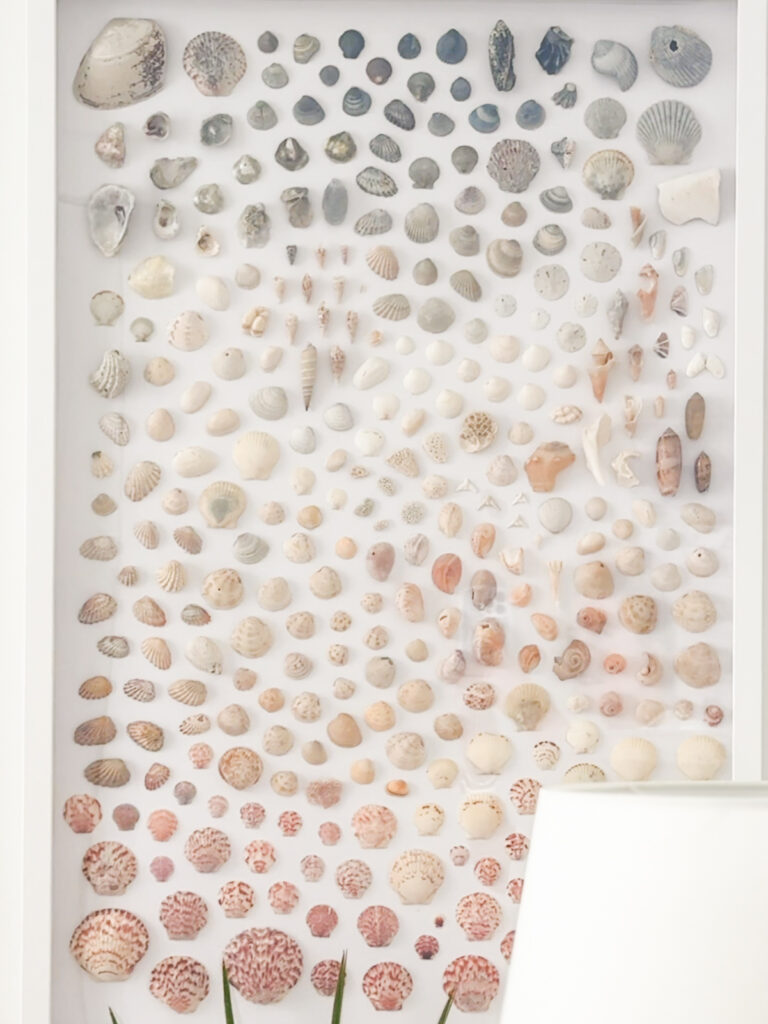
Once it was hung on the wall, it became a bit difficult to photograph with the reflective surface and all the windows! But you can see I went with sort of an ombre effect, creating clusters of similar colors and shapes. I think it would also be really pretty to do something with various shades of one color, too, for a more monochromatic look. You could also experiment with painting the background color.
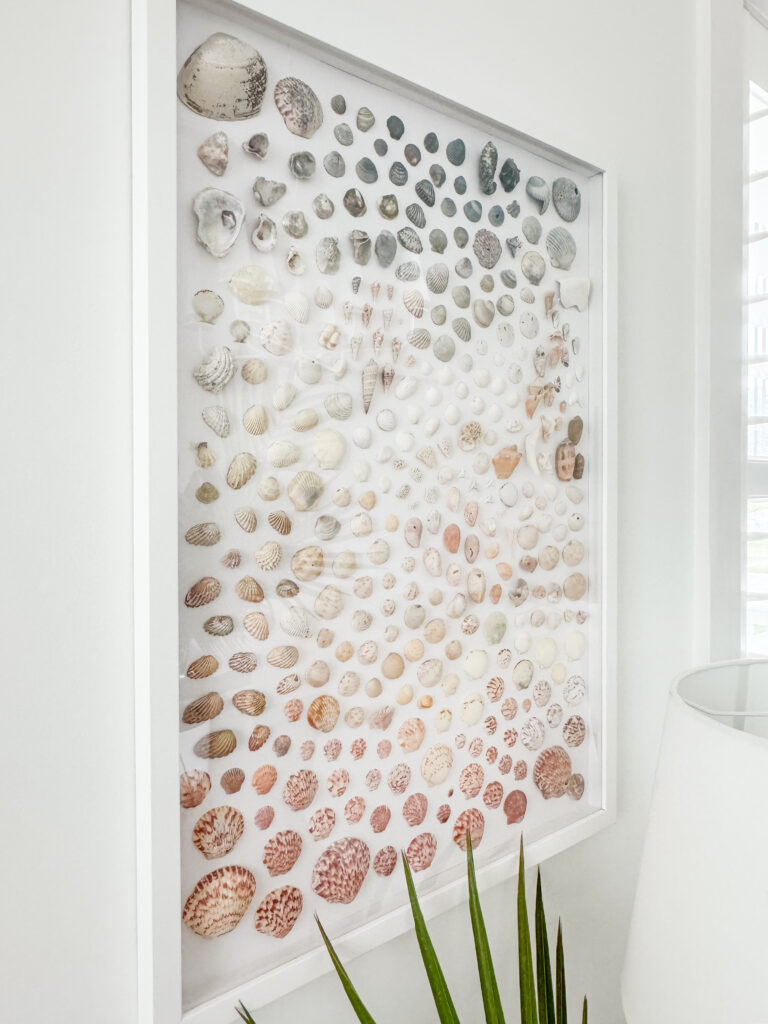
Now I just need to get back down to the beach so I start collecting more seashells for my second frame! But I love this personal addition and the pop of color it adds to my office!
Pre-Made Seashell Artwork
If you love the look of seashell artwork, but don’t have access to shells or the time to make your own, I found some pre-made options. Tap any of the images below for more details on each of the items shown.
Additional Coastal Artwork Ideas
If you love beachy or coastal artwork in general, here are a few other posts you may enjoy. Tap any of the titles below for all the details.
If you would like to follow along on more of my home decor, DIY, lifestyle, travel and other posts, I’d love to have you join me on any of the below channels:
Your wall shell artwork is phenomenal! It is beautiful the way you placed the shells to create the ombre effect. Stunning!
Thank you so much!
Beautiful job! I have piles of shells we’ve collected from
Florida beaches—this is the perfect project to display them all. If you want to collect the pristine shells, head to Marco Island and/or Sanibel and take a shelling tour to the 10,000 islands. The shells are phenomenal!
Excellent!!! Your shell artwork is gorgeous!!!
I’ve been collecting shells for a very long time…. probably time to do something fun like this! As always, thanks for the inspiration!
( by the way, Florida sea shells are the best!)
Love the seashell art! Looks so pretty!
Gosh, I really like this. I think it looks great and so perfect for your aesthetic. Such a pretty use of shells.
Nice job!
Sarah that is absolutely beautiful!
Sarah, it’s stunning!!!
Love your home! Love these DIY ideas for shells 💙!! So happy you were able to move to Florida!! You are living my dream life! I have been following you for years 💙🩵
Stunning! I love the pattern you created.
Thank you so much!
Love your work! Any tips on how to clean your shells beforehand?