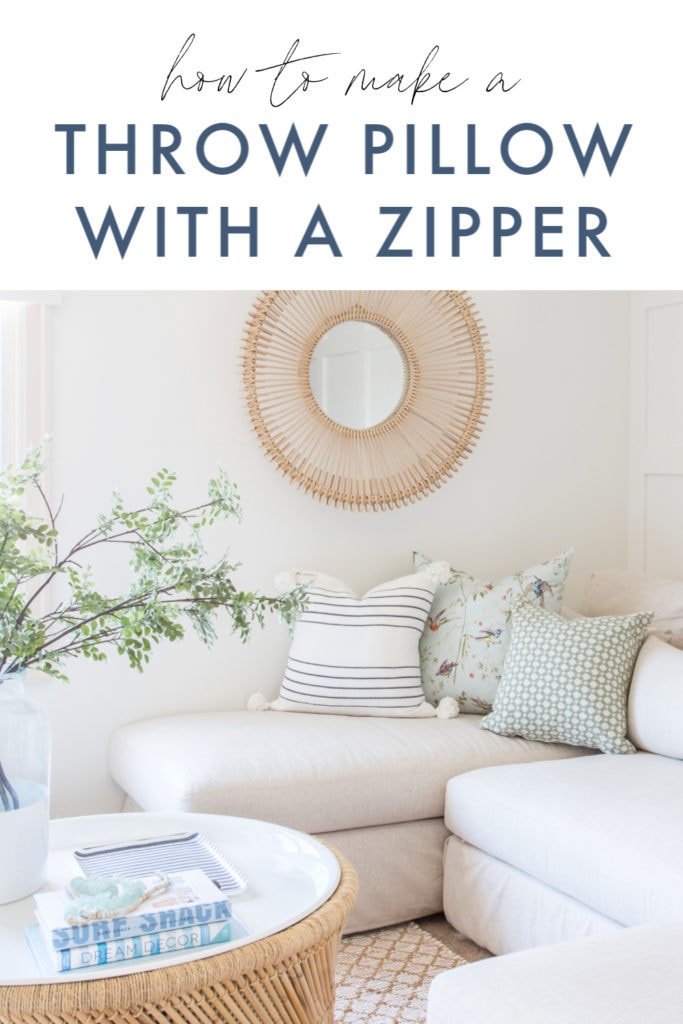
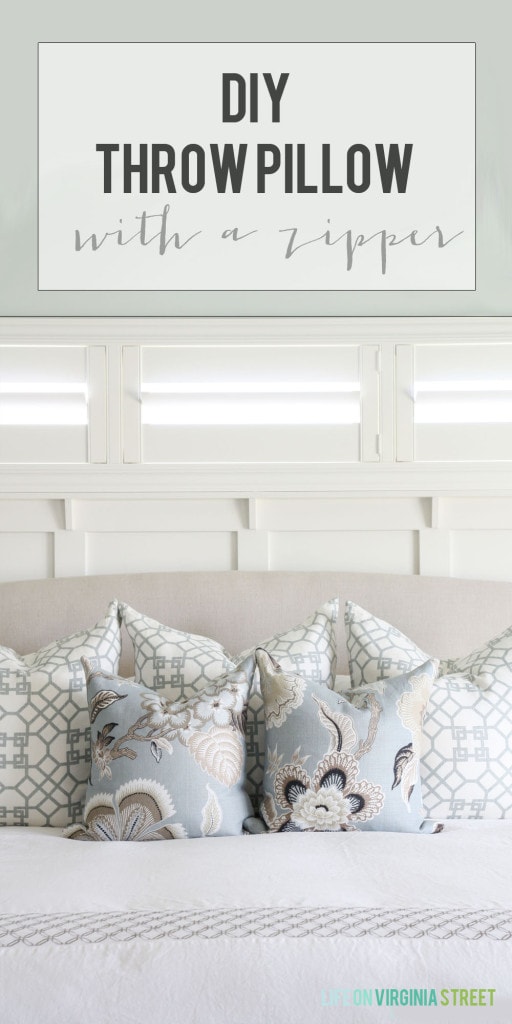
This simple and easy-to-follow tutorial will show you how to make a throw pillow with a zipper. Get the designer throw pillow look at home, for less!
I’ve had a recent influx of requests asking how I make a throw pillow with a zipper, after I shared a few weeks ago that I was sewing. I created this tutorial about nine years ago, and since it’s every bit as relevant today, I updated it with some currently information to share with you again!
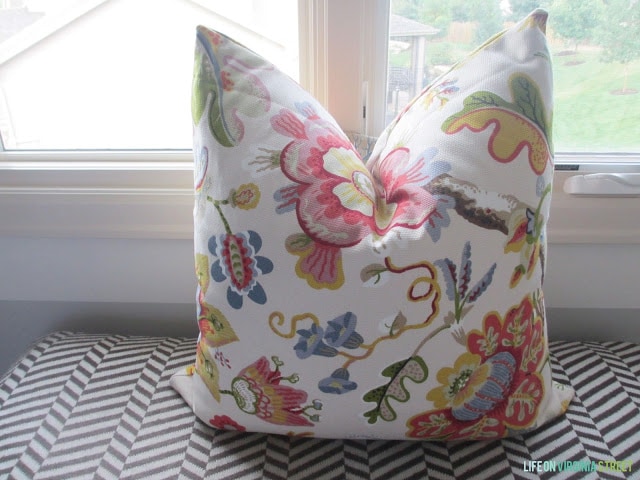
If you don’t know this already, I have a serious throw pillow obsession. I crave designer looks but not always the designer prices. Many of the more affordable versions of designer pillows online only have the pattern on the front of the pillow with a cheap linen or other backing on the reverse side. Today I’m going to share with you a simple tutorial for making your own throw pillow with a zipper.
About a decade ago, I decided I had to learn how to make my own throw pillows. It turns out that I could buy enough fabric for an entire set of pillows (with the same fabric front and back) for even less than one pillow at most online shops. I started with envelope pillows, using a method my mom taught me. You can read my envelope-back pillow tutorial here if that method interests you instead. It still works well, but I started to hate the extra cut (I hate cutting fabric), and I preferred the look of zipper-bottomed pillows. So, today I’ll be sharing my updated method with you for how I make a throw pillow with a zipper.
This post was originally published September 11, 2013 and contains affiliate links for your shopping convenience. You can read my full disclosure policy here.
How To Make Throw Pillow With a Zipper
I’m going to start off by saying that I first learned this technique from a blog called Casa Brasi. Unfortunately the blog shut down over a decade ago. Thankfully, I have most of the steps memorized at this point. However, I thought I would recreate the tutorial but with the modifications I use that I find work best for me.
This is a really basic tutorial, and for a more advanced seamstress, you probably have even better methods for some of these steps. However, I’m going to assume you know how to work your sewing machine. I am a VERY beginner sewer and can’t do much outside of a straight line. If you can do that and follow directions well, you’re golden.
Supplies Needed To Make A Throw Pillow With A Zipper
Following are the supplies you will need to make a throw pillow with a zipper.
- Fabric (be sure to check out my favorite sources for designer fabrics and throw pillows)
- Thread
- Scissors
- A zipper (these are my favorite zippers)
- A sewing machine
- Pillow insert (I prefer down or down alternative for the most designer and high-end look)
My recommendation is to start with some really cheap fabric for your first time through. This will make you much less nervous as you try out each of the steps!
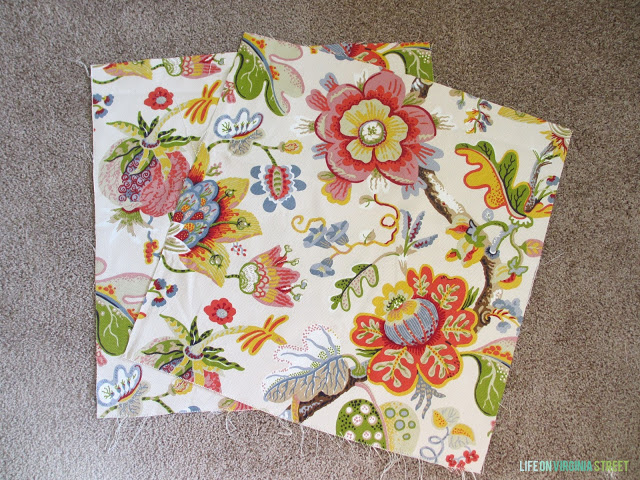
Step 1:
Cut out your fabric. I like my pillow covers to fit fairly snug so adjust accordingly if that is not your preference. For example, when I am making covers for a 27″x27″ Euro sham, like I am demonstrating in this post, I cut my fabric exactly 27″x27″. I do not allow for a seam allowance.
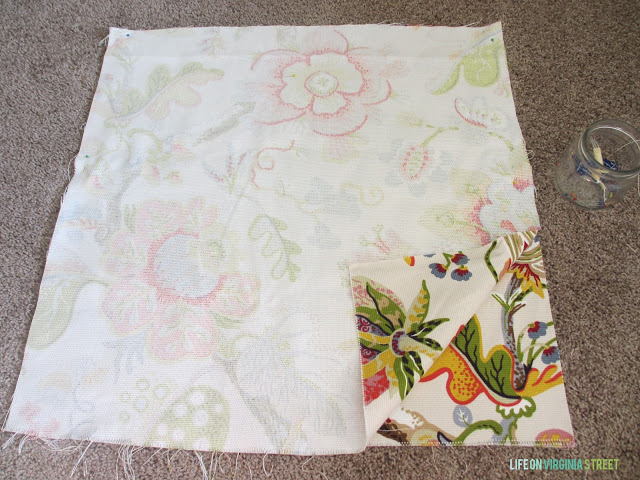
Step 2:
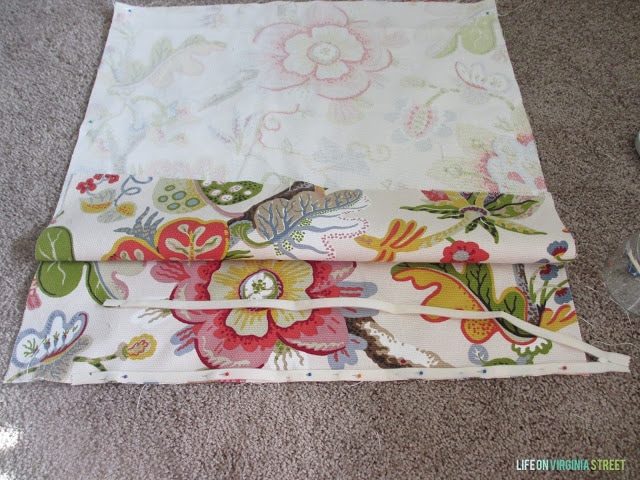
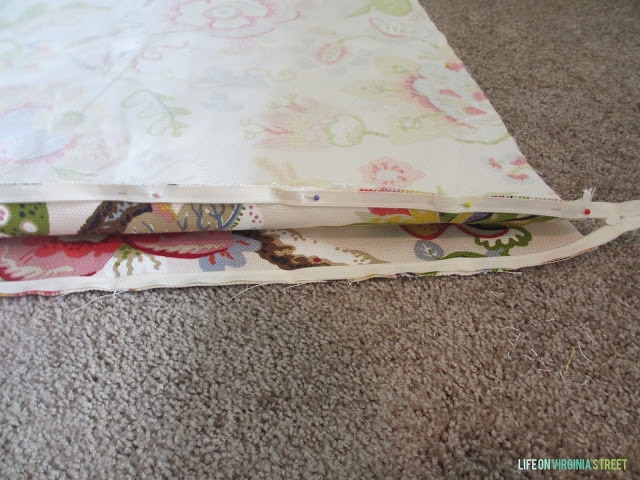
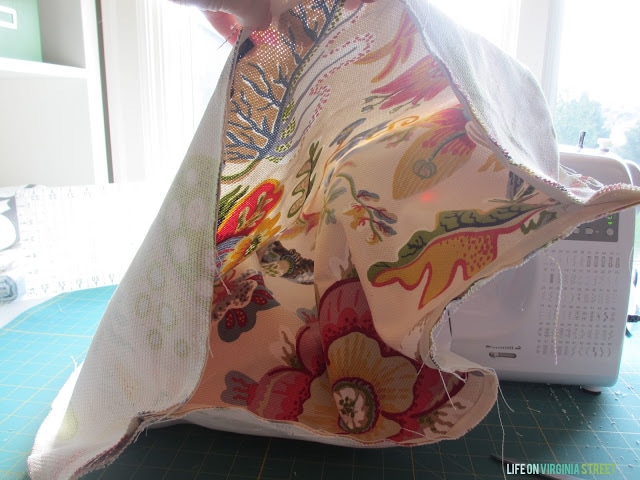
Face the fabric print to print (think of it as inside out), so that your finished sides are touching on top of each other and that any pattern matching you have done is lined up. I pulled back one corner so you could see what I was referring to. I then add a stick pin to the top two corners and each of the sides (in the middle).
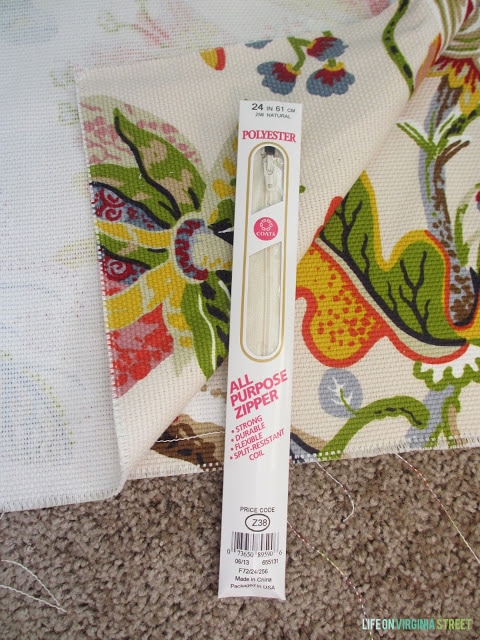
Step 3:
Open the zipper and unzip it all the way. I usually buy 24″ zippers in the natural color, regardless of the size or color pillow I’m making. I find the longer length works best (you’ll see why shortly) and the cream tends to go with nearly all fabrics. The white is usually much too bright. Here are the zippers I use most frequently. You can see all zipper colors and lengths they offer here, to find one that best fits your needs.
Step 4:
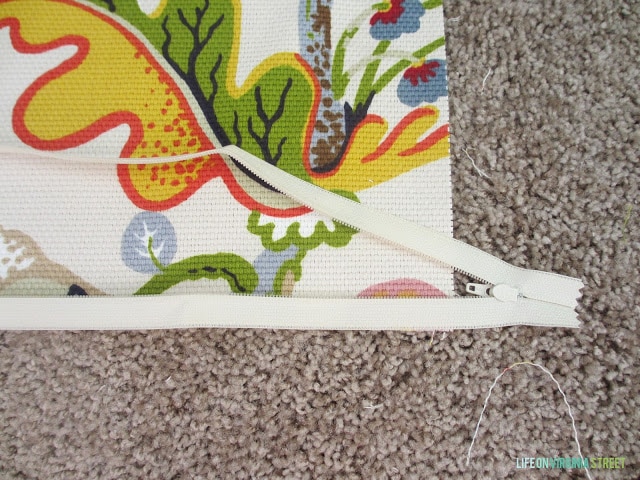
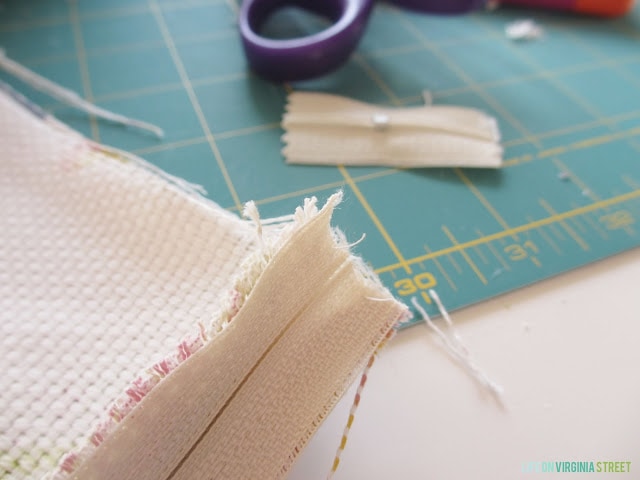
Once the zipper is open all the way, flip it upside down (zipper pull facing down) and line up the bottom edge of the zipper with the bottom edge of your bottom fabric (just fold the top layer of fabric back a bit). Extend the zipper out about an inch past the edge of the fabric like below. This is the part that always confused me the most so I took a few pictures from different zoom levels so you could see what I was referring to. Once in place, add stick pins down the length of the zipper.
**Note: the longest zipper length I can find is 24″ so you’ll note that it stops short on my pillows. For smaller pillows you may have zipper hanging over the edge but its OK! Don’t panic. In fact – I prefer it to hang over as it is much easier down the road.
Step 5:
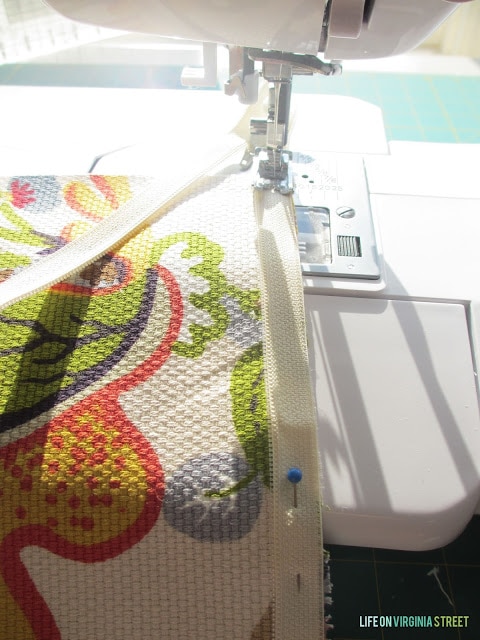
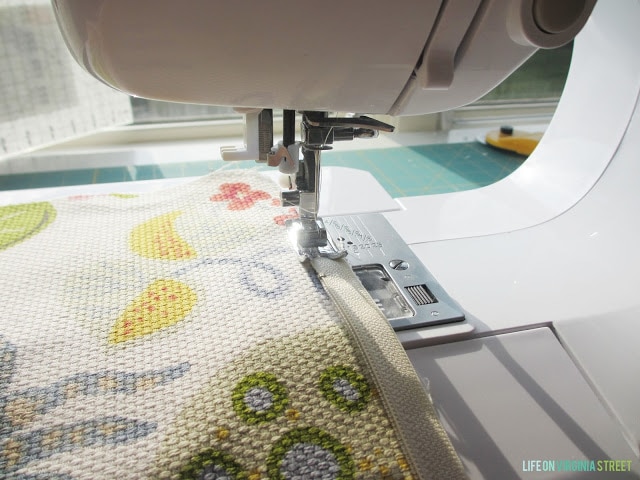
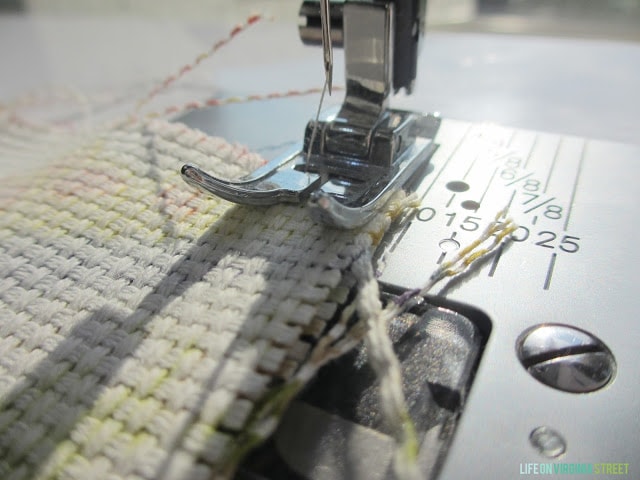
At this point in the process, you’re ready to start the actual sewing! Take out the first stick pin (or more, depending on how close you have them together) and adjust your footer like the photo below. I basically drop the footer on the zipper head and let it fall forward so I start sewing nearly exactly on the pillow edge and just past the zipper (make sure not to actually sew on the zipper head on accident). You can see I line the needle line up as close to the zipper teeth as I can, without actually hitting them. I’ve done that before and it is a real pain to unpick. I find it’s best to have the left foot sitting just over the zipper teeth and you’ll usually find the right foot sits just on the other edge of the zipper and base fabric. *Note: I do not use a zipper foot. I just leave my regular foot on for all steps in this tutorial.
Step 6:
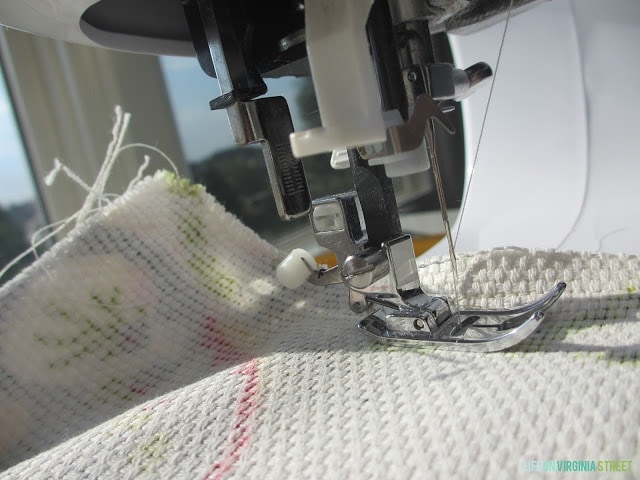
Pinch the zipper over like below and place the top layer of fabric over the zipper (while it is pinched). Take caution to allow the zipper to line up naturally with the bottom layer so that if you were to imagine pulling the zipper the bottom layer of fabric and top layer of fabric are still lined up without a kink in the zipper.
Here is a shot with it opened up. At this point add stick pins to pin the top layer of fabric to the top part of the zipper on the finished fabric side. Again, be sure items don’t shift to ensure the zipper functions properly once sewn.

Step 7:
Start sewing from the opposite end (the end of the zipper), but following the same techniques listed above otherwise.
Step 8:
Congrats! You’ve finished what I think is the hardest part. It’s really just straight lines from here on out!
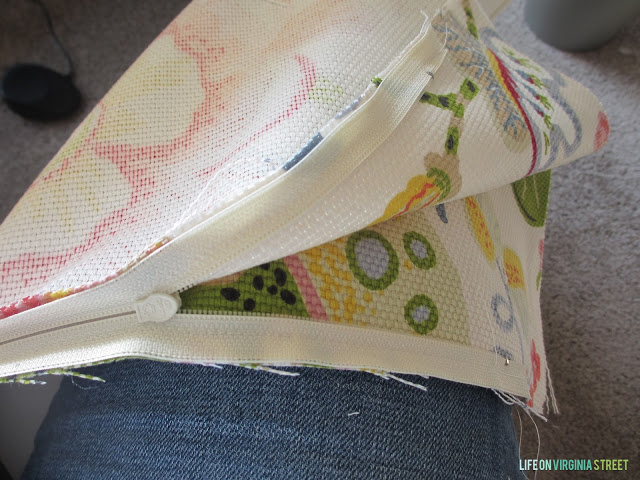
Next up, I zip the pillow about three-fourths of the way shut. Your fabric squares should still line up nicely when you do this. If off a little, you should be okay. But if you see some significant shifting at this point (which, if you were careful on Step 6, this should not be an issue) you will want to unpick one of the zippers sides and redo it.
As far as the opening left, just make sure that when you eyeball it, you think you will be able to fit your hand inside if the seam on the side were sewn shut (the right side of the fabric in the picture below, if they were closed). You’ll need to ensure you can unzip the pillow after the next few steps so you need to be able to reach your hand inside to grab the pull, but it does help to have the zipper closed at least halfway so that the sewing of your other sides is easier.
Step 9:
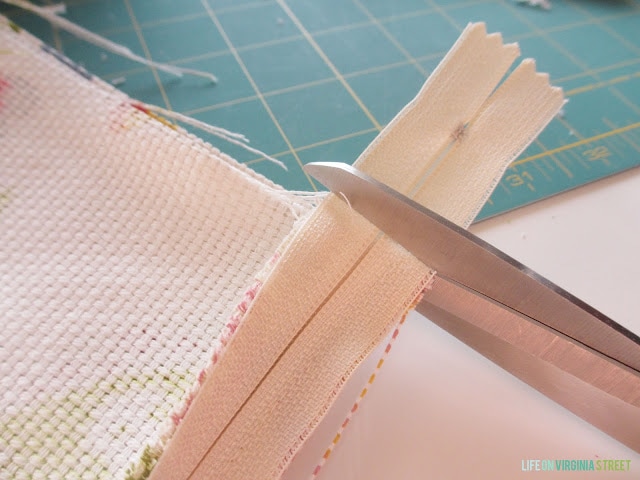
After you zipped the pillow part way in the step above, you will want to cut off any overhang on the zipper track. If your pillow is smaller, you will need to do this on both ends. But in my example since the pillow is longer than the zipper, I only had to cut the back end off. This step seems unnatural to me since you’re chopping off the “stopper”, but trust me. You’re good as long as you don’t try to run the zipper past the edges at this point.
Step 10:
Now comes the easiest parts of all. You’re going to sew the three remaining sides shut. I use the same format and have the right part of the foot touching the outer edge of my fabric, probably only leaving 1/2″-3/4″ seam allowance. I know this is smaller than the usual 1″ you read in other tutorials, but for me, this is the easiest way for me to eyeball a straight line. And it works. Once you hit the zipper track on the two ends, you just go right over it – the needle goes right through the teeth. Note, I always do a backstitch or two as I reach the end of each corner.
Step 11:
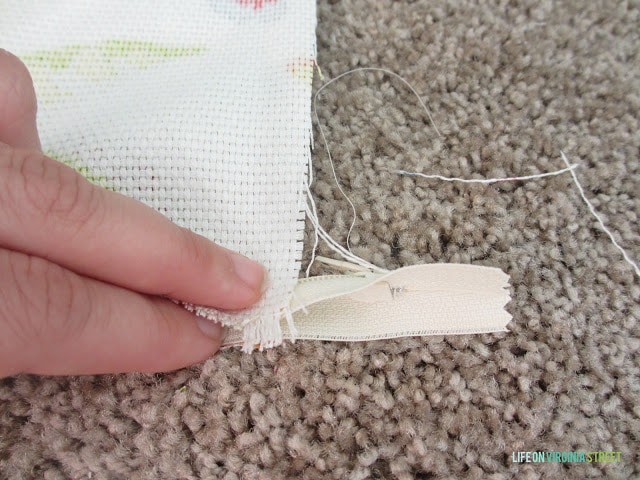
Once your pillow is fully sewn shut, you have two more lines to sew. This is the next semi-tricky part (mostly because I find it the hardest to describe). However, once you get the hang of it, you won’t be intimidated. As with most pillows with zippers you see, the fabric looks normal until about two or three inches from each edge where the zipper actually starts.
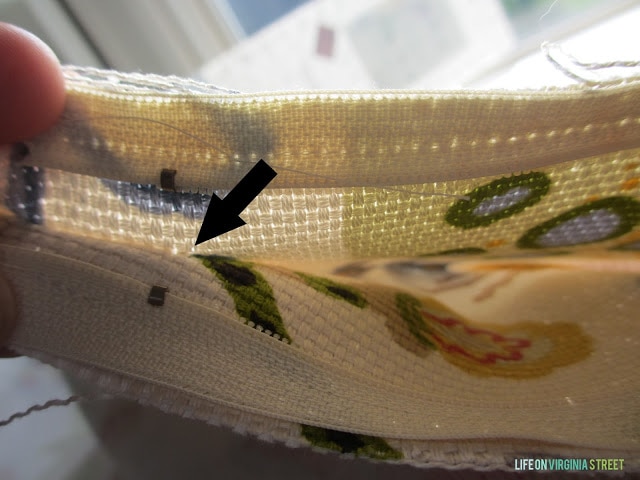
So, we now need to sew that two or three inch section that acts as our zipper “stops”. You want to be on the inside edge of the zipper track – meaning the side opposite the edge of the pillow. You also want to be just high enough that you won’t hit the zipper track. Just sew a straight line for a few inches, and then back-stitch three or so times. You want to ensure this area is pretty tough and won’t rip, because it’s where the zipper will be open and closed from. I tried to include several photos of how this looks on the machine, once sewn, etc. as I think visually it makes more sense.
You can see I sewed until just where the arrow points – which is just above the zipper line and in from the side about three inches.
Both sides are done and the pillow has now been left mostly unzipped. Time to flip!
Step 12:
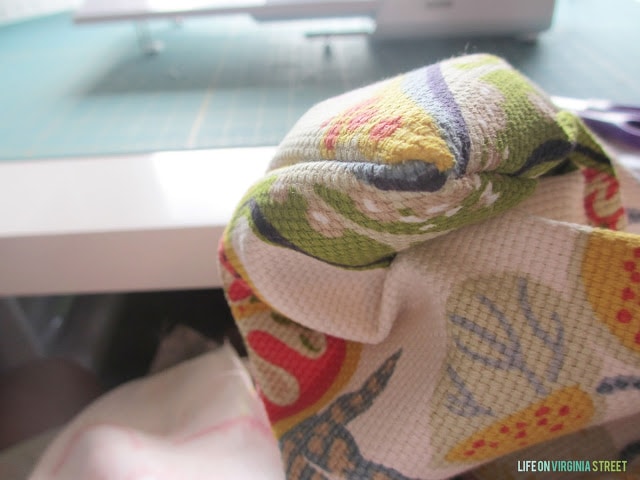
You’re ready to flip it right-side out! The best part in my opinion. I typically use my scissor tips to help fully push out the edges. But do be cautious! You don’t want to rip your beautiful new pillow cover!
**Note: some recommend cutting a slit on each corner but I find because my seam allowance is smaller this is never an issue. Plus, I’m not looking for a sharp, squared-off corner.
See from Step 11 how the zipper just fades once you have your pillow form inside? The other end looks just as great.
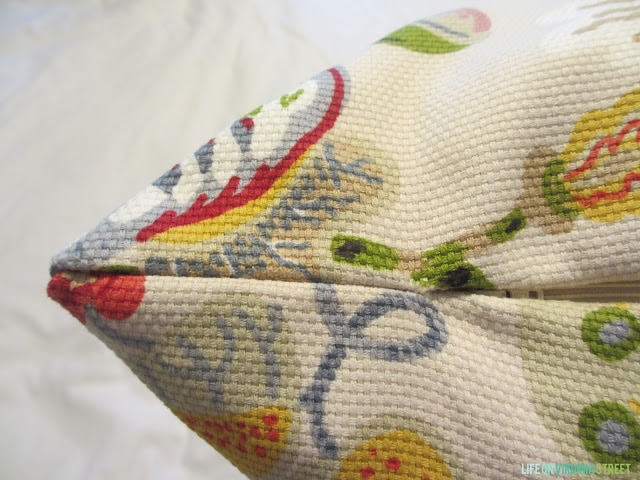
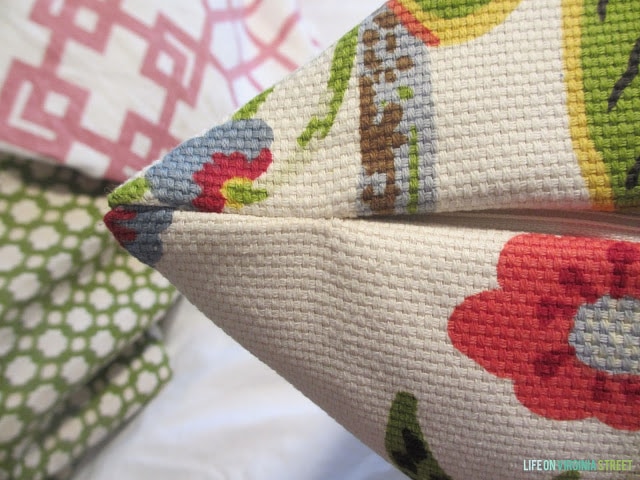
A karate chop later and you are DONE!
Where to Buy Pillow Inserts for Your Throw Pillows
Now, a note about pillow inserts. I used to only use polyfills because they were cost effective. But they also looked lifeless, and you can’t karate chop them.
My current all-time favorite pillow inserts are these from Serena & Lily. I try to only buy them on sale, but they are by far the highest quality I can find. Several I have that are 3-4 years old, still look brand new without any feather loss. My least favorite are these and these from Pottery Barn. While I love most of their products, but they do not excel at pillow inserts 😉
I’ve also been really happy with these more affordable online options. I also have loved the ones from Robey’s Wholesale Pillow Inserts which are a 90/10 blend I also feel like they carry a wider selection of sizes than the local fabric stores. However, their shipping costs can get a bit excessive.
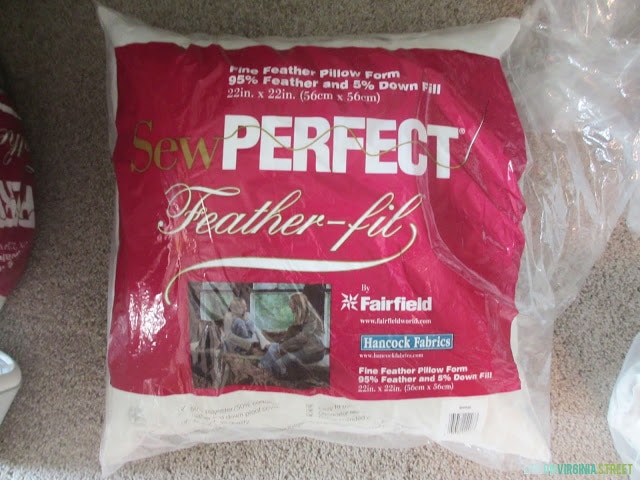
Following are the pillow forms I used nine or so years ago from Hancock Fabric and load up when offered sales on them. I thought I would mention that option, as well, if you’re needing something same-day locally!
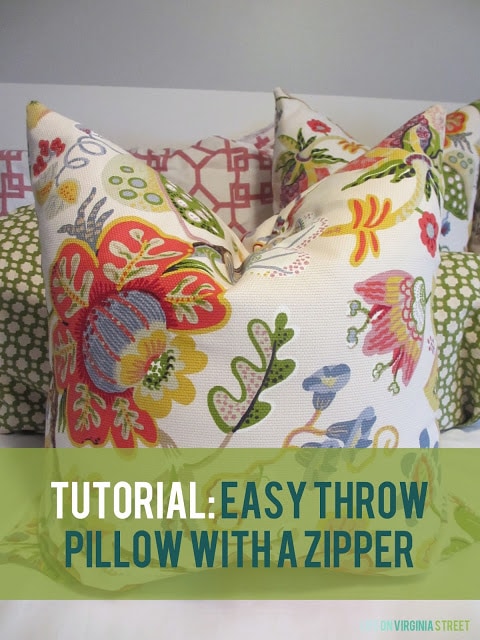
Examples of Pillows I’ve Made With This Tutorial
DIY Throw Pillows in Our Den
I recently made the hummingbird pillows and paired them with an old pillow I made eight years ago along with a new Serena & Lily find! They’re all linked below the image.
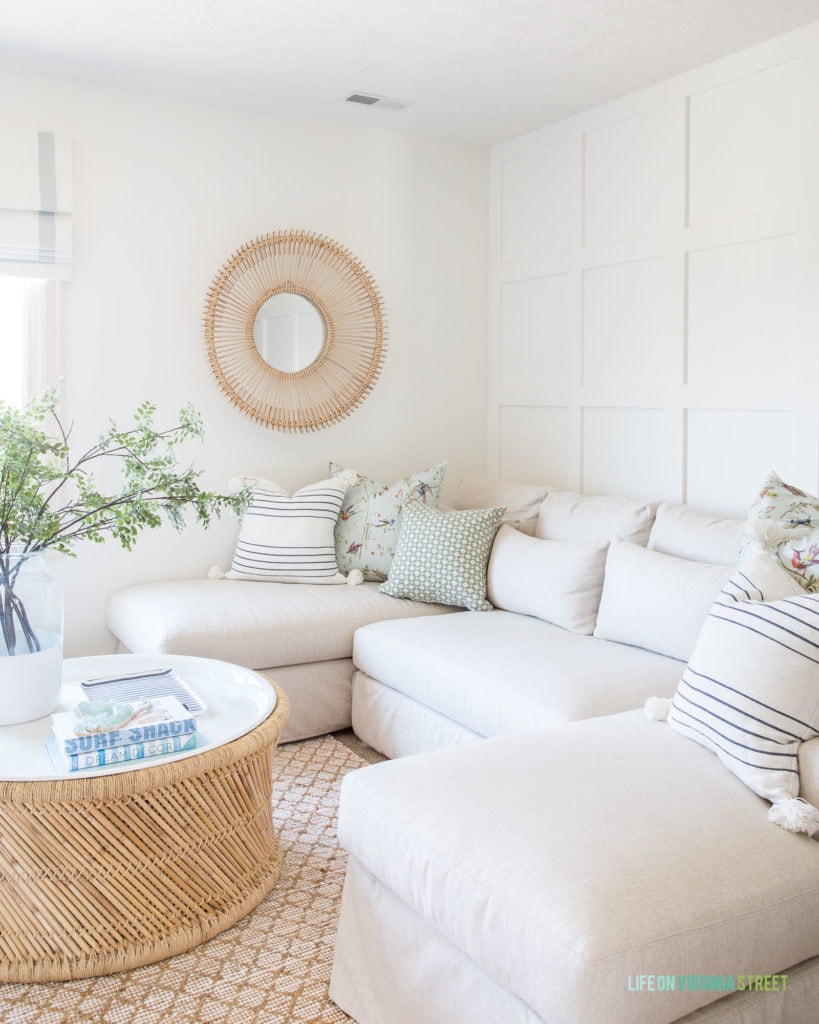
DEN SOURCES: Linen Sectional | Jute Diamond Rug | Similar Rattan Mirror | Coffee Table | Paint Dipped Vase | Faux Greenery Stems | Striped Pillow | Hummingbird Print Pillow (fabric available here) | Woven Geometric Pillow (fabric available here) | Roman Shades
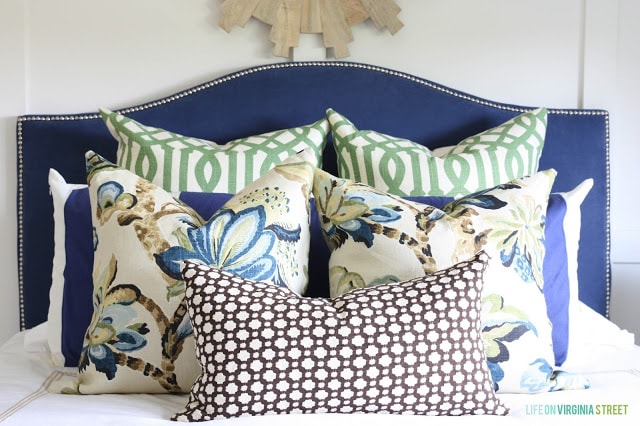
DIY Pillows In Our Master Bedroom
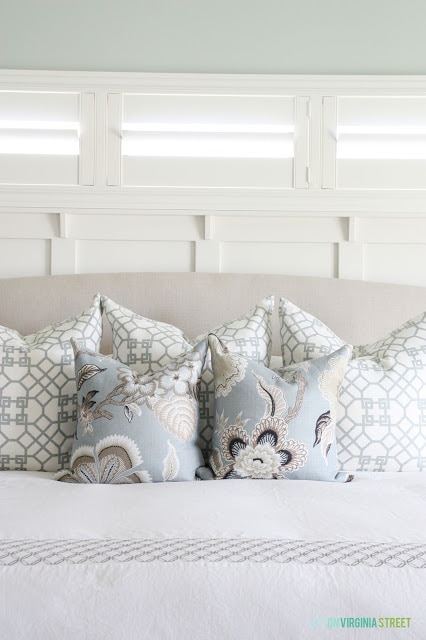 |
| {sewn and posted here – the last on our current master bedroom found here} |
DIY Throw Pillows In The Queen Guest Room
 |
| {read the latest on this room here – note – I did not sew the blue and white striped body pillow which is from Target} |
Our Prior Living Room
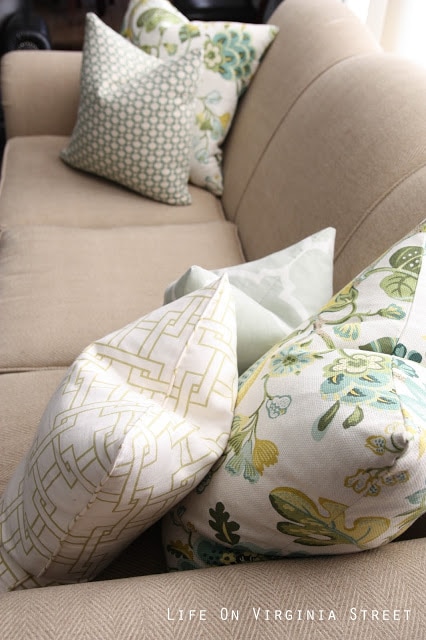 |
| {to see this in our current living room click here – note – I did not sew the pillow in the front left with the piping} |
If this tutorial intimidates you at all, find a cheap remnant or use some fabric lying around. You can then work up your comfort level and before you know it you’ll be whipping up the exact pillows you have been searching for!
If I was unclear on any of the steps above, feel free to leave a comment with questions and I will get back to you as soon as possible. Hopefully you find this helpful and are maybe just a little bit braver to try and make your own! Trust me – in the long run – you (and your wallet) will be glad you did! So, are you going to this DIY throw pillow with a zipper tutorial a try?
If you would like to follow along on more of my home decor, DIY, lifestyle, travel and other posts, I’d love to have you join me on any of the below channels:
Love your blog! I have made a few envelope pillows but I might try a zipper. Thanks for the tips
What a great tutorial!! Love your fabric choices 🙂 Hopping over from Thrifty Decor Chick!! Going to add you to my reader 🙂
This comment has been removed by the author.
Got an idea for you: I’m pretty new to zippers – I took a class at Joann’s. While I don’t remember most of what the instructor taught, the one thing I took away that has saved me for both zippers and piping is a zipper foot for my sewing machine. You just take off your regular foot and replace it with the zipper foot, and it allows you to get SUPER-close to the edges without it being a pain! It’s awesome! My zipper foot cost me about $15, and has been well worth it for the frustration it has saved! Thanks for the tutorial! Yours sounds much more newbie-friendly and memorable!
Well, I have got the best information from here the site is fully stuffed with the knowledgeable information.
bubblegum casting
I’m impressed with the special and informative contents that you just offer in such short timing.
bubblegum casting reviews
I assume the admin of this website is truly working onerous in favor of his internet site, since here each data is quality based mostly.
bubblegum casting reviews
My sewing projects usually end in some sore fingers (from poking myself with the pins over and over) and swearing. Maybe tears. But I love throw pillows as much as you do! This tutorial was so easy to follow I think I might have to give it a shot! So happy to have found you on Just a Girl and Her Blog today!
~Meaghan from DIYfaerie
Thank you for the tutorial, its been super easy to follow. I just had one question, once the zipper is on where did you start your sewing to get the rest of the three sides sewn up?
I usually just randomly pick one of the sides next, then the top (opposite of the zippered side), and then lastly the other side. Hope that helps!
What is the name of the fabric you used for your throw pillows? I love it!
Thanks! It is Braemore’s Wonderland Pearl fabric.
I would strongly suggest when pinning the zipper or the fabric sides that you insert the pins perpendicular to the edge of the fabric. That way you can sew right over the pins which will help keep fabric or zipper from slipping. It is also easier for novice sewers because it’s one less thing to worry about while you are trying to keep stitching straight. The zipper foot is also a great suggestion.
Floral designs are all the rage these days! These pillows will fit right in.
Hi Sarah – this tutorial was super helpful – I’ve been “afraid” of zippers forever, but I may have conquered it today. Making pillows for our deck using indoor/outdoor fabric. One done – a few more to go! Thank goodness for the rain in Wichita – it’s made it easier to stay focused. Thanks!
Thank you for the feedback! I really appreciate it. I’m making pillows this weekend too, because Omaha is equally as rainy 🙂
I’m so happy I ran across this blog! My fabric and sewing machine are sitting on my table (has been for two weeks ) waiting for me to make two pillows, now I think I can tackle it with all this step by step info you have shared!
P.s. I love the fabric you have shown during the step by step process, Could you share with me where you got it?
Glad to help! And yes, the fabric is Braemore Wonderland Pearl. You can buy it at most online fabric stores 🙂
THANK YOU! I have never been able to figure out how to do the zipper. Pinning!!
yes, a zipper foot will help make this even easier. I’ve never seen a zipper done this way where it’s not completely centered on the fabric. Will give it a try. Invisible zippers are also great. I love to make pillows and change covers for the seasons.
i have been searching all over for fabric like the pillows you have made. Where is your favorite place to buy your fabric. I’m exited to sew these. You are very talented and have great taste!
Thank you so much! Honestly, I buy fabric all over the place – although mostly online. I check eBay, Decorator’s Best, Loom Decor, Inside Fabric, the list goes on. I stalk them all 🙂
Thank you so much for a great tutorial!
I don’t sew but have made curtains and drapes (anything with a straight line). I have always wanted to make pillow covers but have been intimidated with the zippers. I am going to pull up my big girl pants, bite my lip and try this!
Confession: I once made a really cute wrap skirt but I had a friend who is an expert sewer holding my hand through the whole process! I was so proud of that skirt…LOL
great tutorial and do i see you are NOT using a zipper foot?? well done.
Thank you! And yes, you’re correct – I did not use a zipper foot 🙂
Thanks fror the great tutorial, I just followed it and made my first ever project 😀 I wondered if you had a tutorial or any advice on cutting fabric? I know it sounds lame but I hard a hard time figuring out how to cut neat squares!!
Actually, cutting fabric is my least favorite too. I’m pretty terrible at it 😉
LOVE the fabrics and tutorial!! I’ve been afraid to try zippers but this really helps conquer my fear! Curious where you were able to buy small quantities of Schumacher fabric? Everywhere I look has a 2 yard minimum with a $250 price tag 🙁
Thanks!
Thanks! Most of my Schumacher I’ve had to buy online with the two yard minimum and then I usually sell what I don’t need here on the blog. I’ve also had some luck with eBay occasionally!
HI Sarah! Really liked your tutorial. You have great design sense because choose some great looking sheets to prepare those pillows. Thanks for sharing.
I’ve made so many pillow covers, but have been afraid of zippers! But with your wonderful tutorial, I successfully made a couple of zippered pillows. I am now confident that I can make zippered pillow covers from now on! Thank you!!
One mistake that I made is that I pinned the zippers on “upside down.” I should have looked at your picture more closely! I didn’t feel like picking them both off and starting again, so I just left them. Makes them a little harder to unzip, but I can do it!
I’m so glad to hear this! Thanks so much for reporting back! And don’t worry – even after making several dozen, I’ve still done the zipper upside down on some accidentally 😉
This just blew my mind.I never though it would be so easy.I am going try this for sure.I love to sew (simple things 🙂 but I have always been too afraid to try zippers! I have some beautiful fabric at home just waiting to be a zippered pillow cover!!! Thanks for the wonderfully easy to follow instructions!
So happy to hear that!
You made this look really easy. I bought a brand new sewing machine at my aunt’s yard sale. I have always been so afraid to use it that it is now at my parent’s house so my mom can use it. I need to not be so afraid and venture over there to tackle a project like this. I am sure once I got started and learned how I would use it for many things. I love your pillows!
Fabulous tut! Would you happen to have a tutorial on a flapped zipper – which is also put in at the top of the cushion?
I don’t – sorry!
Thanks for all the information.This is very helpful.
Great tutorial and I love your fabrics.
Going to add you to my reader on my blog tecktak Great tutorial!! Amazing fabric choice
What a great tutorial!! Love your fabric choices 🙂 Hopping over from Thrifty Decor Chick!!
Thanks soooo much for this tutorial!!! I’m not a fan of sewing on a zipper, but now I’m going to attempt it, thanks to you:)
So happy to hear that!
Love this tutorial and I am going to try it once I purchase the fabric. I’m wondering what size insert you would put in this example of the 27″ pillows you made? Same size or larger? I think my understanding is to put a larger insert so that the pillow looks fuller? Thank you!
Hi! I would see if you can find a 28″ but a 26″ or 27″ should work too. I recommend going larger with the insert when using a store bought cover, because the covers are super close to that size. With my tutorial for the cover, you’ll cut it the size you want, but once you sew all your seams, you’ll typically lose about 1-1.5″+ once it’s all sewn together. So you’re left with about a 1″ smaller pillow cover in the end if that makes sense?