Today I’m excited to finally be sharing our first (and last?) flip house! The Tudor house renovation reveal! It’s taken us nearly a year to get here, but now that the home has officially sold and 100% off our plates, I wanted to share how everything turned out with the project.
This post contains affiliate links for your shopping convenience. You can read my full disclosure policy here.
The Tudor House Renovation: Background Story
In an attempt not to be too redundant, I’m linking my other posts about this home here in case you need a refresher or are new here.
- The Tudor Project: Our First Flip House
- The Tudor House Renovation Ideas & Design Boards
- The Tudor House: White Painted Brick Exteriors & Alternatives
If you want the full backstory on this project, I’d suggest reading this post. But long story short, we ultimately decided to flip a Tudor home from the 1920’s with two other couples last spring. The house had been in disrepair for quite some time. It had been on the market since fall of 2019, and over that winter, the house was broken into and the copper piping was stolen and most of the house flooded. So, prior to us even buying the house, much of it had been gutted to remove the damage. So, as much as we wanted to preserve some of the original character, there wasn’t much left to preserve.
This was the first flip house we have ever attempted. Only one of the other couples involved had prior experience in this area. I was tasked with helping to select many of the design element, including any floor plan changes, finishes, etc. But, given there were five other opiniated people involved, I had to make several concessions 😉 Add in a renovation budget that was spiraling out of control, and I was left with a very small finish budget and had to get really creative with some of my finds. Oh, and did I mention this was all during a pandemic when items were backordered for months? I’ve found it’s also difficult for me to not make the changes I would make if I were actually moving into the house. There are places it would have been worth stretching the budget a little. But, after some major expenses with HVAC, plumbing, etc. we had to ensure we made selections that would hopefully allow us to make a tiny profit – or worst case scenario, break even and call it a learning experience!
I’m not going to go into all the details and issues we encountered, as I know most of you are just here to see the before and after photos! But I also want to make it clear that it was a lot of work (and many tears, mostly on my part) to get here. When you’re dealing with a nearly-100 year old house, basically nothing goes as planned and budgets are blown at every turn. In a tragic turn of events, our contractor was tragically killed in a motorcycle accident in the final weeks of the project. He and I had grown close, and I really just needed to step away from the whole project by that point. I think he’d be proud of how everything ultimately turned out though!
I know I’m being picky and most of you don’t care. But I had to take the pictures at random dates over the past four months and basically, the house was never “ready” for me to take photos. It was one thing after another. So some of my pics are in constructions phase just before they were wrapped up. Others were after two months of showings in the snowiest months of the year and there is salt and grime on the floors. Others are after the stagers are started and you’ll see random things in the rooms. But, I tried to piece them all together so you can see the same angles in the before and afters to see just how different everything looks now!
I’ll also link sources along the way if I know them. Admittedly, there was a period towards the end of the project where I checked out entirely so I don’t have some of the sources for things like the mirrors and towel bars, etc. because I didn’t pick them. But, I’ve included all the other sources along the way!
The Tudor House Renovation: Before & After Photos
So, let’s jump into the part I know most of you are most eager to see: the before and after photos!
I also want to mention the paint colors throughout. The walls are Snowglory 0531 color matched at Sherwin Williams. The trim is all SW Alabaster and the floors were stained DuraSeal Coffee Brown. We were able to save most of the original hardwoods throughout, and the Coffee Brown stain was perfect to enhance their natural color, while also hiding some flaws but allowing the grain to shine through. So happy with it!
Welcome to the before and after of our Tudor flip house!
I’m going to do a dedicated post about the exterior so I’ll save all the details on that for a later date. But here’s a hint: we did limewash it!
Let’s start in the entryway.
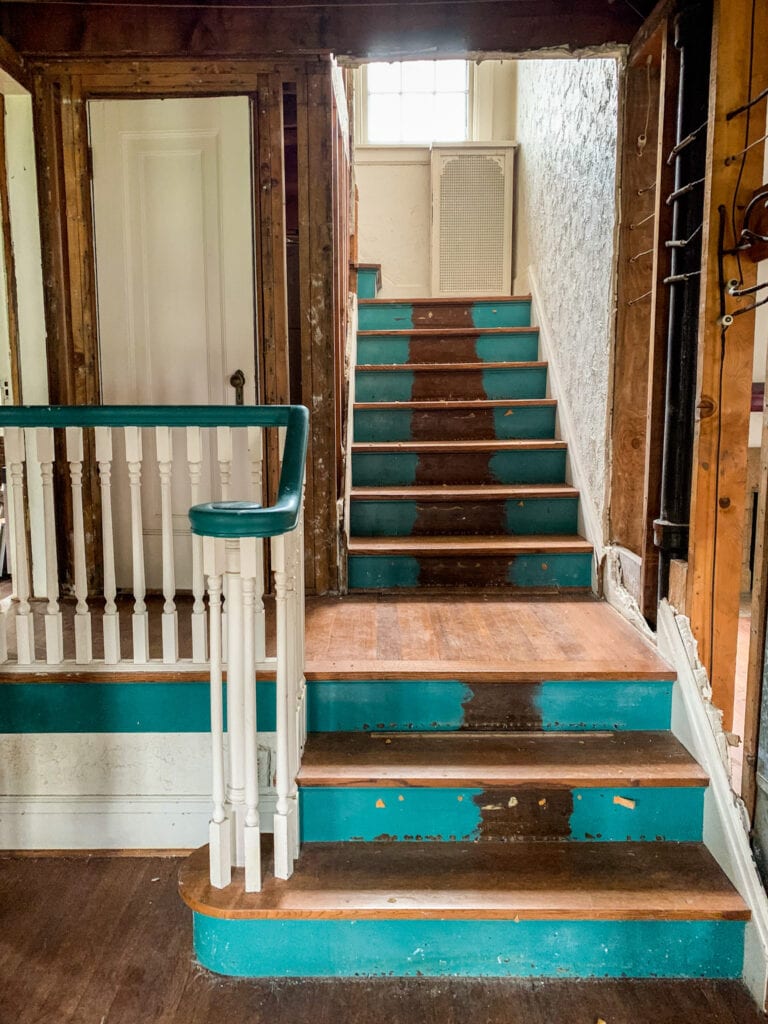
We didn’t do much to change the floorplan of the home. However, one of the biggest changes was lowering the coat closet from the landing to ground floor. This allowed us to carve out a mudroom on the back side near the back entrance!
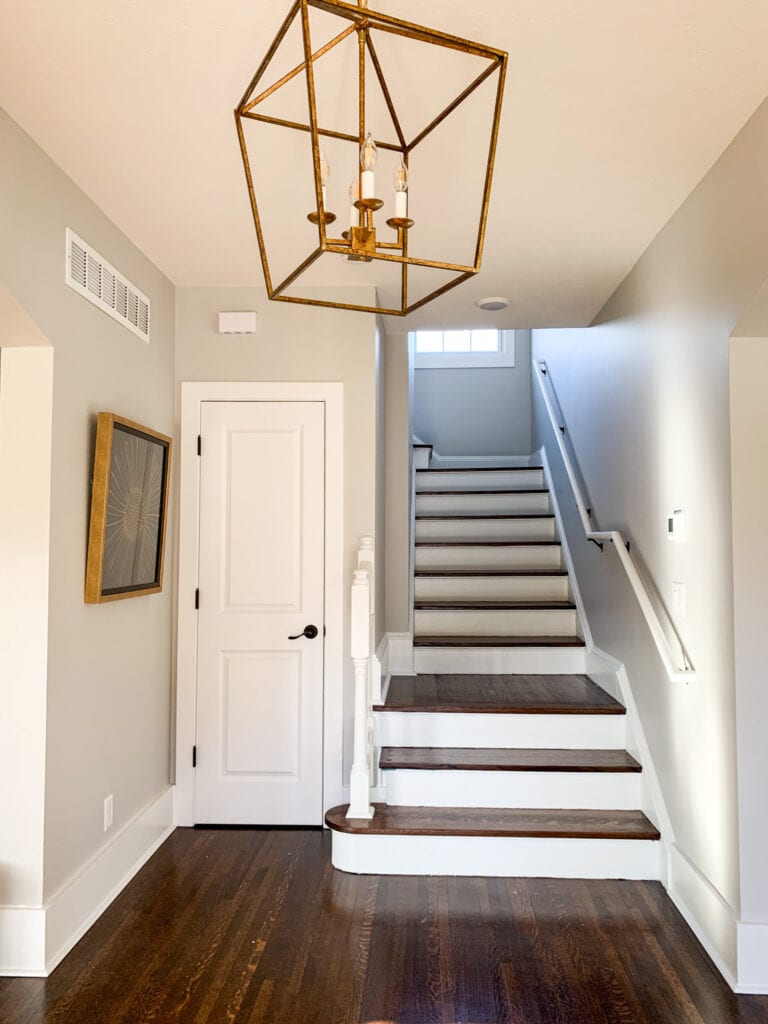
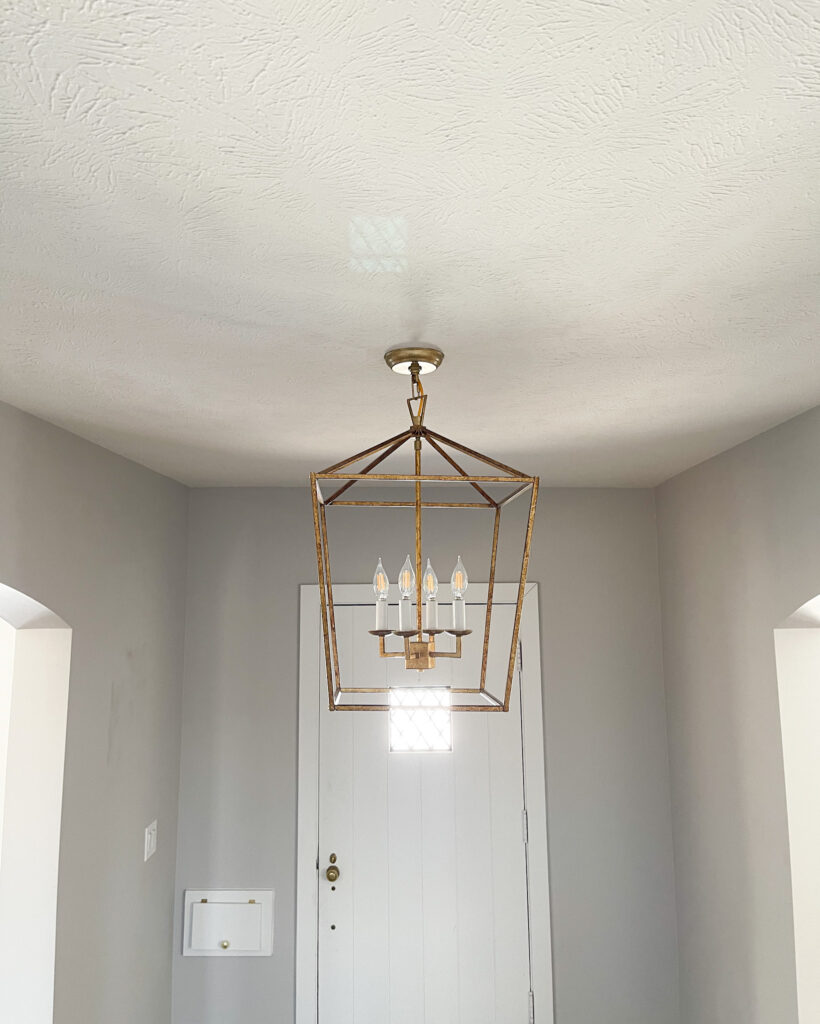
ENTRYWAY SOURCES: Lantern Pendant Light
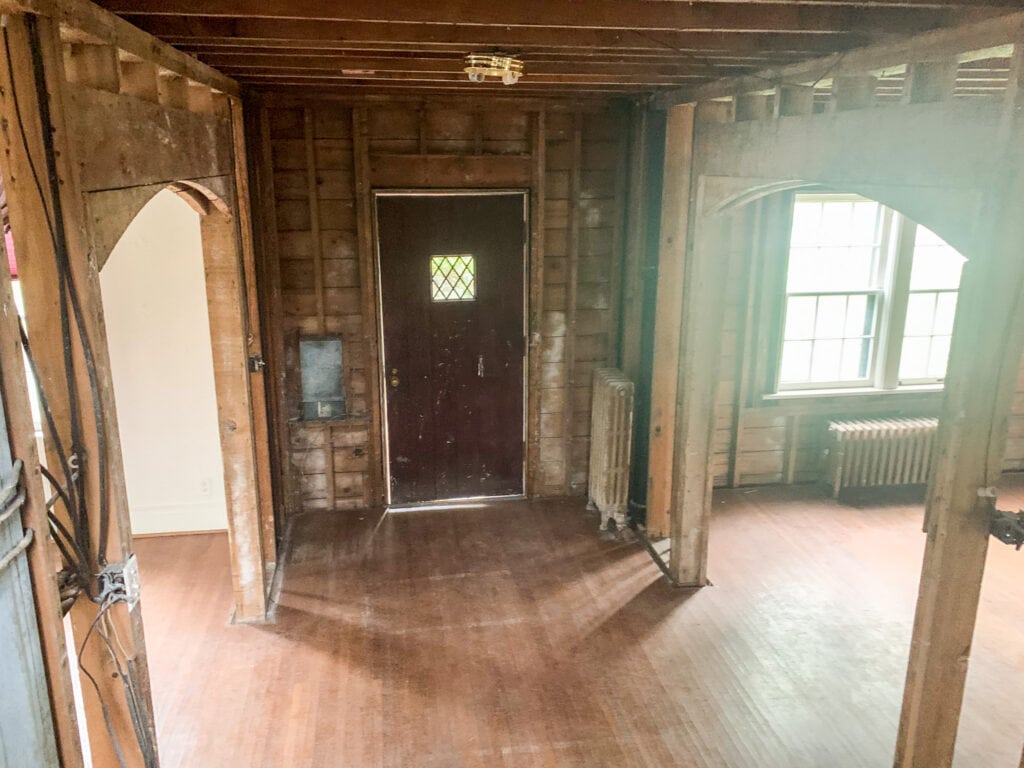
I mandated we keep the front door because there’s nothing better than leaded glass in old houses in my opinion. So pretty!
And here’s that view now.
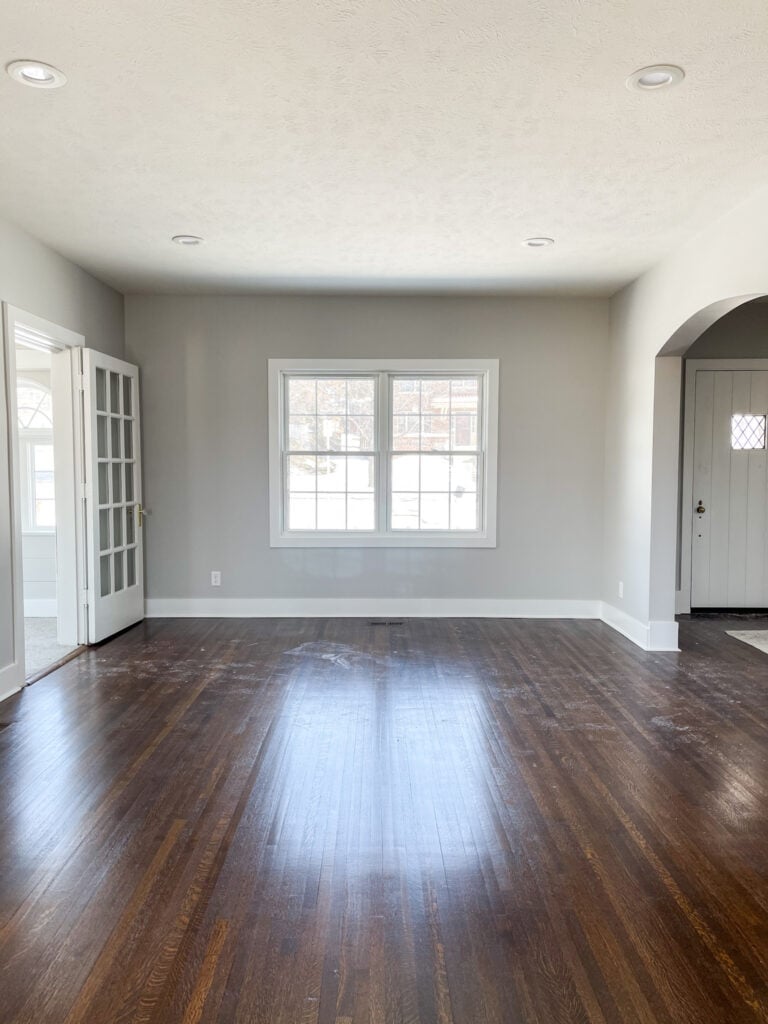
Off to the left of the entryway is the dining room and then the kitchen. There was a wall previously dividing them, making the small kitchen seem even smaller.
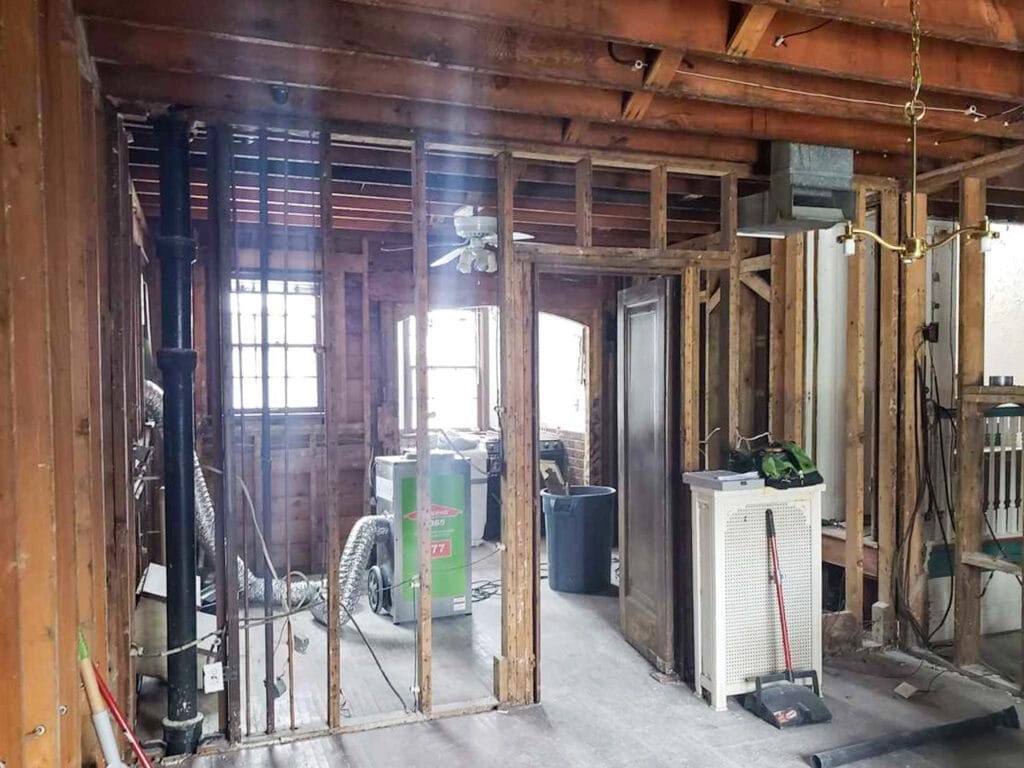
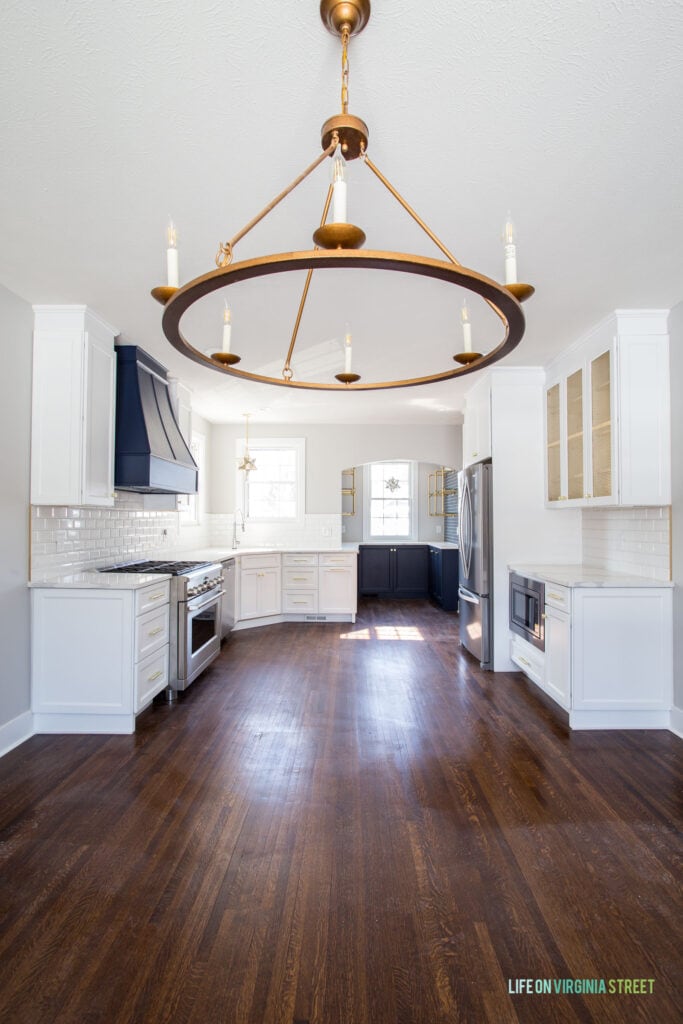
We took the wall down (and moved the main stack) to create a larger feeling floorplan. We stole a few feet from the dining room to give to the kitchen and the difference is rather dramatic. Here is essentially that same view today. Can you even believe it’s the same house?! This is where the dirty floors come out in full glory though, so you’ll just have to look past that 😉
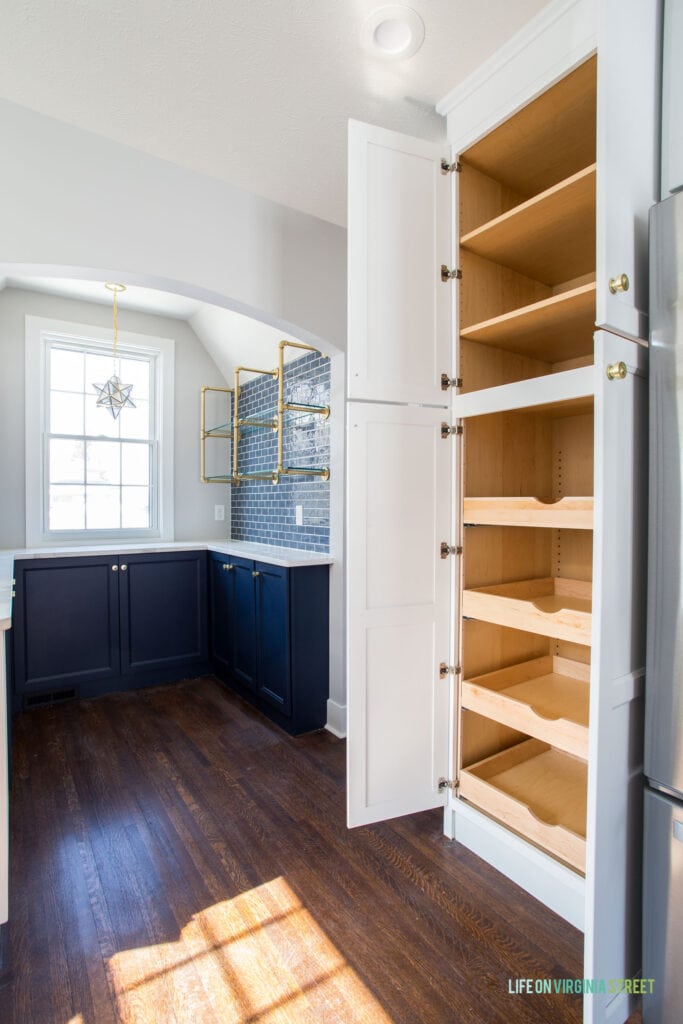
Since the footprint of the kitchen was too small to add an island, we decided to use this tiny little breakfast nook as a butler’s pantry for extra storage.
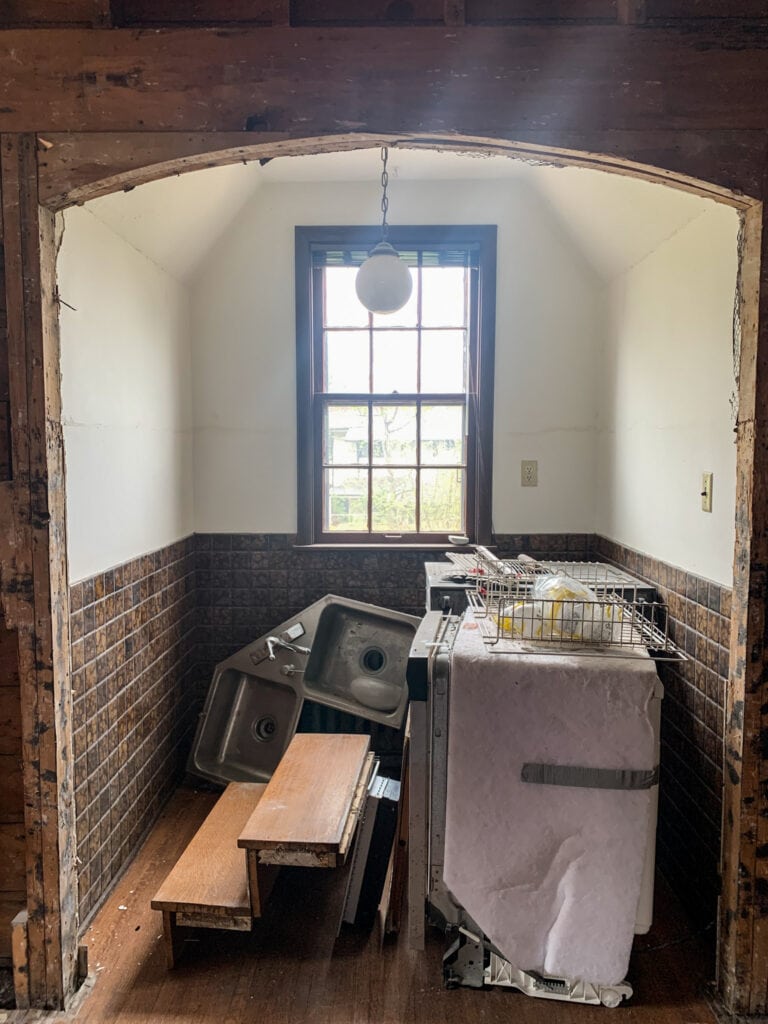
It ended up being one of my favorite rooms in the entire house! I opted for glass shelves so as not to block any of the light coming in from that window. I found a bunch of examples of the types of shelving I wanted, and our crew built these from pipes at the hardware store and spray painted them gold! We then had glass custom cut for the shelves. I couldn’t be happier with how they turned out! This kit would be similar if you’re wanting to try your own!

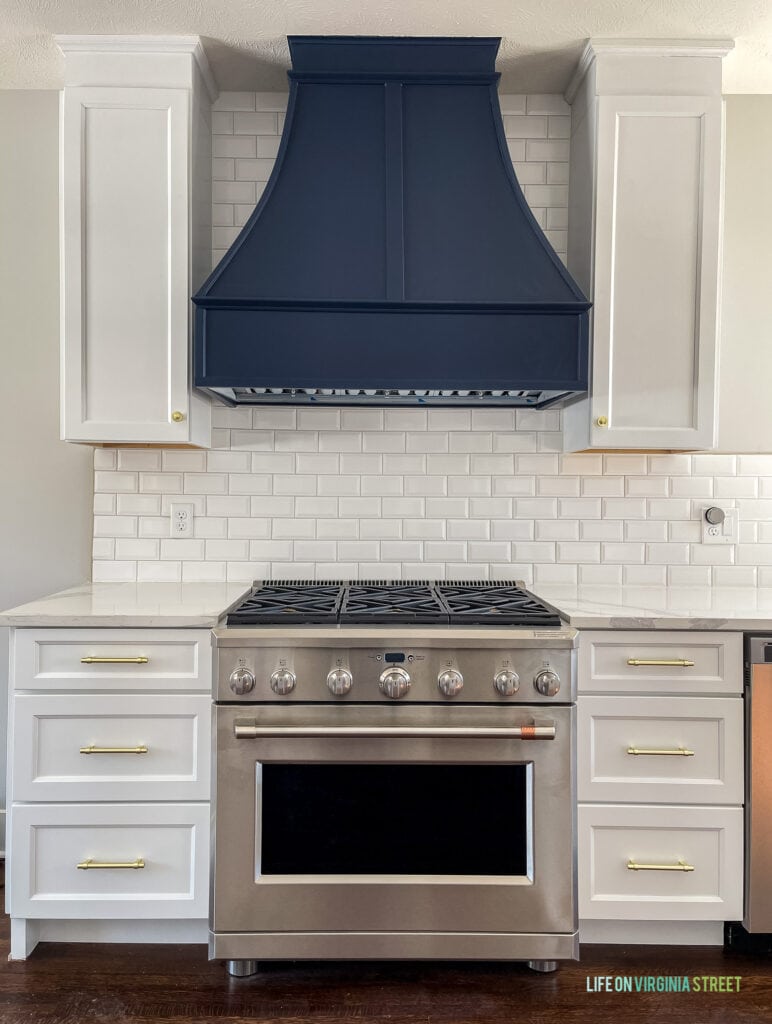
A few more kitchen details. We used Sherwin Williams Naval on both the range hood and the lower cabinets in the pantry and I love how the color turned out!
We worked with Annie at Cabinet Factory Outlet Plus to help us with the overall cabinet and appliance layout, and she was so helpful! There was very little space on the counters for small appliances and since we opted to do a custom range hood, we had the microwave installed under the serving cabinet. It was important to me that when you walked in the front door of the house, you didn’t immediately see the fridge so we tucked it into this wall as well.
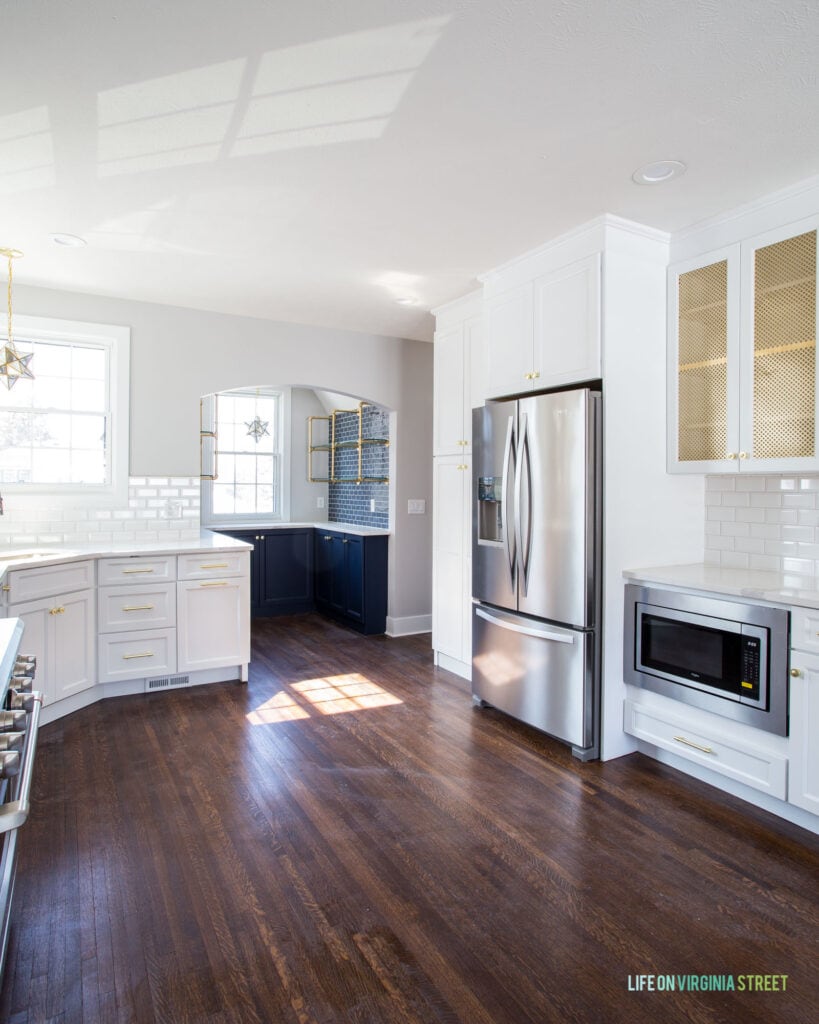
We built a tall pantry style cabinet next to the fridge with rolling shelves for easier access. It’s amazing how much storage this fairly small kitchen now has!
KITCHEN, DINING ROOM & PANTRY SOURCES: Wagon Wheel Chandelier | Moravian Star Pendant Lights | Cabinet Knobs | Cabinet Pulls | Kitchen Faucet | Similar Range Hood | White Subway Tile | Blue Subway Tile
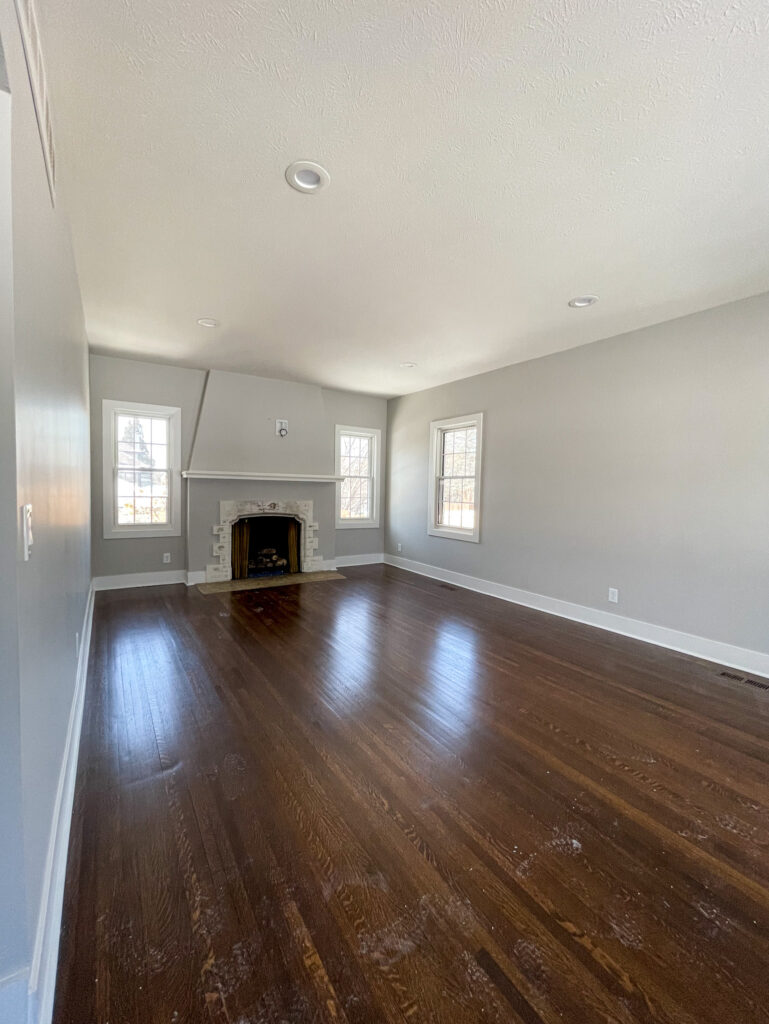
The living room is a fairly long room and the original fireplace was still in decent shape.
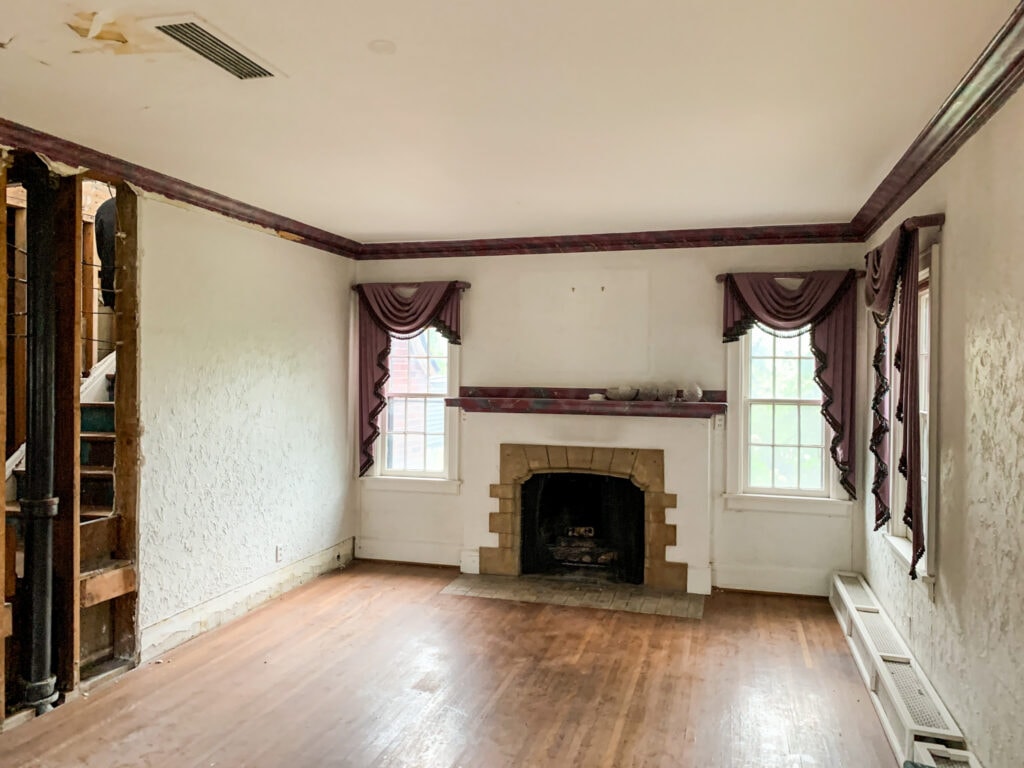
Since the hearth was original and still in decent shape, we opted to keep it but we added a bit more substance to the area by building out the wall above the mantel. The photo below is obviously from when they were still working on the area but it turned out really nice in the end! I showed up one day and they had limewashed the surround to match the exterior but the hearth flooring was left natural.
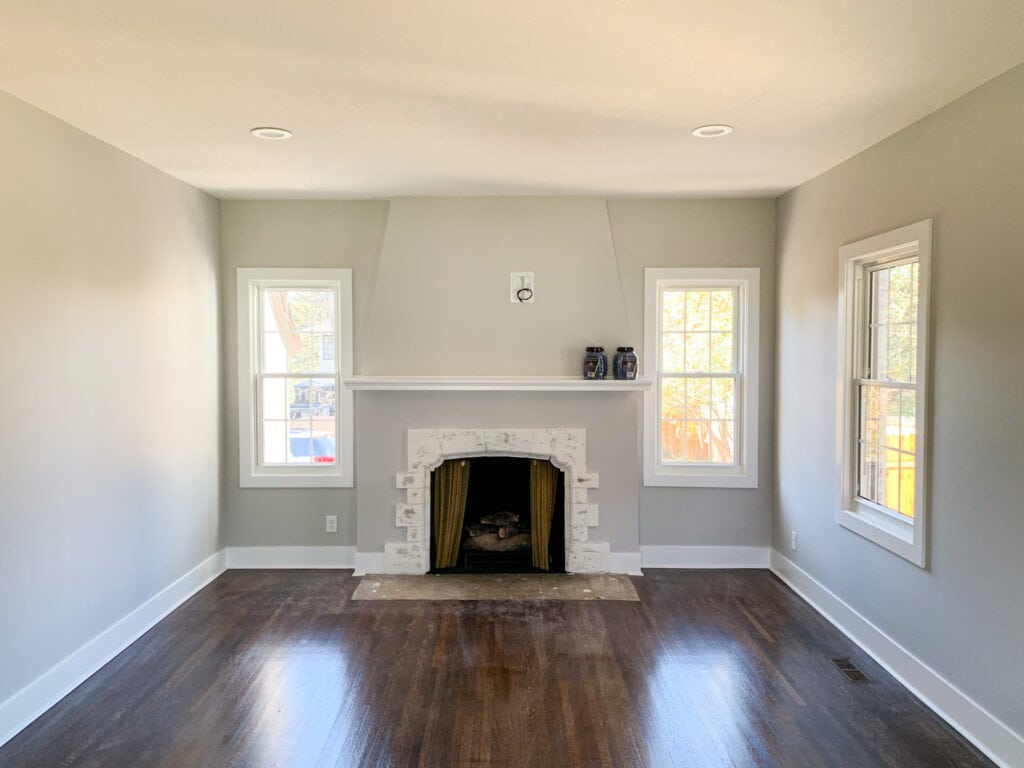
Here’s a more recent shot with dirty floors but it helps to better show the length of the room.
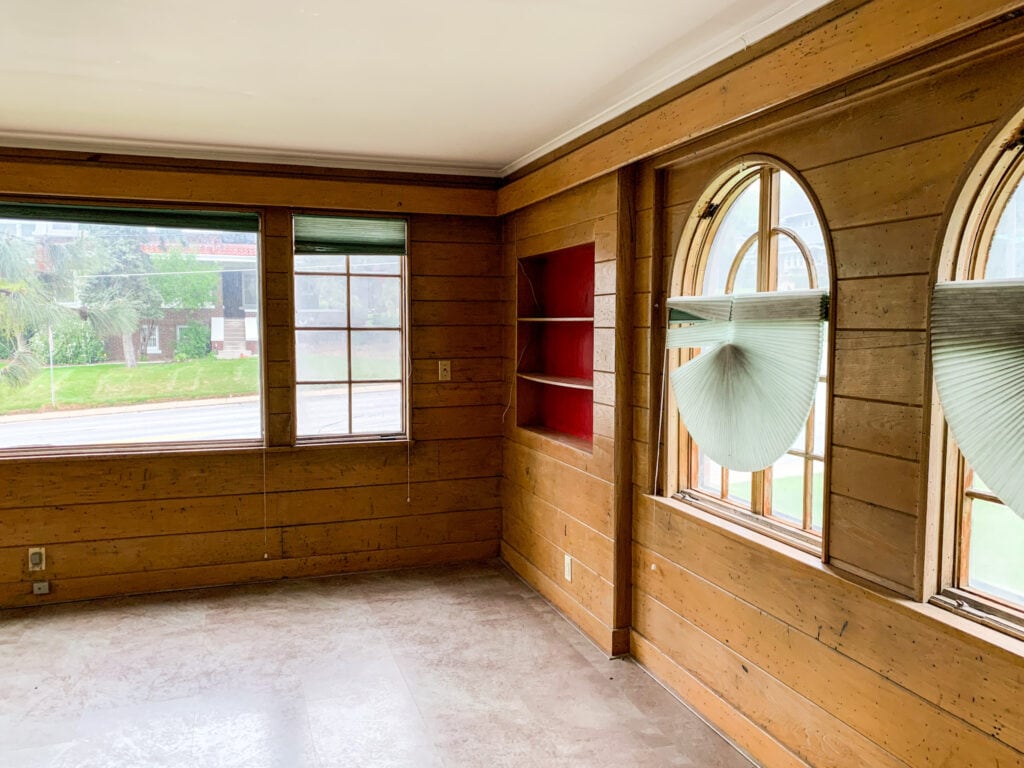
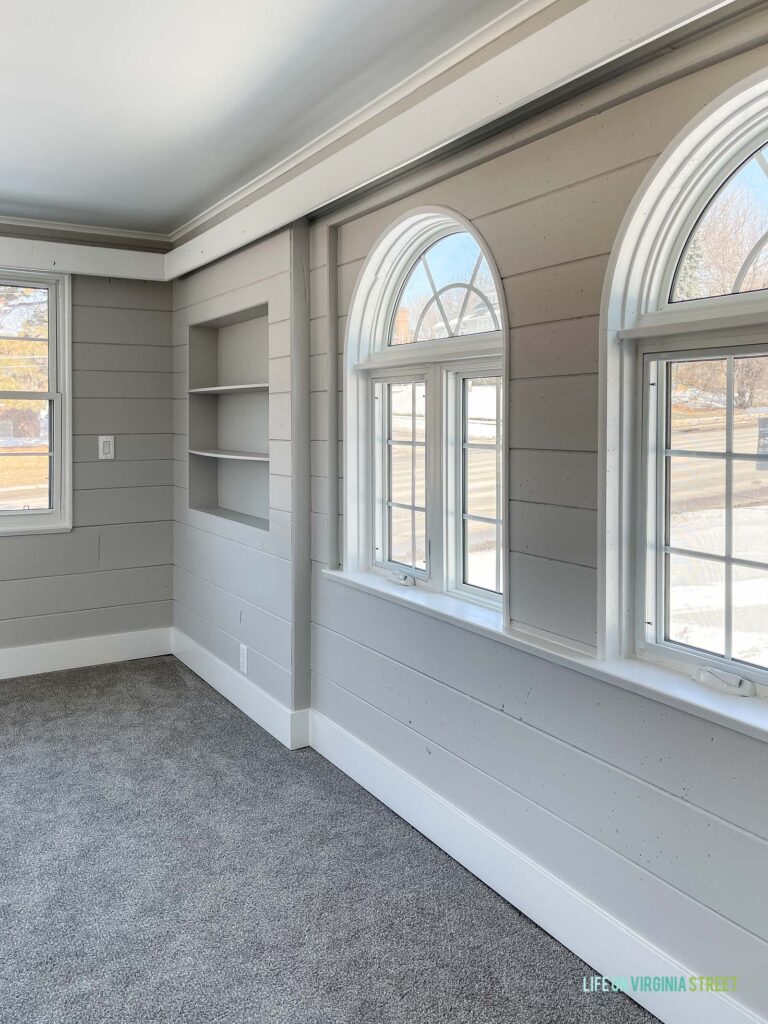
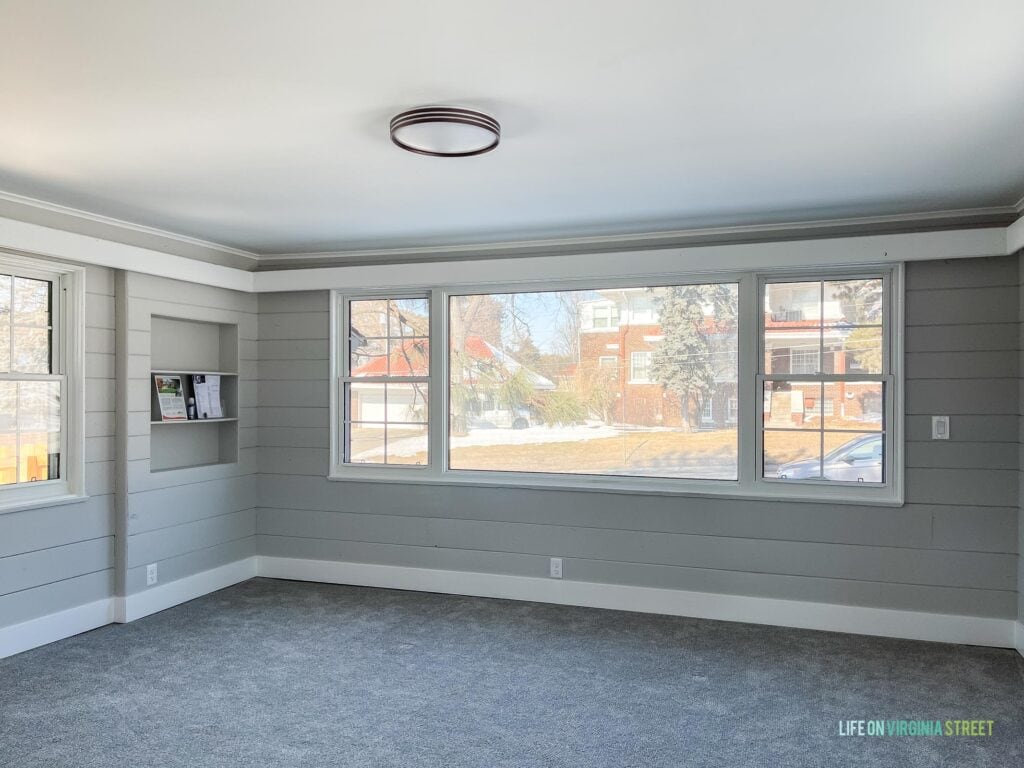
Off of the living room is a really nice size office space. The windows in here were shot so the biggest difference of all was the sound quality once the windows were replaced.
Short of replacing all the windows, all we really did was paint and add carpet.
Welcome to the world’s smallest bathroom. This is the only bathroom on the main level and there wasn’t a way to change the footprint on this one.
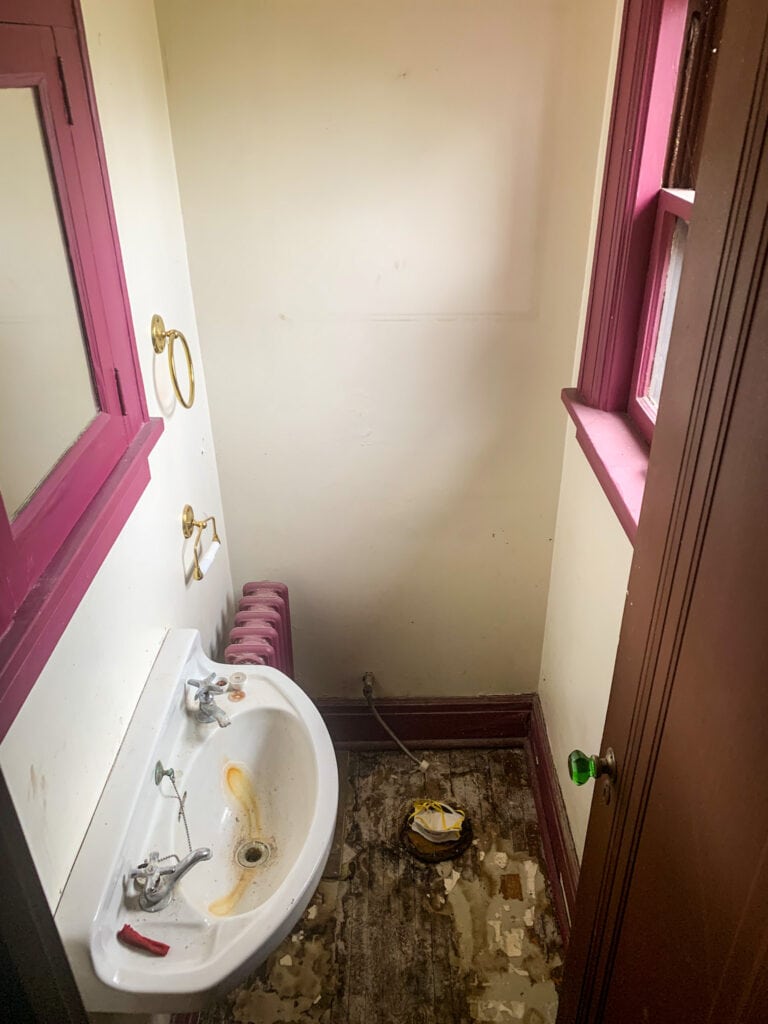
It’s still really tight, but definitely much less creepy now!
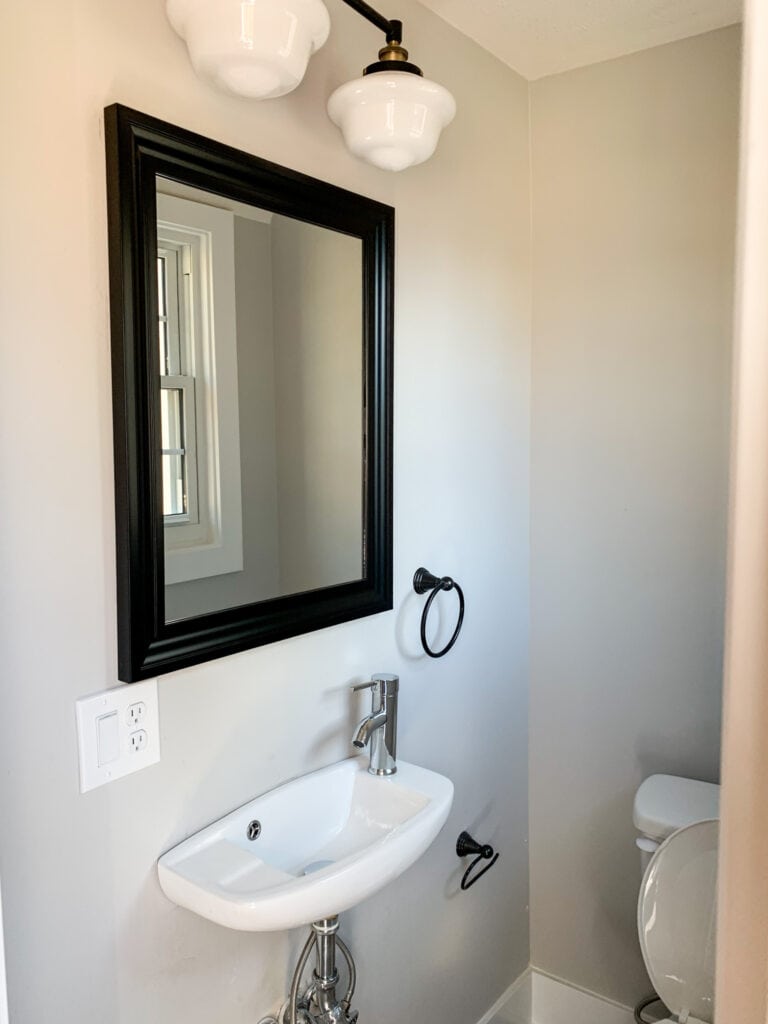
BATHROOM SOURCES: Light Fixture
The upstairs hallway bath was particularly scary when we first bought the house.
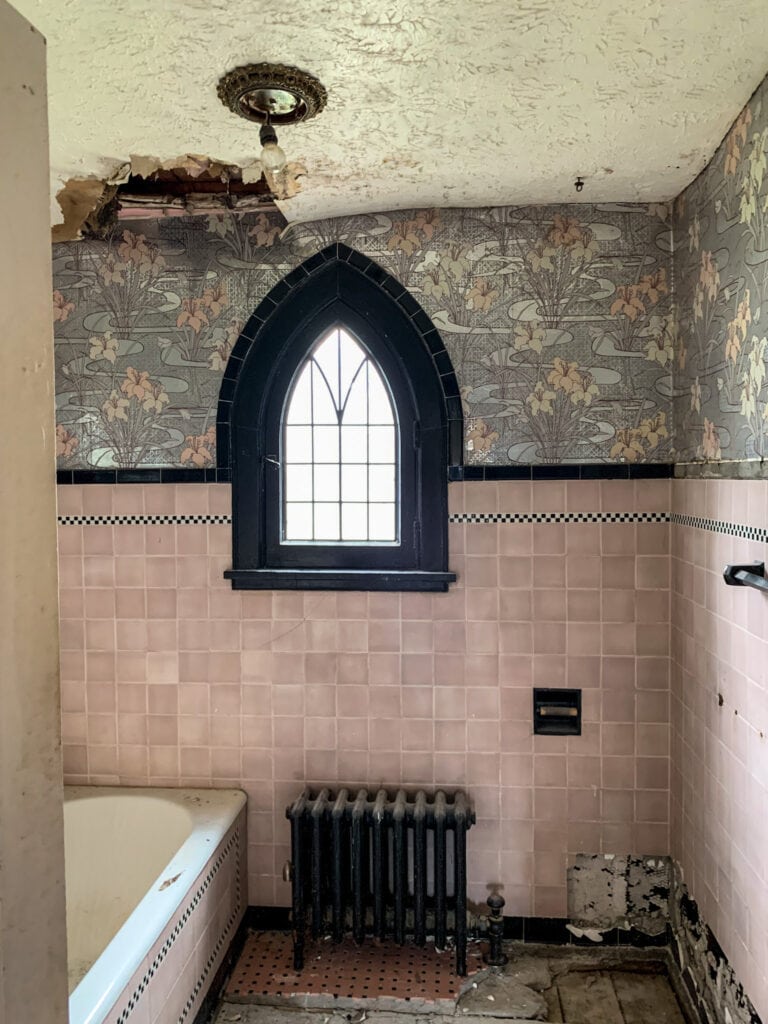
And here is that same bathroom now! We were actually able to find someone to build a new frame for the leaded glass so we could keep the original window. One of the few original items we were able to salvage! We wanted the floors and tub to be classic and reflective of the original style, so we went with a hex marble tile on the floor and beveled subway tiles in the shower.

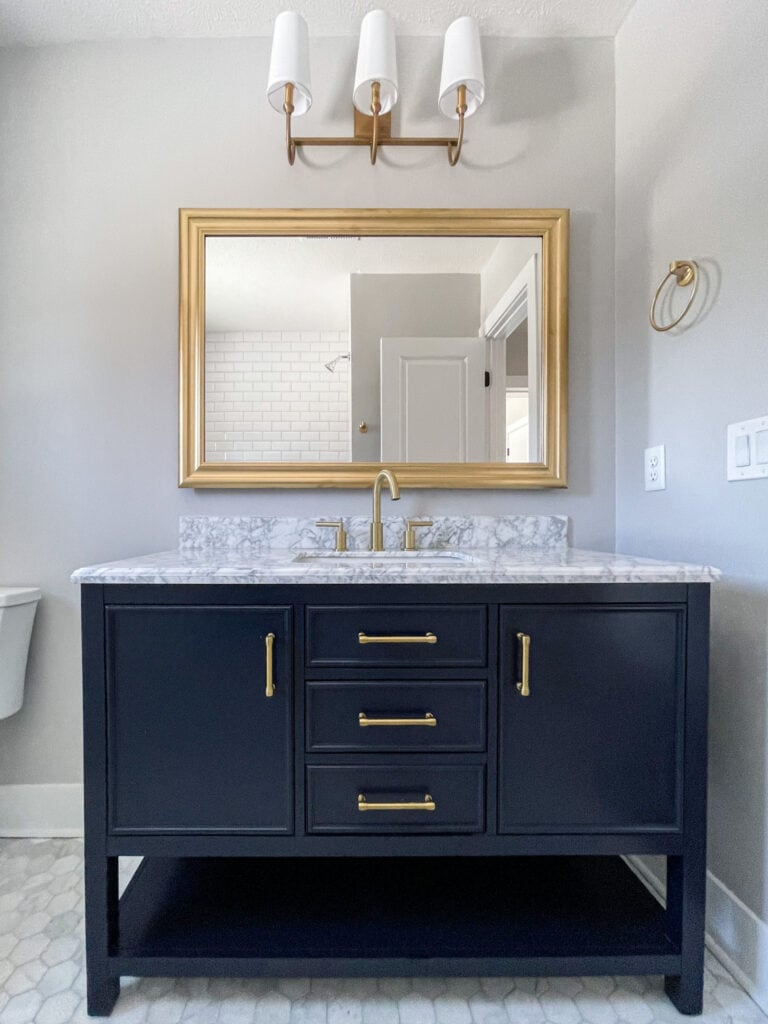
HALLWAY BATH SOURCES: Vanity | Hex Marble Floor Tile | Beveled Subway Tile | Light Fixture
The room below was the former master bedroom. It had a closet-like en suite (I’ll share that below) and essentially a coat closet. So, since we were adding square footage elsewhere, we opted to convert this bedroom into the master bathroom and closet, complete with laundry hook-up in case the new owners wanted an alternative to the basement laundry.
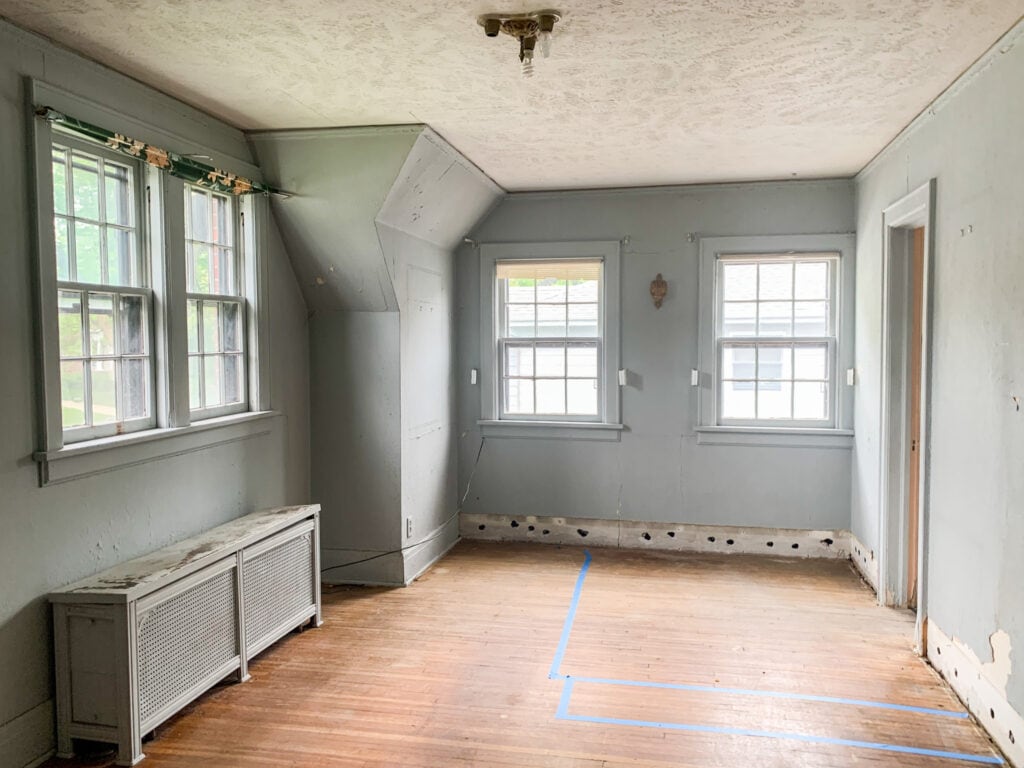
That same space looks like this now. This is the room we likely had the most “discussions” about, design-wise. It’s a different direction than I would have gone for the style of the home, but I had to choose my battles, and it still turned out beautifully.
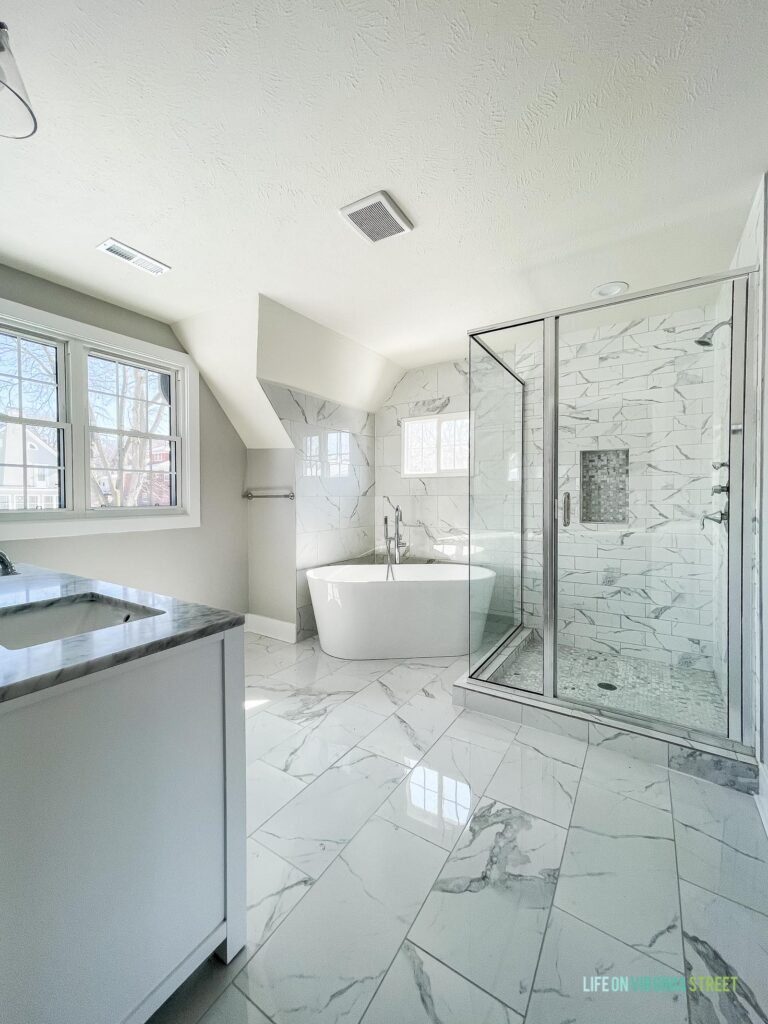
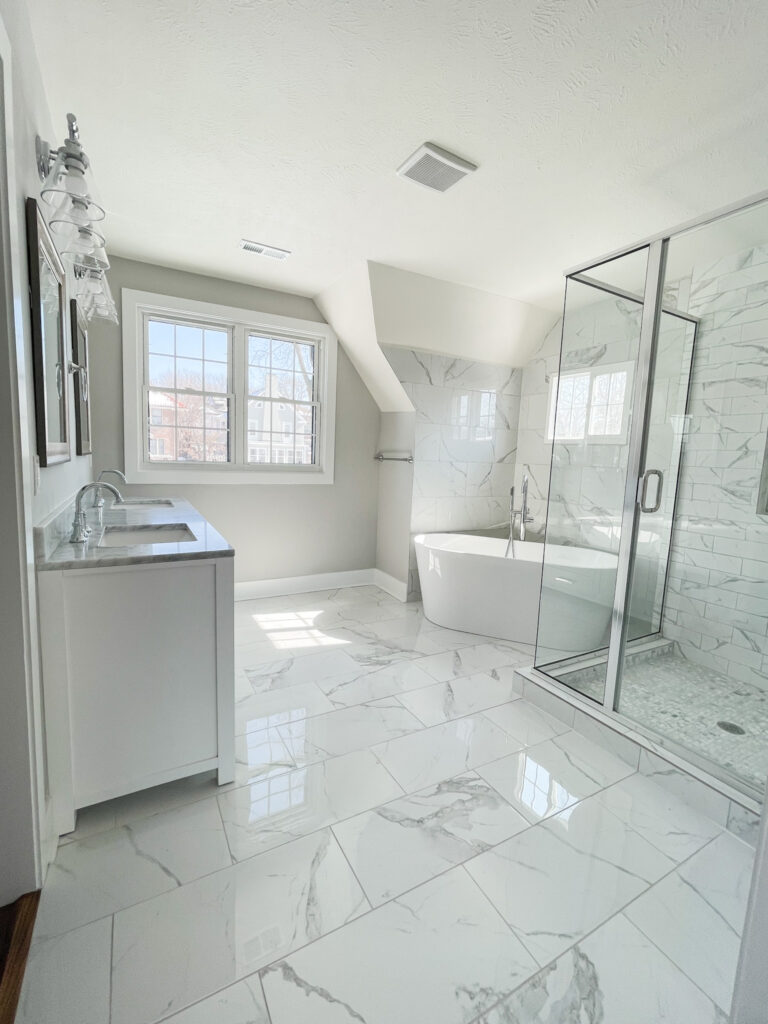
MASTER BATH SOURCES: Vanity | Light Fixtures | Floor Tile | Shower Wall Tile | Shower Floor & Niche Tile | Bathtub | Bathtub Faucet
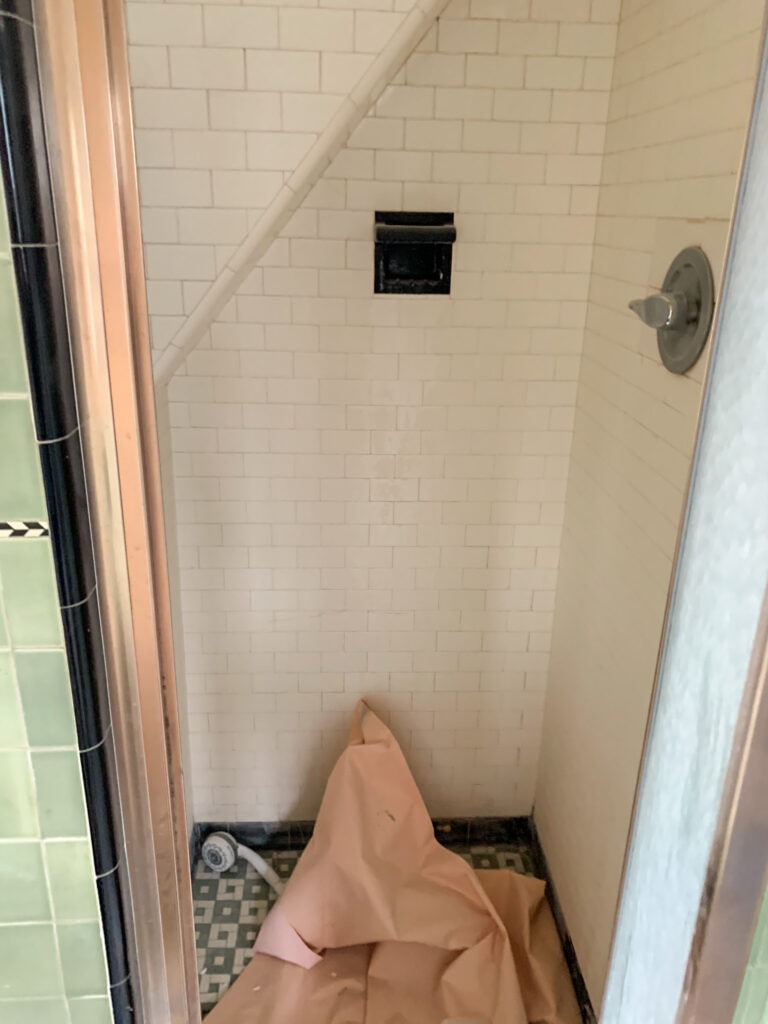
Here was the shower below. It was tucked under the slope of the roof, and I’m guessing even most average-sized people had to duck while inside.
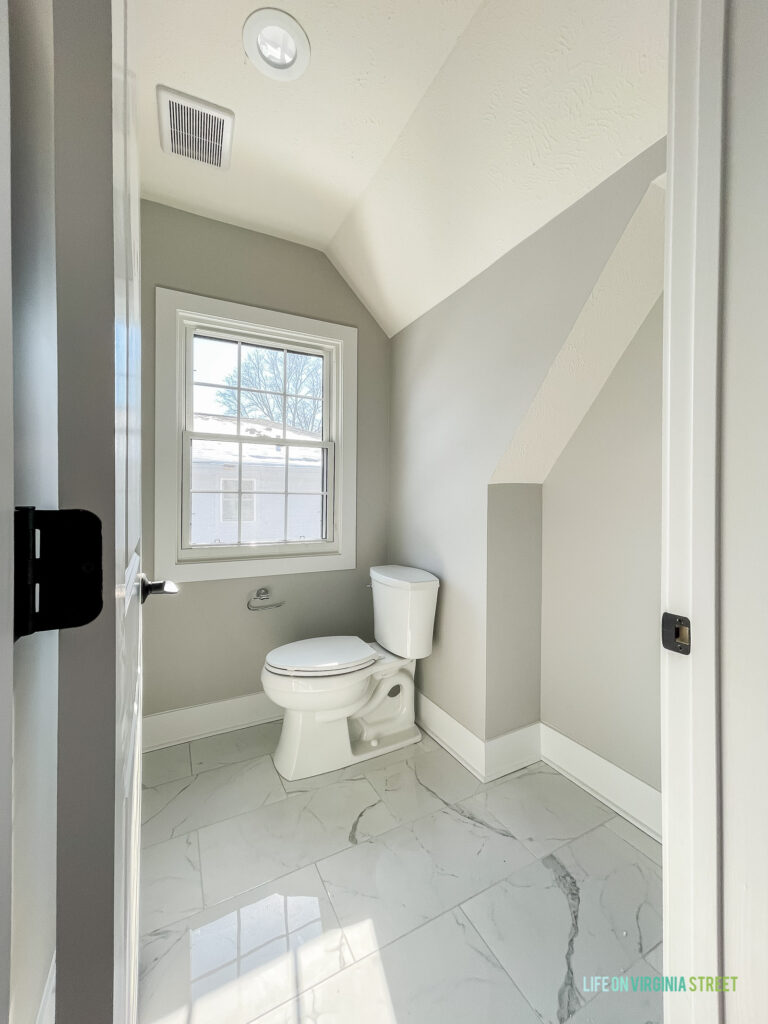
The footprint that held the toilet, sink and shower is now home to just the toilet. At one point we had envisioned built-ins under the roofline, but ultimately left it as is to allow the buyer to do what they want with the extra space.
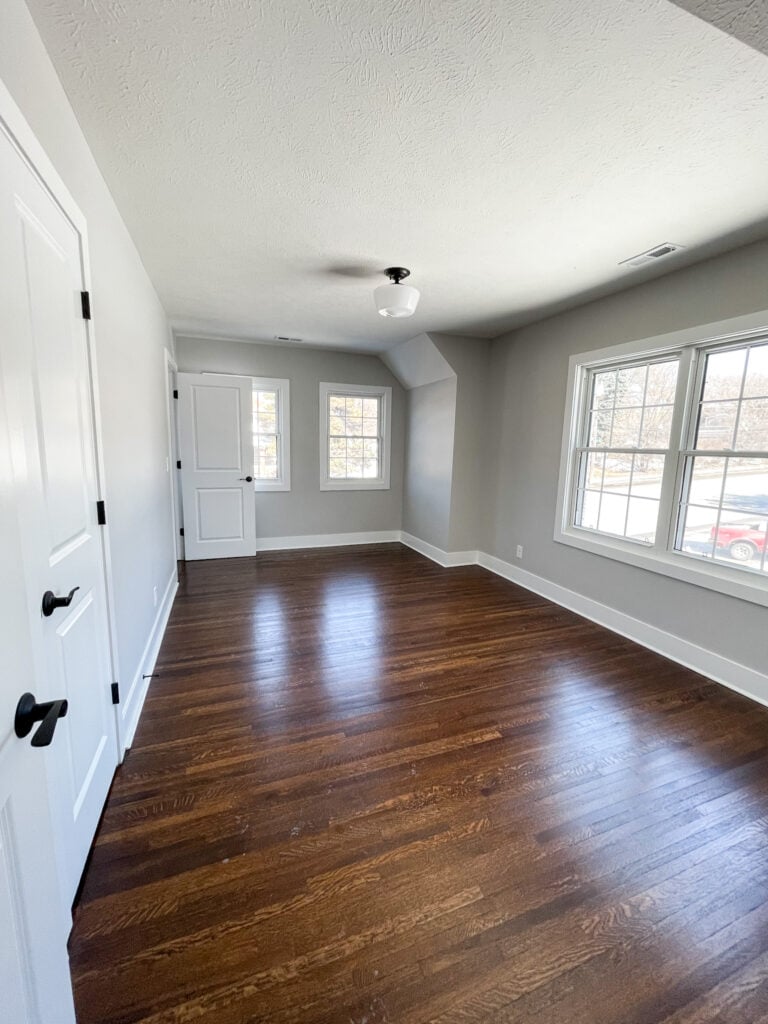
And here is the actual bedroom. It was the bedroom next door to the prior master bedroom, and we joined it with the new bathroom and closet space. We like this location best because it’s also the quietest and most private corner of the house.
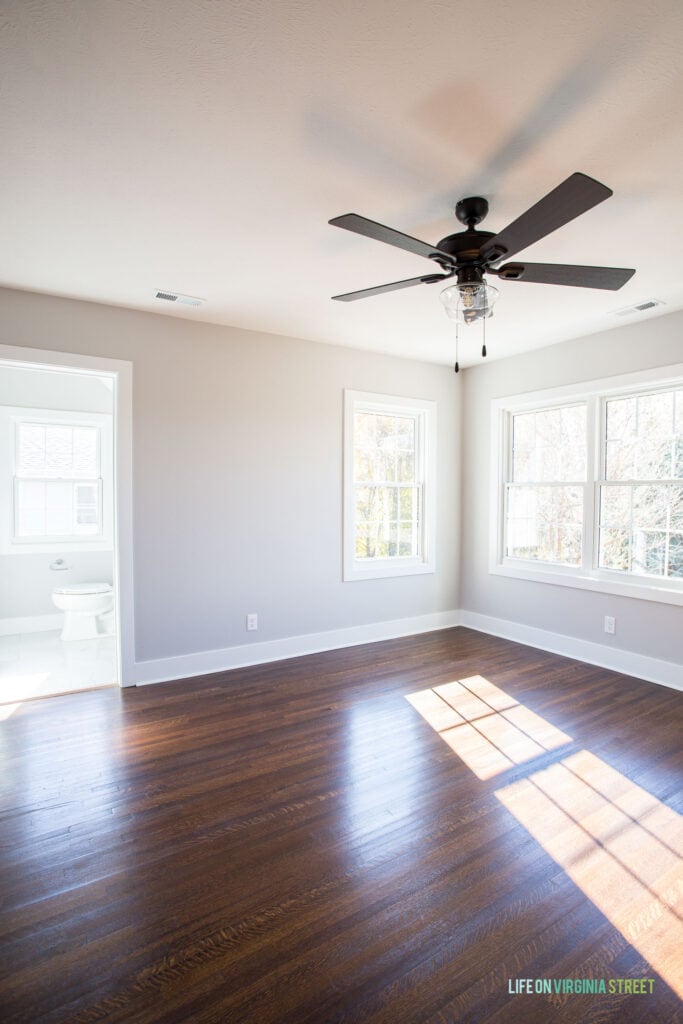
Other than some closet reconfiguration, we didn’t do much in the other two bedrooms other than drywall, staining the floors and updating the windows/trims and light fixtures!
BEDROOM SOURCES: Schoolhouse Light Fixture
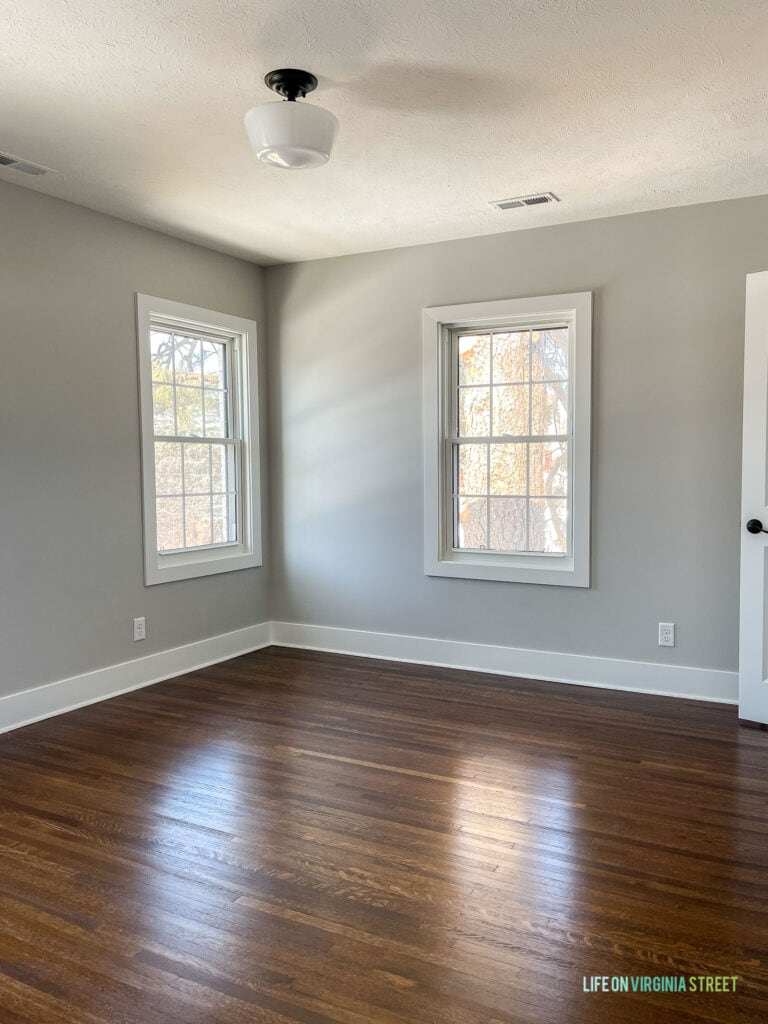
And here is the other bedroom.
We also had to make the decision to remove this little bathroom off one of this secondary bedrooms. We were unable to adjust the footprint, and it honestly felt more creepy than functional. Your knees had to go under the sink to fit on the toilet. We tried 😉
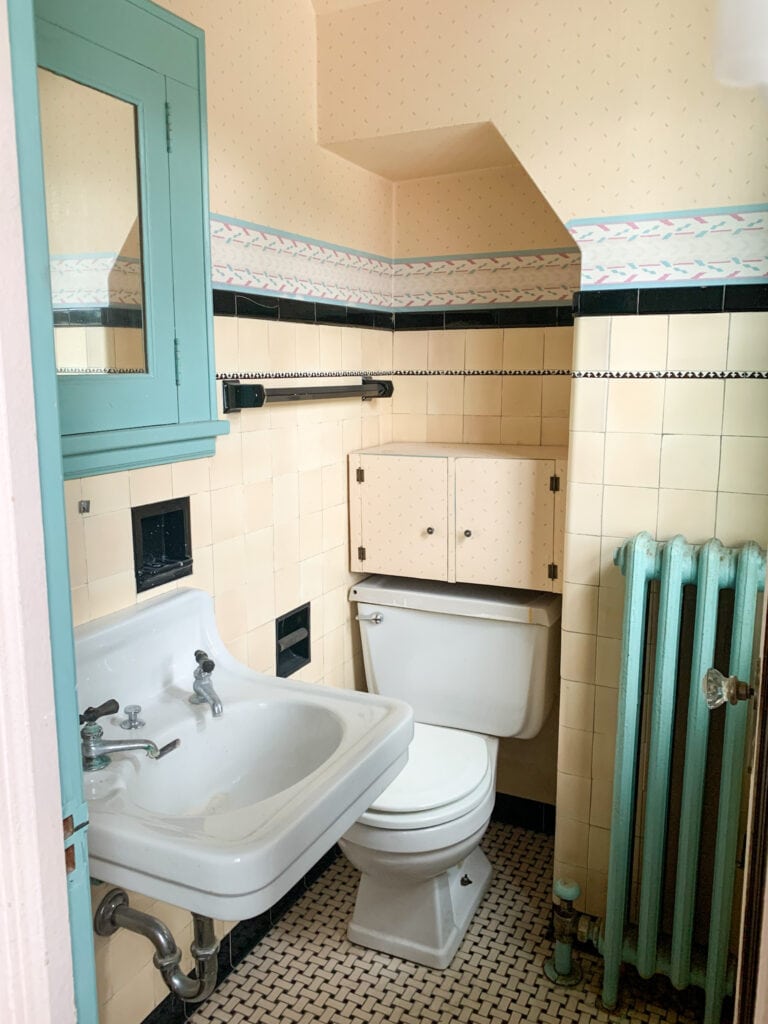
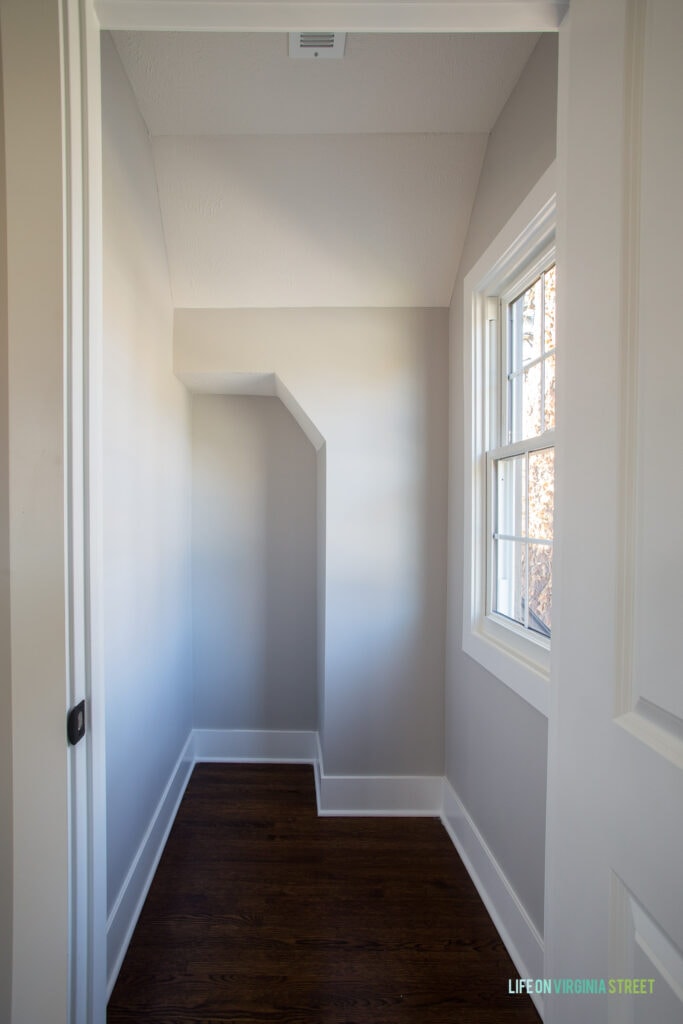
So, although we hated to get rid of a bathroom, we ultimately made this space a closet since we weren’t able to move any of the walls here for structural reasons. The bedroom actually has two closets now, and this one would also be perfect for a little desk or toy closet! My wide-angle lens makes it look much larger now. I assure you it’s still tiny – it just looks less tiny without the toilet, sink and radiator! We also changed the orientation of the door so that it now swings out instead of in to avoid blocking the window when it’s open.
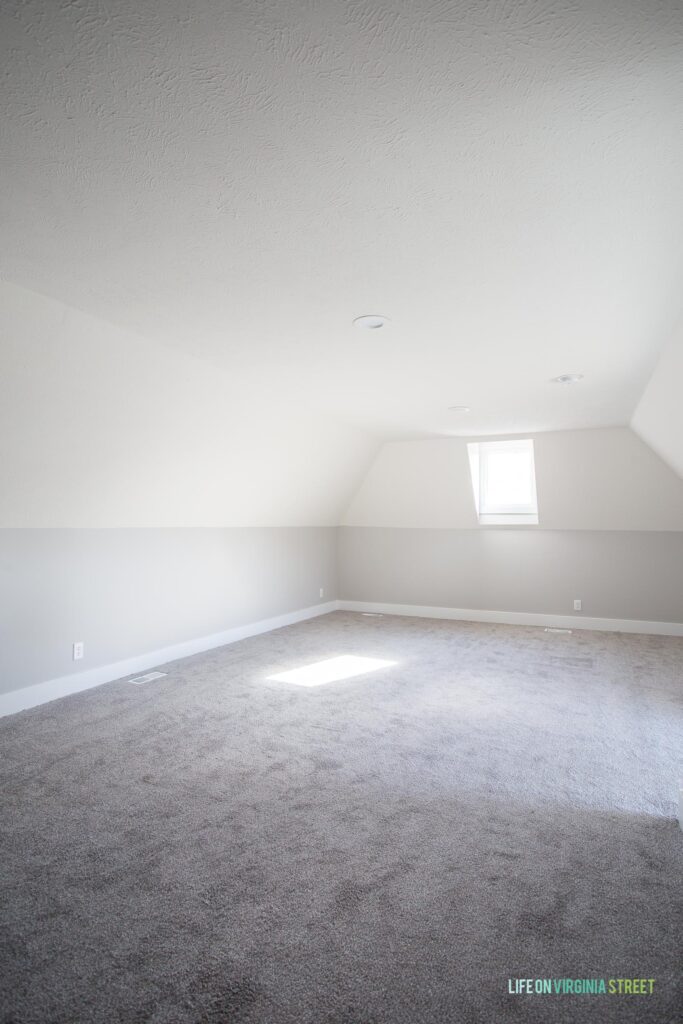
Perhaps one of the biggest changes we made was removing the old boiler system from the upstairs attic and moving to modern HVAC. Granted, this was by far our biggest expense, but by removing this equipment, insulating the walls and refinishing the space, we were able to add several hundred usable and finished square footage!
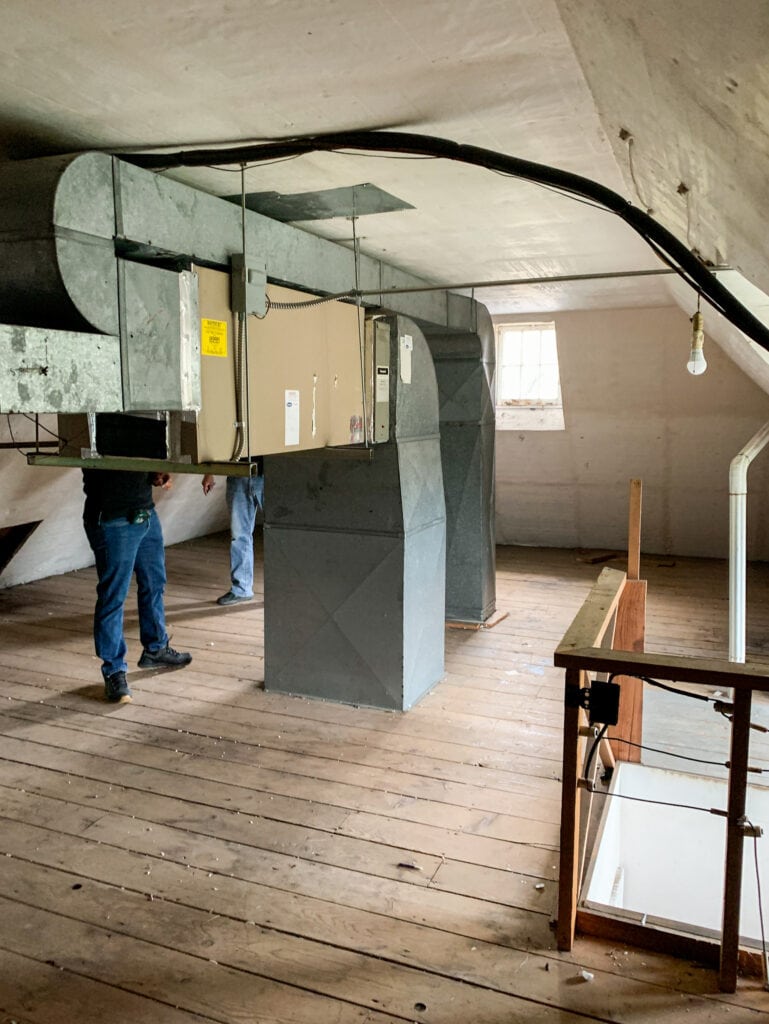
This is the same view as above. It’s crazy how open it is now! Perfect for a studio, toy room, office space, or really even another large bedroom!
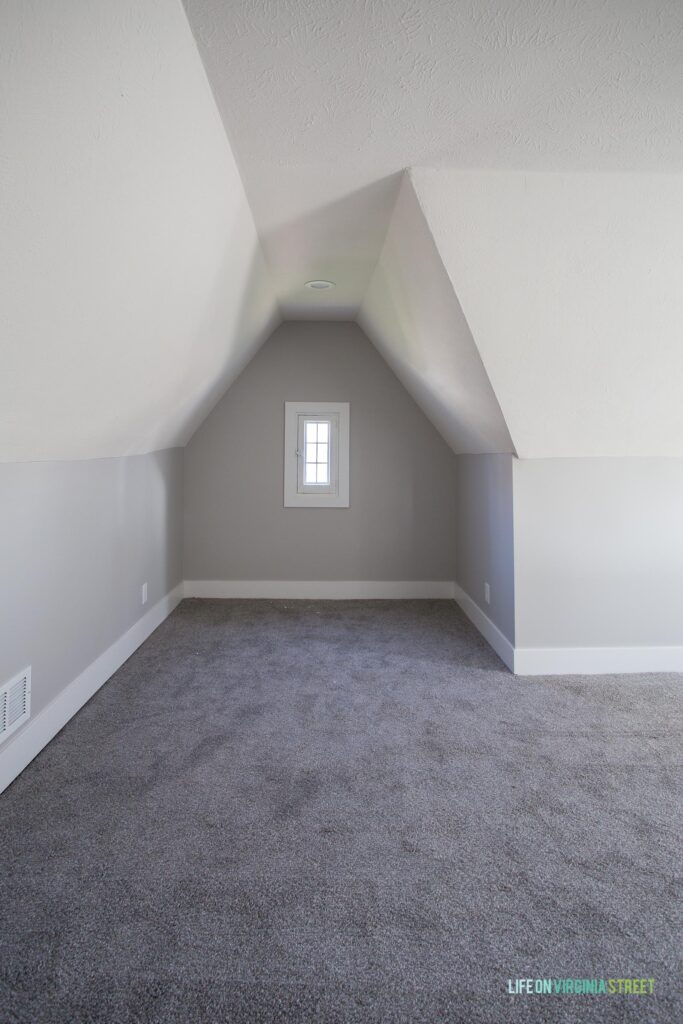
This is a nook further down in the space. It’s also the only other original window we were able to salvage. To help with sound and cozy factors, we added wall to wall carpet. I don’t have any info on it, as I was not involved with ordering it.
Here are a few other details from the home.
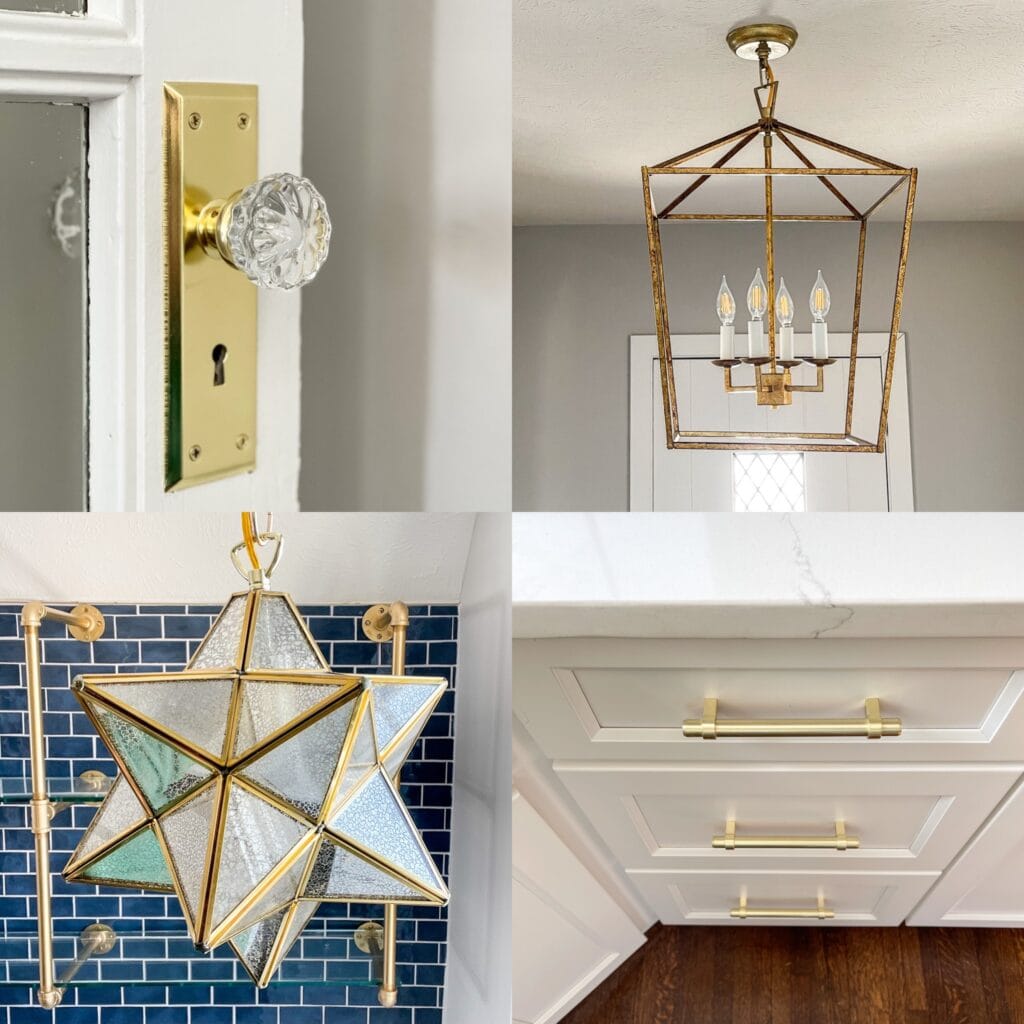
SOURCES: Original Doorknob on Office Door | Lantern Pendant Light | Moravian Star Pendant Light| Blue Subway Tile | Drawer Pulls
The house is officially sold as of last week and I hope the new family loves the home we created. I’ll plan to do a follow-up post at a later date on the limewashing of the exterior. I don’t have tons of details on the actual process, but thought more images would be helpful for those possibly considering it!
I hope you enjoyed seeing this project over the past few months! Feel free to leave any questions below in comments and I’ll do by best to answer them!
If you would like to follow along on more of my home decor, DIY, lifestyle, travel and other posts, I’d love to have you join me on any of the below channels:
Beautiful job! Such a shame having to replace the windows in the office though with that beautiful bent wood framing – they were exquisite. Almost looks like pecky cypress paneling too in the pics. Glad the Tudor got a facelift and a new family!
Wow you did a really great job. Looks like a tooooon of work! Also sounds like you would *not* undertake something like this again – too many cooks 😉 I hope you at least recouped your money out of this. Houses here have been selling for $100k or more over asking – the market is nuts!
what are the floors throughout . i think they look very nice
You guys did an awesome job! Very impressive!! Love all the work and glad you kept the charming vintage arch windows, it adds so much character. God bless!
I love the backstory about the process – one of the things that makes your blog my personal favorite is that I always feel like you have a “tell it like it is” view about projects and results. I do love a before/after – but I also want to know how it all works in real life! (My favorite series was the one about, “What it looks like behind beautiful staged photos . . . “). The flip turned out beautifully and you really do have some great character still in the home even with the challenges you faced. Well done!
Wow, looks great! Not sure if I missed it somewhere…just wondering what paint colors you used? Thanks
Looks beautiful!! Are you happy with the quality of that navy vanity? What kind of gold spray paint did you use for those bistro shelves?
I’m also wondering what paint color was used on the kitchen and living room walls??
Wow, it’s gorgeous. Just wondering, in the end, did you make a profit, break even? It’s so hard to have partners, we’ve been there too and it’s a tough spot! Great job.
Wow, what a great job! I wish the office walls could have stayed unpainted as I always think it’s fun to have one room unpainted and original as an element of surprise. If I’m ever tempted to go in on a reno with friends I’ll read this again cause it gave me anxiety! I like being the lead dog on ALL design decisions! Lol!
Absolutely stunning. I certainly can’t tell that this is a first time flip. Beautiful choices with a designer flair. Cannot tell at all that this is a first time flip.
The house turned out so cute. A great first attempt at flipping. It sounds like it was a struggle but I hope you do more of them! Maybe without a pandemic and massive water damage?!?
I am wondering, did you manage to at least break even?
Thanks for taking us along for the ride, it’s so fun for me to see how people transform houses of all types!
Really gorgeous! I hope you enjoyed a healthy profit for all your hard work!
Someone asked about the floors earlier…I’d love to know stain you used.
Nancy
Absolutely beautiful! You should very proud of your accomplishment. What color ain’t was used on the wall.
Thanks for sharing🙂
Just awesome!
Hi Sarah, thanks for sharing. The kitchen is beautiful. Overall, great results to save a historical home. I cannot
imagine the stress involved trying to complete this project under the circumstances (pandemic, etc.)unfortunate that the master bath does not reflect the architecture of the home. The lay out is odd (especially the tub placement and half tiled wall behind it)and the finishes too modern …looks like it should be in a tract home. The original home could win an award for tight bathrooms, lol! (It’s as if they forgot to put them in when building the house until the last minute and then said “hey let’s put a half bath in this closet”…. “ok we’re good, done.”😭)
Looking forward to seeing the exterior!
Wow! Awesome! 💞
OMG INCREDIBLE!!!!!!!! The kitchen with the gold touches! You added gold into some really cool places that I hadn’t seen before. Just love it!
This is beautiful! And I love options that look good on a budget, the shelves in the butler pantry are 😍. Would love to see some pictures of the exterior!
Thanks so much for sharing this! And your honesty is refreshing. I particularly love the kitchen and butler’s pantry. Don’t they say kitchens sell houses — so you needn’t have sweated (too much) the elements selected by your other partners in other parts of the house. While they may not have been exactly to your taste, the overall feel of the house is impressive. I disagree a bit with the commenter who criticized the master bath. That is one room where I think people would rather have up-to-date, highly functional features, and grey and white marble is timeless!
Y’all should be extremely proud, it looks wonderful!
This is seriously mind blowing! You did such an amazing transformation with this house! I can see areas where you stepped out of your comfort zone. I’m so, insanely impressed Sarah with all the design choices. Kudos to you and Kurt!
I don’t know if you are aware but ads that run along the side of your blog block part of the photos ~ really annoying
love you blogs though!
This is beautiful. I’m currently updating at 1920’s Tudor that I live in so I loved this. I’m curious how you added the metal grill work to the kitchen cabinets. Did you do it yourself or was that something that your cabinet company offered?
Wow! What an amazing job you did with this home! I love it! I especially love that butler’s pantry and beautiful navy color you used in there & the kitchen.
Wow. That hallwaybathroom went from worst to firsta
! Beautifully done. It sounds like this was quite an undertaking and I wish you rest in knowing you did a wonderful job.
Beautiful and a great job.
But, you were right about that big bathroom design: large scale faux marble porcelain slab tile was not the “best” choice for that house. 😉
Thank you for showing the renovation with complete details.
Loved what you did with this project. I’m curious… What color paint did you use in the bathroom? Thanks.
Thank you! All of the paint in the house is Snowglory 0531 color matched at Sherwin Williams. The trim and doors are all SW Alabaster.
Hi Sarah, sorry to bother you! I was inspired by your pipe shelves and am in the process of trying to build some of my own and struggling to find the right gold paint. You would make my world if you could share the details on the gold paint you used on yours! Thank you SO much in advance and for the years and years of inspiration! This home is gorgeous..as is everything you do! ❤️
Hi! Sorry for the delay! Unfortunately I’m not sure which color they used. I showed up one day and they were already painted. I know it definitely wasn’t anything custom though. I’m fairly certain they just bought a gold spray paint at either Lowe’s or Home Depot off the shelf (I know it was spray paint). I looked through my old photos and hoped I had some info, but I’m sorry I couldn’t find more info!
Wow, I must admit I am a hard critic, rarely fully impressed but this is incredible!!! Those bathrooms were hilarious too haha. We’re you concerned about the bones of the house, plumbing and electricity? Roof? It could not have been cheap. What I loved best about this gut remodel was you did it right, you didn’t do it cheaply. Resell value if that’s important for you should be in your favor IMHO
I can see a lot of work went into this and happy for you if it makes you happy. But as someone who loves old homes, this renovation feels like a charm-ectcomy. While some of the finishes were in bad shape, and some of the colors busy, it felt designed, and warm and cozy before and now it feels cold and impersonal like the builder finishes on a typical track home. It doesn’t even look historic or Tudor any more. I wish people who buy historic homes would try to keep or replicate more of the historic finishes that make these homes so special and inviting to begin with.
Those bathrooms were gorgeous before you removed them. How sad 🙁