A detailed tutorial on how to paint a concrete patio and make it last! This step-by-step post shares the supplies you need and the steps to follow. Such a beautiful painted concrete patio makeover!
Sometimes (okay,most of the time), blogging shows the glamorous, pretty, styled version of life, like the fall home tour I shared yesterday. Perfectly styled photos, perfectly cleaned and organized spaces, pillows fluffed to perfection. The list goes on.
The reality is, there are usually some deep, dark blogger secrets when you step back and look at what’s outside of the view from the camera lens.
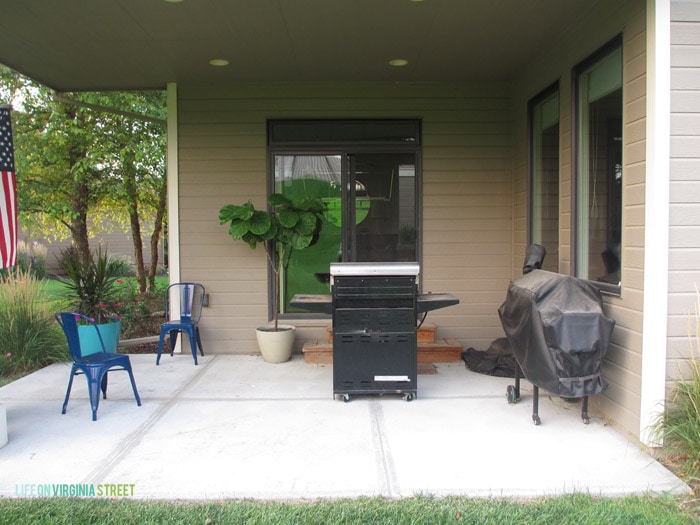
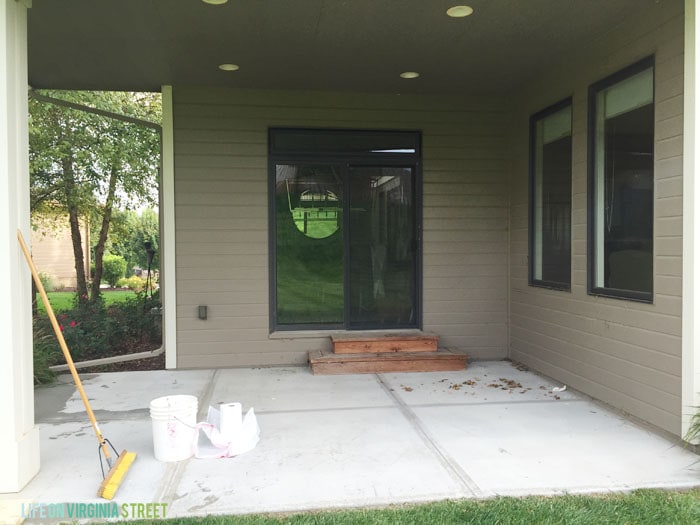
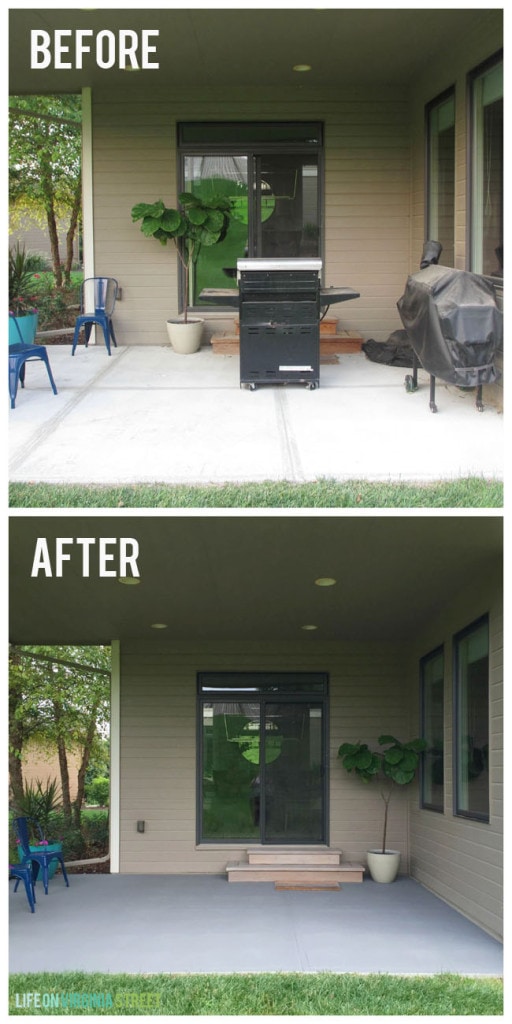
Our Current Backyard Patio
Take our back patio for example. A month or two back I had spruced it up just in time for the Fourth of July. However, it has quickly gone downhill. Today I’m going to share an option for a painted concrete patio makeover – and we love the results we achieved!
From far away, the patio just looks a little disorganized.
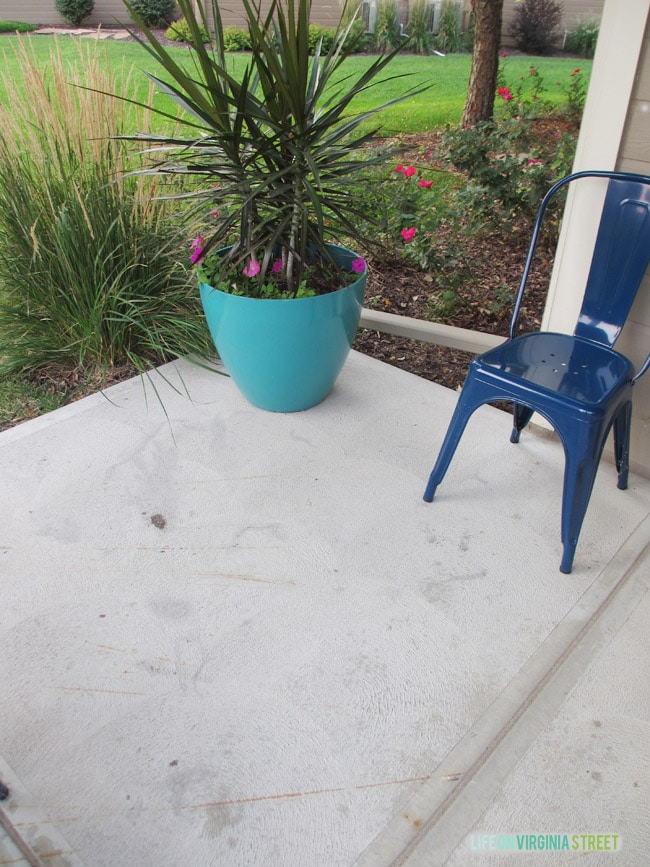
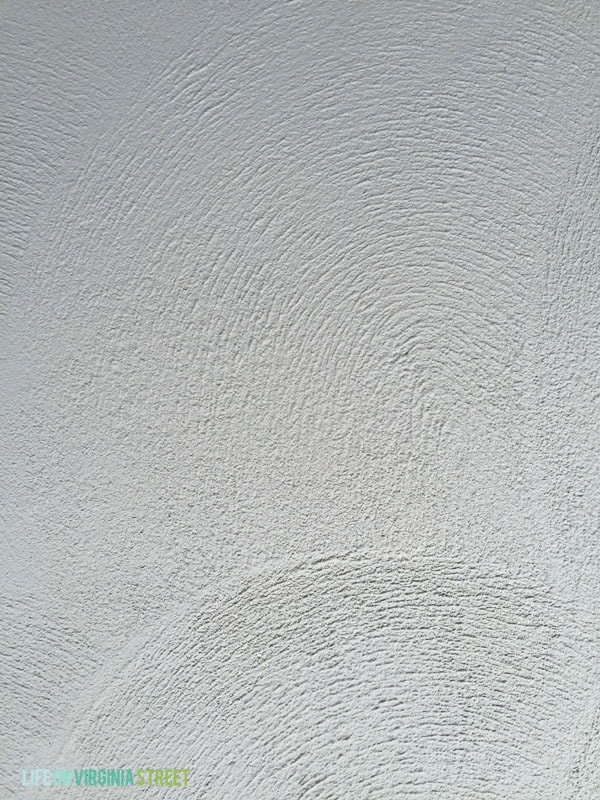
However, upon closer inspection, you can see it needs help. First up is the concrete. For whatever reason, there are multiple rust stains on all six of the concrete squares. I would say upwards of 25-30. You can also see other various staining and marks (those are not watermarks – this is fully dry concrete). The concrete is also highly textured and seems to accumulate dirt much easier because it has a little more grit/grip and the texture is not necessarily consistent.
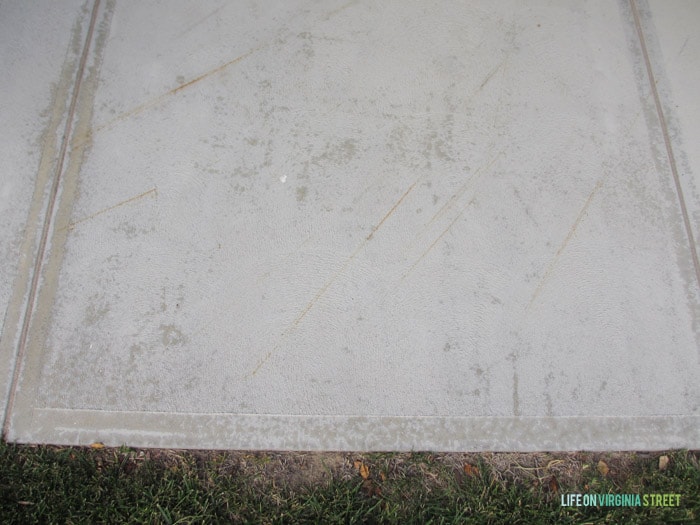
Here you can see more of the concrete stains and variations.
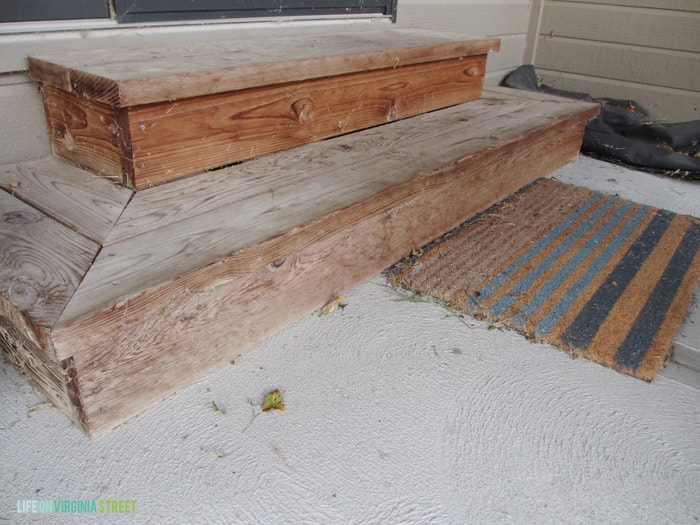
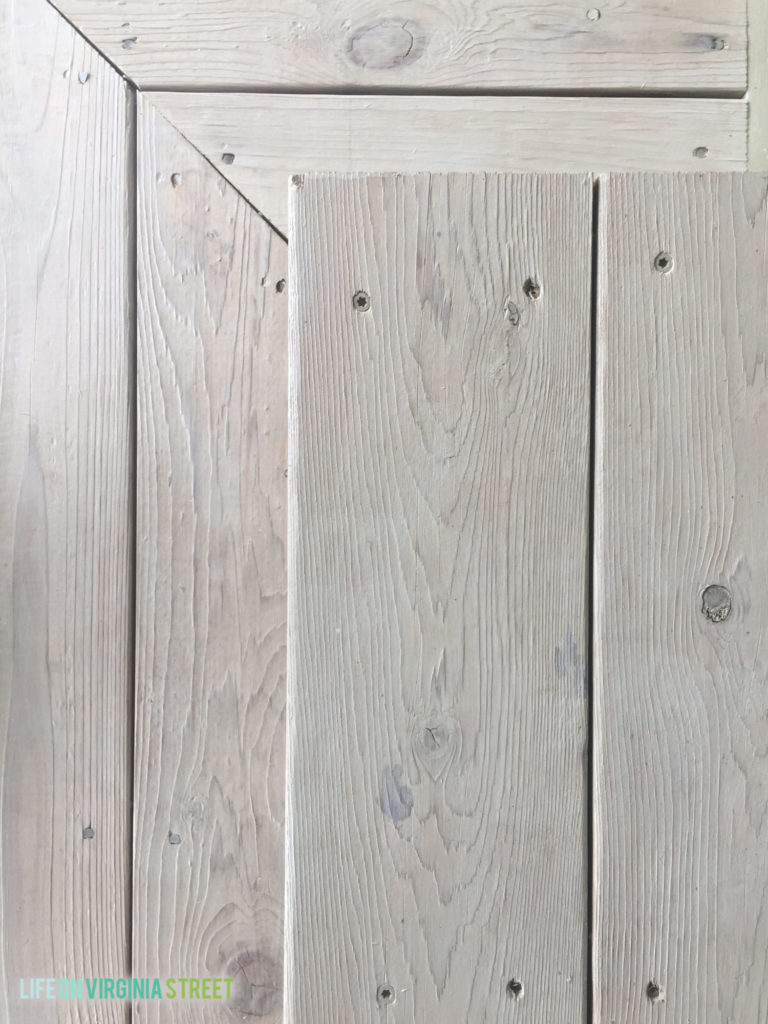
The porch steps were really scary. Although they are structurally sound, they’ve obviously never been stained or sealed and were covered in cobwebs, dead grass clippings, dead leaves, and dust/dirt. Don’t judge!
The house itself under the covered patio, as well as all of the window frames, were equally as dirty – which is crazy considering they were all clean just two short months ago. Another issue with the space was functionality. Because we have the courtyard with a more intimate seating area, we tend to use the back porch solely for grilling and smoking various foods. Two functions that don’t exactly lead to spotless conditions.
The reality is, it didn’t make sense to fancy the space up without addressing some of the core problems: the stained and velcro-like concrete, the faded steps and some basic organization of the grilling/smoking equipment.
BEHR® sponsored this blog post. The opinions and text are all mine.
How To Paint a Concrete Patio
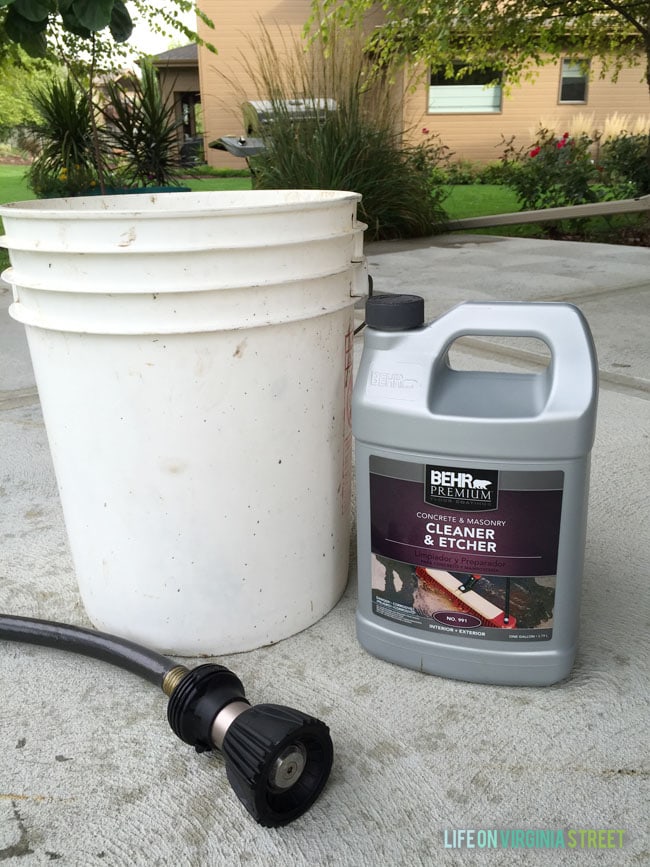
First up, we removed everything from the patio and then swept (and used a leaf blower) to remove as much debris and dust as possible before we officially cleaned the surface.
Because the concrete is fairly new (our house is about seven years old) and not currently painted or stained, I used the BEHR PREMIUM Concrete and Masonry Cleaner & Etcher® to clean and “prime” the surface. We ended up following the dilution method found on the packaging (with a one-to-one ratio of water and cleaner), mixing it all in a five gallon bucket. We then simply followed the directions on the packaging. Quite honestly, this product alone would have made for a much cleaner area (simply by removing most of the spots and stains), but I also knew it was likely that this area would continue to receive wear and stains if I didn’t take it a step further. It was fun to watch the product work – we compared it to hydrogen peroxide – you actually see it foam as it starts cleaning.
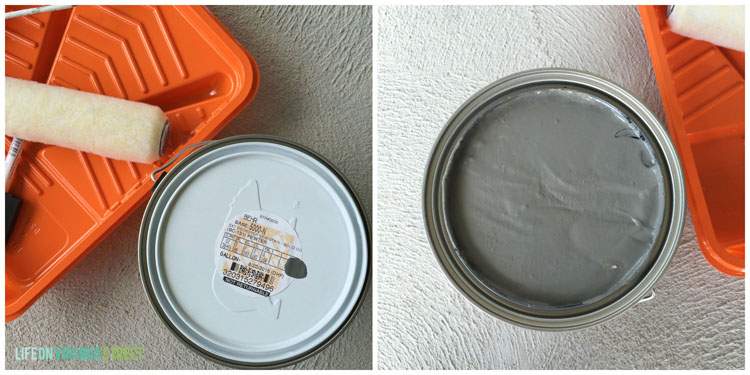
Rather than leave the raw, clean concrete, I decided to try the BEHR PREMIUM DeckOver® product. This product is really unique, in that it brings new life to old wood and concrete surfaces. It also dries four times thicker than traditional solid color stains. Additionally, it conceals splinters and cracks up to 1⁄4” thick (which is major if you have an old deck). I also love that it is available in 54 custom colors and can also be color matched on a limited basis. We all know I’m a paint color fanatic, so choosing the right color for the space was very important to me.
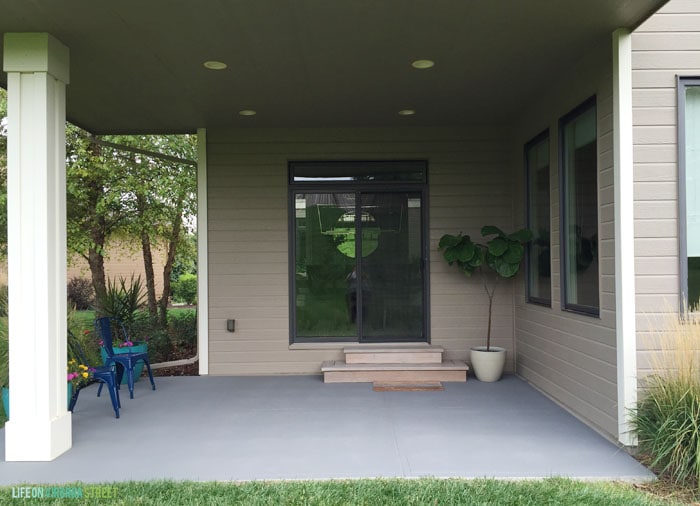
I went with the Pewter color – a deep charcoal gray. You’ll note that the product is much thicker than a normal paint and since we were applying ours to rather porous concrete we applied it fairly heavily, as it seemed to be soaked up quickly if I didn’t. We applied two full coats, using two gallons total for this project.

Prior to painting the concrete, we taped of the house, steps and post to ensure we didn’t get the paint anywhere we didn’t want it. I then attached the roller to an extension pole (simply so I didn’t have to crawl around the patio on my hands and knees). Although I used a paint tray for the first few areas, I quickly found that because the product is so thick, it was easier to pour the paint directly on the concrete in small batches and then roll it in before moving on. While I was rolling, my husband was brushing around the perimeters (and areas I couldn’t get the roller).
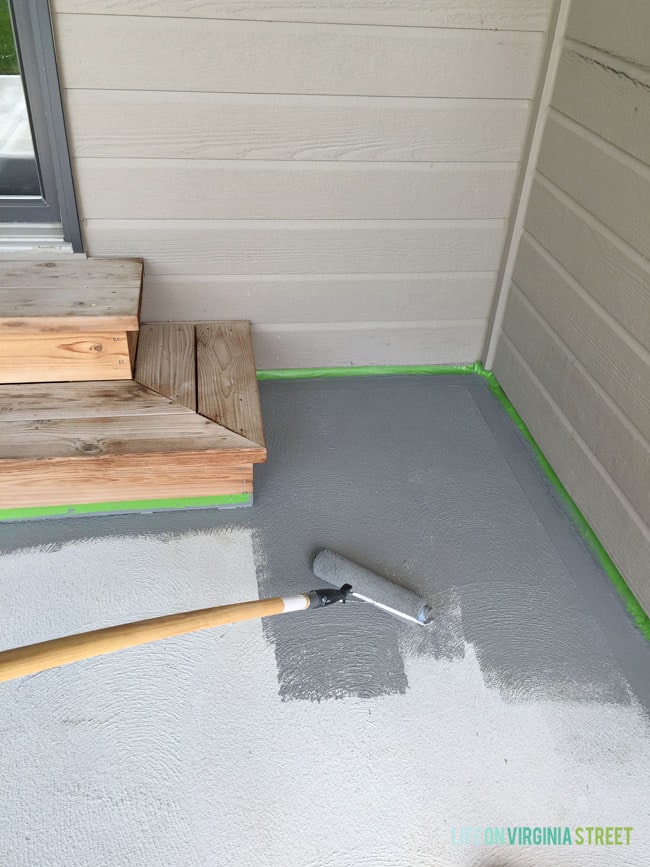
The second coat only took me about 30 minutes to apply because the surface was less porous now that one coat was on. I applied it first thing the next morning before it got too hot or humid out.
Lastly, I chose to stain the porch steps using BEHR PREMIUM® Semi-Transparent Weatherproofing All-In-One Wood Stain & Sealer in the Cape Cod Gray color. I loved the color because it reminded me of driftwood. I’m partial to seeing a bit of wood grain, so I went with the semi-transparent version to let a little of the natural character of the wood show through. This also helped to allow some of the natural wood tones show through (which tied in well with the house), but it also gave a nice gray cast to it as well, to look good with the painted concrete.
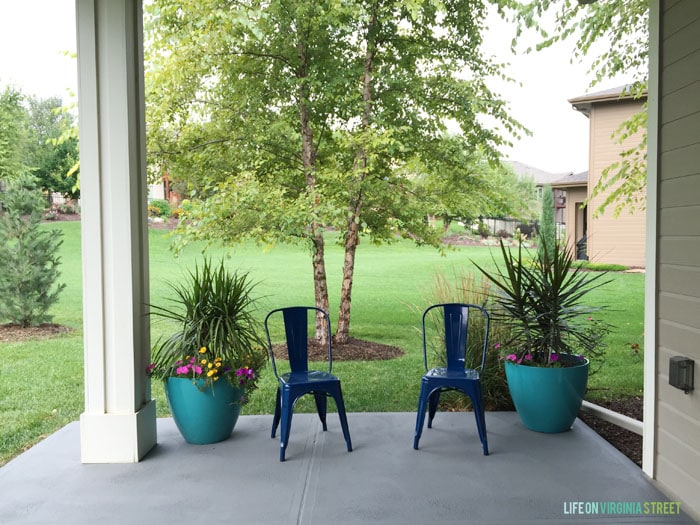
We are absolutely in love with this makeover! I also don’t think we realized just how much glare came off the former concrete, so the new deeper color helps minimize that and definitely makes it easier on the eyes. My husband loves it because he feels like it looks like freshly poured concrete.
We’re still working out the logistics of where the grill and smoker should go (we clearly have differing thoughts) but ultimately, we know the grill will likely have to stay in this space because of it’s convenience to the kitchen. Down the road, once we figure out our backyard plans, we may end up building the grill in somewhere.
Clearly I also have a lot more styling to do back here, but now I have the perfect foundation to set the stage for changes I want to make in the future! At some point, I see a sectional and some outdoor curtains to make the space cozier. We may also add a large outdoor rug and a TV so that we actually use the space as well. But for now, we love the much cleaner space and the look of the painted concrete and stained steps! I hope you enjoyed our painted concrete patio makeover!
If you would like to follow along on more of my home decor, DIY, lifestyle, travel and other posts, I’d love to have you follow me on any of the following:
Pinterest | Instagram | Facebook | Twitter
This post is brought to you by BEHR. Color that’s True to Hue. If you feel it you can find it. Visit True To Hue.
BEHR® sponsored this blog post. As always, the opinions and text are all mine and I only share products with my readers I genuinely love. Comments submitted on this post may be displayed on other websites owned by the sponsoring brand.
Hi there – looks great. Im wondering how its held up as alot of the reviews say it peels off over winter and or within six months.
Our actually looks as good as new right now and it’s almost been a year! Ours definitely gets traffic on it as well and seems to have held up fine. I hope that helps!
Hi- as it has been a few years now, how was the paint held up?
It has held up really well! We do have a few areas on the outer edges where the paint came off (less than four inch diameter) but I have been able to touch it up with leftover paint. Overall, it still looks great. I hope that helps!
Do you know if this will work for uncovered concrete area?