I will show you some technique on how to paint over striped walls in your house.
This post is sponsored by Dutch Boy® Paints. As always, all thoughts and opinions are my own.
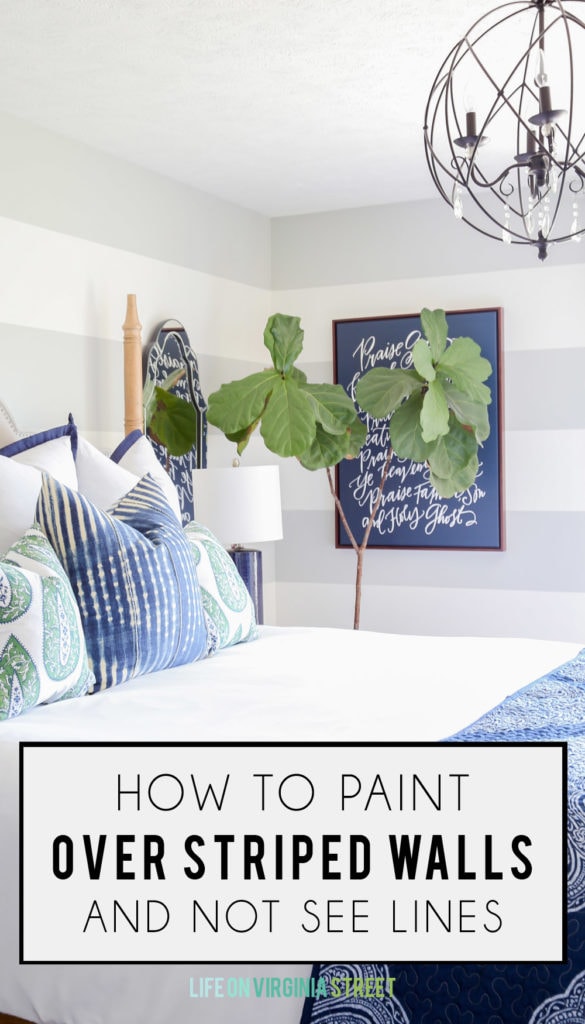
Stripes are one of my biggest obsessions. You’ll see them everywhere around our home and in my wardrobe. They are by far my favorite pattern! However, the time had come for me to paint over the stripes in our guest bedroom so I could create a more neutral space that allowed me a bit more freedom to use other interesting patterns and textiles.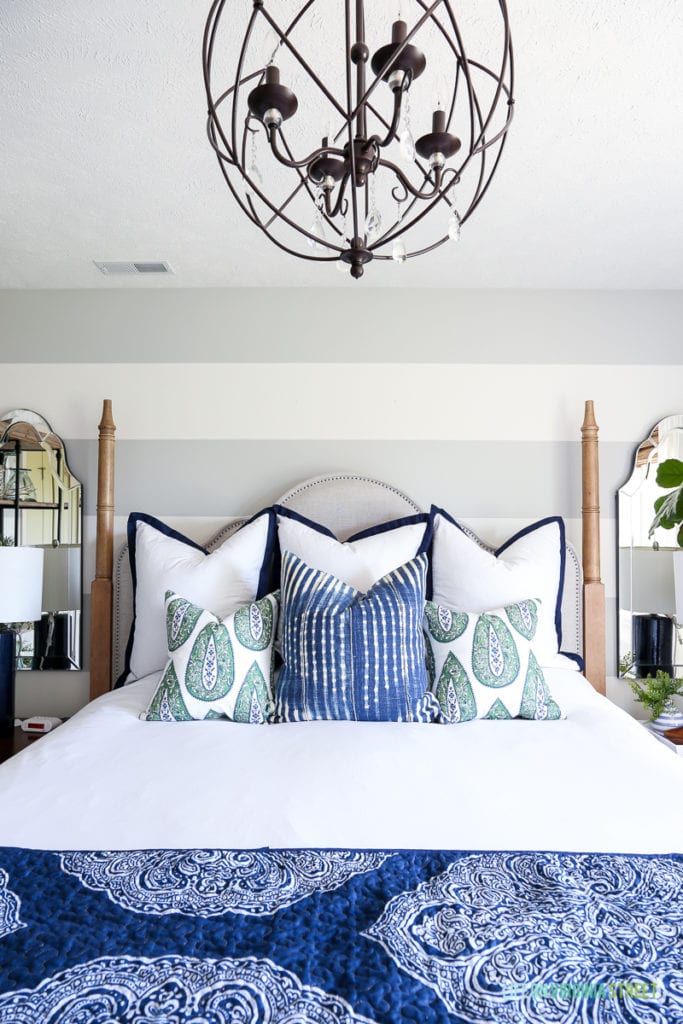
But let me rewind. I had painted a striped feature wall in the master bedroom in our last house. I used two colors that were next to each other on the paint strip and I absolutely loved the results. When we moved into our current home nearly five years ago, I wanted stripes in another space because I loved them so much. I ultimately ended up choosing to paint our main guest bedroom. Here’s how the space looked as of a few weeks ago.
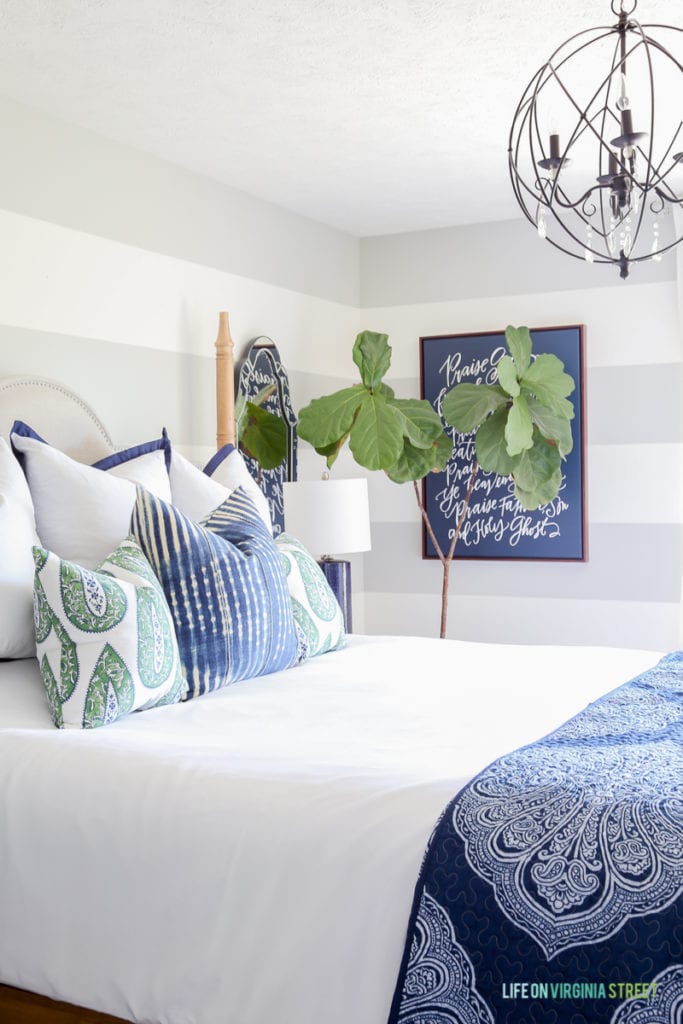
Don’t get me wrong. I still love the look! And I know some of you are going to be freaking out that I painted over the stripes 🙂 But, I added them in July 2013 (can you even believe that was over four years ago?!?), and I was ready for a change. I love stripes more than any other pattern. But, I found that over time, having stripes on the walls limited the stripes I could use in the textiles. In fact, I felt like certain patterns never looked quite right in the room because of the walls. I also didn’t love the contrast with the white and gray. It just felt a bit too modern for my current aesthetic.
By late summer, my mind was made up that I would begin to undo the stripes. It was an option I’d been mulling over for some time, but I knew it could possibly be a lot of work. I know you may be thinking “can’t you just paint over them with paint/primer?” In short, not necessarily. I’ll get to all the details shortly.
Bedroom Paint Colors
But before I began addressing the stripes, I first wanted to hunt down the perfect neutral paint color for the space. Given my love of fabrics and throw pillows, I wanted a color that would work with a variety of options and could work with beige-tones as well as gray-tones. I didn’t want to tackle the project until I had a more concrete plan and a specific color in mind. So,I headed to Menards and pulled several Dutch Boy paint samples. I had used this paint line in my buffalo check laundry room makeover and decided to go with it again because I was so happy with the product.
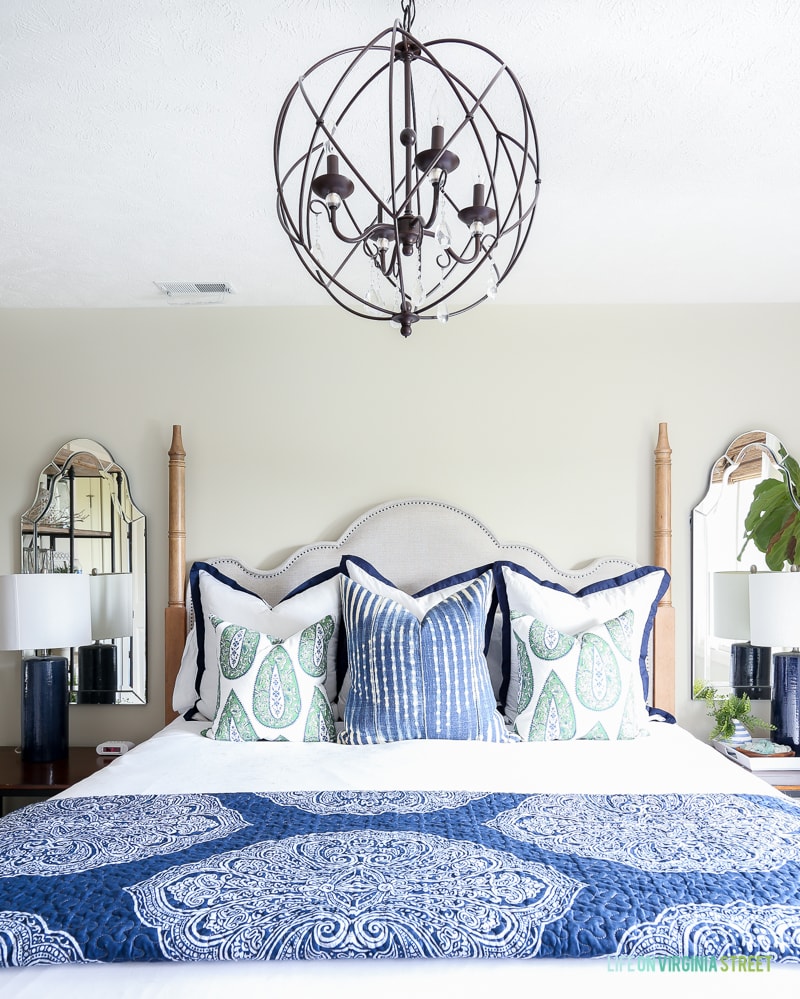
Then I narrowed my choices down to the following five strips (the lightest color on each). The strips are shown next to the fabric on the guest bedroom headboard.

If you look closely, the colors are all very similar, however, each has it’s own unique undertone. I ultimately fell in love with Existence (420-1DB) because it seemed to have the perfect undertones (leaning a bit green/yellow) but had that infused warm neutral tone I was looking for. I walked it all over our house to compare to some of our existing colors and it was the clear winner!
Now that I had a paint color plan, it was time to address the stripes!
Supplies Needed to Paint Over Striped Walls
- Paint color of your choice. I used Dutch Boy Platinum® Plus Interior Paint + Primer Existence (420-1DB) in Eggshell
- Paint tray
- A small paint roller
- A large paint roller (if you’re painting your entire wall first)
- Sandpaper or electric hand sander (preferred)
- Putty knife and wall spackle if you have existing holes to fill
- Sanding safety mask and protective eyewear
How to Paint Over Striped Walls
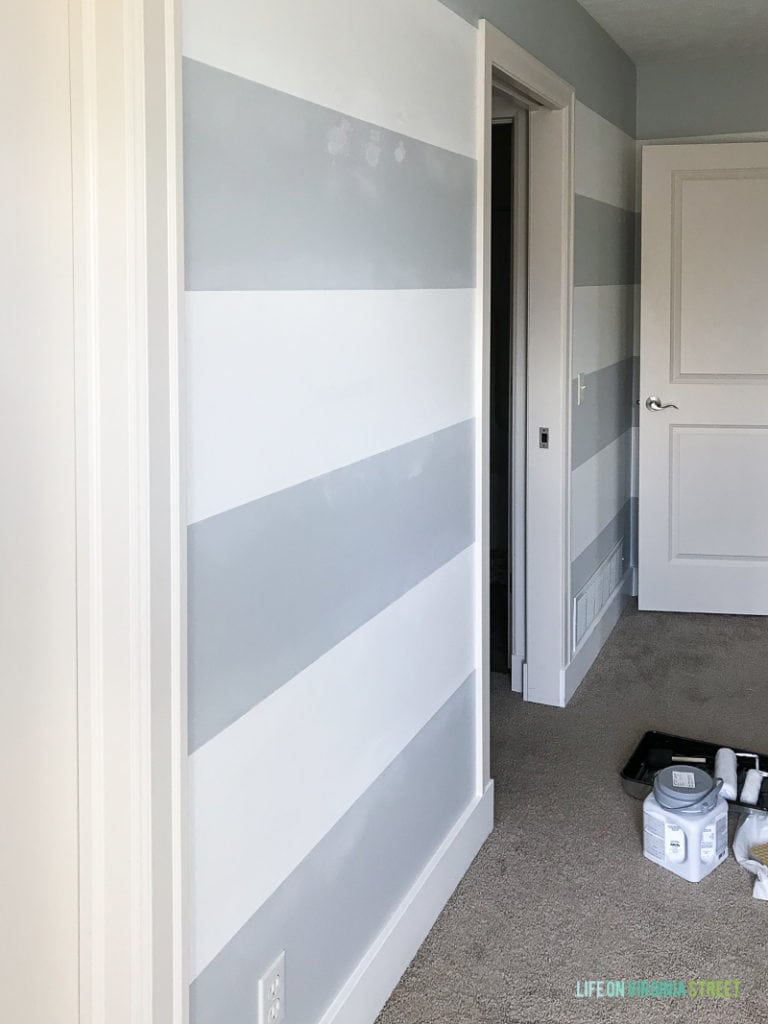
For the past few weeks as I’ve alluded to painting over the striped walls, many have questioned why I was sanding the walls. Most assumed it was as simple as just painting over the stripes with a primer and/or paint and primer in one. However, any time you use painter’s tape to create a pattern, you are very likely going to have a ridge along the edge where the two paint colors meet. This may not always be the cases with every version of stripes out there. But, if you think about it, one layer will have 1-2 coats more of paint, and it may not seem like much, but when you go back to one paint color, that lip is evident. You’ll see additional details and images below.
Have a Test Wall
I opted to use this section between the closet door and the bathroom door as my test section. This helped immensely. Not only did I realize hand sanding wasn’t going to cut it, but it also allowed me to test the paint in a small area without committing to the color in case I didn’t love it on the wall. The last thing you want to do in a project of this scale is to sand the entire room, find out it wasn’t enough sanding, and then have to re-do your work. By having this little test section, I could try a few techniques to find what worked best given my situation.
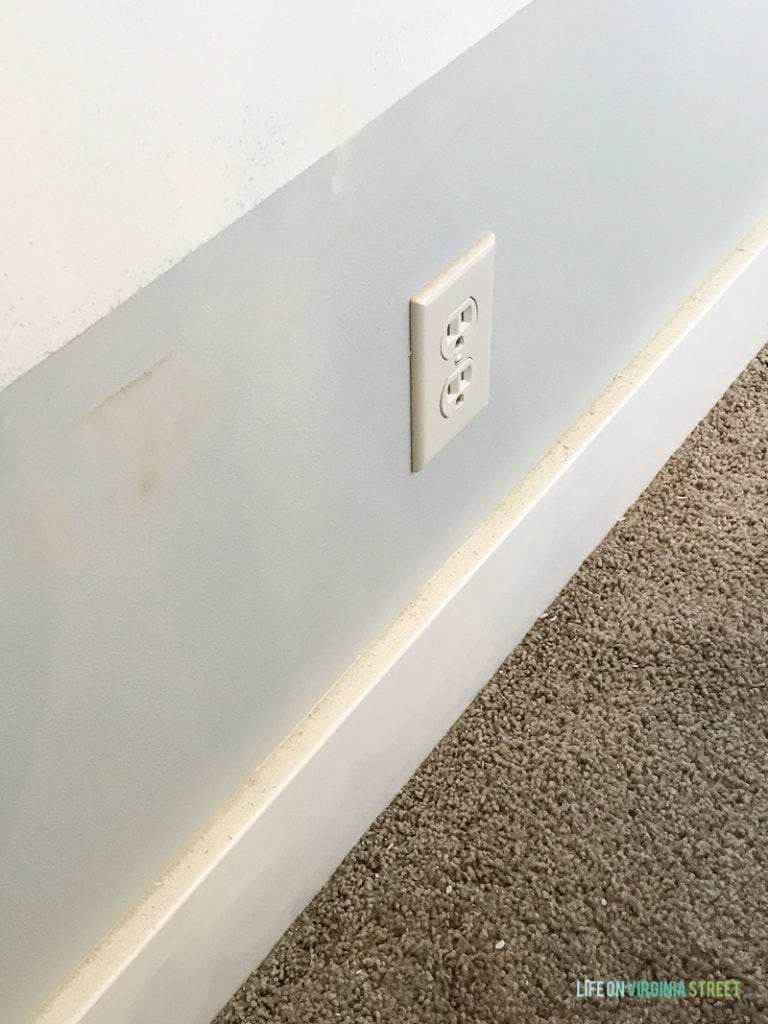
Fill Nail Holes and Remove Outlet Covers
As with any paint job, you’re going to want to do some basic prep work. This includes filling any existing nail holes that you want to remove and removing outlet covers. You can see in my image above that my holes had been filled and cured prior to me moving on to the next step.
Test to See If You Need to Sand
Before starting this step (and any of the sanding steps below), I would suggest wearing a sanding safety mask as well as protective eyewear. If you’re lucky, you may be able to get away with hand sanding or no sanding at all. However, in my case, it was clear rather quickly that even hand sanding wouldn’t cut it.
Unfortunately, it wasn’t totally obvious to the naked eye until I applied a test coat of paint. During the hand sanding process, I tried two different grits of paper, and found that 180 or slightly less worked the best. Here is how the wall looked after a light sanding and then one coat of paint. In the image below, you can see the paint color coverage was good, but the ridges between the stripes were rather apparent. The good news: I was in love with the color!

Seeing that the stripe ridges didn’t fully cover, I opted to use my electric sander for the remainder of the room.
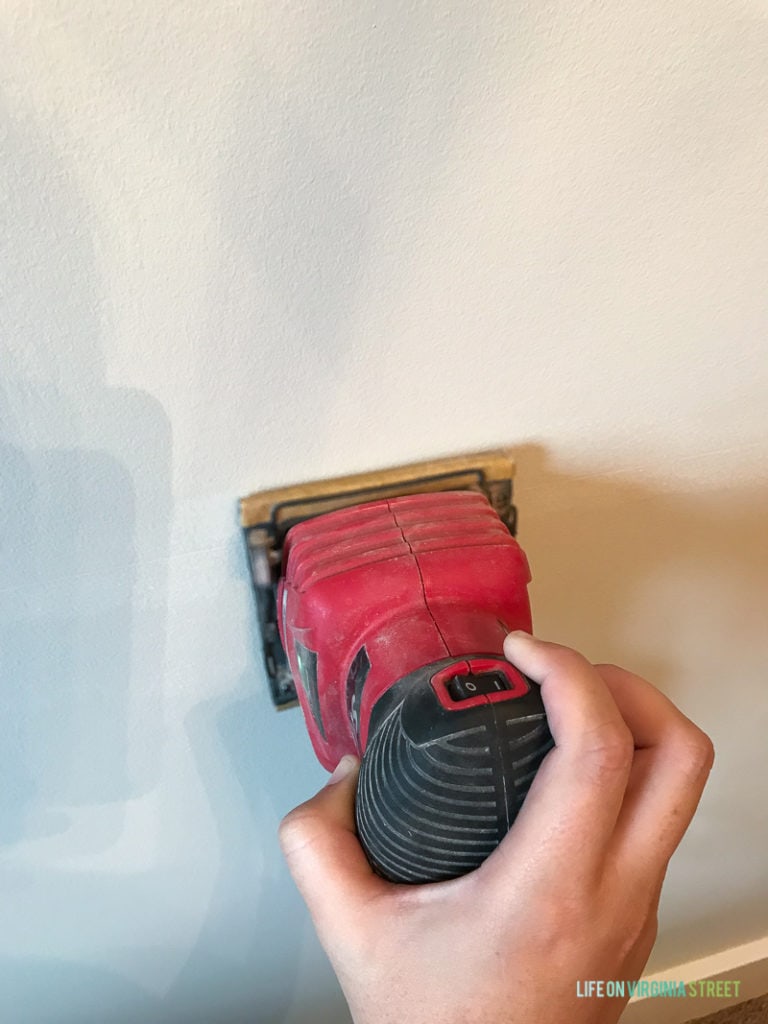
For me, I found that sanding the ridge until I started to wear the top layer off the stripe was the happy medium. You can see what I’m referring to in the image below. For my striped walls, the gray was my base color and the white was the stripe I added over the top afterwards. So, I sanded until some of the gray showed through. You can typically judge with your hands if the ridge is gone. And when you think it’s gone, sand a little more. The extra work is well worth your time!

Wipe Down Your Walls and Baseboards
If your stripes do require sanding, once you’ve finished sanding and/or prepping your walls, you are going to want to clean all your surface thoroughly before painting. Sanding is a messy project and you want to ensure the paint adheres to a clean surface! I wiped down all of the walls, wiped off all the baseboards and then vacuumed the room. I even had to wipe down every leaf on my fiddle leaf fig tree after this project!
Paint Your Walls
I applied two coats of Dutch Boy Paints Existence (420-1DB) using their Platinum Plus Interior Paint + Primer. I found that the coverage was excellent and there are no remnants left of the stripes! The color turned out even better than I could have hoped for! Here is an in-progress shot, where I had one coat on a portion of the wall. It helps to see this side-by-side comparison of the new color versus the old colors. It’s so much warmer!
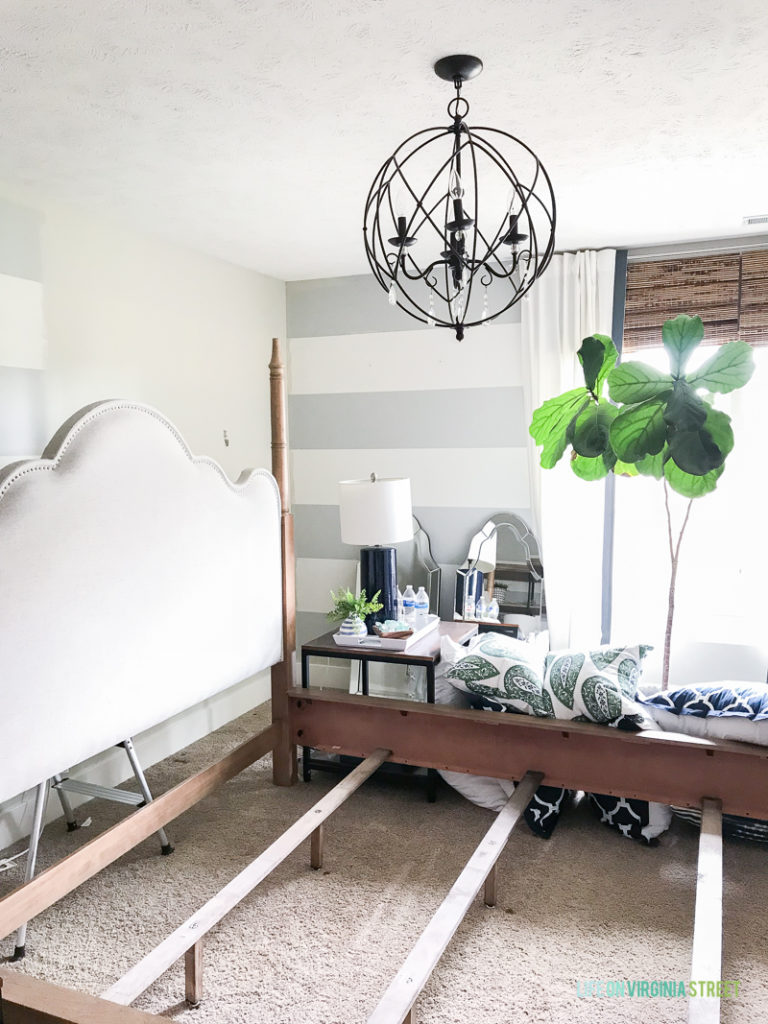
And now, the end results! I can’t believe how much larger the space feels without the stripes on the walls!
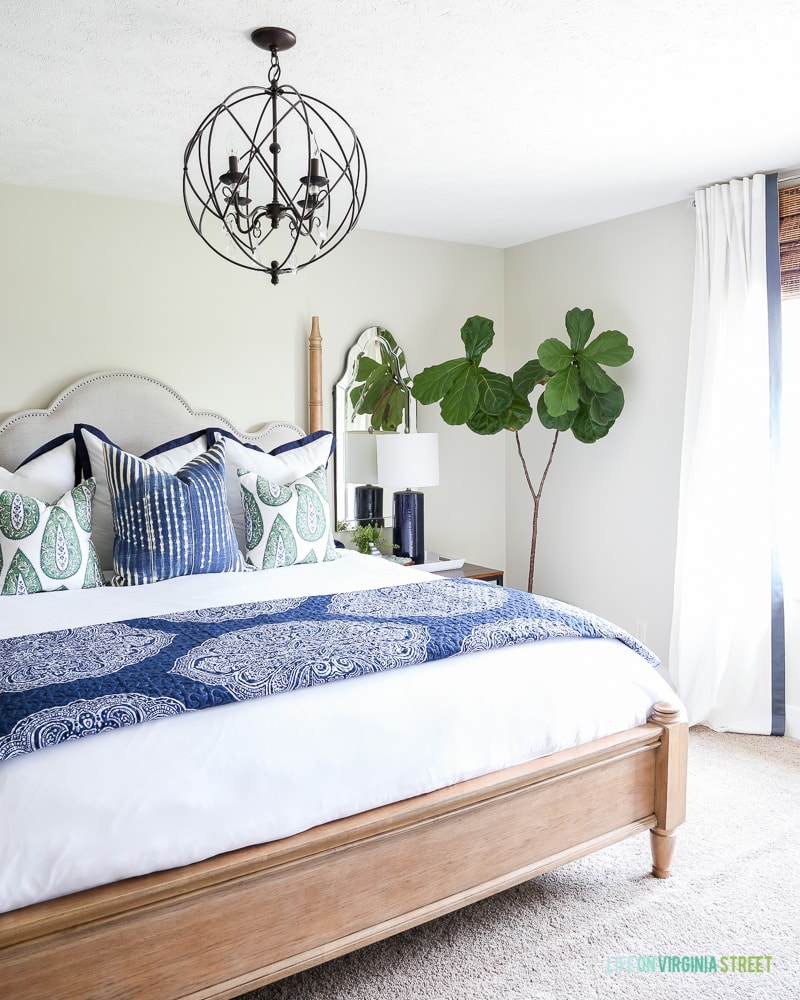
I couldn’t be happier with how the color turned out! It’s that perfect mix of warm and cool, depending upon the light. It really is the perfect neutral!
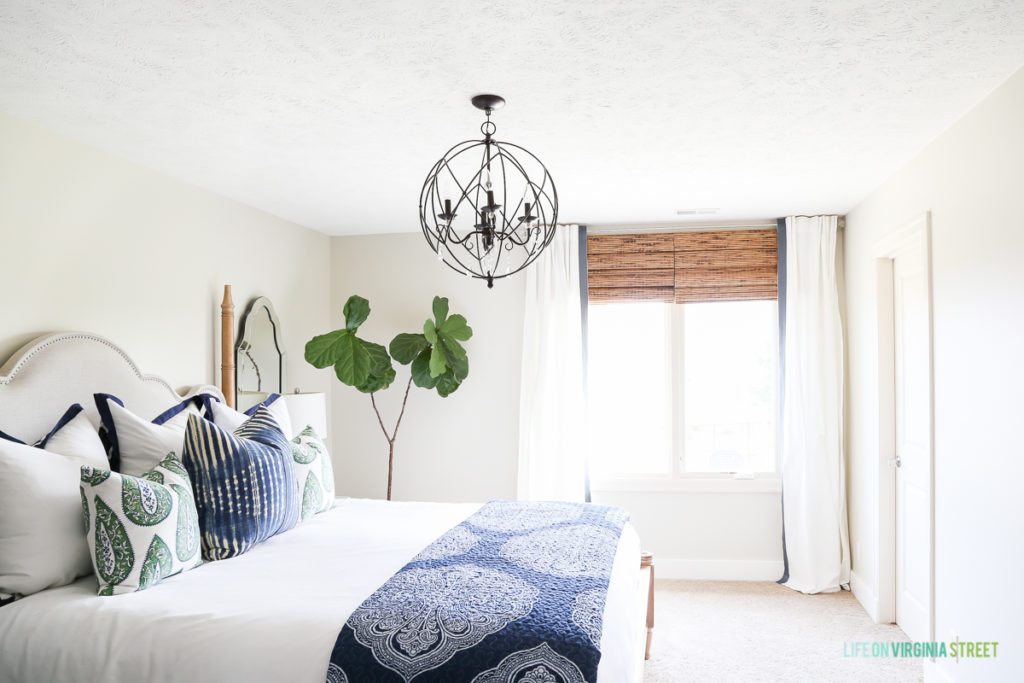
It’s safe to say, I feel like all that sanding was more than worth it! Existence provides the perfect neutral backdrop for any future updates I may make to this room. I’m so excited for all the decorating freedom I’ll have in this space now that the stripes are gone!
Over the coming weeks, I’m going to start looking a for a few easy textile updates. Now that I can start using striped fabric in this room, there’s probably a good chance some will be included. Stripes won’t be gone forever in this space!
Thank you to Dutch Boy Paints for collaborating with me on this space and for inspiring me to paint over these stripes!
If you would like to follow along on more of my home decor, DIY, lifestyle, travel and other posts, I’d love to have you follow me on any of the following:
This is a great tutorial and timely, as I also have outgrown painted stripes in my own house.
Can you tell me–did you use 180 grit sandpaper with the electric sander as well?
I really like your navy quilt that you have folded at the foot of the bed. I was wondering where it was purchased.
Thanks so much…Kay Cable
Thank you so much! You can buy it here: https://rstyle.me/n/daiyqp75re
Love both the before and after! And your bed!! Do you have a source?
Thank you! The bed is from Hayneedle. Here’s the direct affiliate link: http://rstyle.me/n/ct2aif75re. Thanks!
Looks wonderful!
I am always amazed at what paint can do. This is such a beautiful color and amazing transformation!
What is the source of that lovely bed?
I got it from Hayneedle. Here’s the direct affiliate link: http://rstyle.me/n/ct2aif75re. Thanks!
I love the navy throw at the end of your bed – can you tell me where it is from?
Thank you! I got it at Hayneedle but they no longer carry it. You can also get it here: https://rstyle.me/n/cwf4is75re.
Hi! Do you recall the size cases of the green, blue and white paisley pillows? What do you do with them when you’ve moved on to others? Sell them by chance? Or the white with Navy trim?
They are 20″ squares. I actually use the same forms for all of mine and basically just cycle the covers. So, I hang them all up in a closet to use again in different areas. You’ll start to see them in other rooms over time. I hope that helps!
Yep…we made the huge mistake of trying to paint over brick red, black and gold stripes in our sons bedroom…disaster!!! We actually had to take drywall compound and fill the area out, sand, fill, sand, fill, sand and paint paint paint…wish we would have sanded first.🙄
I see another person asked before but I don’t see your response…did you use 180 grit on the electric sander?
Yes, I used 180 grit on mine 🙂
I just want to know where you got the blue throw from!
Thank you for posting this tutorial. I”be been contemplating painting gray and white horizontal stripes in our master bathroom. After reading that it would be necessary to sand each stripe when the time comes to remove them, I’m having second thoughts. Also, our walls are textured so the stripes might not work as well as I hoped.
Really enjoyed this post! Informative, thoughtful, and nicely presented — great job.