I made some additional progress in the mudroom this weekend, and I feel like it now visually is starting to come together {even though I still have a lot to finish}. I was able to complete all of the caulking, nail filling and priming so it definitely feels like progress. We also hung the new light! I have to say, it is a total stunner and larger than I expected {which makes it look even pricier}. So impressed with the look for how affordable it was!
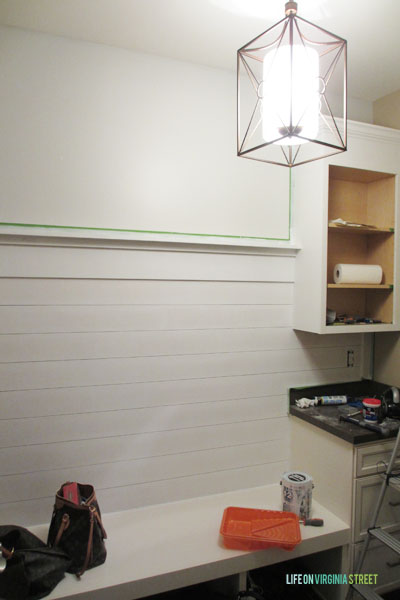
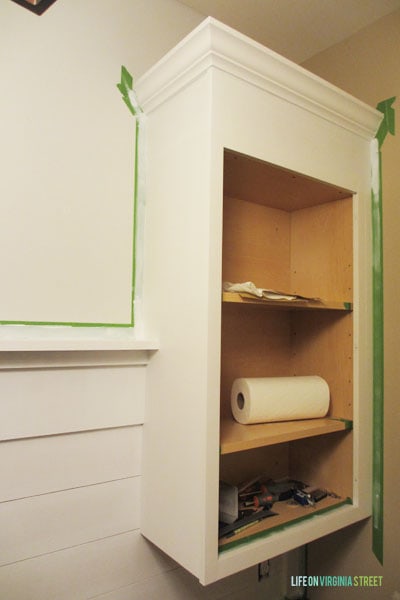
It has certainly helped adding the additional 100 watts of light and to remove the weird shadows the bead chandelier was causing. If you look closely, you’ll also notice how the extended cabinet will look. Now that it is all primed it doesn’t look so odd with the different wood finishes and you can finally start to get an idea of how it will look once painted.
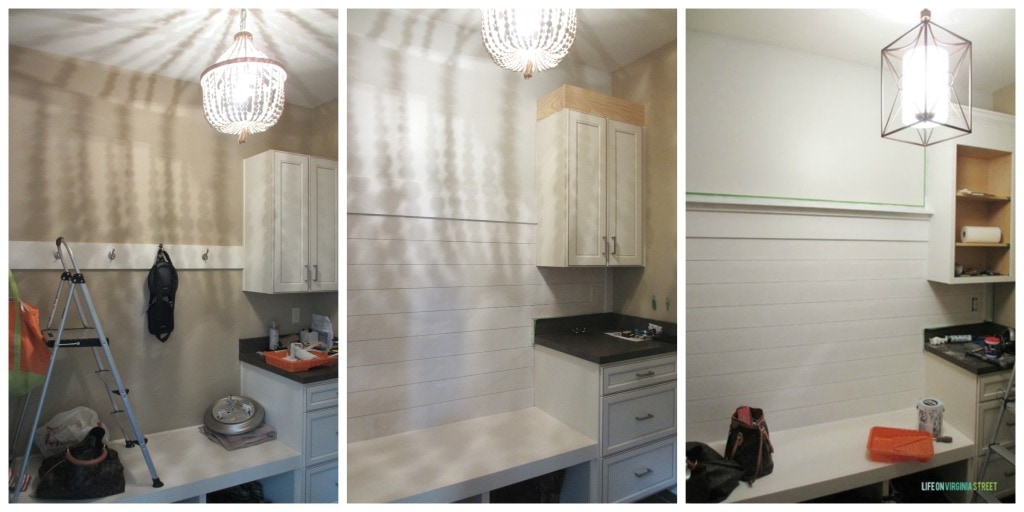
Here’s a fun comparison of how far we’ve come in very little time. The original original mudroom had a boob light but the angles were off so this still gives you a good idea.
If you haven’t previously been following along, you can see we removed the existing hook rack {it was too low}, added a new thicker piece, added planking to the walls, added a shelf and trim piece to the top of the hook rack, extended the cabinet and added crown molding to the top and I’ve slowly started to prime it all to prep it for some fresh, white paint {no more dingy cream colored cabinets}. I need to start priming the bench and lower cabinets as well. I also need to paint the remaining three walls in the room so they aren’t that flat, fleshy tone that was previously there. We’ve also updated the light fixture {twice}.
I’m hoping with another good weekend or two, we should be able to fully wrap this space up! It has been a fun project for us to work on but we have some other projects in mind we want to move along to, so we’re hoping to wrap it up soon!
If you would like to follow along on more of my home decor, DIY, lifestyle and other posts, I’d love to have you follow me on any of the following:
Pinterest / Instagram / Facebook / Twitter / Bloglovin’ / Google+
disclosure: affiliate link used
it is looking great! i love the new light!
Love the new light too
Love the new light and you are so right, much better than the beaded one. Everything is looking fabulous.
Add me to the list of loving the new light. I love how bright it is. Can you please tell me how many watts your light is? I so need to brighten up our laundry/mudroom. Zero natural light. One of those boob lights came with the house, but I need a flush mount light as I think a hanging one with 8 ft. ceiling would get hit for when we do carry taller things in from the garage. We are always working on something around here.
It takes 3 60 watt bulbs for a total of 180. The beaded chandelier we had before only took 2 40 watt bulbs. Hope that helps!
LOVE the new light! Such great lighting in there now…so bright. And with the paneling and fresh white walls it is stunning!!
How tall are your ceilings? Your light fixture is pretty, but TALL!
Our ceilings are nine feet. I think the light is around 22″ or 24″ so we still have about seven feet of clearance. I love big lights 🙂
I was so excited to see your light fixture on IG since I had bought the same one and hadnt hung it yet. Now it’s up and I love it! Gotta love overstock! And hands down its a much brighter light in your room than the beaded one.
I agree! It looks even better in person in my opinion. Glad you are loving it too 🙂
It looks beautiful!! Thank you also for showing the beaded light. I have been searching for the perfect light for above the stairs and I have always looked for the beaded chandelier. The shadows would have driven me crazy. I love this light. The whole room looks great.
Can I ask where you found the thicker hook rack? Love your entire house!
Thank you! The hooks are actually from Lowe’s!
Looks great! What trim pieces did you use to create the shelf?
Thanks! We just used a 1″x4″ piece of wood 🙂