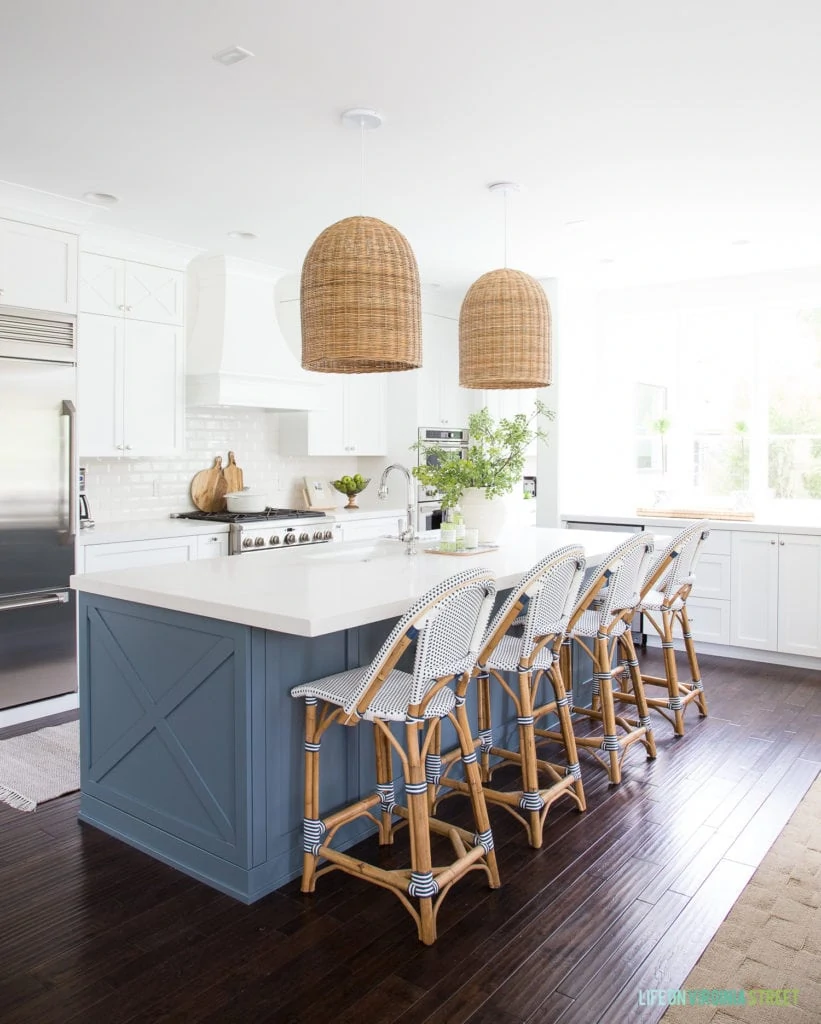
Sharing all the answers to our coastal kitchen remodel FAQs along with additional photos!
Thank you again for all of your comments and questions related to our coastal kitchen reveal last week! Today I wanted to circle back and answer some of the questions that came up most frequently, as well as share a few additional kitchen images that were requested.
As you may know, the bulk of our kitchen renovation was wrapped mid-July. However, we still have little odds and ends that need to be wrapped up, and with that, we’ve had trades people here weekly since we started in mid-June. But, for the most part, we’ve been able to really “live” in the space for about a month, which helps answer the great questions that have come up so far.
This post contains affiliate links for your shopping convenience. Click here to read my full disclosure policy.
KITCHEN SOURCES: Pendant Lights | Barstools | Runner | Similar Vase | Faux Greenery | Similar Wood Serving Board | White Dutch Oven | Sunday Suppers Cookbook | Similar Cookbook Holder | Fruit Basket | Beveled White Subway Tile
Kitchen Remodel FAQs
Following are details to all the questions I received in regards to our coastal kitchen remodel! All measurements below are approximate, but should be within about 1/4″.
Q: How tall are your ceilings?
Our ceilings on our main level are 9′.
Q: What are the dimensions of your kitchen?
Our kitchen is rather wide, but not very deep and is very close to our living room. The room is 22’4″ wide and 13′ deep.
Q: What are the dimensions of your island?
The footprint of the island (around the base) measures approximately 38.5″ x 112″. The countertop on the island is 50″ x 113.5″. We made the island as big as possible without having to use more than one slab of quartz. So the measurements perfectly accommodated one full slab with a 2″ mitered edge allowance.
Q: What are the dimensions of your pantry?
The room itself measures 90″ deep and 64″ wide.
Q: What is the cabinet depth in your pantry?
The pantry is not a large room, as outlined above. Therefore, the cabinets had to be made smaller than standard depth in all areas. The broom closet cabinets are 22″ deep, the base cabinets are 20″ deep, and the upper cabinets are 12″ deep.
Q: How high did you hang your lights over the island?
After reading tips on the Studio McGee website, we have 31.25″ between the base of the light fixtures and the top of the countertop. I believe the exact advice was to hang them between 30-32″ apart. Since our light fixtures are opaque with the baskets, we wanted to have them on the higher end of the measurement so they don’t break up eye contact or conversation around the kitchen island.
Q: How are you liking the one-level island?
This was a total game changer in making the space feel much larger and more open! It has also required us to clean the countertops nightly (no more junk corner!) which has turned out to be a great thing! The only complaint here is that every time we turn on the faucet it sprays on the counter (whereas before, the second tier must have blocked a lot of the spray). Not really an issue, but just something to note that we didn’t think about previously!
Q: Can you give more information on the windows you had installed?
The windows are the Pella 450 Series. The large window in the kitchen is actually three separate windows that Pella then makes into one. The overall dimensions are 60″ x 70″. Pella offers quite a few customization options if you look at that line. So, we were able to match our existing exterior windows (in the bronze finish) and then leave the interior side raw would so we could paint it white to match our other windows. The pantry window is similar, and measures 36″x36″.
Q: Can you give a review on your new appliances?
We’ve only had the appliances for about a month now, so at this point, I don’t feel comfortable giving a review on them. This can be something I do down the road though if there is interest! Our initial impression is that we’re very happy with them. We’re still adjusting to a counter-depth fridge though!
Q: Did you have any issues with flooring since you already had existing hardwood floors?
One of the main reasons we didn’t change the footprint of the kitchen much is because of the flooring issue. The hardwoods we have cover most of the main floor and it really wasn’t an option to replace them. Our home was built just over ten years ago, and while the builder and prior owners did leave the leftover flooring, it wasn’t much more than enough for a few small patch jobs. Unfortunately we don’t know the brand and very likely, it isn’t made any longer regardless. You can read more about how we had to fix the floor around the island here. Because we added two appliances that weren’t already there (the full range – which was previously just a cooktop, and the beverage center), we actually had to just add MDF boards underneath them.
Q: Why did you opt to replace your cooktop stove with a full range?
I’ve always loved the look of large ranges, but the real reason for this change is so that we could add the microwave to the built-in oven wall. Our prior microwave was just on a random shelf that jutted out from the cabinets (dorm room style) where the big window now sits. We talked about moving it to the island or pantry, but ultimately, we decided neither location was ideal for how we use our kitchen. The best option was to put it on the double oven wall. The microwave is also a convection oven, but we mostly anticipate to only use it as a microwave. It has worked out perfectly for us in that location!
Q: Can you give more info on the cabinet paint & finish?
The cabinets were sprayed onsite at the cabinet makers, using M.L. Campbell MagnaMax Pigmented Lacquer. The lacquer was color-matched to Benjamin Moore Simpy White and Benjamin Moore Providence Blue.
Q: Can you give an approximate budget breakdown?
This one is tough! Although we got a cost breakdown for each “job”, Erica handled all payment and then invoiced me so I only had to pay her – which we loved! But the biggest issue is that items like the bill from the painter (who also did the trim and work outside of the kitchen) and carpenter (who did our windows and fireplace) just had one master bill. So, with that being said, the numbers below are approximate:
- Cabinets for Kitchen & Pantry + Range Hood: 28%
- Windows: 8%
- Countertop Fabrication: 11%
- Appliances: 32%
- Electrical, Plumbing, Tile Setting, Painters, Demo: 15%
- Cabinet Hardware, Sink, Faucet, Tile: 4%
- Miscellaneous Costs: 2%
Surprisingly, our appliances were the most expensive portion of the kitchen. The existing appliances were ten years old and we ultimately decided it didn’t make sense to build a new kitchen around appliances that could shell out at any time. However, we were able to sell our old double ovens and are keeping our old refrigerator and dishwasher for a rental house that needs to new appliances. The remainder were donated. Keep in mind, geographic pricing differences can vary drastically for all of the items listed above so it’s worth getting multiple bids if you’re looking to take on a similar project. If you have more specific questions on pricing, please feel free to message me privately!
Additional Picture Requests
I received several requests for additional pictures in specific areas. Be forewarned, these are not cute, styled pictures. Just real-life, cabinets open pictures!
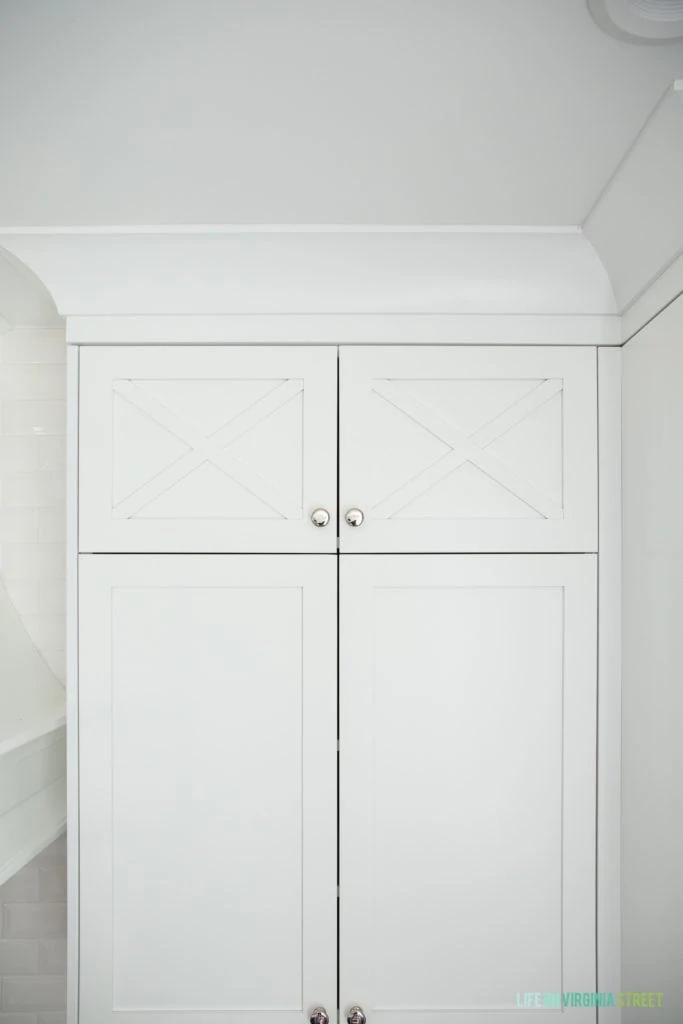
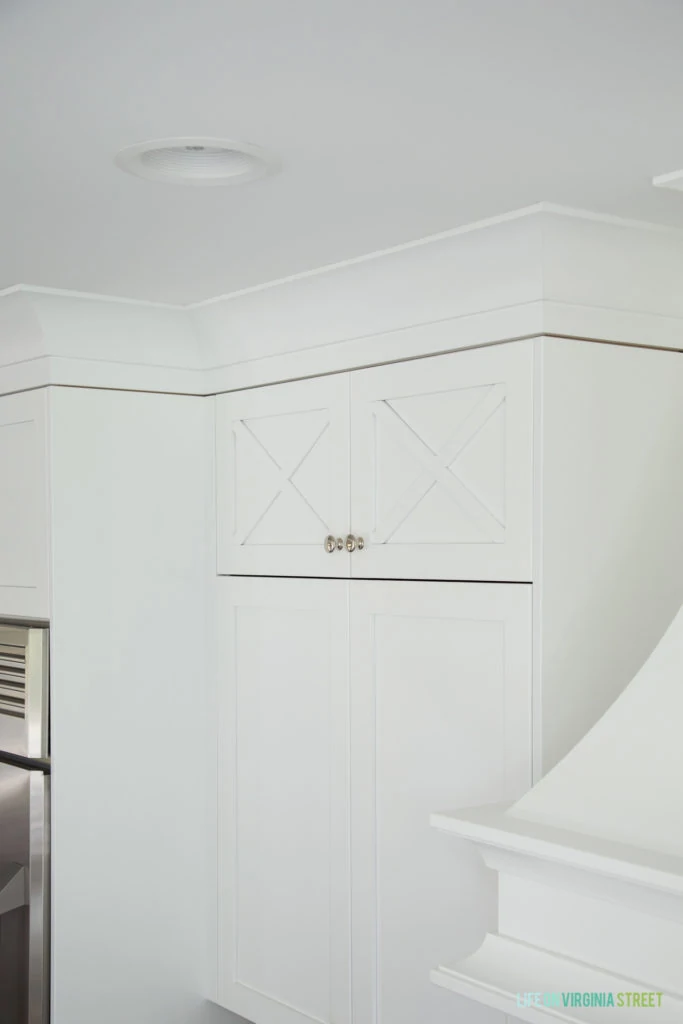
X-Detail On Upper Cabinets
In my wide room shots, the x-detail on the upper four cabinets around the range is hard to see unless you zoom in. But, as you can see below, the pattern mimics the one we have on each end of the island, just in a much smaller scale. I love the look of glass uppers with the x detail, but I knew I would never actually use them if they had a glass backing. So I asked the cabinet guys to do a solid back with the x detail and we love how it turned out!
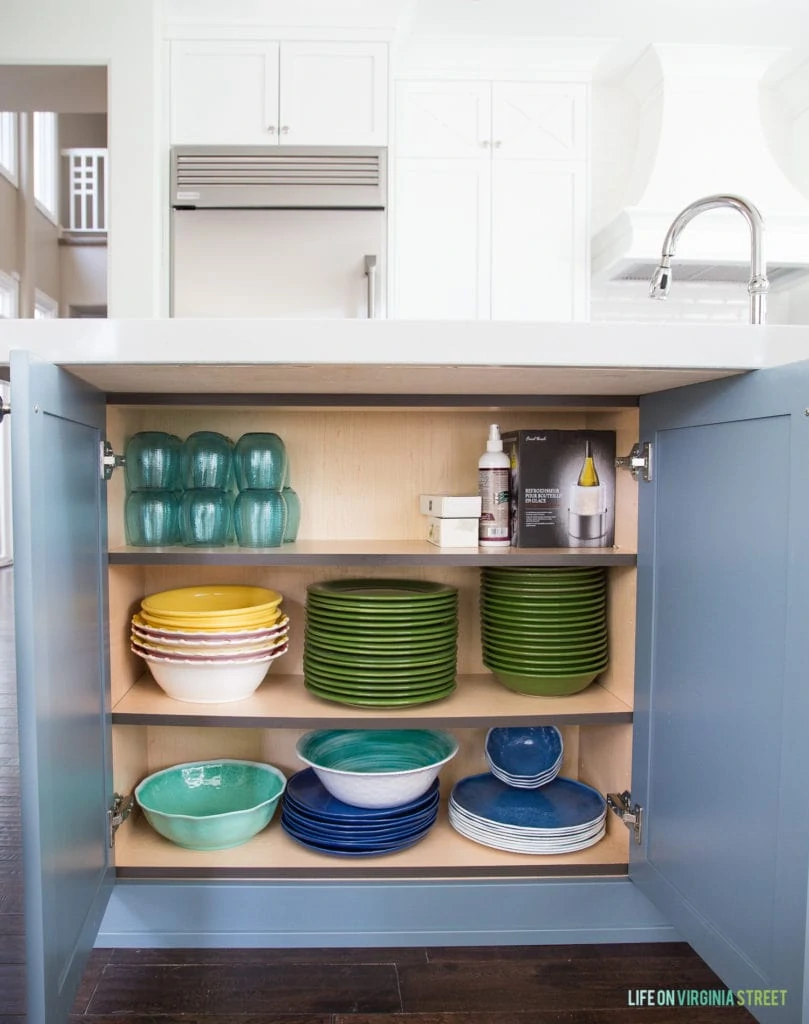
Cabinets on Back of Island
The cabinets on the back of the island are hard to photograph because they’re so close to the living room. I would have to basically move all the living room furniture to get a full shot of all of them together, so I figured you guys just really wanted to see how they function. There are a total of six doors, making three equal sections like this on the back of the island. One section has outdoor entertaining pieces (this one), the next has more formal entertaining pieces, and the last one has our recipe books, aprons, candles, etc.
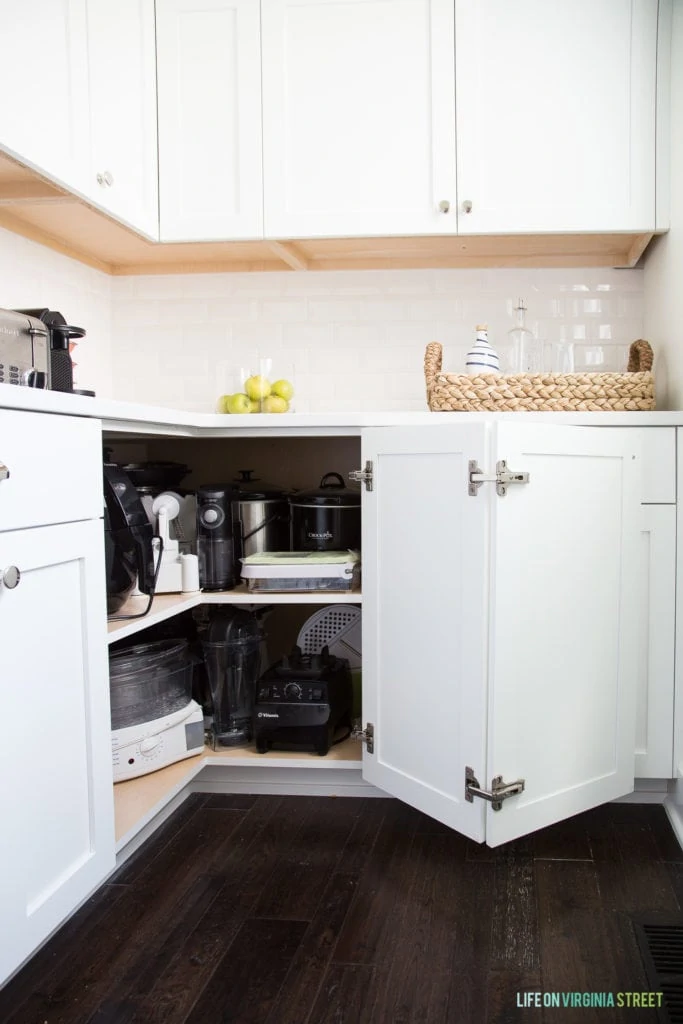
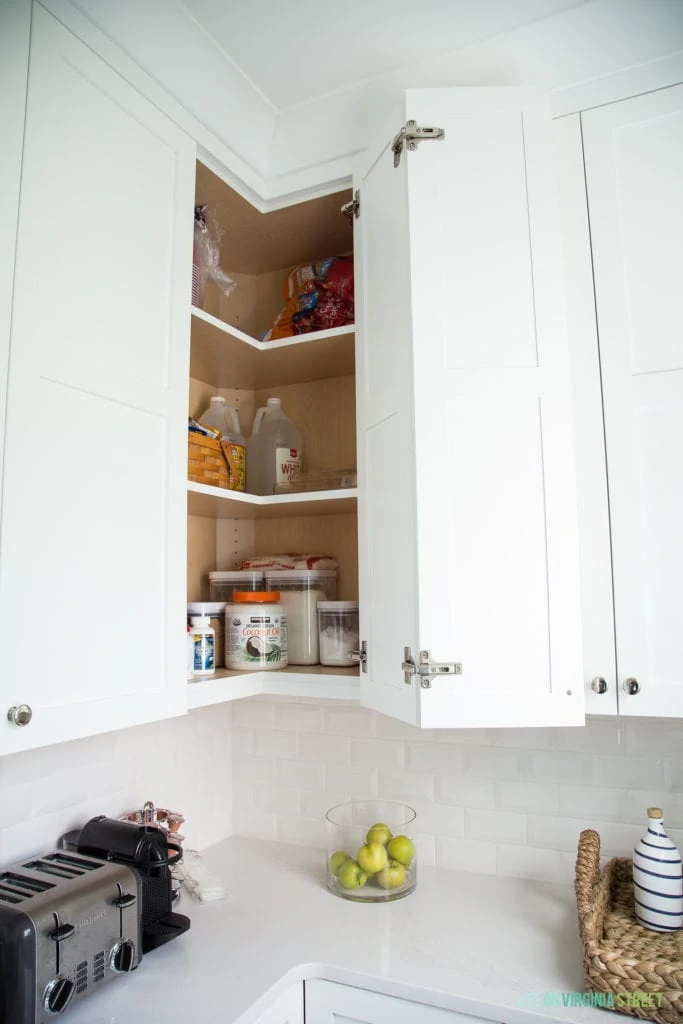
Corner Cabinets in Pantry
I got a lot of requests to see how the corner cabinets in the pantry open up (since it sounds many of you hate lazy susans as much as I do). This room is so hard to photograph, but hopefully you can get a better feel of how these cabinets work in the photos below.
We use the lower shelves to store crock-pots and other small appliances.
The uppers store our baking canisters and other large items that are hard to fit on the regular shelves.
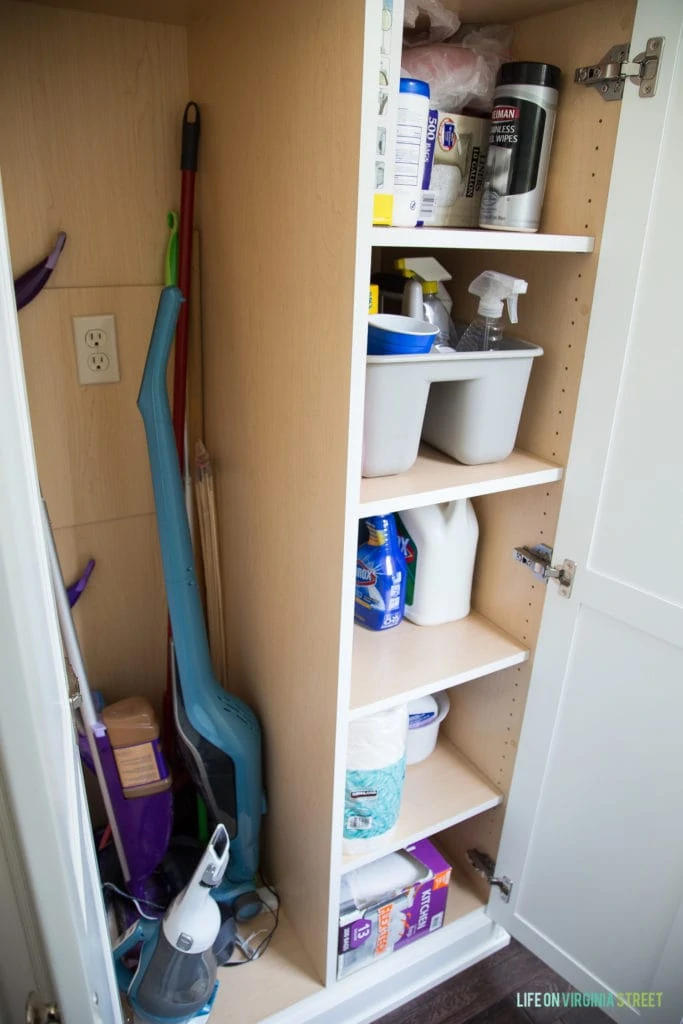
Pantry Cleaning Closet
This space is the perfect area to store our hardwood vacuum, mops, etc. The pantry previously had a washer/dryer hook-up (never used by us or the prior owners) so we had to leave the access panel for that. But, it also allowed us to have a plug in for our hand vac and hardwood vacuum. We then store all our cleaning supplies, extra paper towels, etc. on the other side (and up above).
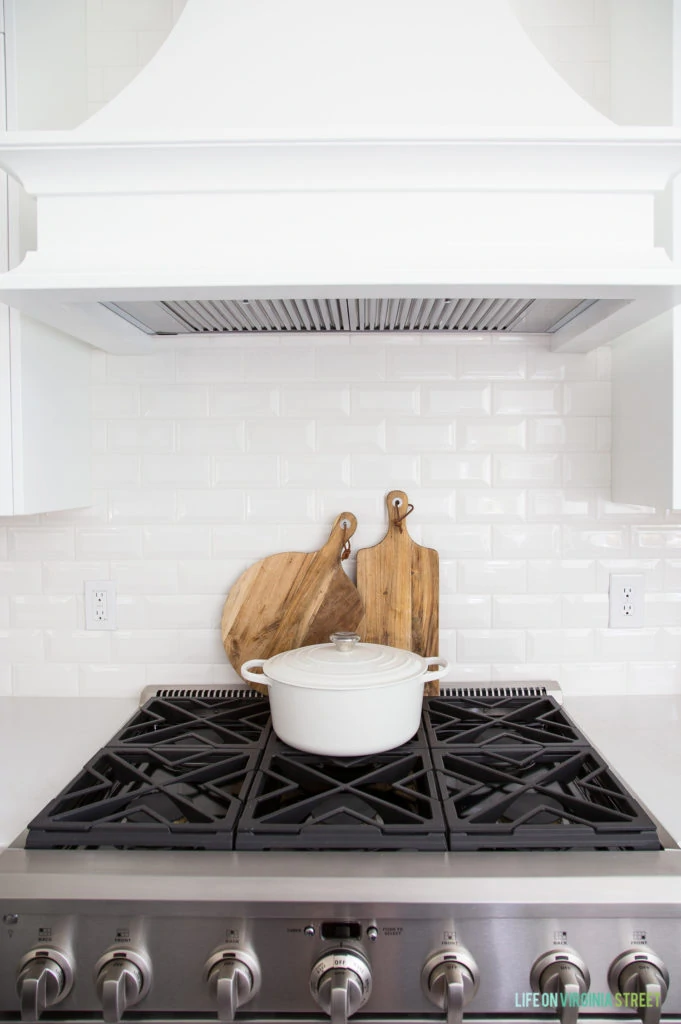
Range, Range Insert and Grout Details
Our range is 36″ wide and is duel fuel, meaning the burners are gas and the oven is electric. The range hood insert was fairly inexpensive, and came highly recommended by the sales guy at Nebraska Furniture Mart. For the price, he said you can’t beat it. Our hood does not vent to the outside so we had to add on the ventless recirculating charcoal kit. In terms of the grout, I don’t have the brand info because the tile guys just showed me a slab of colors and I pointed to one 😉 But, for those asking, it is a bright white (not gray) because I prefer little to no contrast. I also know it’s called a power grout and does not have to be sealed.
If I missed any other questions, please feel free to leave them in comments and I’ll get them added to this post. I hope you found all of this additional information helpful!
If you would like to follow along on more of my home decor, DIY, lifestyle, travel and other posts, I’d love to have you follow me on any of the following:
Pinterest | Instagram | Facebook | Twitter
disclosure: some affiliate links used

Beautiful! This is a great article for anyone planning a kitchen reno!
Beautiful! What widths are your walkways between the cabinets & the island (from counter to counter)? How do you feel about it?
I’m redoing a kitchen now and it’s stressing me out trying to decide if I should go smaller to accommodate a larger island! Thank you:)
Beautiful transformation in every area! I’m so happy to read the planning that went into it and view the final product and see how it met your needs. I was really curious about how the “lazy-susan-less” cabinets worked, too, and glad you showed those pics. I used the IKEA lazy-susan in my kitchen reno a couple of years ago, and my corner cabinet is deeper. So it does help me not shove stuff in the back and has held up very well so far.
What paint color is that you used on the island? Love love love it..
Thank you! It’s Benjamin Moore Providence Blue.
Hi Sarah
I really love the color of your kitchen Island. Is the color you used “Providence Blue” #1636 by Benjamin Moore or is it “Province Blue” # 2135-40 by Benjamin Moore ? Thank you!
It is Providence Blue 🙂
Hi! Thanks so much for all of the kitchen inspiration!
I’m curious after several months with your sink, if you are still 100% happy with it. We currently have a black Blanco double basin. When we get new white quartz, I am considering going with a single basin in a gray. I was nervous the white would look dirty. What do you think after several months? Thanks in advance!
We really do love it, but we have definitely been surprised at how much more work it is to keep it clean looking that our prior stainless steel sink was. If I had to do it over, I would likely still go with the white, but I’m pretty sure my husband would say “no way”.
What backsplash did you use? I am on the hunt for the perfect subway tile! Thank you!
We just got ours off the shelf at Lowe’s but they no longer carry the exact one. Sorry!
Lovely kitchen! A bit late to this post, but wondering is the 22’4″ length including the pantry – but not the dining space correct? Could you share the length of cabinetry from fridge to microwave/oven?
What countertop did you use?
It’s Caesarstone Calacatta Nuvo.
Beautiful! Do you mind sharing you wall paint color?
Thank you! It’s Benjamin Moore Simply White 🙂
Would you say your back splash tile is a true white or more off white or cream? I’m almost certain that this is the tile used in my home and am struggling to paint my cabinets because it isn’t a true bright white.
I’d love to know this too!!!! I’m struggling and my deadline is yesterday 😏😂😂
It’s a fairly true white, but definitely leans a bit warm. Our cabinets are Simply White (which has yellow undertones) and the backsplash definitely looks more white. Part of that however is because of the glossy finish reflecting more light than the cabinets. I hope that helps!
What color did you paint your walls next to your cabinets?
Hi! They are also Benjamin Moore Simply White but in an eggshell finish 🙂