Today I’m sharing a major house reveal that has been a long-time coming! For those of you that are new-ish to the blog, Kurtis and I own a real estate investment company. Which sounds way cooler than it is 😉 It’s a side hustle we started four or five years ago, and mostly involves a handful of long-term rental houses. Typically the homes we buy are fairly turnkey, but we got adventurous with this purchase and I’m sharing the results today.
We bought this particular house in the summer of 2018. The housing market in Omaha was super competitive and turnkey homes were only lasting a day or two on the market. We decided it may be “fun” to branch out and try a home that needed some love. I won’t go into the depths of our naivete, but we had grand illusions of rehabbing this property ourselves. However, after about six weeks of work, it was pretty clear we may never finish (given we both have full-time jobs and were just doing this in the evenings/weekends). So, we ultimately hired someone to handle the project for us and finish it all up.
The work wasn’t 100% finished until we were on our Mediterranean cruise last May, and then it was already rented by the time we got home. So, I was never able to get in the house to take final pictures. However, a few weeks ago, those tenants moved out and I was finally able to get some pictures! Granted, it had been lived in for a year at this point, but I wanted to share for all of you who followed the story and were waiting on a reveal. It only took an extra year 😉
We’re fairly certain the home was originally bought on auction. And then we bought it from someone that had started the demo and said they had “too many projects going on” and wanted to dump it. That should have been our first red flag. I won’t got into all the issues we found, but let’s just say there were a lot. And our renovation budget basically had to double fairly quickly. We always want to be proud of our properties and for them to be spaces we’d actually live in. With that being said, there were a lot of repairs we wouldn’t have necessarily had to make, but did for the health and safety of our tenants as well as our own peace of mind.
But, we’re so happy with how the house turned out! Since we’re in it for the long-term, we wanted to everything correctly the first time around. It was essentially gutted down to the studs in most rooms and completely remodeled. Although it isn’t necessarily “Instagram worthy” it’s a beautiful home, and is in the cutest neighborhood!
In regards to final finishes. The only source I have is the paint color (Sherwin Williams Agreeable Gray). I have used this color in every single investment property we have. It’s one that changes from gray to beige depending on time of day. It is such a perfect greige color. With all the other finishes, our contractor basically showed me a board of options from a line and I picked the color. So I don’t have brand info or anything. I was really ready to be done with this project at that point 😉 He picked all the light fixtures so they would fit within our (very limited) remaining budget. Since this is a rental house, I really try to pick finishes that appeal to the masses, and not necessarily what is “my” style.
Details on the house. The house was built in 1982 and when we bought it, it had 3 beds and 2 baths (and a random toilet in the basement). We were able to add a fourth bedroom and a bathroom in the basement. The house now has about 2300-ish finished square foortage.
So, let’s jump into all the before and after photos.
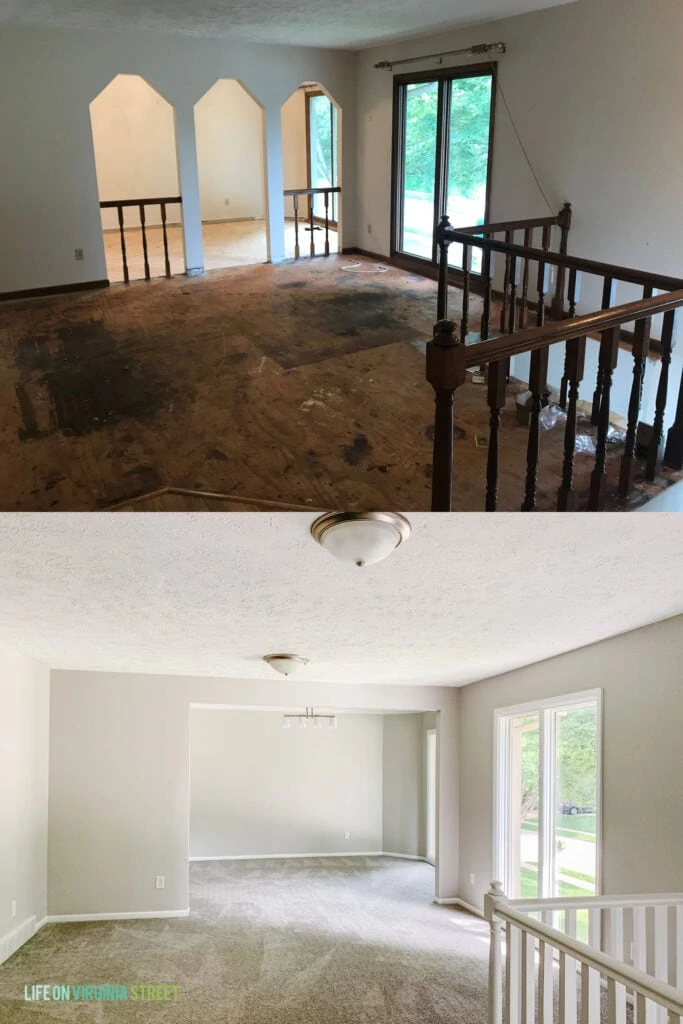
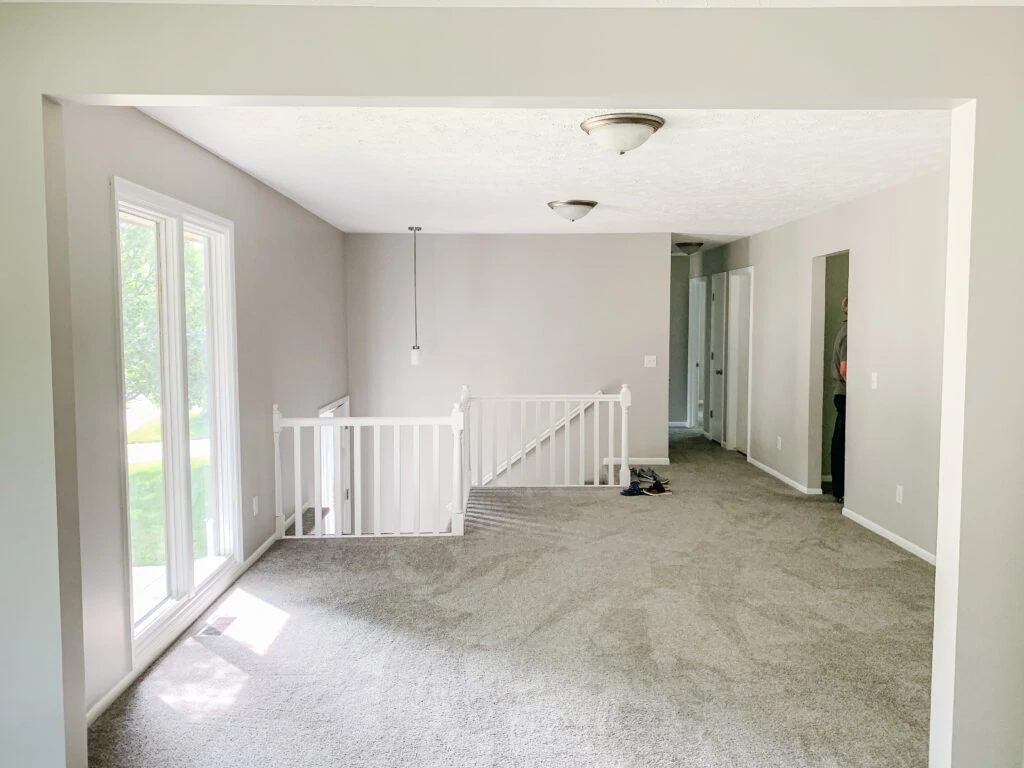
The first thing I requested be done was to get rid of all the unnecessary arches between the formal living area and the dining room. Kurtis and his dad actually tackled that project and it made such an immediate impact!
And here’s that same space but looking from the other direction.
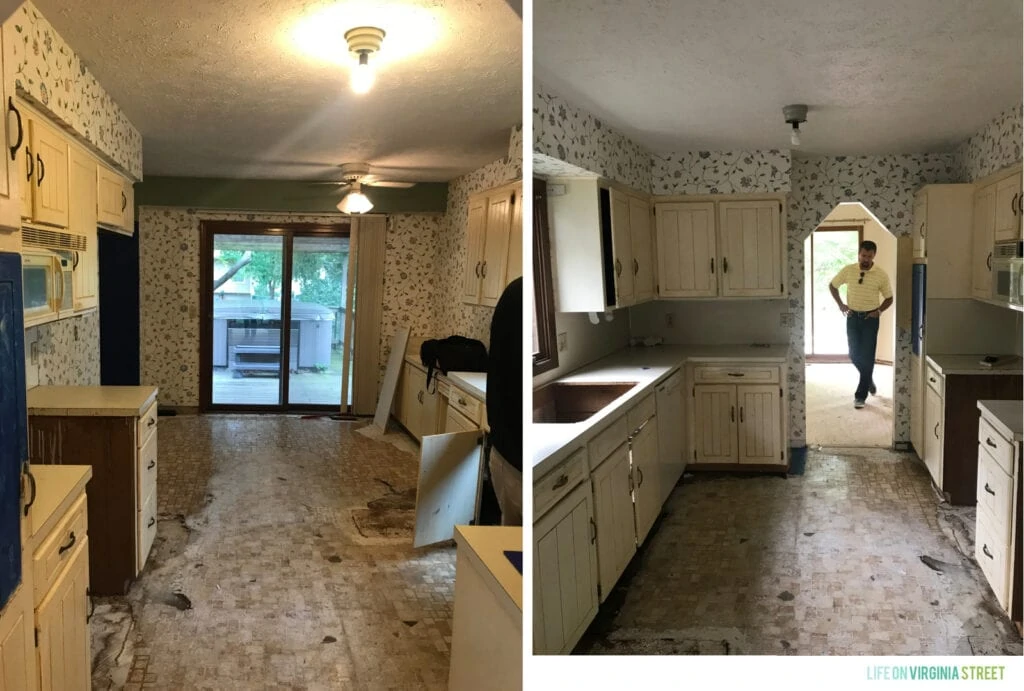
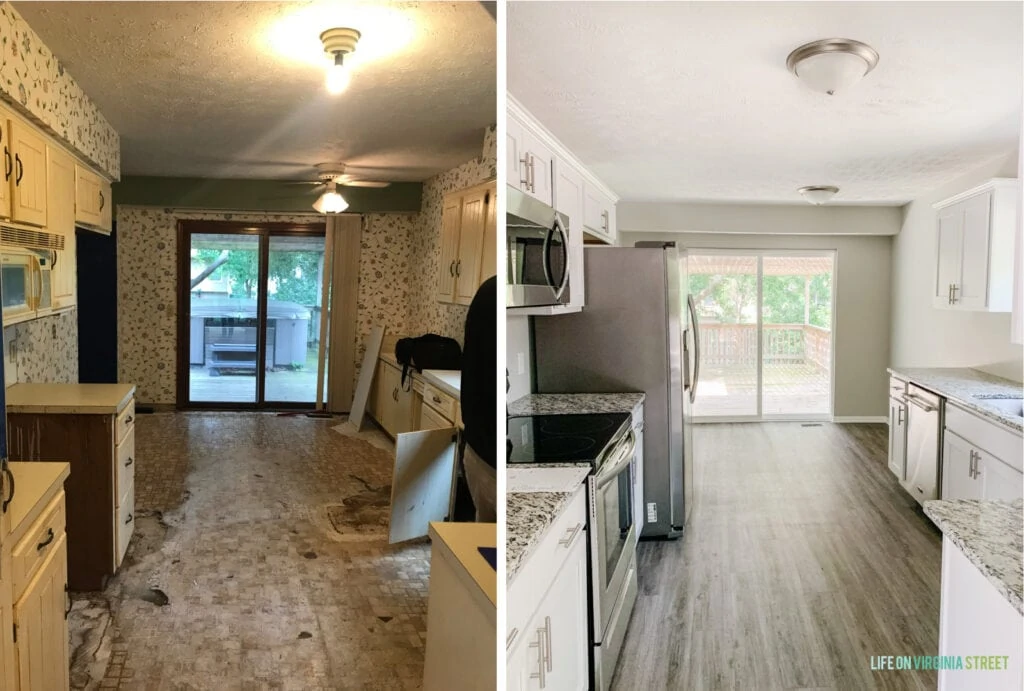
When we bought the house, the kitchen was the biggest concern. The water under the sink hadn’t fully been shut off, and there was a slow leak, causing all the flooring to swell and buckle. We later found it also impacted the subfloor so it all had to go. We even found some mushrooms growing under the sink. That was a fun day 😉
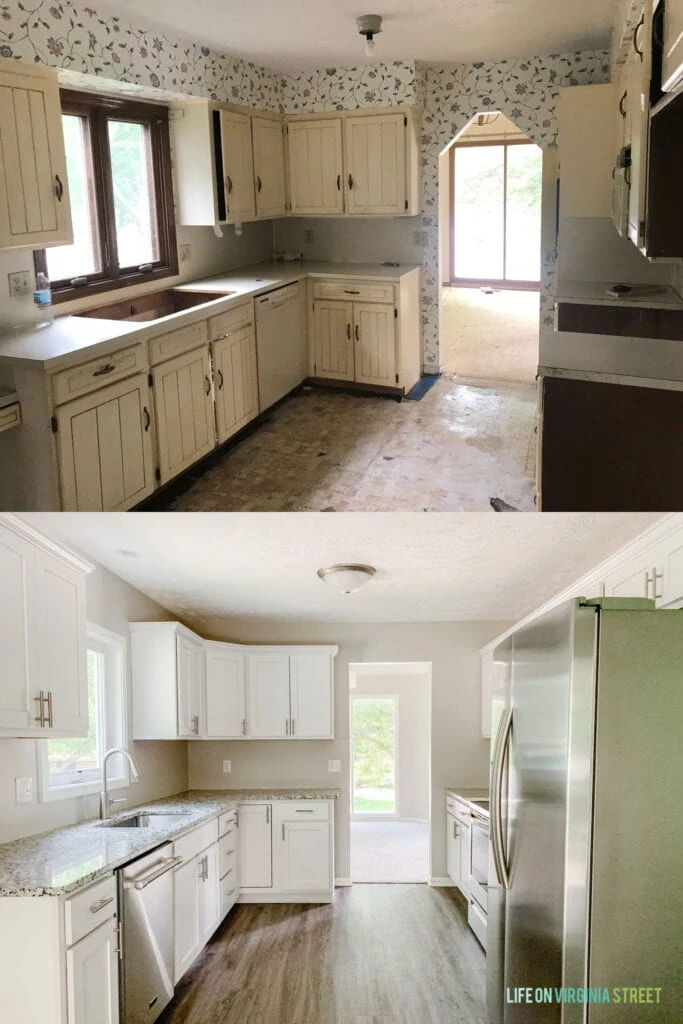
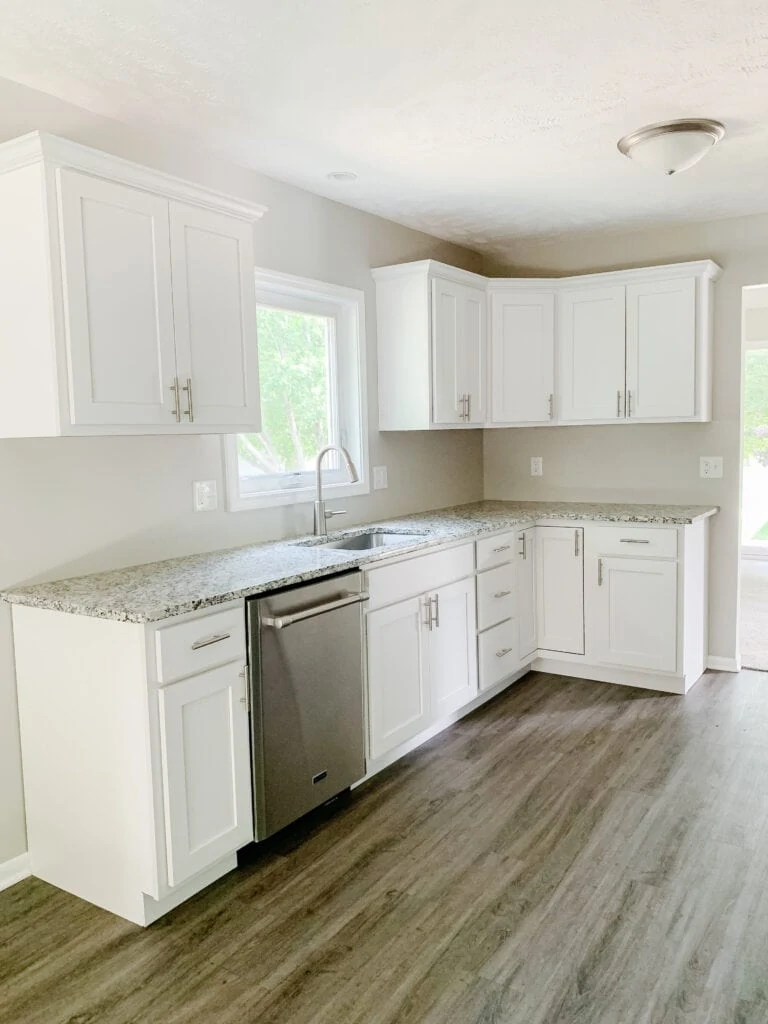
The kitchen is basically an entirely new room. This was one area we replaced the window (it was rotted), opened the archway, and tore everything out (including the subfloor). It’s such a bright and clean space now with the simple white shaker cabinets. We also used luxury plank vinyl on the floor. The fridge looks gigantic below, but it doesn’t feel quite so imposing in person!
The sliding door was also replaced and let’s so much great, filtered light into the kitchen and breakfast nook.
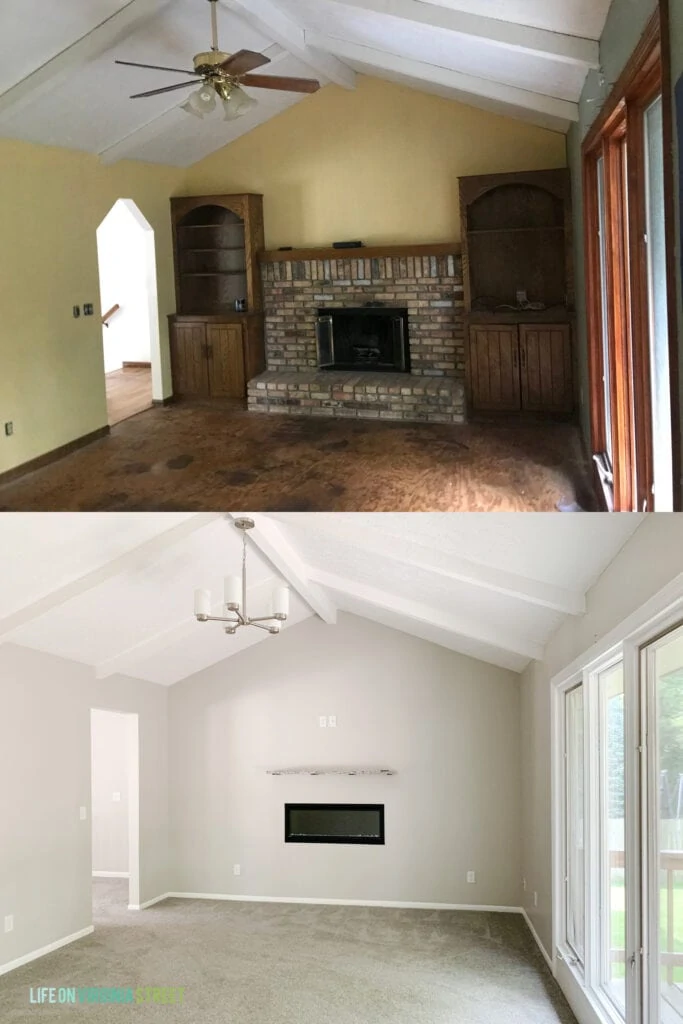
The family room had so much potential! We actually really wanted to keep the brick fireplace (and maybe paint it?) but our contractor recommended getting rid of the wood-burning fireplace entirely. In order to do that, the brick had to go. We went with an electric fireplace and basically had that whole wall dry-walled. We added a quartz “mantle” to block heat for a TV to go over the fireplace if the tenant chooses. We’ve found it’s much easier to have the boxes added than for tenants to try and rig their own solutions 😉
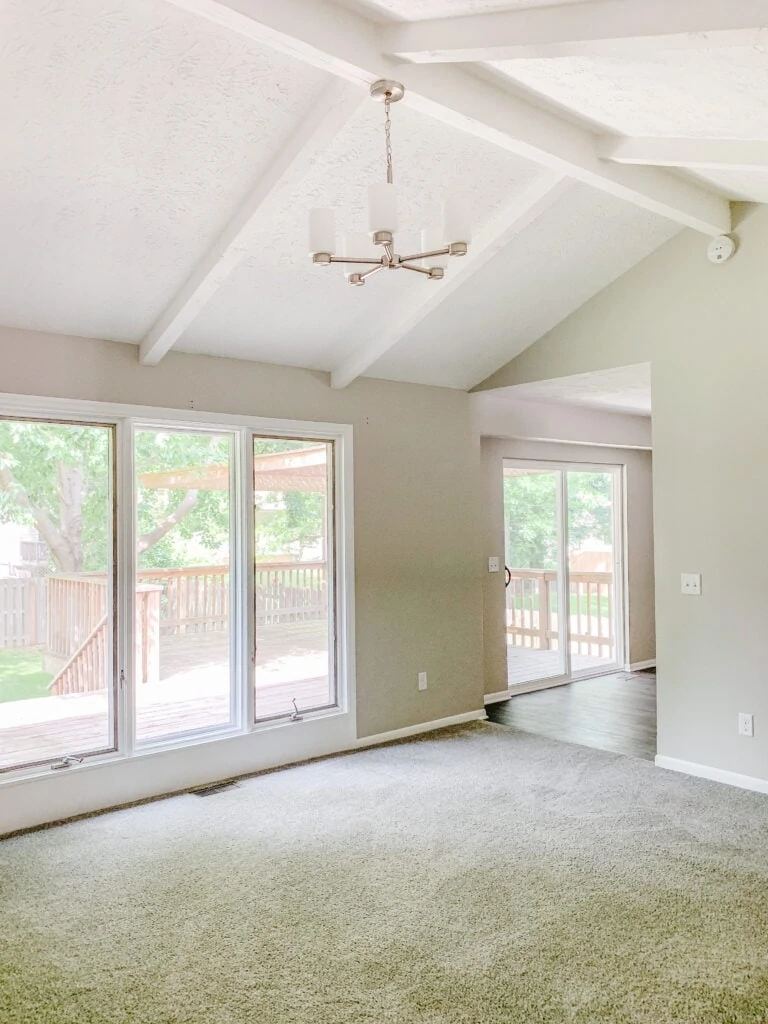
And as inefficient as the vaulted ceiling is, it’s one of my favorite features and makes this space feel so much more grand!
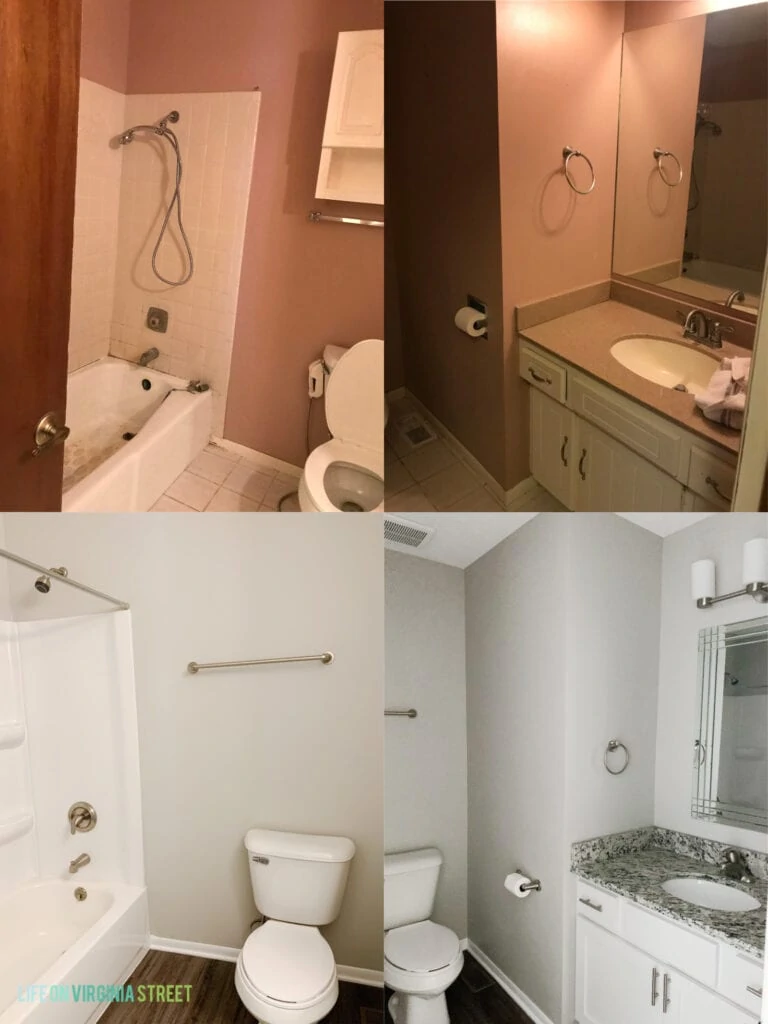
The main hallway bath essentially had to be fully gutted to. To keep everything consistent throughout, we did white shaker cabinets and the same quartz as the kitchen on the countertops.
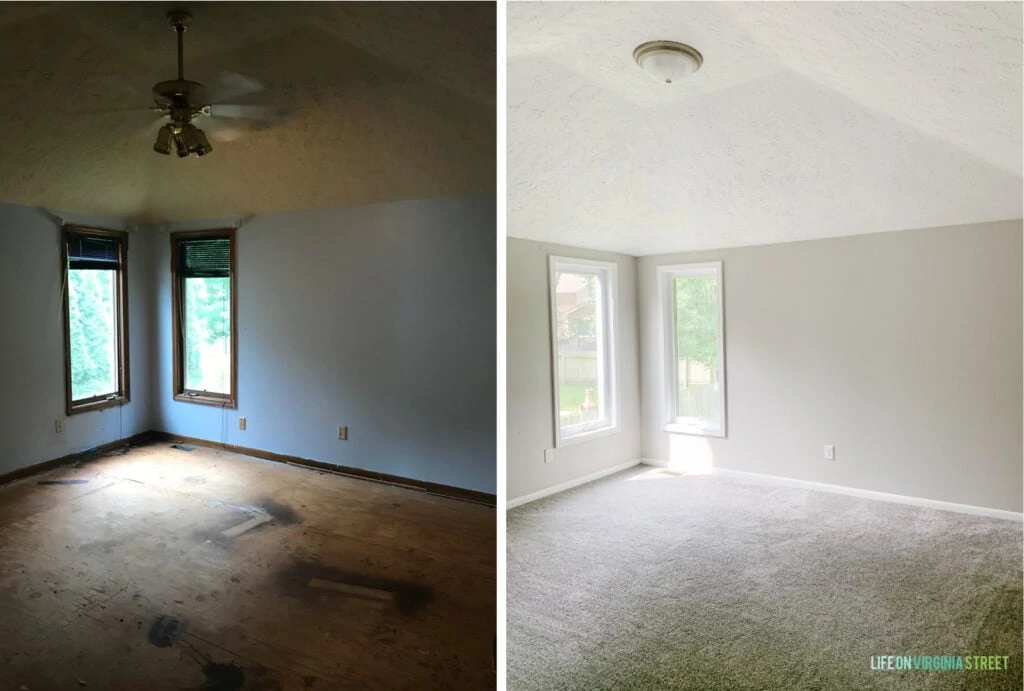
The master bedroom and bath are almost unrecognizable now! We also had to replace the windows here because they were also rotting and weren’t up to code (we needed them to be egress). The ceiling was painted dark yellow and the walls were blue, making it feel very dark (and dirty).
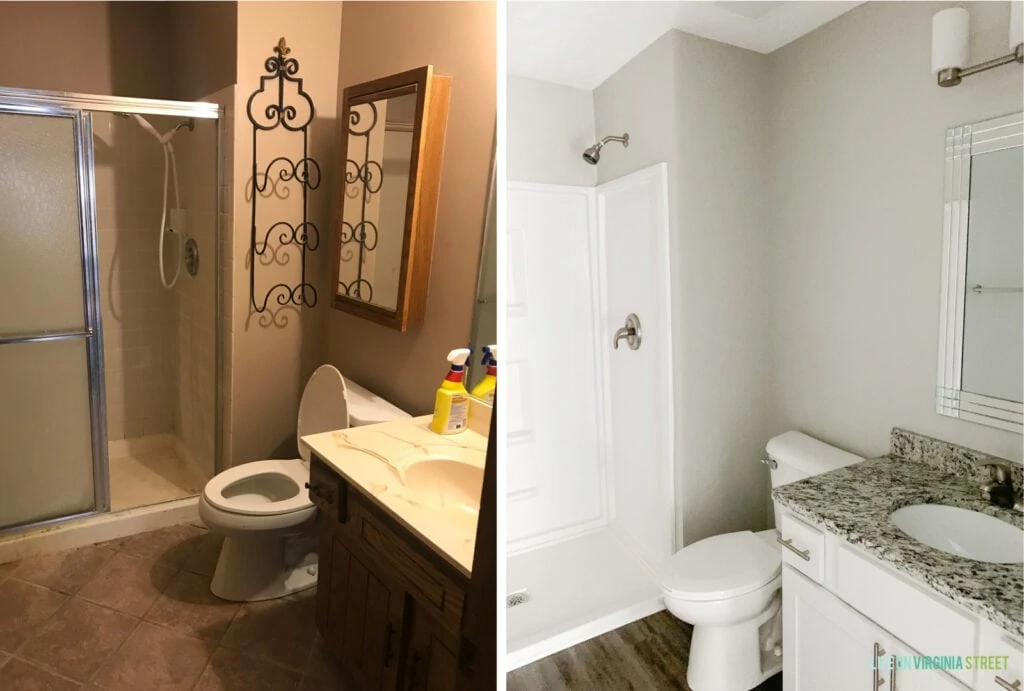
The master bath also needed to be fully gutted as it had gone into disrepair and the shower was leaking into the basement.
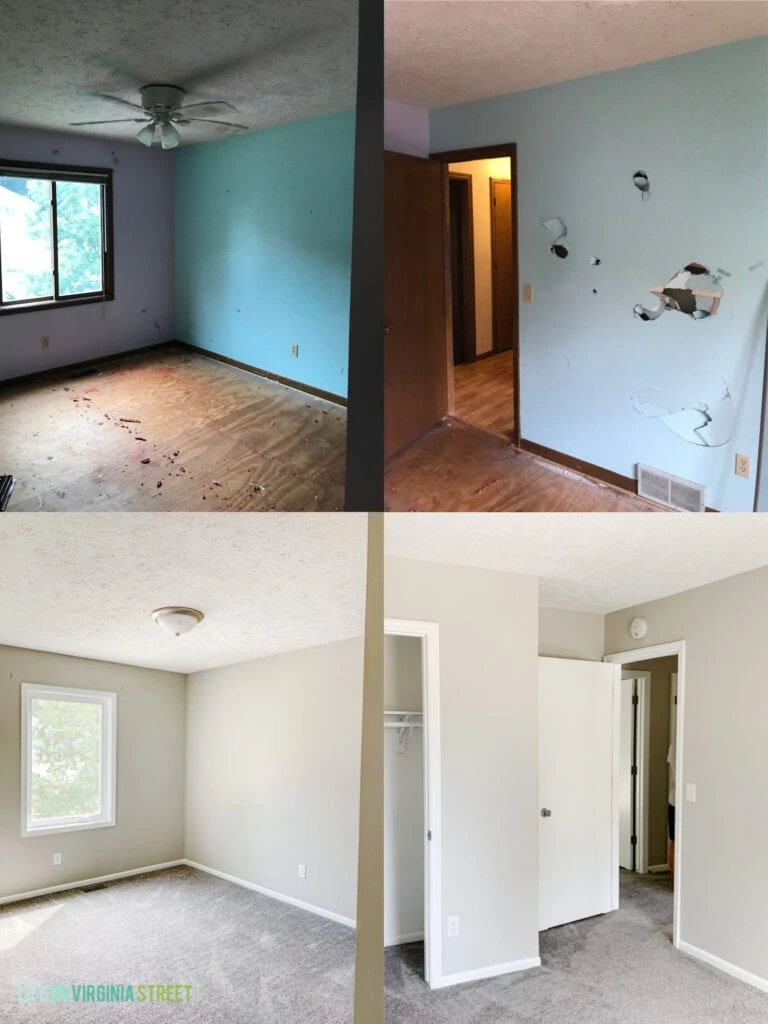
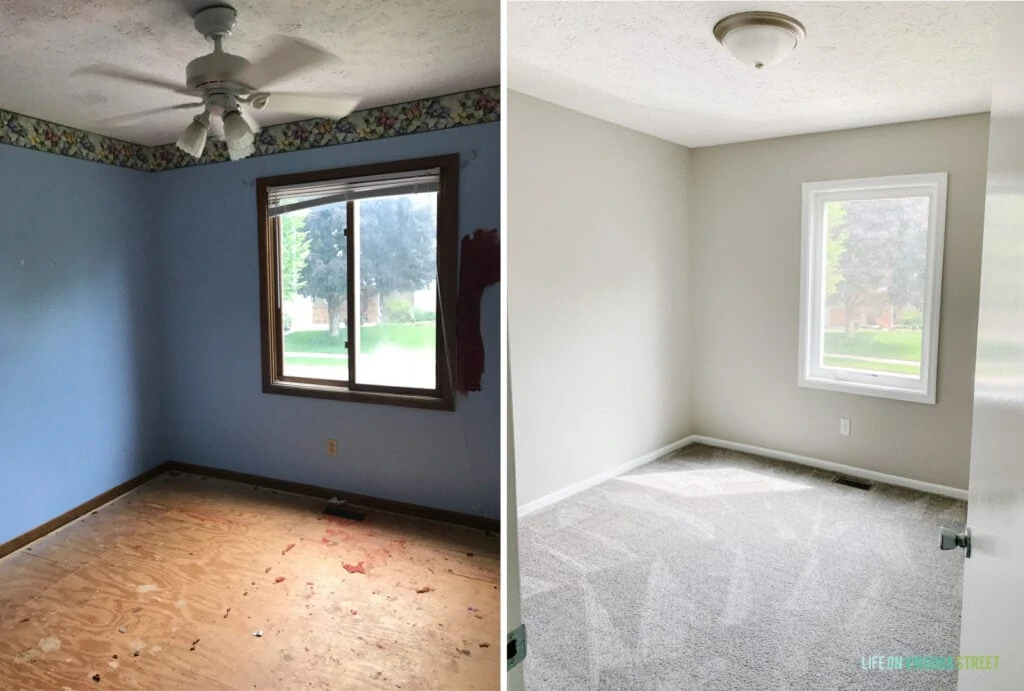
One of the rooms that scared me the most was this other bedroom. Holes were punched in the walls, there was something sprayed on the walls (it looked like blood but I think it was soda) and there were chunks of carpet pad everywhere. I got to pick those out on my hands and knees with pliers. Which is maybe another reason I hated this room 😉 But I love how it looks now! This also got a new egress window.
The neighboring bedroom was much less offensive, but had wallpaper that needed to go. It also got a new window and looks worlds better now!
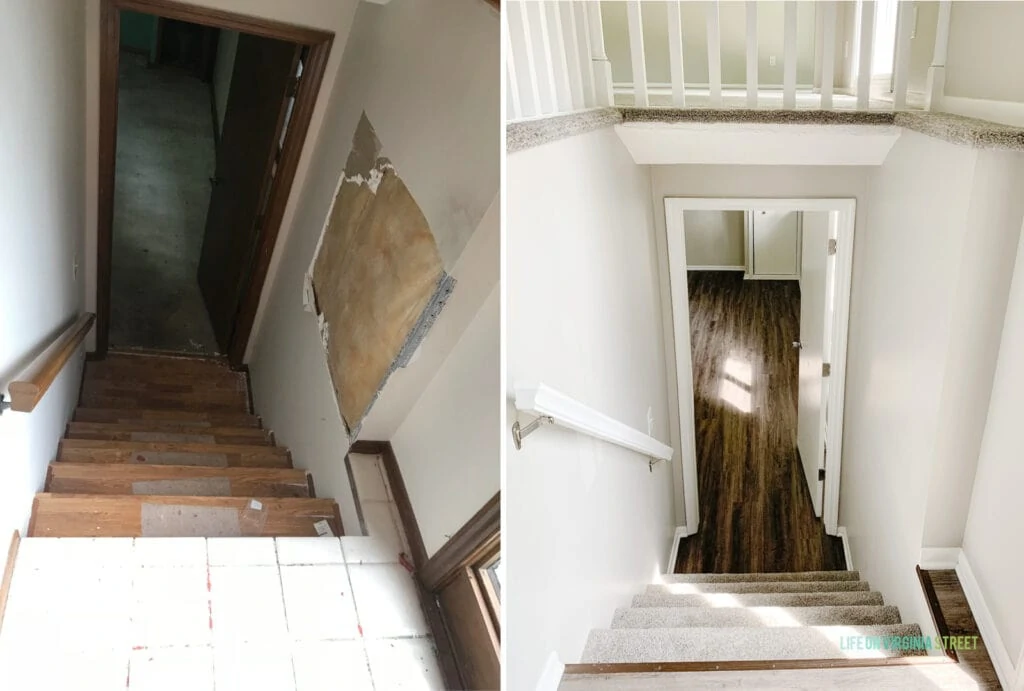
Let’s head down to the basement now. This wall initially had holes punched through it as well.
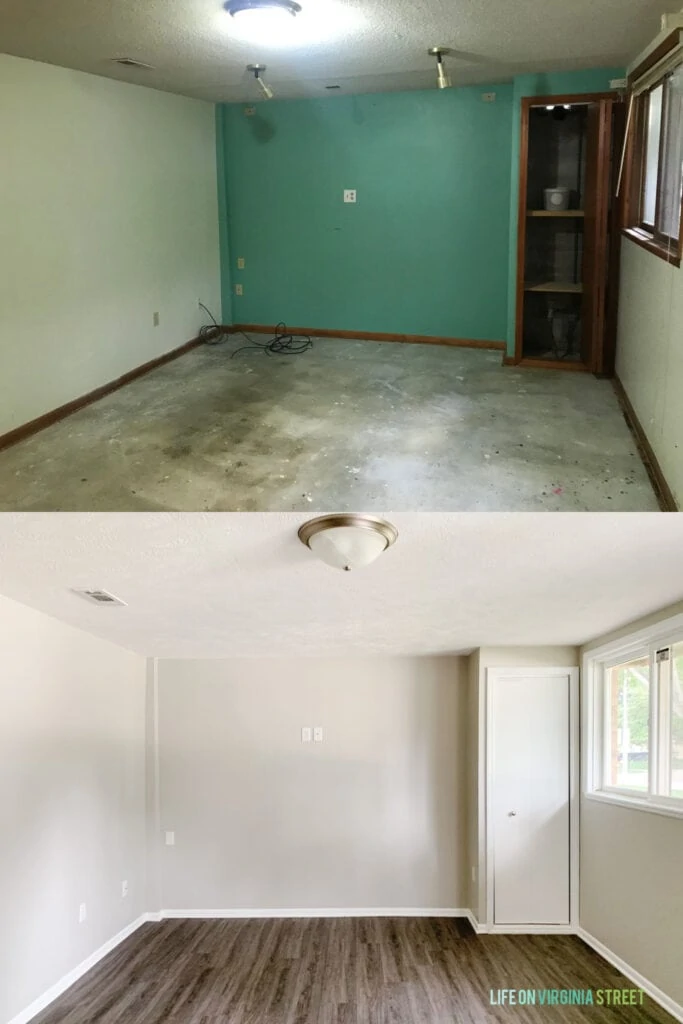
There is a nice little living area. We had to have all the popcorn ceilings scraped and then it was just mostly cosmetic.
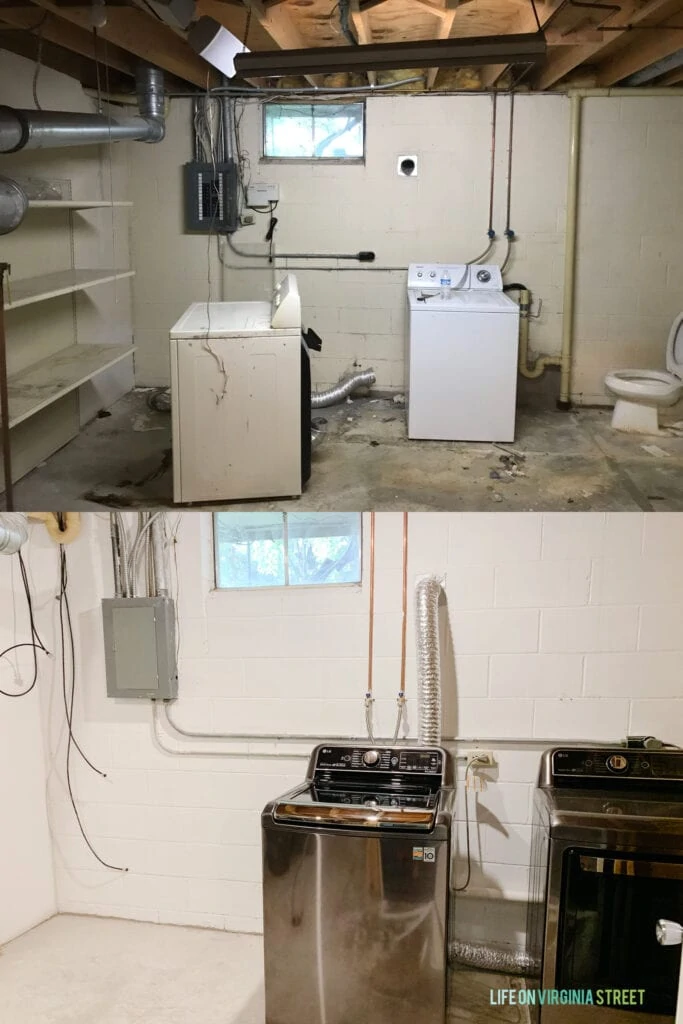
If you notice in the ‘before’ photo below, we had this creepy laundry area with a random toilet in the basement. Although it wasn’t in our initial plans, we decided to make a dedicated laundry space, and new basement bathroom and an extra bedroom (you’ll see that in a minute). It’s so hard to believe what fresh white paint, power-washed floors, and some really deep cleaning did for the space!
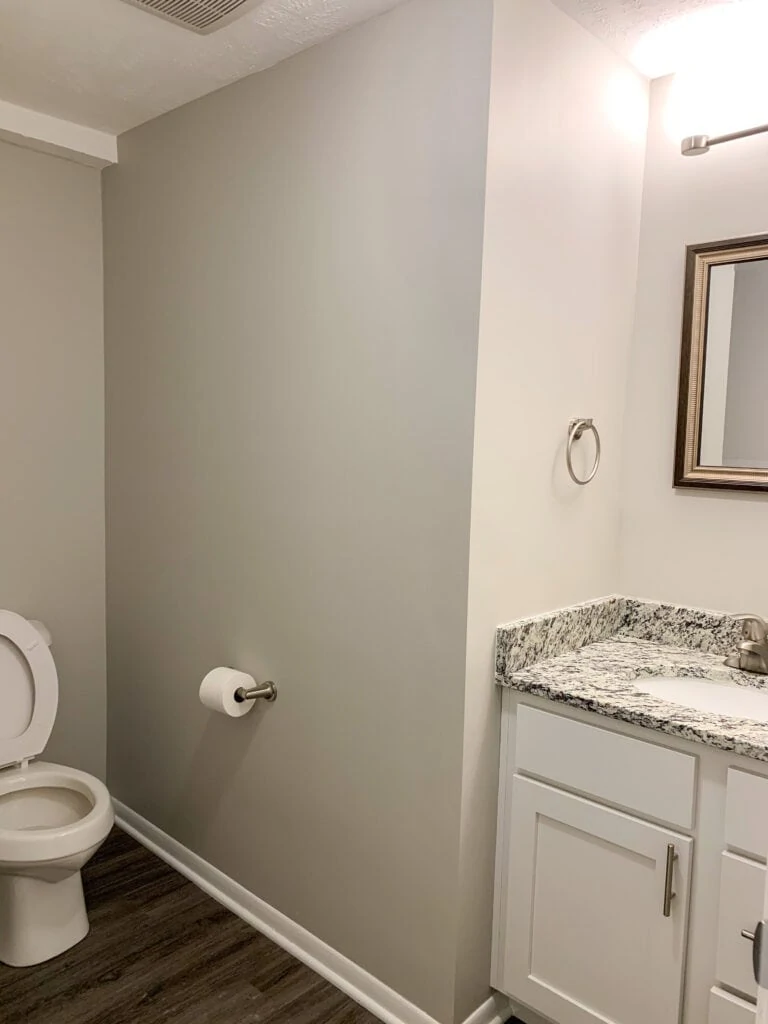
And here is the little bathroom we were able to create. Our contractor did an amazing job with this one. He perfectly planned the exact size so that none of the lines needed to be moved, and we still had a full bedroom/closet on the other side.
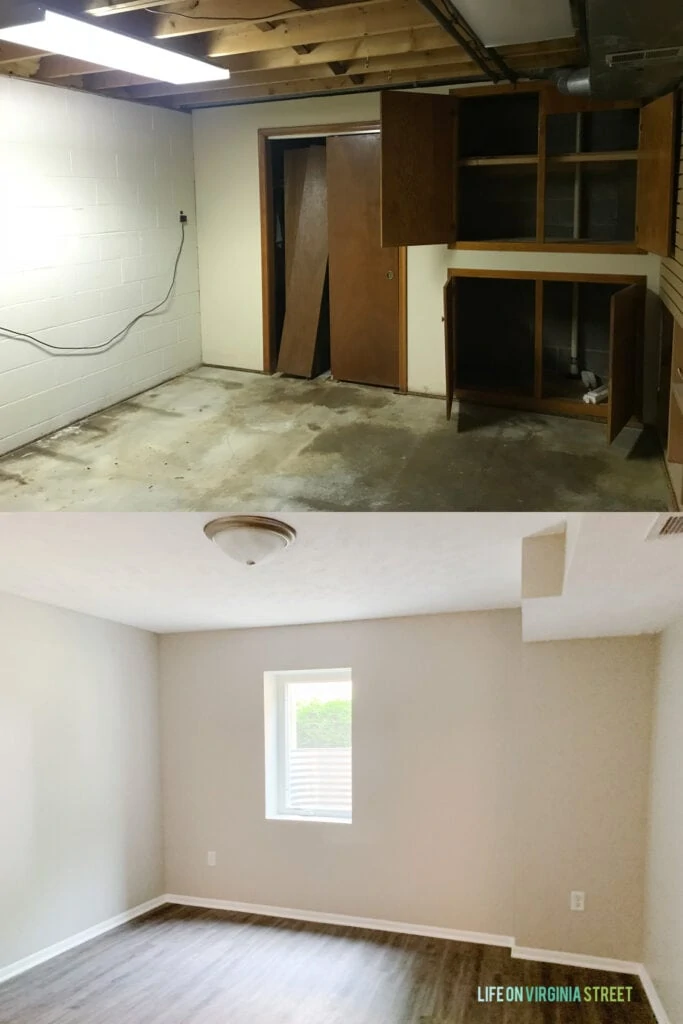
This next space is one of our favorite projects we decided to move forward with. There was this awkward room in the basement that was semi-adjoined to the laundry area/floating toilet. With the grade of the house, we quickly realized this would be an easy way to add a fourth bedroom into the basement! The room was actually super creepy initially and now it’s one of my favorites!
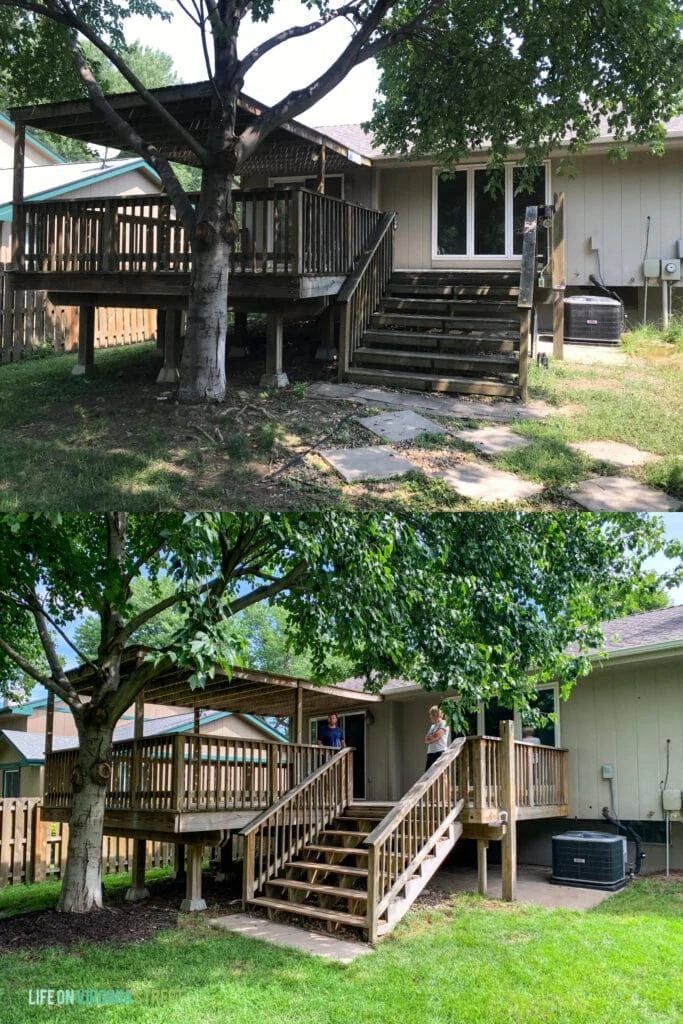
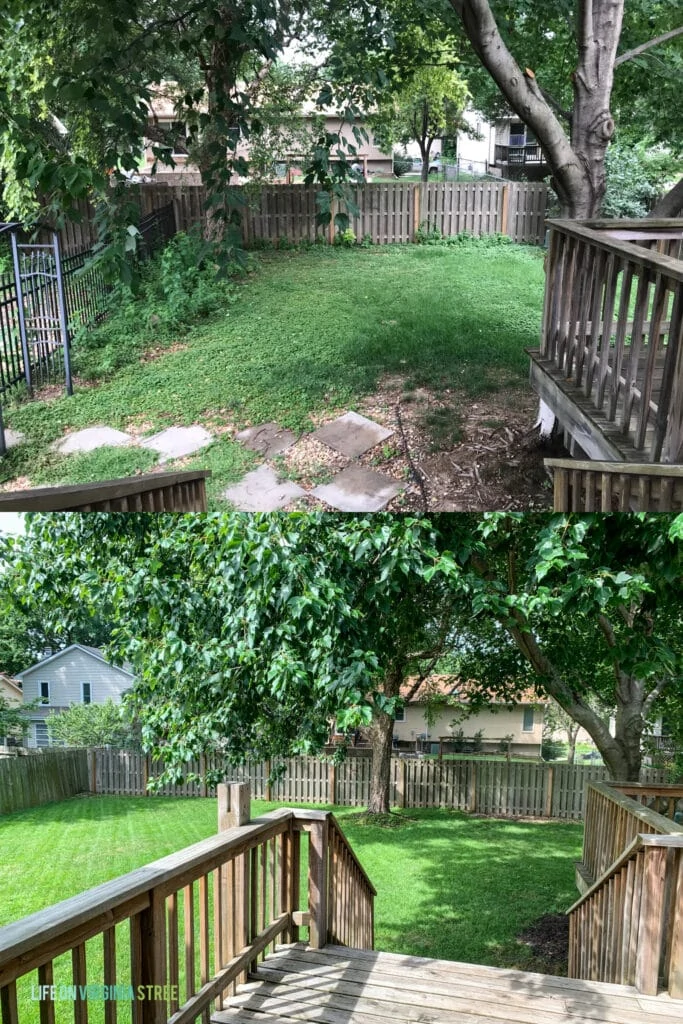
That concludes the inside of the house tour. But, don’t think it’s over yet! One of the things we learned about this project is we were really only equipped to handle either the interior or exterior issues. Luckily, this house had both! Haha. Remember when I said this house will be our biggest learning project ever?! This initial view doesn’t look terrible. Just a lot of clean-up that was required.
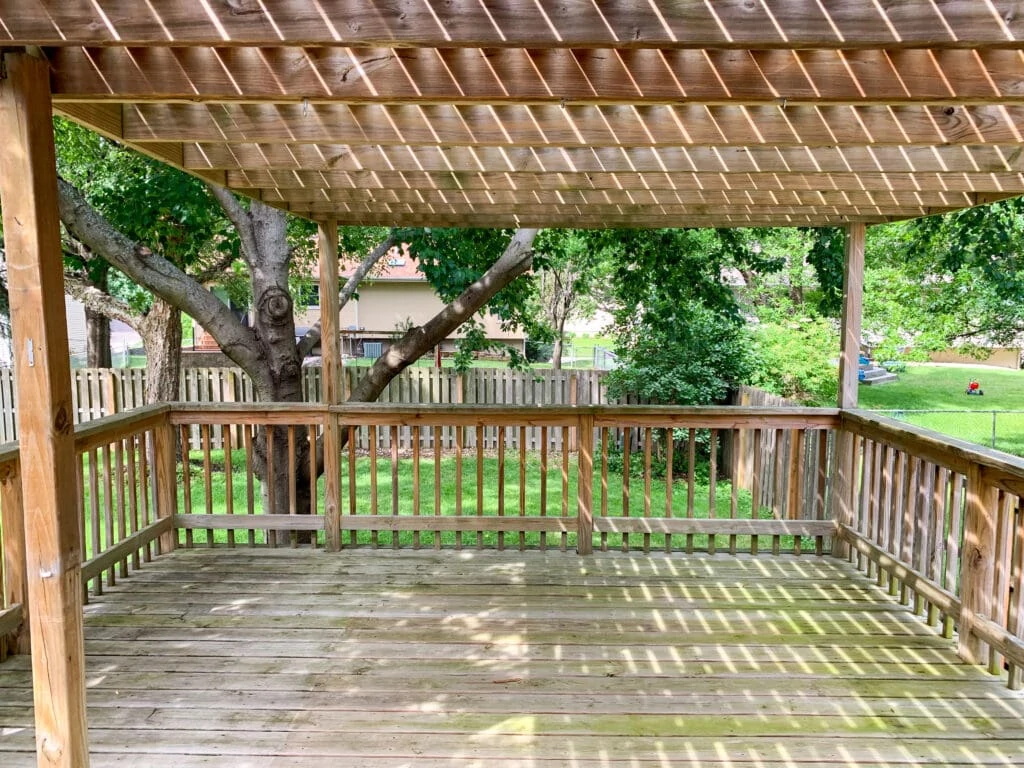
We actually really like the deck (now that the hot tub is gone). We need to get it power-washed and stained soon.
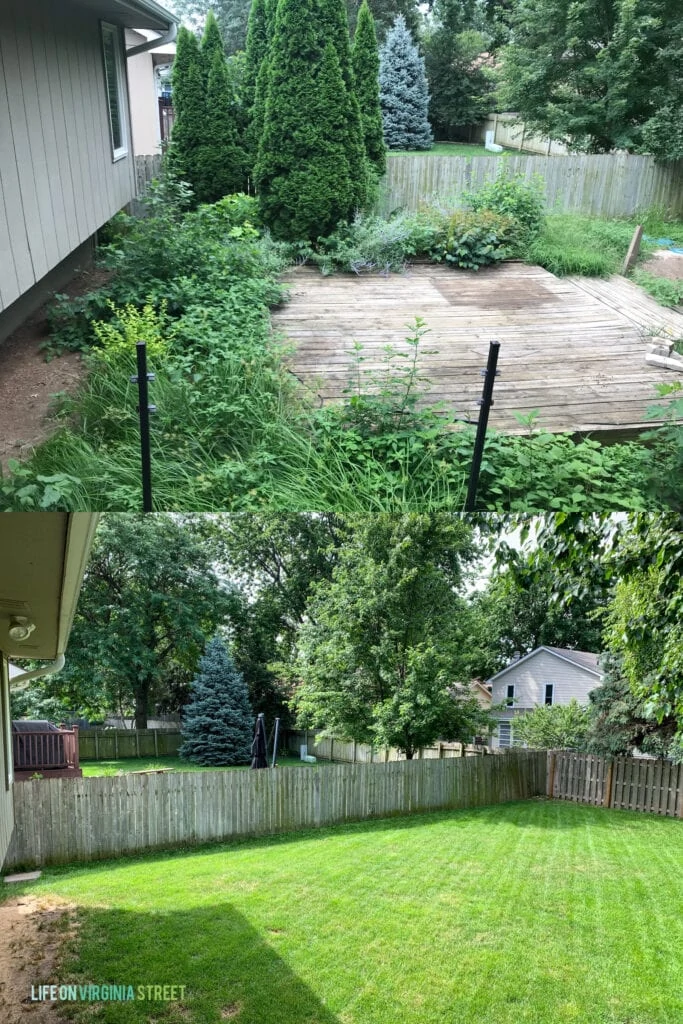
But, you can see below more of the issue. Off to the left, they had a metal fence for the side of the yard that had an above ground pool partially dug out. It also had a huge “pool deck” and insanely overgrown landscape.
We also found random wires all over the yard for what must have been landscaping lights and the pool equipment. It was bad!! We had to spend a lot just to clean it up, and then ultimately just had it graded and sodded.
Since we still have a few projects left, we decided last year we needed to take them in stages. We actually had some additional landscaping work done the past few weeks. We added some hydrangeas, ornamental grasses, and roses to a new landscaping bed out front. We also rocked the areas on the back side of the house (under the deck and eaves) where the grass was having a hard time surviving.
So, that about sums it all up! I’m really trying to get Kurtis to help me with a post on our experience as landlords over the years. He’s much more equipped to handle some of the specifics, but I hope to get something ready for you fairly soon. In the meantime, if you have any other questions (or info you would like included in that post) feel free to comment below and we’ll do our best to get it answered!
If you would like to follow along on more of my home decor, DIY, lifestyle, travel and other posts, I’d love to have you follow me on any of the following:
Pinterest | Instagram | Facebook | Twitter
disclosure: some affiliate links used

Looks great! Amazing how hard work and elbow grease can transform and house!
Great job but I was surprised to see so much broadloom, esp in a rental. To my eye it makes all that new design look a bit dated. But I’m sure you had your reasons!
Whew! I am exhausted just reading all the work you put into this project. Great job!
Absolutely beautiful, all of it, inside and out!!! Every last detail carefully thought through. Pure perfection!
The transformation is amazing. Such a really cute house now.
This is awesome! Great job!
wow its amazing i would love your tips on if its better or easier to remove a popcorn ceiling or cover. remove wallpaper or put up new drywall. why did the contractor say to remove the fireplace. so much work how long did it take for the full makeover. thank you
Wow! What a transformation! Looks great!
Wow! Great job! I would love to see a post on pros and cons of rental ownership, also what you look for in a potential rental property before buying. Thank you!
Incredible transformation, despite the boob lights…..
I inquired on this rental awhile back and you’ve surmised the project wonderfully. You have such good side by side before and afters. Knowing it’s a rental but still putting so much thought into each decision to repair, update and replace is significant for securing good renters long term.
That neighborhood is very lucky that you two purchased the house and did such a nice job with it!
This renovation is unbelievable!! Well done!!