This post has been a long time coming, but it always felt so involved that I avoided it. However, I’m receiving questions so frequently about taking interior photos (especially on Instagram) that I felt it was time to finally get the information published! Today I’m sharing all the details on my favorite photography equipment and how I edit my photos!
This post contains affiliate links for your shopping convenience. Click here to read my full disclosure policy.
As a home decor and lifestyle blogger, I’ve completed a lot of online and in-person courses to improve my photography. I absolutely still do not consider myself a professional, but I’ve gotten to the point where I’m mostly happy with the images I take. There’s always room for improvement, but when I look back at photos even from only two or three years ago, I can already see drastic improvements. So, today I’m going to share all of my favorite photography equipment as well as some of the info on how I edit my photos.
My Favorite Photography Equipment & Camera
- My Camera – About two years ago, I upgraded from a Canon Rebel to a full-frame Canon EOS 6D, and I feel like it’s been a total game changer! More specifically, I purchased this kit with the camera body and the 24-105 mm lens. The Canon Rebel is an excellent choice for a starter camera though if you’re wanting to make the move to a DSLR. I love that my Canon EOS 6D is also wi-fi enabled so I can use my phone as a remote and/or send photos from my camera to my phone immediately.
- My Everyday Lens – The lens I use nearly all the time is the 24-105 mm lens that I mention above that came in my camera kit. It works best for almost all shots and has a lot of flexibility for one lens!
- Additional Lens – For detail shots and times I want a really blurry background, I use this very affordable 50 mm lens. It’s one of the most popular in the industry because it’s at a great price point, and does an excellent job! This is also the lens I used when I took my niece’s graduation photos.
- Tripod – Tripods are one of the most important accessories for good interior photography. In order to get sharp, in focus photos, most rooms need to be shot with a tripod so you don’t have any movement at all. In the early days of my blog, I had a tripod, but went super cheap with it and I can definitely tell now looking back on photos. After I switched to my full-frame camera, I had to upgrade my tripod as well because the old one wouldn’t even hold the heavier camera! I went with this one which is a solid mid-grade tripod. Eventually I’d love to upgrade even further to one that has a swing arm, but for now, this one is great!
- My Camera Bag – I bought this camera bag for our trip to Italy last year. I love that it can hold my camera and two lenses as well as my charger and an additional battery. I would basically use this in lieu of a traditional purse most places because I could also still fit a lip gloss, cash, credit cards, etc. I also like that it doesn’t look like a traditional camera bag.
- 5 in 1 Reflector Kit – This super affordable reflector kit works wonders for filtering odd lights, warming light, cooling light, and so much more! It’s typically a two person job (the holder and photographer) but I’ve also had good results with the help of a chair, sofa, and the floor 😉
- Tabletop Tripod & Smart Phone Adapter – It’s actually surprising even to me just how many times I’ve used this tabletop tripod & smart phone adapter. I’ve used for everything from creating videos for Instagram, to take large group photos (with my iPhone set on a time). The adapter fits most smart phones and allows you to take hands-free and un-shaky photos and video. It’s also great for travel if you want a couples photo but don’t want to ask someone else to take your photo!
- Light Kit – I do have this light kit but it become a fairly rare occasion that I use it. However, sometimes it is necessary in order to get evenly distributed light.
- Studio Kit – I use this studio kit along with this white paper roll for all of my outfit flatlays. It’s also a great option if you have products you want to photograph. I then use my iPhone to take all of the flatlay photos and edit them in the Lightroom app (more on that below)!
How I Edit My Photos
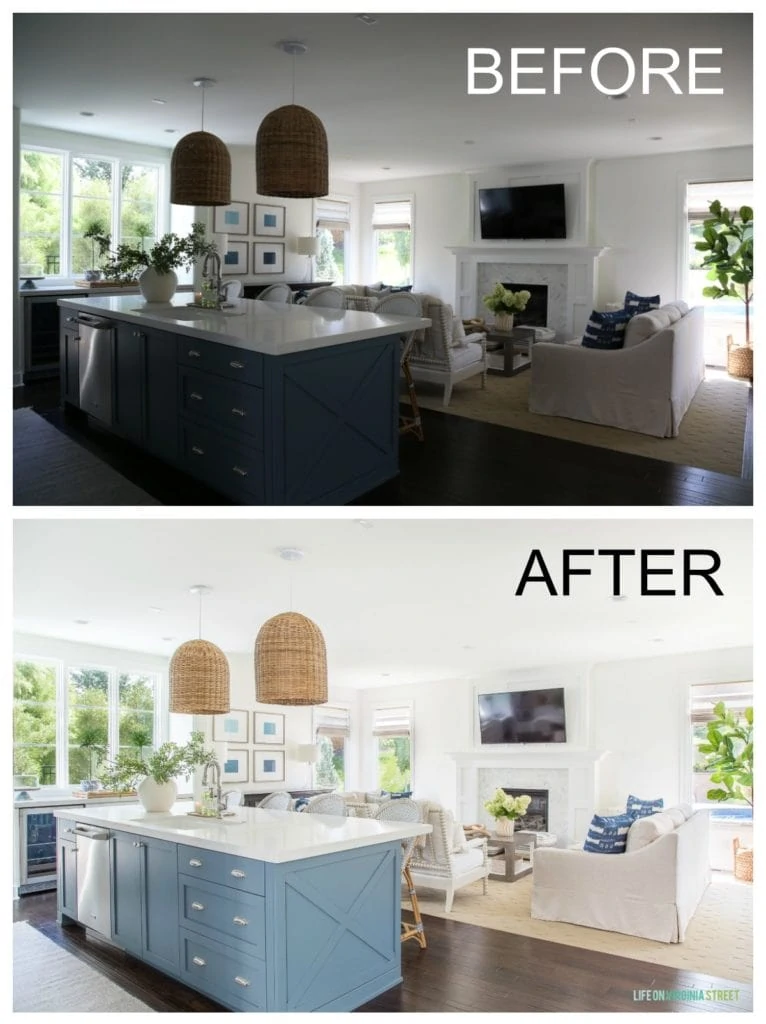
As important as your photography and camera equipment is, the editing process can also make a dramatic difference in the look of your photos! The below example shows the importance of editing. The first image is how this view looked when I took the photo straight out of the camera. The second shows the exact same image but after the power of editing!
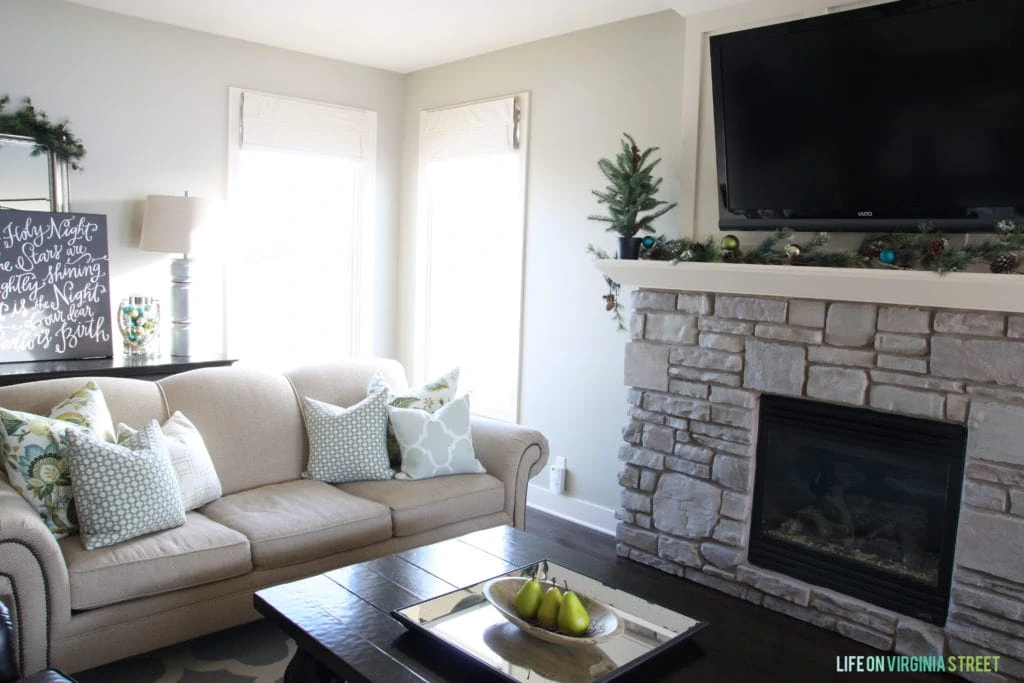
In the past, I tried to take the perfect photo right out of the camera. However, to get the room as light and bright as it should be, all of my windows would be very blown out. Here’s what I’m referring to. This image is shortly after I had painted our living room white and I was still learning how to photograph the brighter space. See how the living room space is the right color but all of the details by the window are completely lost and super white?
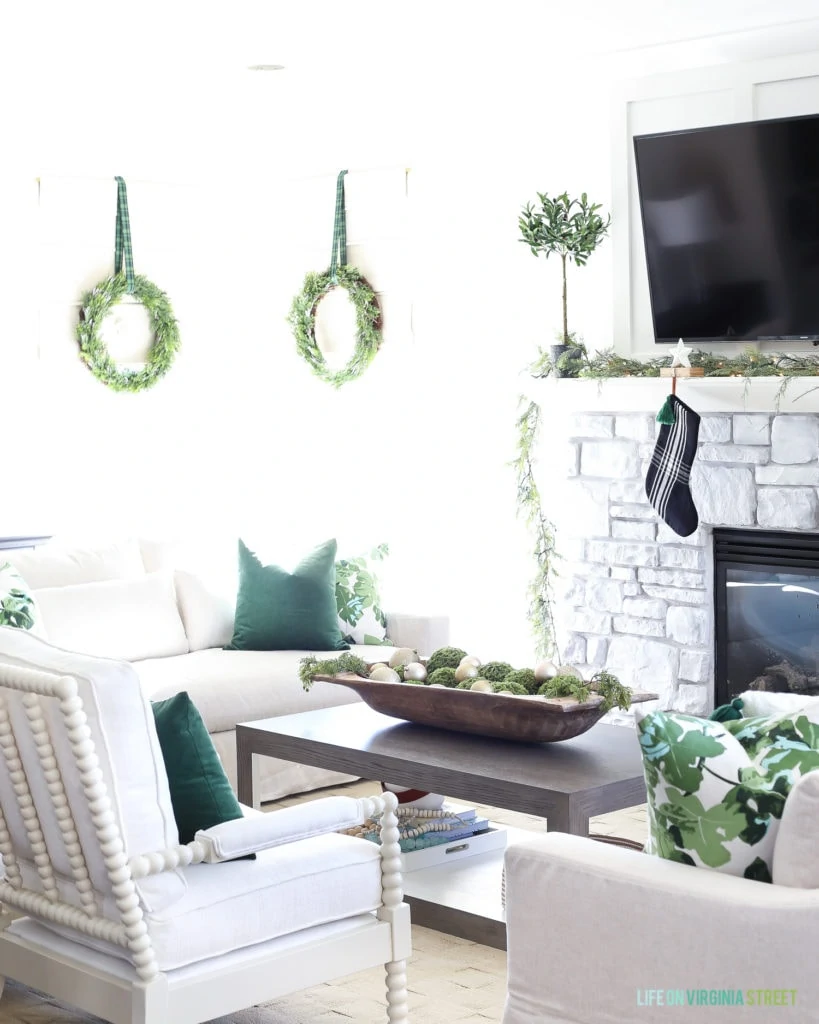
But for comparison, here’s a photo I took back in 2013. It was one of my very first home tour photos I ever took. And this is after I had edited the photo. God bless the auto-straightening tools that now exist!! 😉
Many years ago (likely eight) I purchased Photoshop when it was only available as a software disc and spent upwards of $700 on it. As you can imagine, it quickly became outdated and irrelevant. Nowadays, I simply subscribe to Adobe Creative Cloud for the $9.99/month plan – which includes Photoshop AND Lightroom, and always the most current version of either – and it’s the best $10 I spend any given month! For years I believed all the Lightroom addicts just didn’t want to spend the money on Photoshop but now I’m completely obsessed with Lightroom and couldn’t live without it! I now even adjust my iPhone pics in the Light room mobile app!
In most situations now, I underexpose my photos and then finish the images in Lightroom. The proper editing techniques give you the ability to shoot beautiful interior photos even on the rainiest and darkest of days! It takes years to gain this knowledge on your own, but if you’re looking for a more intense path, my friend Rachel has developed an incredible Photographing Interiors course. She’ll show you how to use your camera, edit images in Lightroom and simplify your process. I just wish all the good courses didn’t come out after I was trying to learn this information! It’s definitely an investment, but I feel like her course combines the best of all the other courses I’ve taken in the past into one. I can’t recommend this course enough if you’re serious about improving your photography and editing skills!
The most common elements I edit in Lightroom are Brightness, Shadows, Clarity, Saturation, and Sharpness. And I almost always use the auto-straightening tool (one of my favorite features)! I try to keep my adjustments of each of these elements consistent so that from photo to photo they all have a similar look and vibe!
How I Manage Photo Storage
As you can imagine, I have a lot of photos from over the years. I save every original photo and then save a watermarked and larger un-watermarked version of every photo I edit. In addition, I probably take 600 photos per home tour and save all the originals – even the ones that I don’t use. So, my storage needs are pretty dramatic. I store copies of my photos in the following locations:
- Originals and all versions of each photo are stored on my computer hard drive (probably not ideal but I like having immediate access).
- Originals and all versions of each photo are stored on an external hard drive. I love that these are essentially pocket size nowadays with more storage than I ever thought possible!
- All final versions of images are stored in a Dropbox account. Dropbox is one of my favorite tools out there. When I load an image or document, I can access it from virtually anywhere. I store all final versions of my photos there for immediate access on my phone (which is great when I want to post on Instagram). I love it so much, Kurtis and I even have shared folders set up so that we can store all of our rental documents/images/etc. in one location that we both have access to. It’s a total game changer in keeping us both organized. I have the 1 TB Annual subscription with Dropbox and it’s the perfect size and we’ve never had issues filling it.
There’s absolutely something to be said about experience and just learning to know your preferences for photography and editing. But it certainly helps to have a good starting point! I hope you found these tips helpful and if you have any other questions, please feel free to leave a comment and I’ll get back to you!
If you would like to follow along on more of my home decor, DIY, lifestyle, travel and other posts, I’d love to have you follow me on any of the following:
Pinterest / Instagram / Facebook / Twitter / Bloglovin’ / Google
disclosure: some affiliate links used


Sarah, thank you so much for this post! While I’m not an aspiring home interior photographer, I am looking to expand my general photography hobby and this was extremely helpful info. I always wondered what types of items people use (or don’t really use) and how they store them. I also have been on-the-fence about whether Photoshop/Lightroom was really worth it, but it sounds like just $10 to try it will be completely worth it. Thanks, again! I will definitely be referencing this post in the future 🙂
Great post! Thank you so much for sharing your photo secrets!
Great tips! What settings are you shooting interiors now? And Lightroom doesn’t have brightness do you mean exposure?