Sharing all the details on how to organize bathroom drawers on a budget!
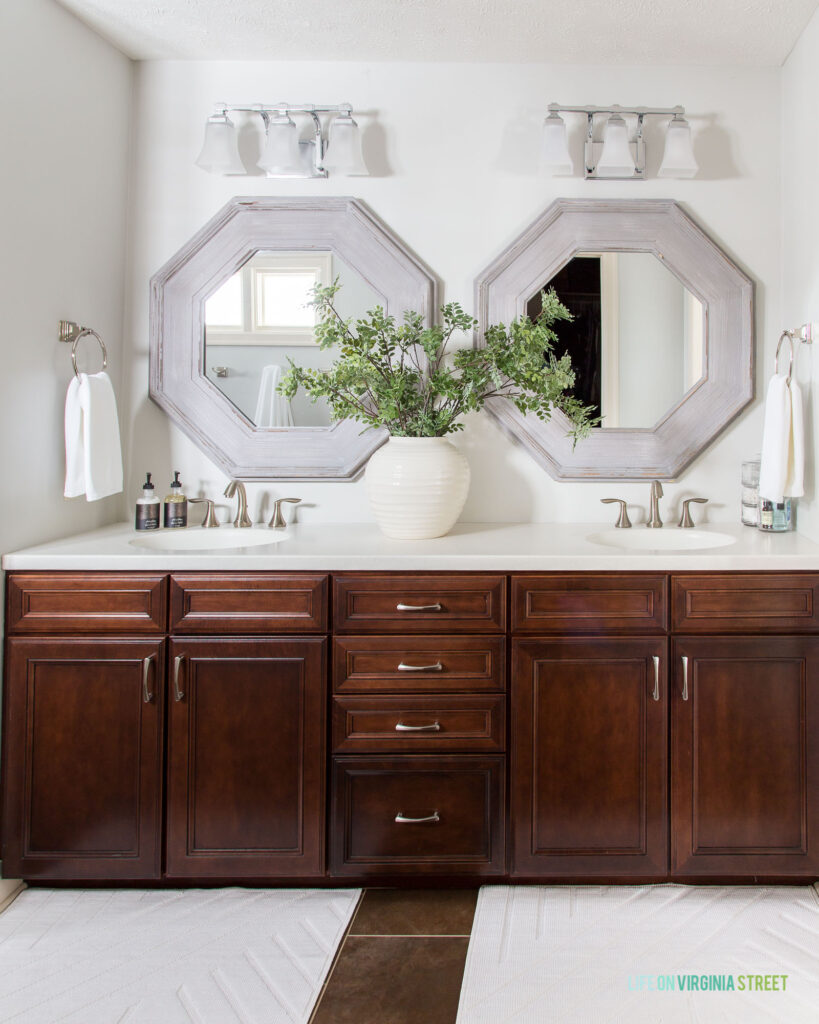
I’ve never kept it a secret that we don’t love our master bathroom. But, the reality is, a makeover is probably several years off. Functionally it’s fine (not great), so we’ve made it work for us the past nine years. But, I think because it’s not our style (so much brown!) or layout preference, despite a few simple updates, we kind of just use it and then get out without much further thought. Here’s how it looks when it’s all clean, styled, and as pretty as it can get.
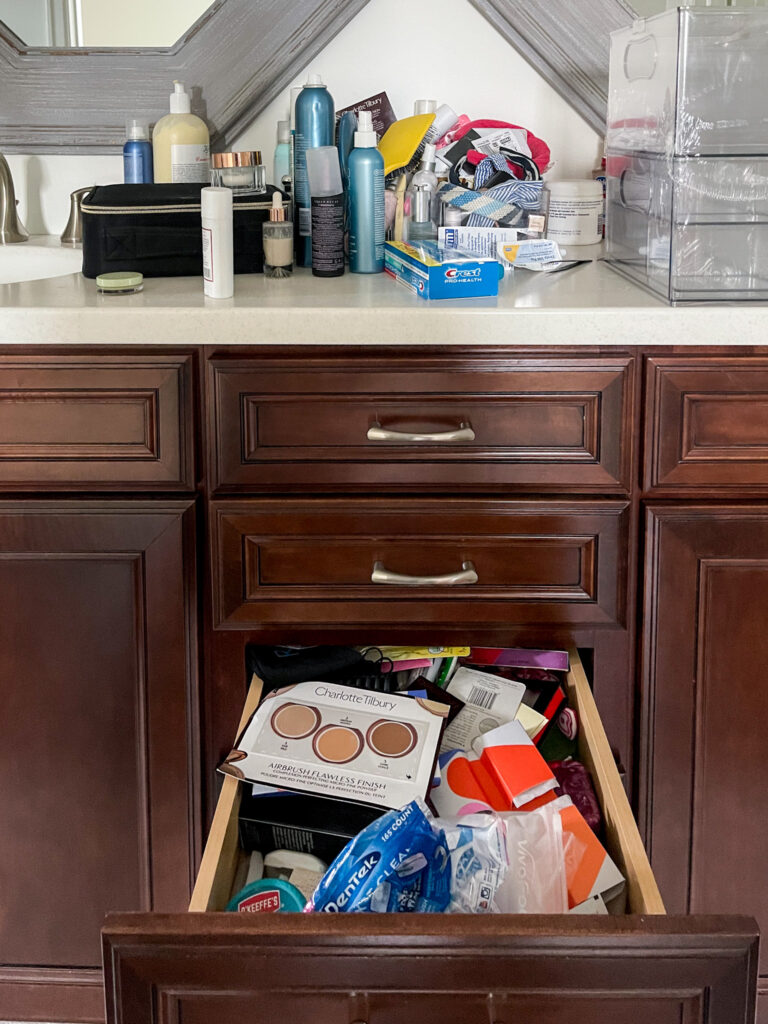
But, the reality is, as of last week it looked like this. I wish I could say I staged it for a good “before” photo but this was a live action shot as I went to take care of it. Our drawers are rather shallow (except for the bottom one), and it’s easy to get them full in a hurry. Organization is key, but we were clearly lacking that! And I borderline couldn’t even close that drawer any more without a little shoving!
Thankfully, they look so much better now. It was a relatively painless and affordable project, so I’m sharing my steps on how to organize bathroom drawers today!
This post is sponsored by Walmart and contains affiliate links for your shopping convenience. As always, all thoughts, opinions, and product selections are my own. Read my full disclosure policy here.
How To Organize Bathroom Drawers
I don’t know if it’s because most others don’t typically see inside our bathroom drawers, but I’ve never been great about organizing them. I had tackled the cabinet side of things last year and am happy with how that has worked out. But the drawers (specifically mine) were a wreck. When Walmart launched a collection with The Home Edit, true masters of beautifully organized spaces, I was so excited that it motivated me to tackle a few spaces in our home! The collection is top-notch quality and the prices are so affordable!
This project took me around an hour and a half to get all of our drawers cleaned out and organized. Following are the steps I took and how I organized my bathroom drawers.
STEP ONE
Empty everything out of your drawers. It helps to have 100% of the contents on the floor so you can easily see everything and take your time going through each item. Then, wipe out all your drawers with hot soapy water. If you’re anything like me, chances are they have not been cleaned in years. Oops!
STEP TWO
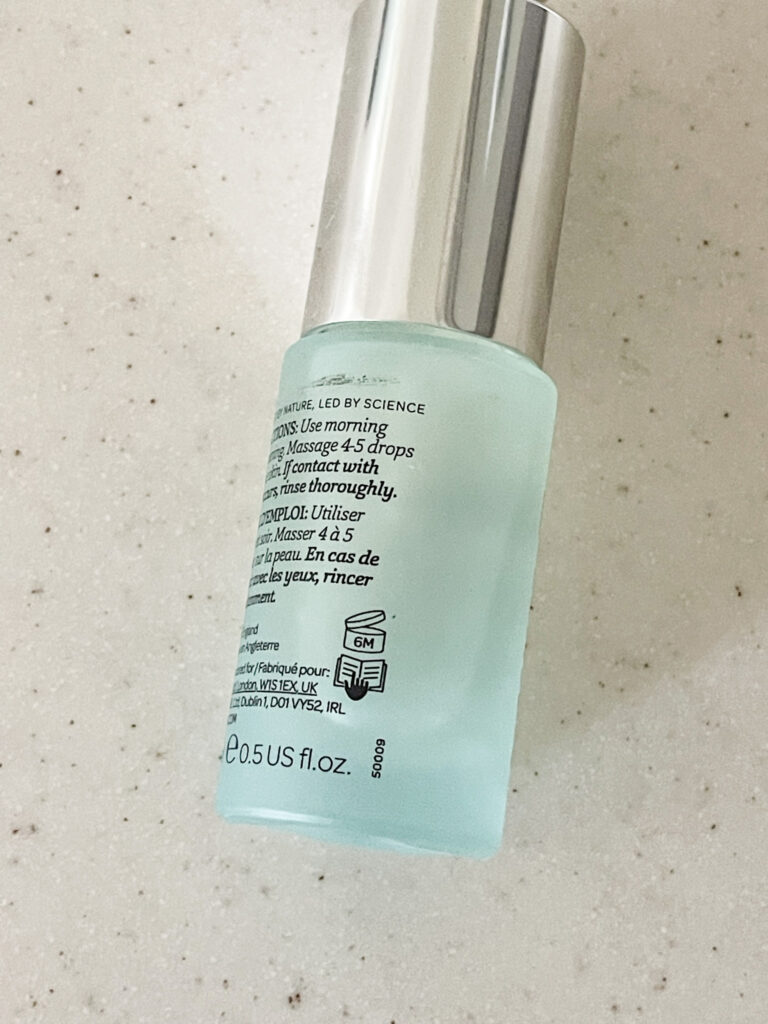
Purge, purge, purge. It’s amazing how many items that I found in my drawers that I didn’t even remember having (hello, tanning bed glasses from two decades ago) or that were long past their expiration date. It only took me about 35 years to figure out that most beauty products have a little label on them that tells you how long they last once they are opened. Did you know that’s what this symbol is for? In the image below, it’s the symbol that looks like an open jar. This one is good for 6 months (6M) after opening (most are 12-24 months). I’m guessing you can stretch it a little, but given that some of mine were 5-8 years past due, they needed to be trashed! Especially since a handful were nearly empty.
STEP THREE
It was also quickly apparent to me that a lot of the bulk in our shallow drawers came from unnecessary product packaging. Large bags that were only 1/3 full, product samples on postcard sizes of cardstock, razor packages much larger than the actual blades, etc. So, I decided it made sense to take most of the items out of their packaging to reduce a massive amount of storage needs. From there, I was able to assess just how much space each product needed once sorted into categories.
STEP FOUR
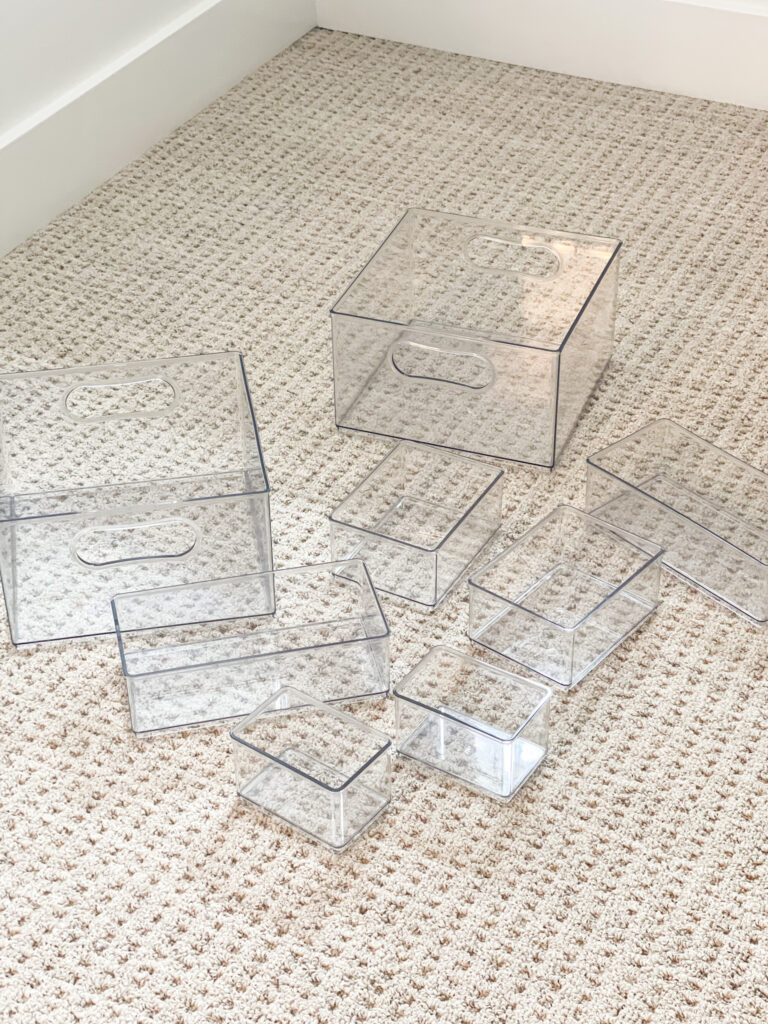
From there, I identified which items in this The Home Edit kit would work best for each of the groupings I wanted in a given drawer. You can see everything that comes in this particular kit below. I love these pre-packaged kits because they’re a great combo of pieces nearly every one could use. But, you can also order the pieces individually to fit your needs. I’m linking all of them at the end of the post. I did also get the 5-Piece Laundry Kit and the 5-Piece Pantry kit to address other areas in our home. This page gives a ton of examples of how all the various pieces can be used in a number of places around your home!
STEP FIVE
Start loading the organizers into your drawer in a configuration that makes the most sense for you. I basically made sure the items I use daily were most accessible and then went back from there. It’s amazing how much space this freed up. This project actually ended up saving me money, as well, when I realized just how many razor refills I had. I knew I had a fair amount, but nowhere near this much. Needless to say, I was able to cancel my razor refill subscription for the time being and probably shouldn’t need to activate it for another year or so! By simply eliminating all the excess packaging on most of these items, it cut my storage needs down dramatically. I was even able to add my flat iron to this drawer so it no longer had to sit out on the counter! If you have a lot of smaller items, this pack of 6 small insert bins might be a better option for you than the full kit!
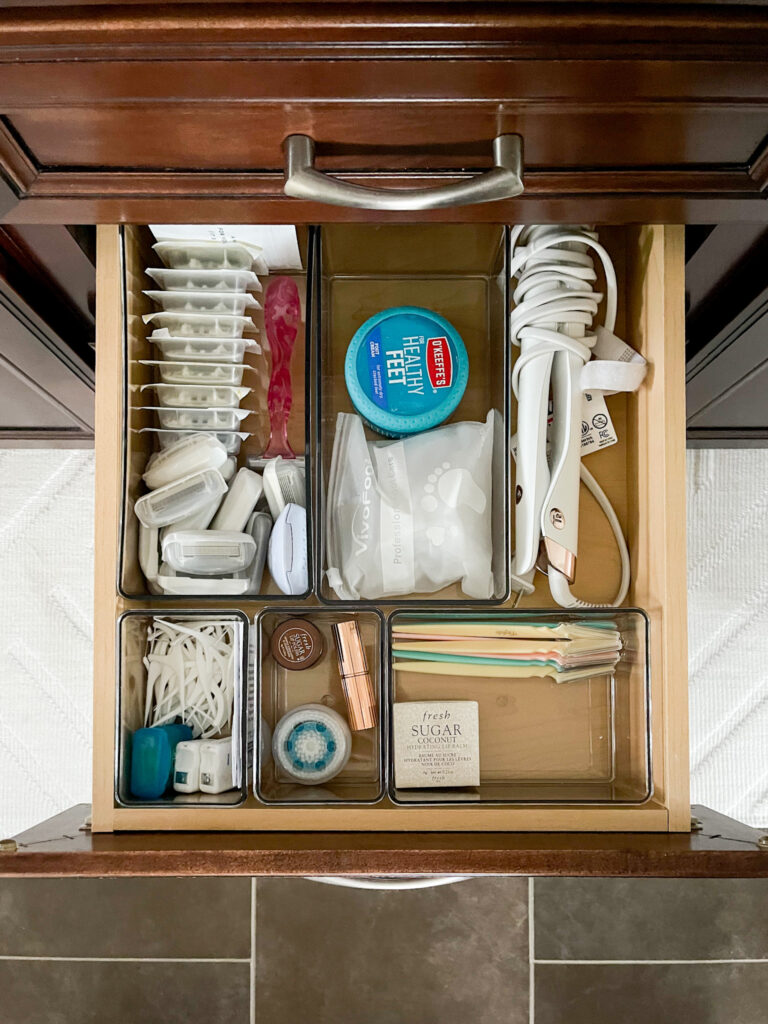
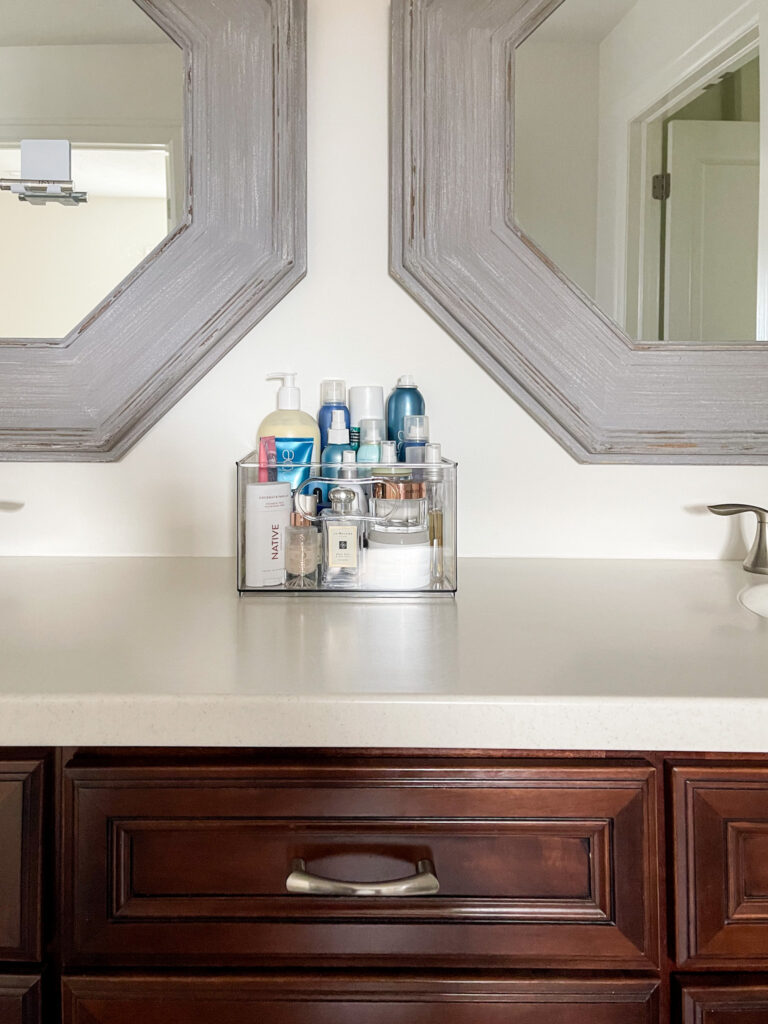
Since the kit included two of the larger bins, only one of which fit in the bottom drawer, I decided to take care of the countertop situation! I had bought an acrylic organizer years ago, but it wasn’t really designed for what I was using it for. But I made do with it for the past 5+ years. The problem is, it was almost too large, so rather than helping me stay organized, it allowed me to keep items out I don’t use regularly, and accommodate junk or expired products. My hair products didn’t even fit inside, and that’s basically all I wanted easy countertop access to! So, I used this large bin, and only allowed myself to add items that I used regularly – as in, at least weekly! This also makes it super easy to take everything off the countertop on cleaning day. I love that the footprint is so much smaller but all of my daily essentials are still within reach.
The other large bin is now in the bottom drawer and holds all the headbands, hair elastics and hairbrushes. Plus I still had a medium sized bin left over that I’ll let Kurtis use in his top drawer! Which is more than enough, because he basically owns like four products.
Additional Organizing Products from The Home Edit and Walmart
The Home Edit collection at Walmart includes pieces for nearly every organizing project you may need. And they all have nearly perfect reviews! Here’s a quick collage of the entire collection. I have each of the pieces linked below the graphic.
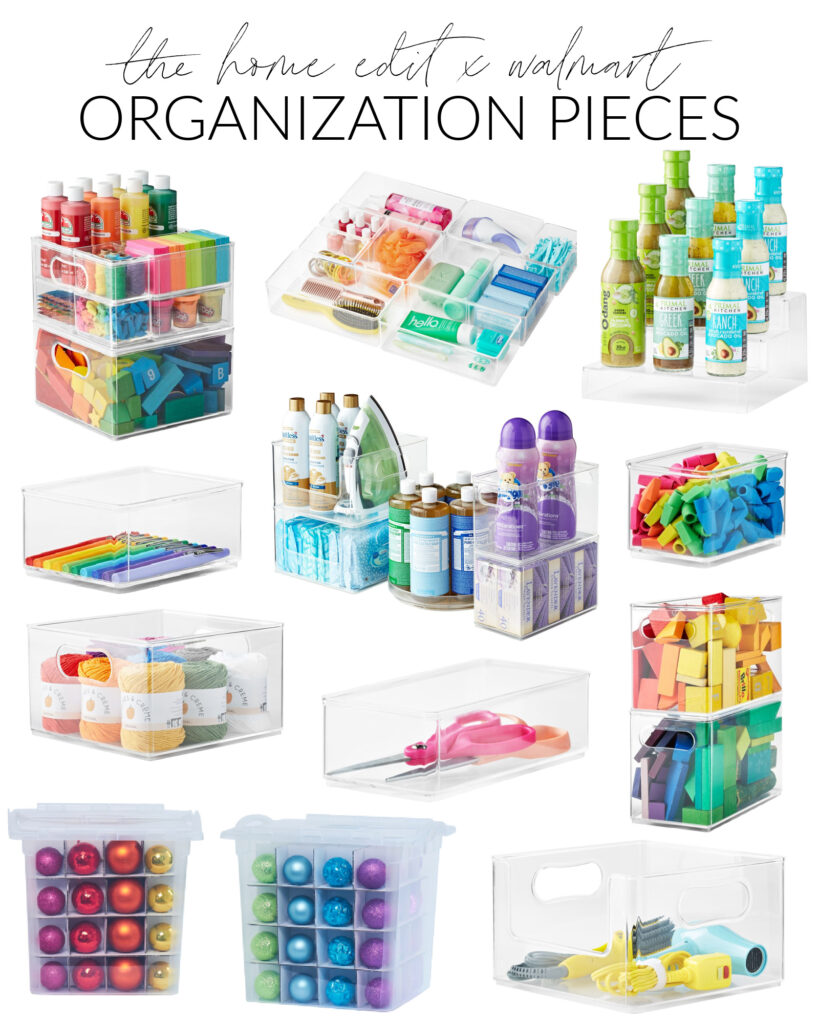
The bigger sets include most of the individual items (minus some of the large pieces like the ornament bins). You can see all the items available below. Simply click any of the images to learn more about each of the items.

If you would like to follow along on more of my home decor, DIY, lifestyle, travel and other posts, I’d love to have you follow me on any of the below channels:
Leave a Reply