Today I am sharing the last two quick tutorials from our recent guest bathroom.
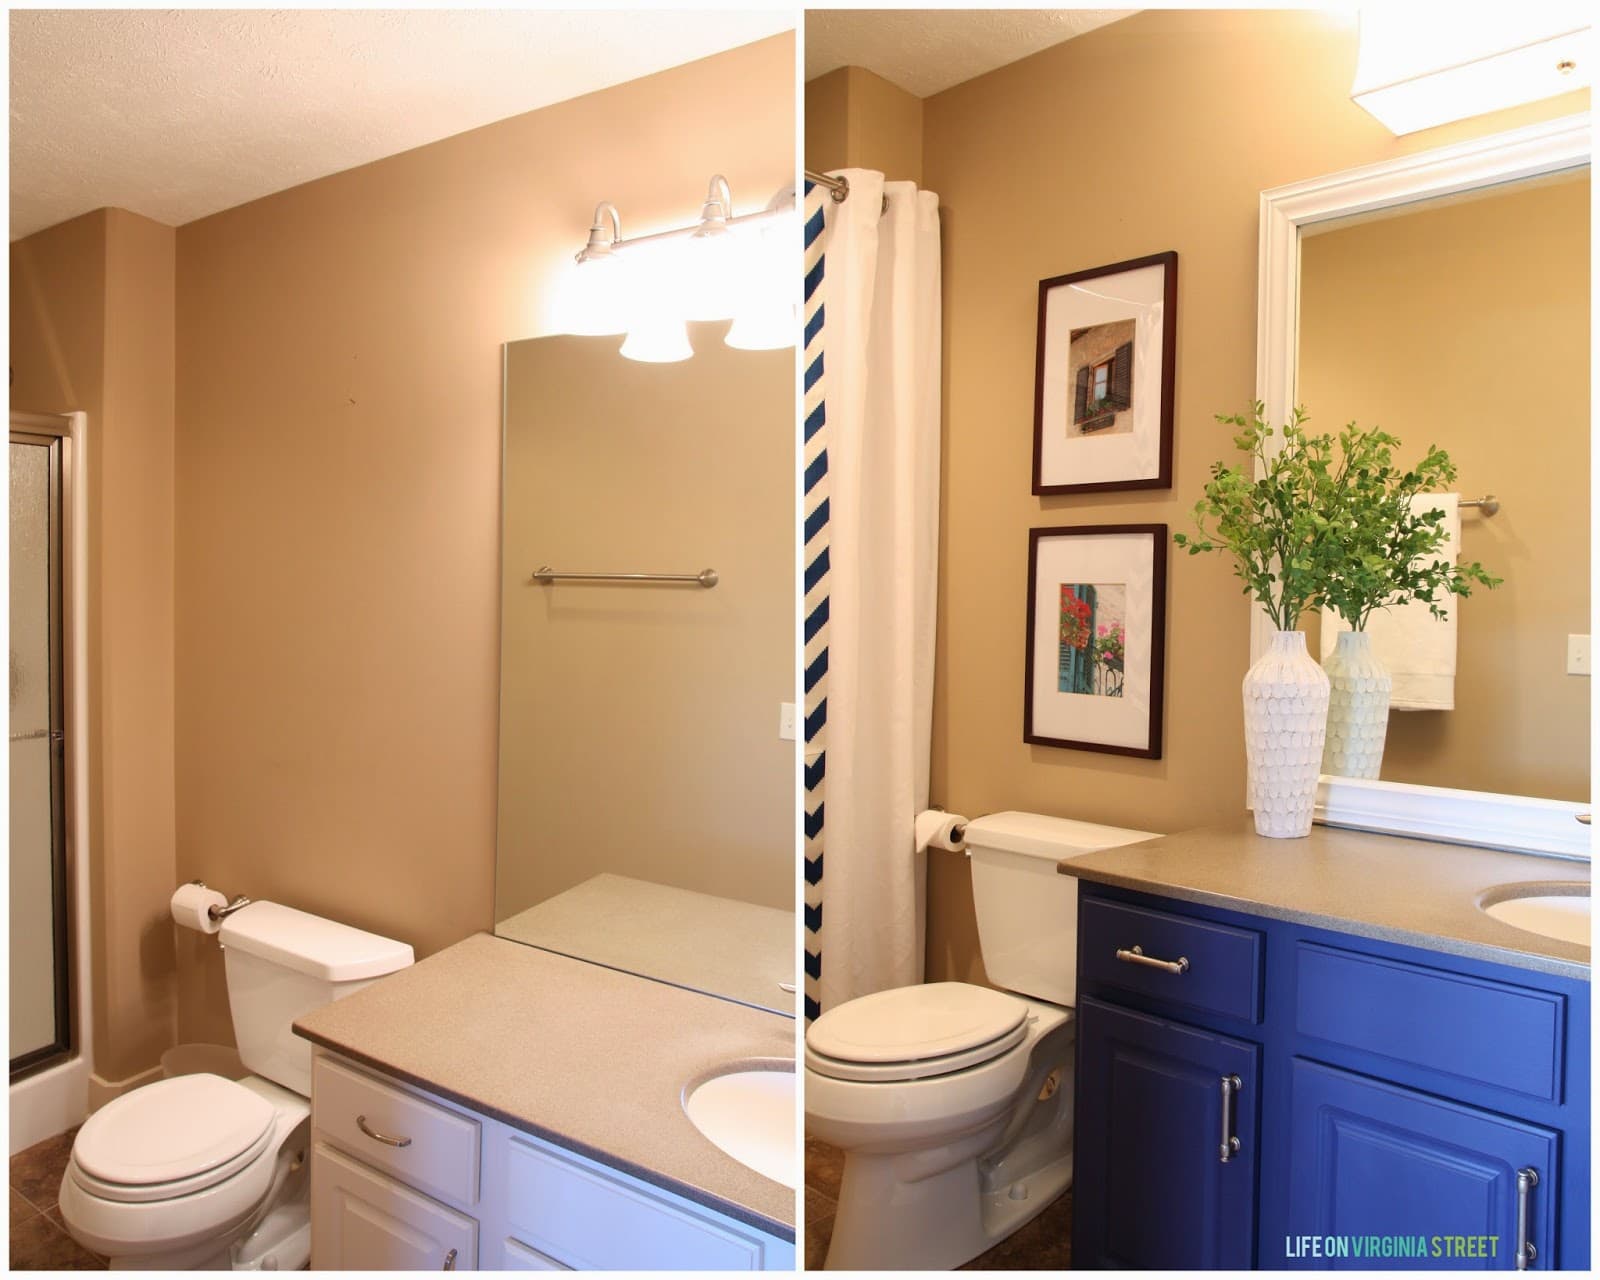
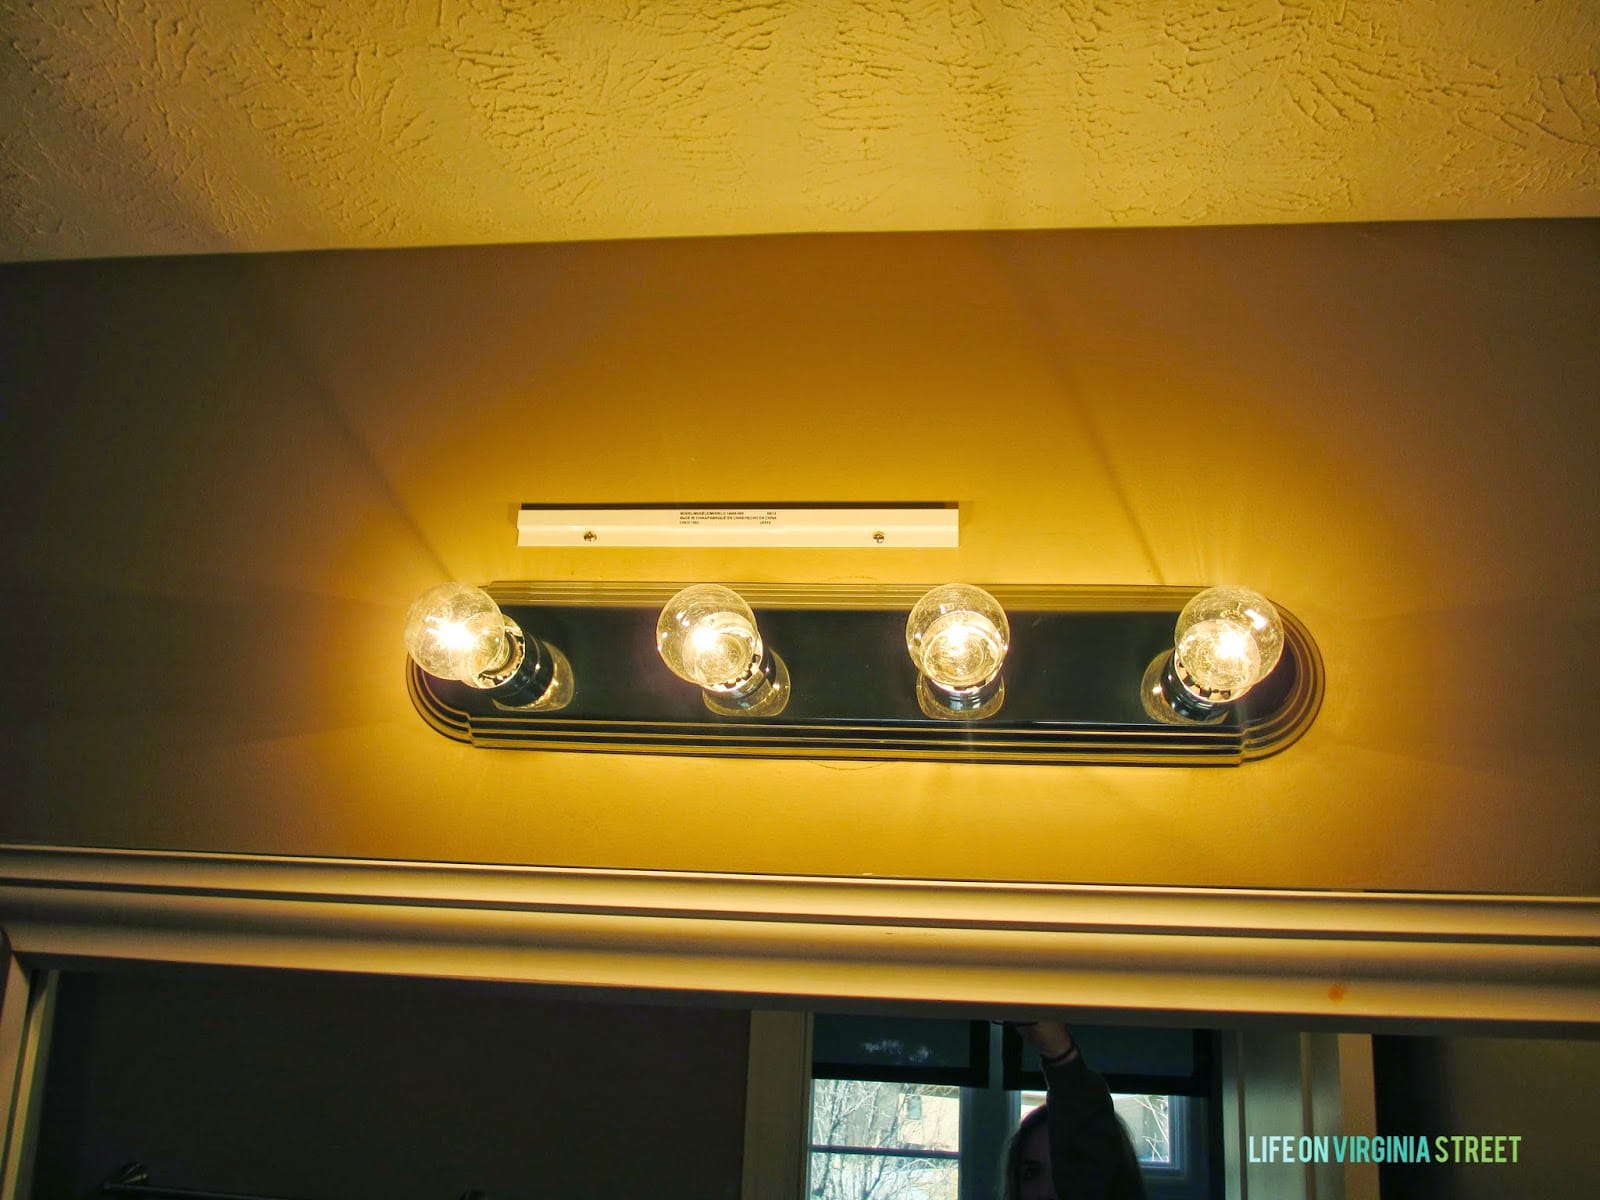
The first involves the lighting. Not really a tutorial, but a more a “see how this light came to be”. The light fixture before was a four-light typical vanity light. Just as blah as the rest of the room. There is also a can light over the shower area {controlled with the same light switch}. Although the room is not overly large, the four-light fixture is definitely a necessity for adequate light.
The problem is that scouring the interwebs for an affordable {and cute!} four-light fixture is quite challenging and expensive!
One day while I was at Lowe’s, I saw this shade that I loved. But, it required me going back in time and buying a super old-school Hollywood-style light fixture {$14.98 for the four-light version}. The shade itself was on clearance for $34.99, bringing the total light cost to just under $50. Not bad at all!
Specifically, I purchased the Project Source 4-Light Chrome Bathroom Vanity Light and the Catalina 7-in x 26-in White Linen Fabric Bathroom Vanity Light Refresh Kit with Decorative Nickel Finial.
 |
| {via Lowe’s} |
So, this is the first light I officially installed by myself {while my husband supervised – but I’m proud to say I knew how to do it all after watching him install my 347 lighting requests over the past year}. This style of light is much easier than a chandelier – but hey, I did it!
After the light was installed, you can see above we mounted the cleat for the shade I purchased. You’ll notice ours is off center, but that is because we wanted to ensure we hit a stud {so we didn’t have to use the pesky wall plugs}. The great thing about this shade is that the whole backside has a cleat that mounts to the wall cleat, so you can slide it around until it’s centered! I love the look – and it’s so easy {and affordable} to achieve! The whole process would be even easier if you already had one of the light bars above installed in your home.
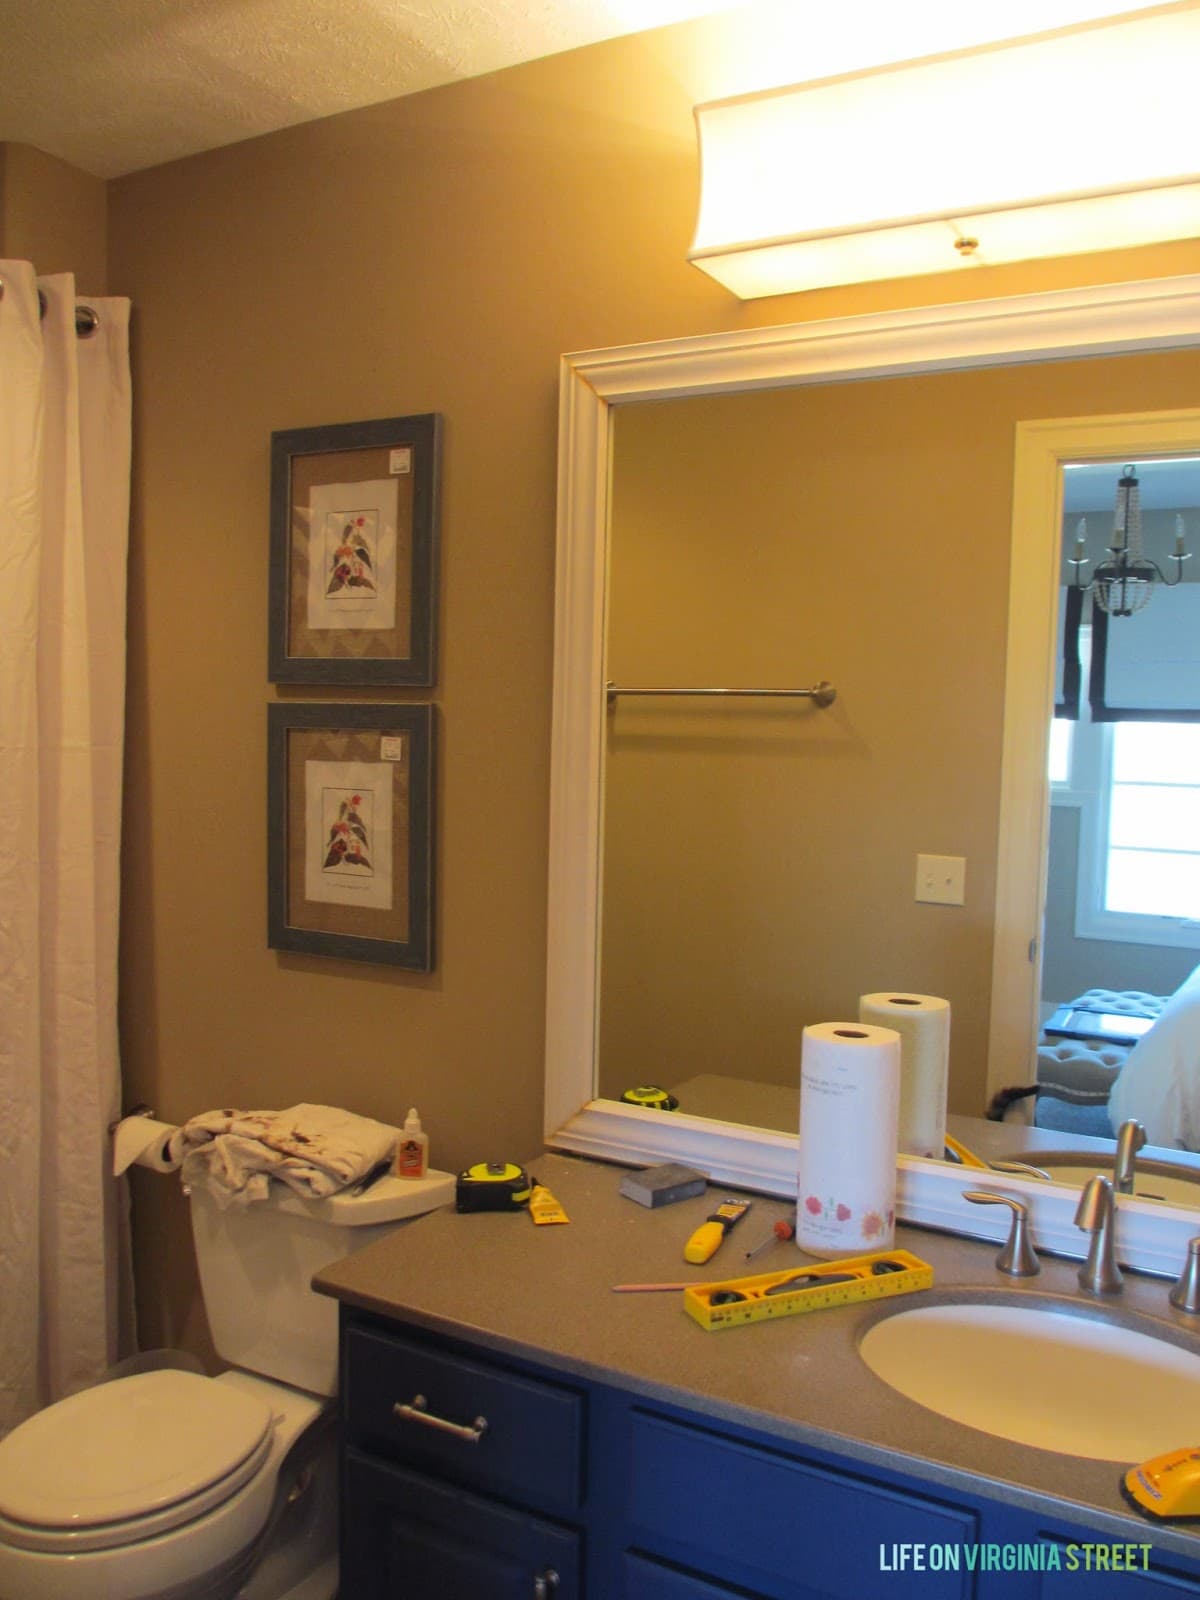
I won’t rehash the full process on building out the frame for the mirror {there are tons of other great, in-depth tutorials online}. But I’ll summarize the steps we look.
I started out by visiting the trim aisle at Lowe’s {I actually think it was the same day I bought the light fixtures}. I had dropped my husband off to get a haircut, so I had 15 minutes to get in and get out of Lowe’s – I didn’t have a lot of time to really analyze what trim I wanted.
I selected a piece of crown molding that I liked. Although it doesn’t look all that substantial on this huge mirror, it is one of the thicker pieces Lowe’s sold. I loved that it was pre-primed, saving me several steps overall.
Once home, I had my husband measure and cut the pieces, using a simple 45 degree cut. We then set up a large work table in the garage to lay the frame on and piece it together. He pre-drilled holes in all the corners to attach the ends with a nail. After pre-drilled, I covered the raw edges with wood glue prior to us nailing the pieces together. We simply pressed them together, and then he nailed in the pre-drilled hole. I immediately wiped off any excess glue that seeped out.
We let it dry overnight. Next we carefully brought the frame into the house and propped in up near the mirror. We used a white-drying Gorilla glue to attach it directly to the mirror surface. I was careful not to get the glue too close to the mirror edges, as you can sometimes see the reflection in the mirror behind the wood if you over-apply. We found some props to ensure the mirror didn’t move or fall over night. You can see we used the shower curtain tension rod for one of the stabilizers {with a piece of scrap wood in between, so as not to mess up or ding the mirror frame}.

A few days later I used some wood putty to fill in the corner seams better. Once dried, I lightly sanded the entire piece. I then applied two coast of semi-gloss Behr Swiss Coffee paint {I taped off the interior sides and then just used a razor blade on any paint that seeped through}. This frame helped transformed not only the mirror, but the entire room!
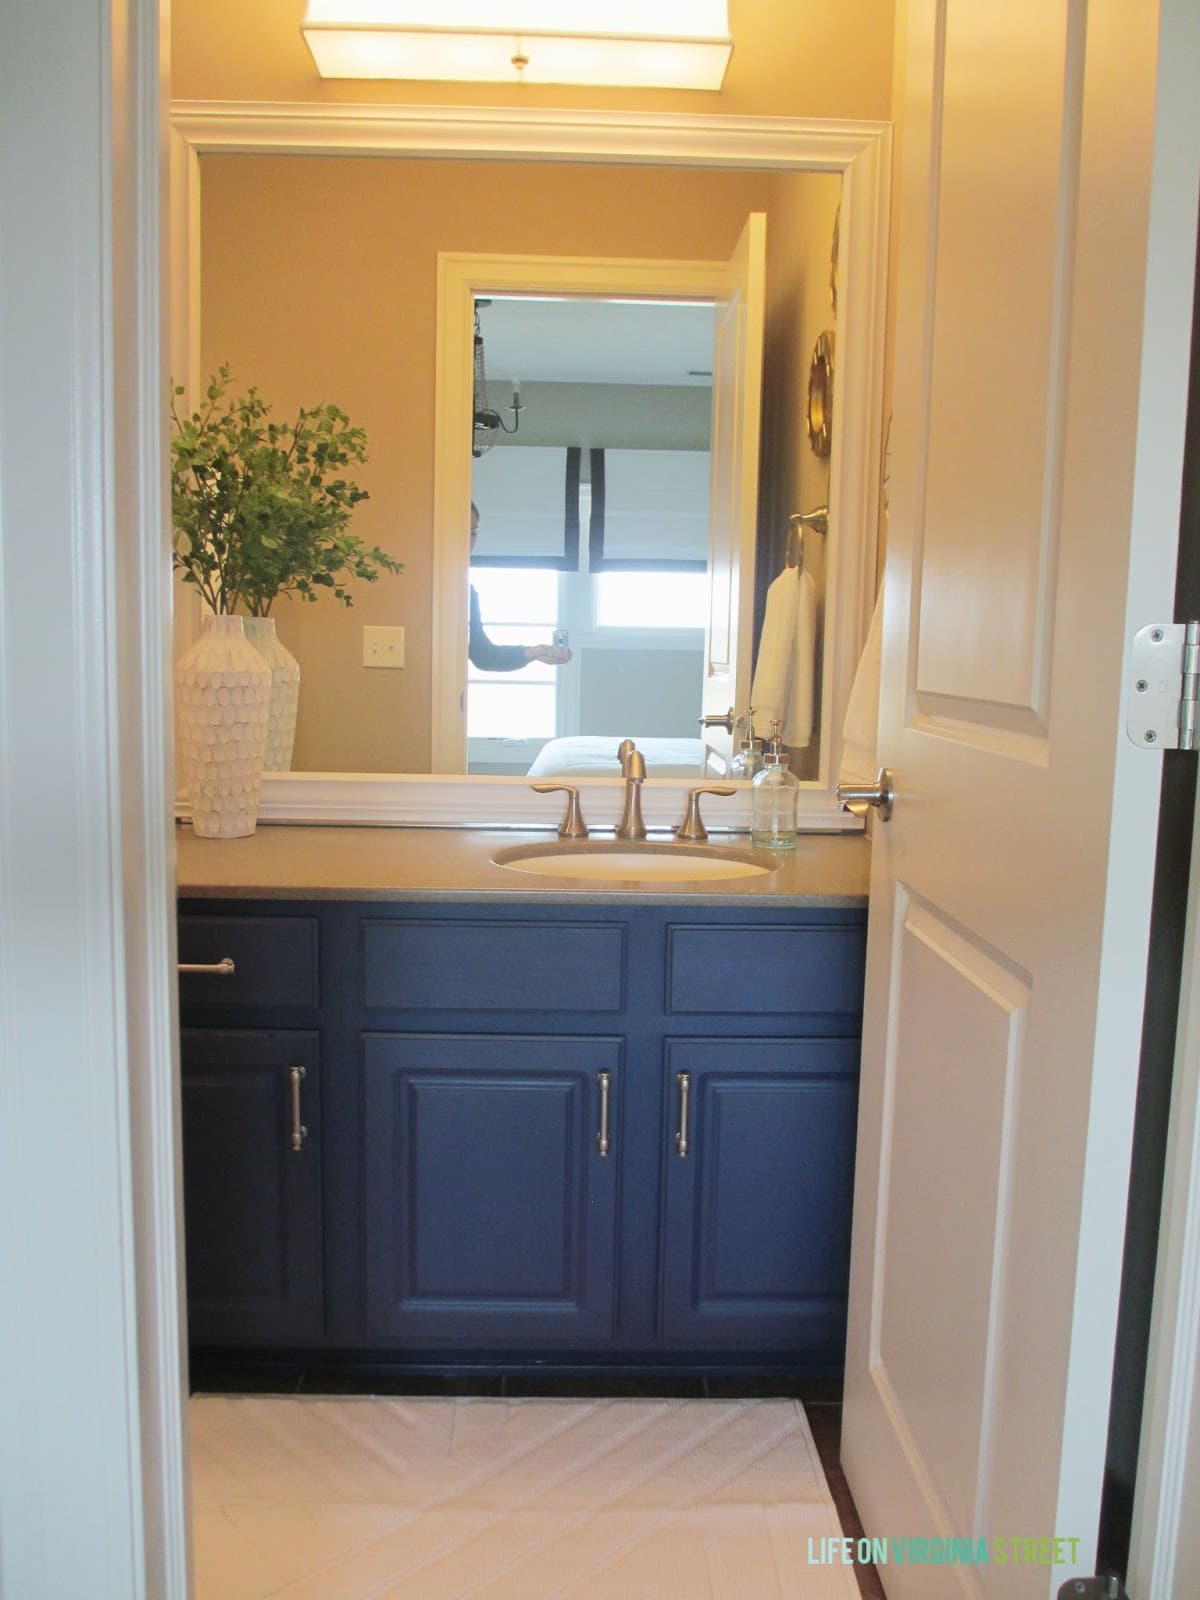
I love how this space ultimately came together! If you missed the posts on the reveal, the no-sew shower curtain or the Country Chic Paint painted vanity, be sure to check them all out!

Now I’m ready to get the walls in this space painted!
What simple upgrades that make a huge difference, Sarah! It looks amazing now!
Looks awesome! Framing my builder grade mirrors has been top of my list for so long. Something about gluing directly to the mirror really scares me for some reason!
Simple changes, big impact! Looks incredible, Sarah!!
I honestly never would have thought to use a shaded light like that, but I love it! It really dresses up the space. The whole makeover is fabulous!
Love how that shade looks, Sarah! I have a trip to Lowe’s planned and that shade is going on my list.
We inherited those Hollywood lights when we moved into our condo 2 1/2 years ago and thought some day we would
replace them, but now I don’t have to!
Great sheds… really light installation is one of the most part of designing for make home stylish.
Your bathroom looks fantastic! What color are the walls painted?
Thank you! Unfortunately the walls were already painted when we moved in, so I am unsure of the color. Sorry!
fantastic. love the colours…
I am looking at the results 5 years later–still relevant!
Karen
Thank you!