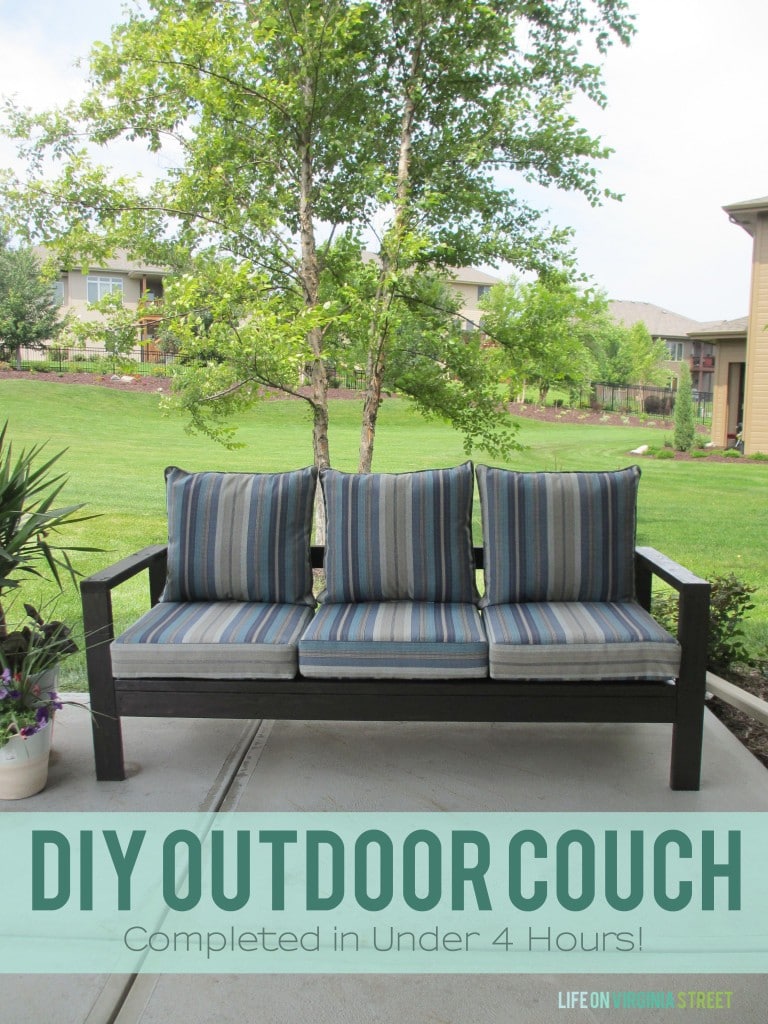
Learn how to build a simple DIY Outdoor Couch using 2×4’s and a little manual labor! This outdoor sofa can easily be customized by varying the stain and cushion colors!
Today is the latest in our Look 4 Less series {my earlier projects included my DIY “Wood” Bead Chandelier, my DIY Designer Inspired Art, and my Pottery Barn Inspired Ribbon Trim Drapes}. This time around, I sharing all the details on how to build a DIY Outdoor Couch in four hours or less!
I saw the inspiration for this outdoor sofa at the Ryobi booth at Haven Conference and thought it would be the perfect statement solution for our back porch. In the summer, we frequently grill for dinner and then hang out on the back two steps. We were looking for a more comfortable solution! With our courtyard, we find that we rarely use our back patio for anything more than grilling and I thought it was time to change all that. The problem is, outdoor furniture is very PRICEY!
Enter these plans from Ana White. My husband is very handy so we were able to watch her YouTube video and we were good to go. Although the project costs a little more than I expected it to {about $165 for all the supplies/cushions/stain}, we were able to crank the whole thing out in about four hours. Which is perfect since we didn’t even start until Sunday afternoon. The project has a very simple supply list and there are only three lengths of cuts to make! Easy peasy! Following is the supply list, tool list and tutorial to create this outdoor sofa:

This post contains affiliate links for your shopping convenience. Click here to read my full disclosure policy.
Supplies Needed To Build A DIY Outdoor Couch
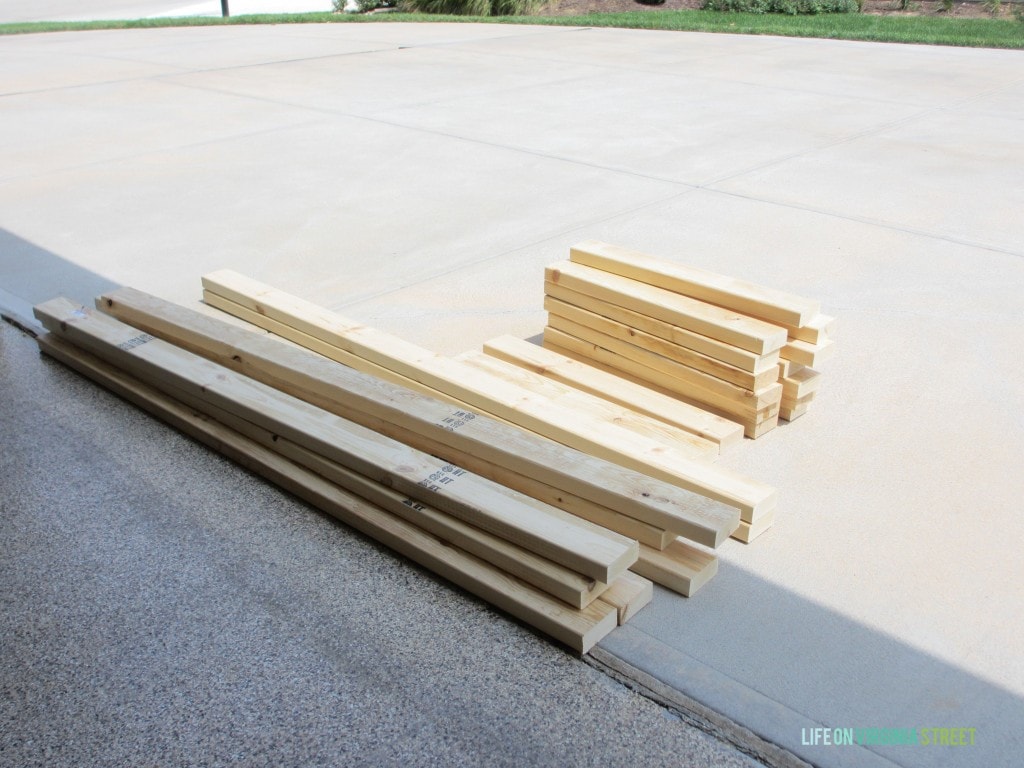
Here is the abbreviated supply list: 11 2x4x104″ or 120″ boards, deck screws, stain and outdoor cushions. You only have three sizes of cuts to make! Following is the official supply list to create your outdoor sofa.
- 11 – 2x4x10’ (prefer cedar boards)
- 2-1/2” self-tapping exterior decking screws
- 2-1/2” pocket hole screws (4)
- Wood glue
- Sandpaper
Tools Needed to Build a DIY Outdoor Couch
Keep in mind, most hardware stores will cut your lumber for you (sometimes for a minimal fee)! This is especially convenient if you don’t own your own tools and/or don’t have a vehicle long enough to carry the full-length boards! Following is the full tool list needed to built the couch.
- Saw (circular or compound miter saw)
- Sander
- Measuring Tape
- Square
- Drill with Driver/Drill Bits
- Mini Pocket Hole Jig
Cut List
Following are the exact lengths of boards you’ll need for this project (cut down from the lengths listed in the supply list):
- 9 – 2×4 @ 72”
- 13 – 2×4 @ 25-1/2”
- 2 – 2×4 @ 28-1/2”
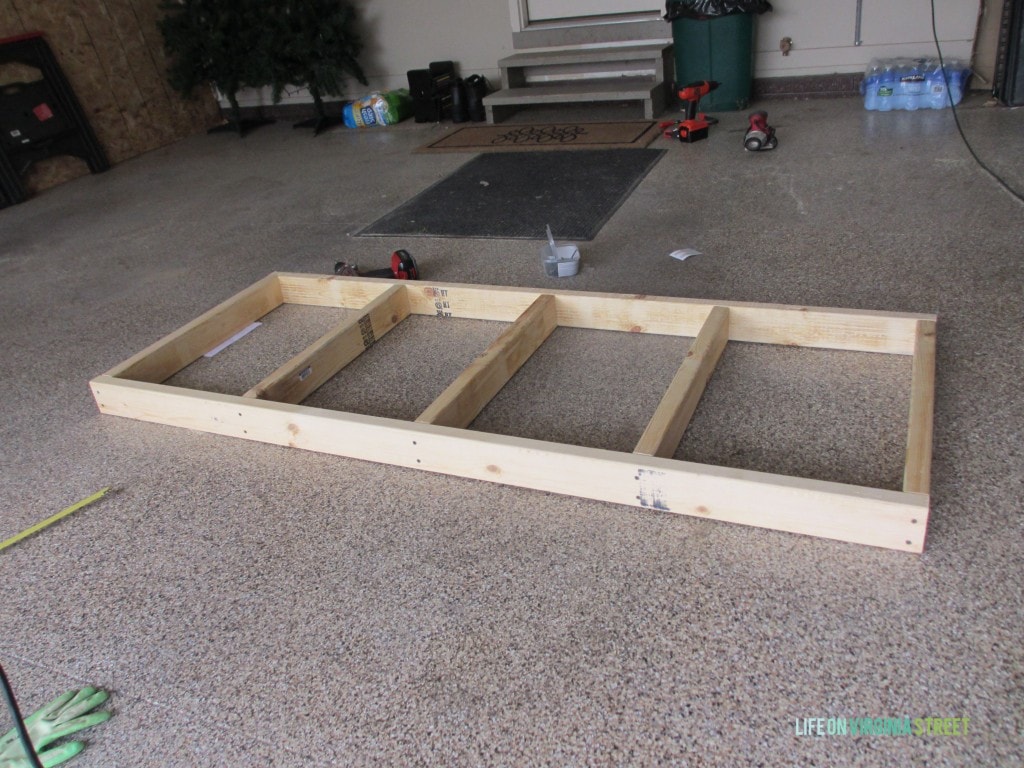
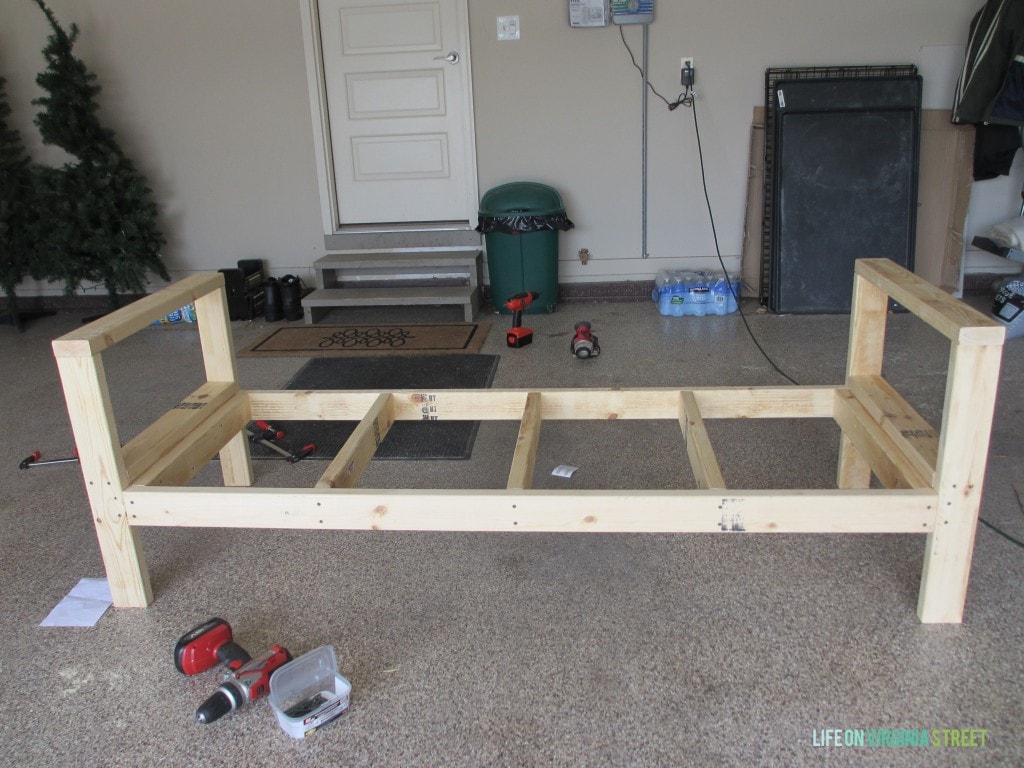
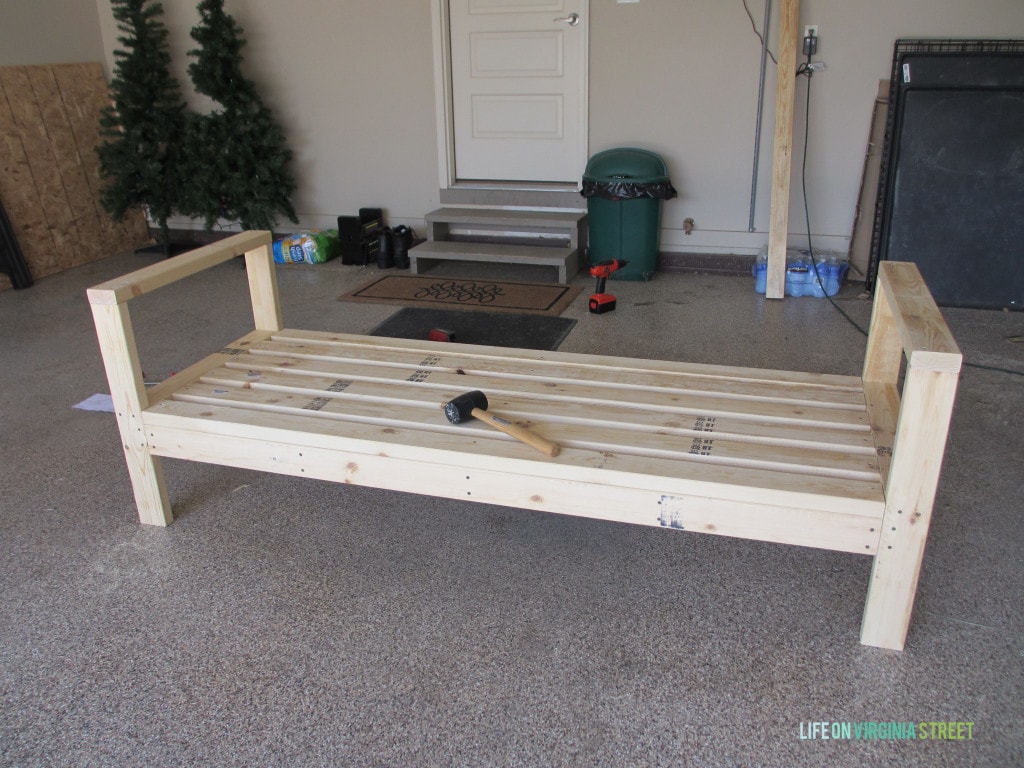
How To Build a DIY Outdoor Couch
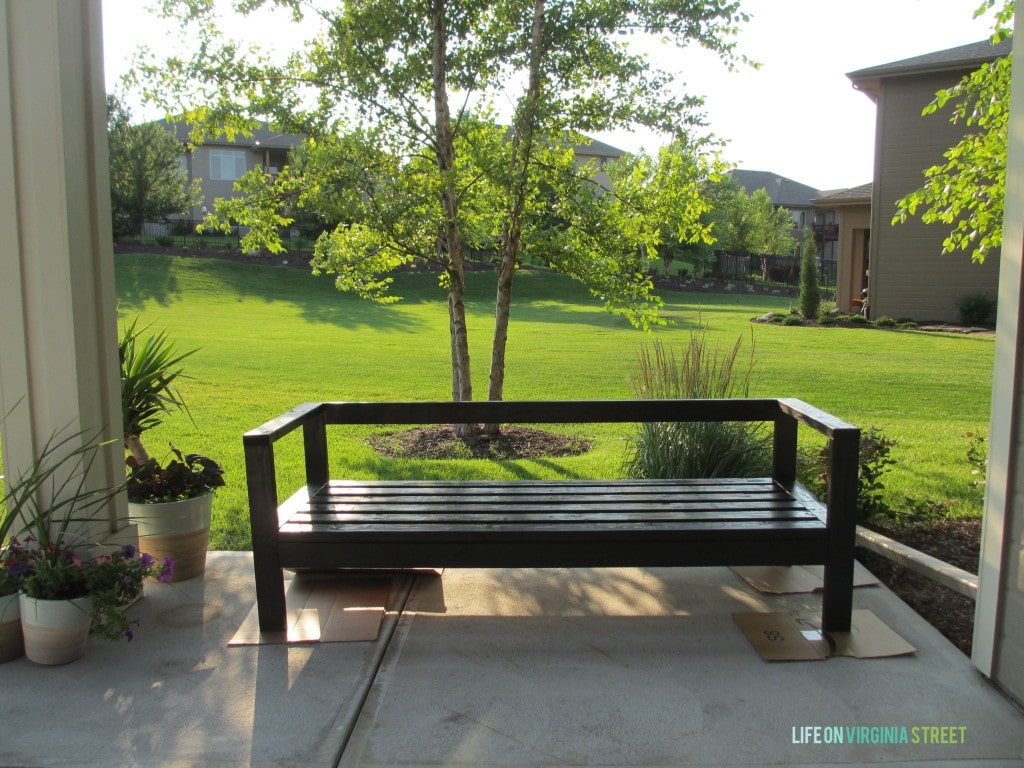
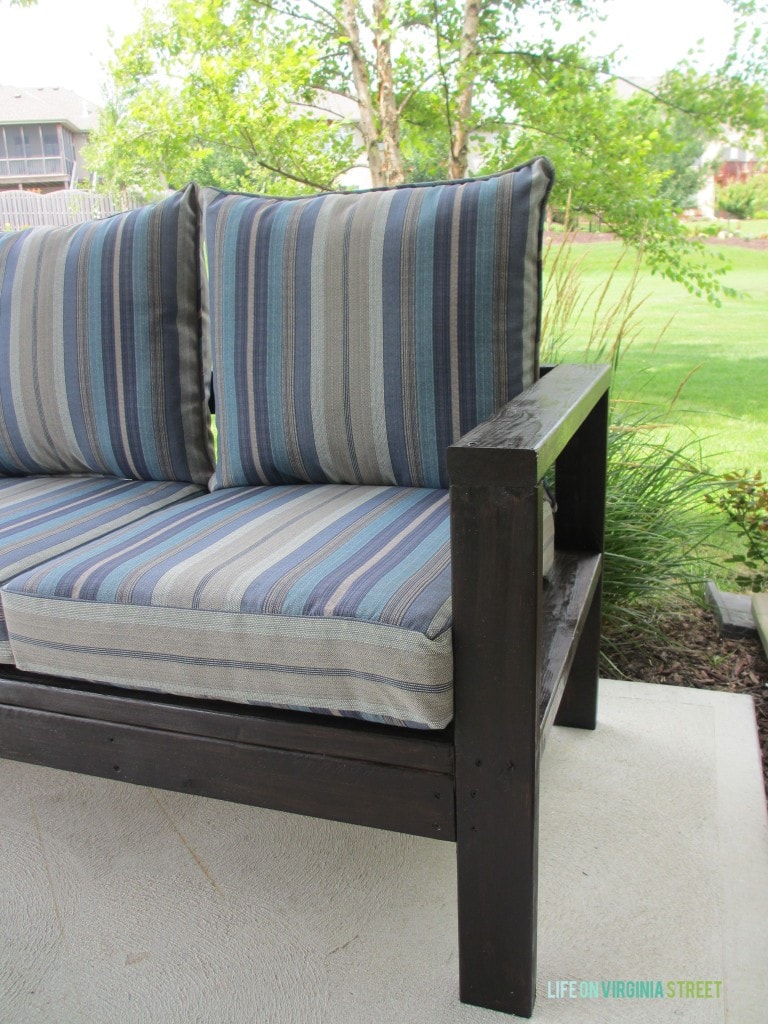
I’m not going to recap the entire tutorial since Ana’s is so straightforward, but I’ll show a few pics from along the way. This couch started from these three sizes of 2×4’s as mentione din the cut list.
The stain is this Kona color stain. I love the richness of the color and and it looks great against the fabric on the cushions. It’s actually an indoor stain, but since this is a covered patio, I wasn’t concerned and opted to save the extra money for something I knew likely wouldn’t ever get wet anyways. The stain claimed to dry within an hour, but in our extreme heat and humidity, it was still tacky after a few hours. I decided to wait overnight before adding the cushions {since I knew these were extreme conditions}.

Outdoor Cushion Ideas for Your DIY Outdoor Sofa
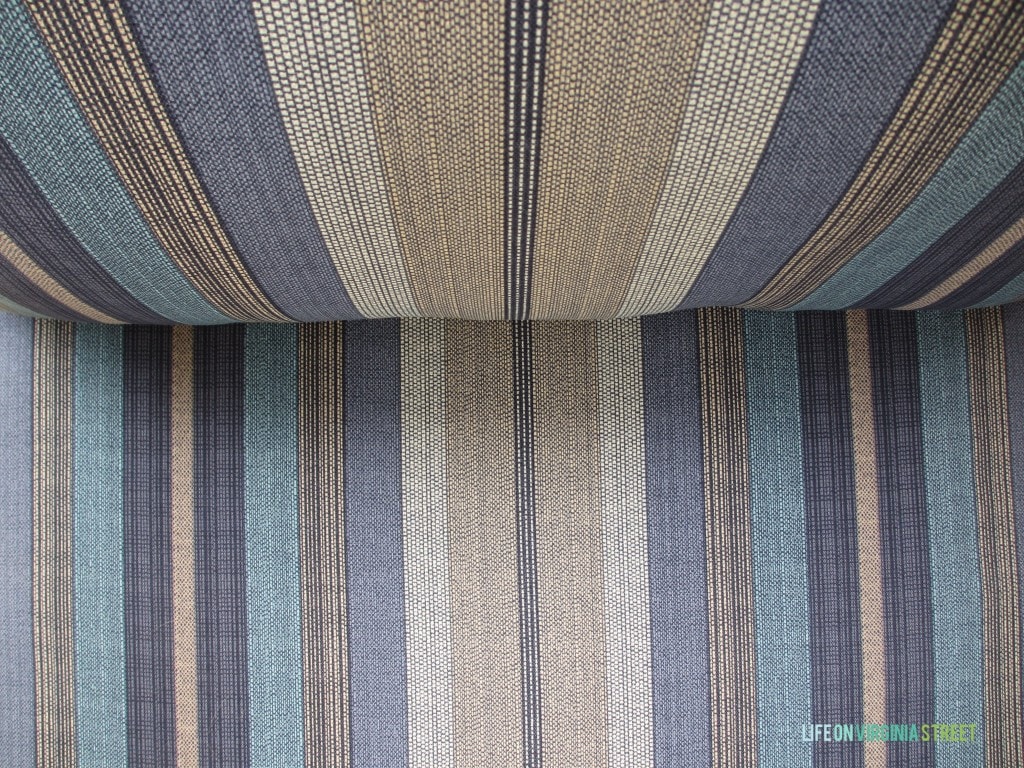
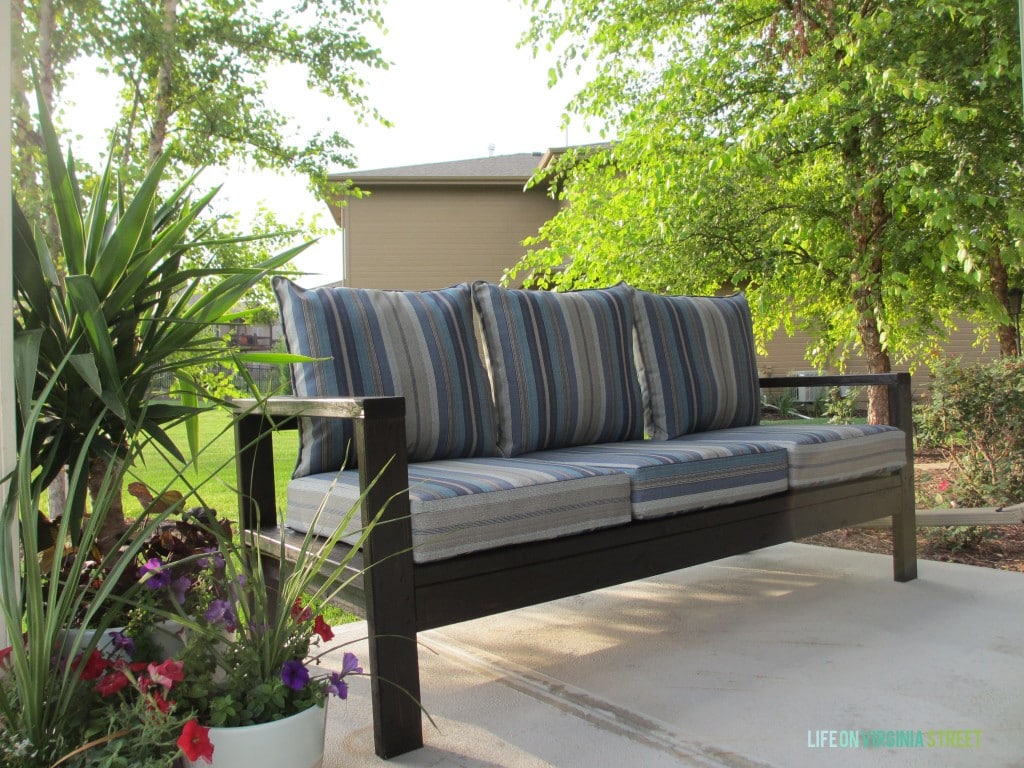
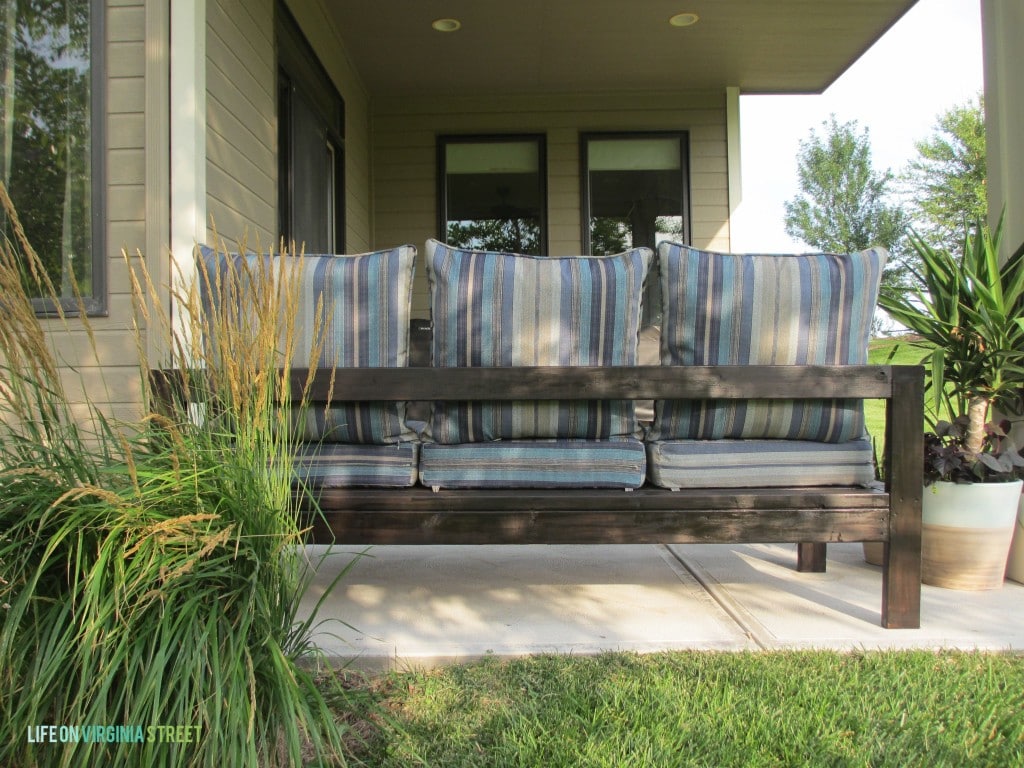
By far, the most expensive part of the project was the cushions. We used these striped cushions that were on clearance at Lowe’s. At first, I wasn’t crazy about the stripes. But now after seeing them in the space, I love them and think they will work well to hide stains. They are outdoors after all!
Following are similar cushions that would work for this deep seat sofa. Most of them come in multiple colors and patterns. Click any of the images to learn more:

Down the road, we may jazz up the arms a little bit by adding some ‘x’ pieces or some additional slats, but for now, it is perfect! I’ll probably also add some navy or other solid color pillows to the sides. And did I mention the space between the armrests is six feet?! Perfect for a quiet place for me to lay on and curl up with a good book! I couldn’t be happier with how this project turned out.![]()
I hope you love our DIY outdoor couch as much as we do!
If you would like to follow along on more of my home decor, DIY, lifestyle and other posts, I’d love to have you follow me on any of the following:
Pinterest / Instagram / Facebook / Twitter
disclosure: affiliate link used
It’s like you’re reading my mind! We’ve got some DIY patio furniture in our future and this is some great inspiration for us to finally get started. Great job, and thanks for being a L4L’er!
I’m so impressed! I have yet to attempt to build anything of that size, but now I really want to. 🙂 And I love the dark stain!
DYING! So in love. It’s amazing. I can’t believe how quick it came together! I want to make something exactly like this for our front porch. It’s perfect!
xo,
Kylie
This looks amazing! I love Ana’s tutorials, she is totally my girl crush 🙂 I just built an out door swing that is super similar and am struggling to find cushions I like. I’m going to have to check out our Lowes clearance bins soon!
I’m a sucker for outdoor living and love different seating arrangements. Your 2×4 couch is awesome! I love the colors you chose. Great job!
I am so impressed Sarah!
What a cute little outdoor couch! Is the back comfortable since there is just that one 2×4 supporting the upright cushions?
I was thinking the same thing! What is supporting your back, shoulders and neck? I would like this, but I think I would have to build it up in back somehow.
I was wondering about the back too and if the cushion stays in place or would slip out since just one back board.
HI! this is a very cool project. I’ve looked at the Ana White tutorial before and the thing that keeps me from doing this is that it seems like the back would be very uncomfortable to lean back against due to the single 2×4 support. Is that true? Can you comfortably lean back against the cushions for very long without feeling like there is a bar in your back? Thanks!
I also wondered this! Could you also tell me the length of the pieces that serve as the legs (and extend up to support the arm rest)? Thanks!
LOVE this so much!! I’m not much of a builder, but this looks manageable! Love that it is so large too! I’m impressed!
Cool project! Looks great. Thank you for hosting the link party.
That is so amazing it took less than 4 hours to make it! It’s gorgeous Sarah! It was so great to meet you at Haven and thanks for hosting the link party too – linked up my latest RH inspired DIY build!
Saw this on instagram and had to check it out. Amazing! You and your hubby did a fantastic job! 🙂
Omg it looks sooo good!!! Im wondering if theres a way to tweak this into a porch swing design? Hmmmmm? Love the cushions too! Great job.
This looks fabulous and I love your choice of cushions too. What a great project. You two are totally amazing, I love that ottoman also. Thanks tons for linking to Inspire Me.
This couch looks amazing! We have looked all season for the “perfect” set and still haven’t found one. I am showing this to my husband!! Fabulous job and thanks so much for sharing 🙂
Hi Sarah, this couch looks great- good work! I am considering building this same design. However, a few posters have enquired as to the comfort of the back rest. You may well have responded but I can’t find your reply. Could you let me know if the single beam at the back is comfortable, please? I’m assuming you’ve had plenty of use from the couch by now, so it might be a good time to ask for your views. The comfort of the backrest would definitely make/break my decision to go ahead and build.
Many thanks,
Clint
I think the biggest issue with the backrest is that we feel it is a bit low so it hits on an odd part of your back. I don’t notice it as much as my husband, but he has contemplated reconfiguring it slightly. There really isn’t an issue with it being a single beam, other than it can be annoying at times because the pillows want to fall through. We may also add a few vertical slats to prevent that from happening. I hope that helps!
That’s great, Sarah. Many thanks for your reply!
That makes sense! Thanks. Love the plan but may reconfigure the back!
Love, love, love this! Featuring you tomorrow on the blog and FB – thanks for sharing it at our Outdoor Extravaganza party!
Thanks SO much Krista! xoxo
Sarah,
I’m going to make this sofa this weekend so to put on our front porch and wanted to know what the lengths of all your boards are. Based on your response for the back rest comfort, I am going to make it a bit taller and add additional boards, probably horizontal.
All of the exact board lengths are found here: https://www.ryobitools.com/nation/projects/2651. Good luck on the project!
So cool and I so need this! Thanks for this!
That’s fab!!! Really realy Fab…
Thank you so much! 🙂
Hi!
Looking great! What length of screw did you use?
We just built this last night and it took us about 3 hours and stained it a cedar color, going to get cushions tonight. I love the look of it and very sturdy.
So happy to hear that! Thanks for the feedback!
What size do i make the 2×6’s why do you not list any 2×6 matterial?
There aren’t any 2×6’s required for this project. Only 2×4’s.
Hello! This Bench is beautiful 🙂 How does it hold up in the rain??? do you seal it?