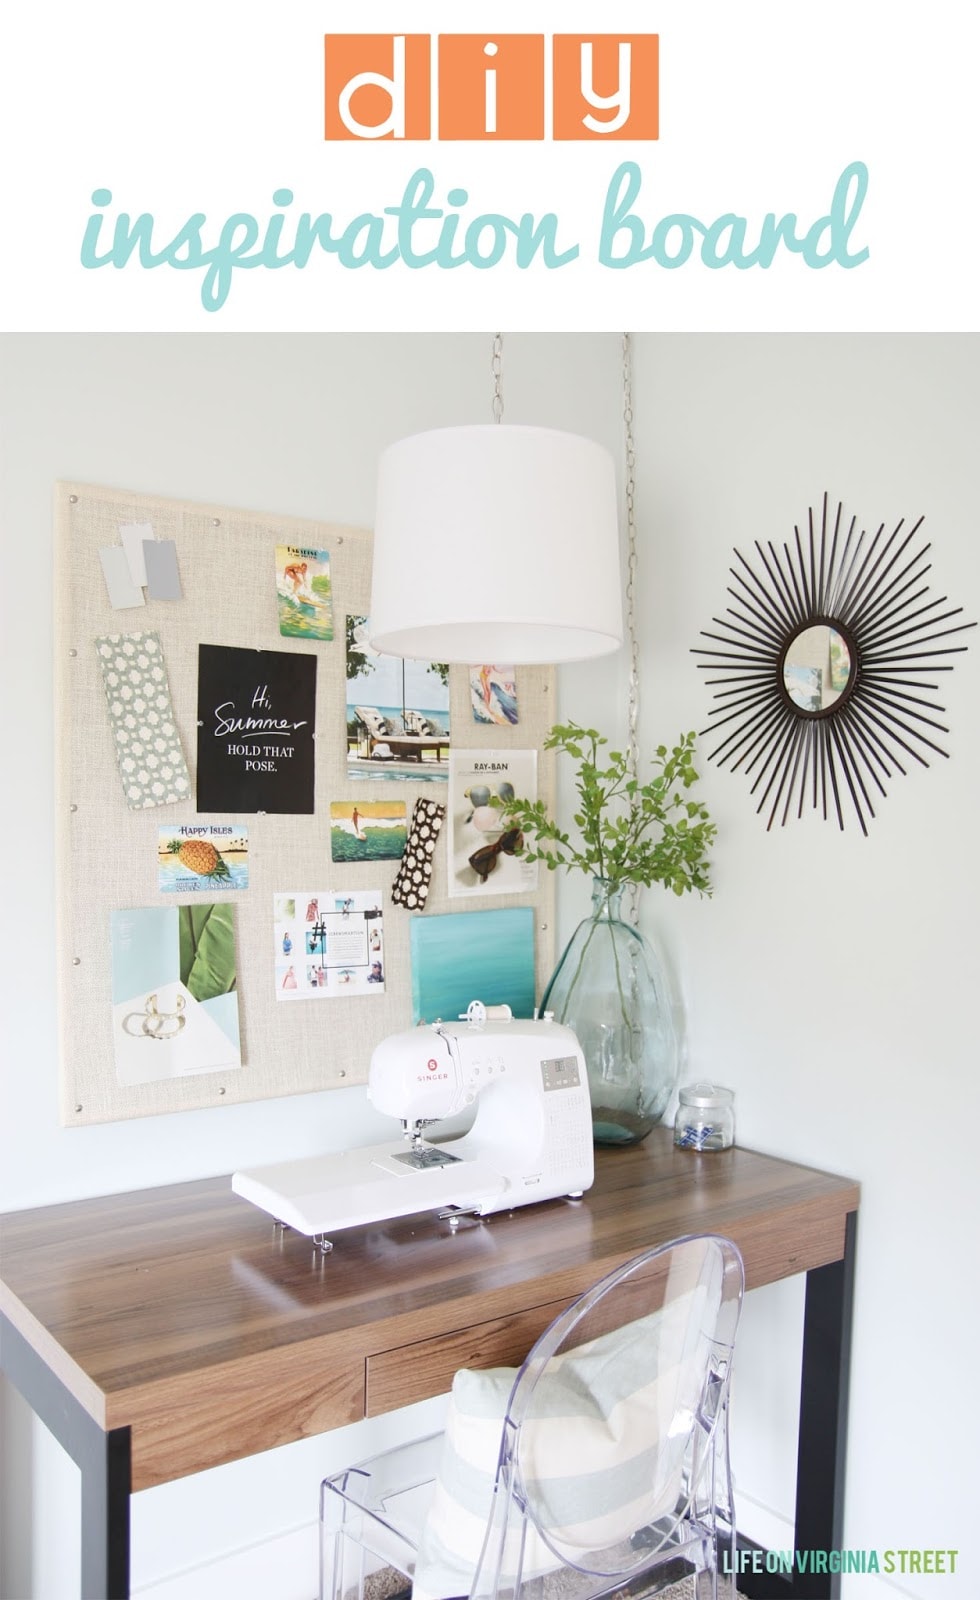
Today I’m sharing the easy tutorial for how I made the inspiration board in my craft room that you saw on Friday’s big craft room reveal.
Supplies Needed {clickable affiliate links included below for your shopping convenience}:
- Cork bulletin board {I picked mine up at Hobby Lobby. It rang in at $14 for the 36″x36″ size with a 30% off sale they were having}. I’ve linked to one that is 24 x 36 that is similar.
- Burlap or fabric of your choosing. I selected a light-toned burlap and purchased 1.5 yards for the 36″x 36″ board. You’ll want several extra inches around each edge, so make sure you buy more than the size of your board. This was also on sale and rang in at just over $3.
- Upholstery tacks. I picked up a pack, also at Hobby Lobby. Regular prices was $1.99 but since it was the only item in my basket not on sale, I was able to use a 40% off coupon on it.
- Hammer.
Total cost for this high-impact DIY project? Less than $20 and it probably took me less than 20 minutes to complete once I had all the supplies!
It turns out I took far fewer photos of this project than I had intended to, but I think it should still be easy to follow along with this tutorial.
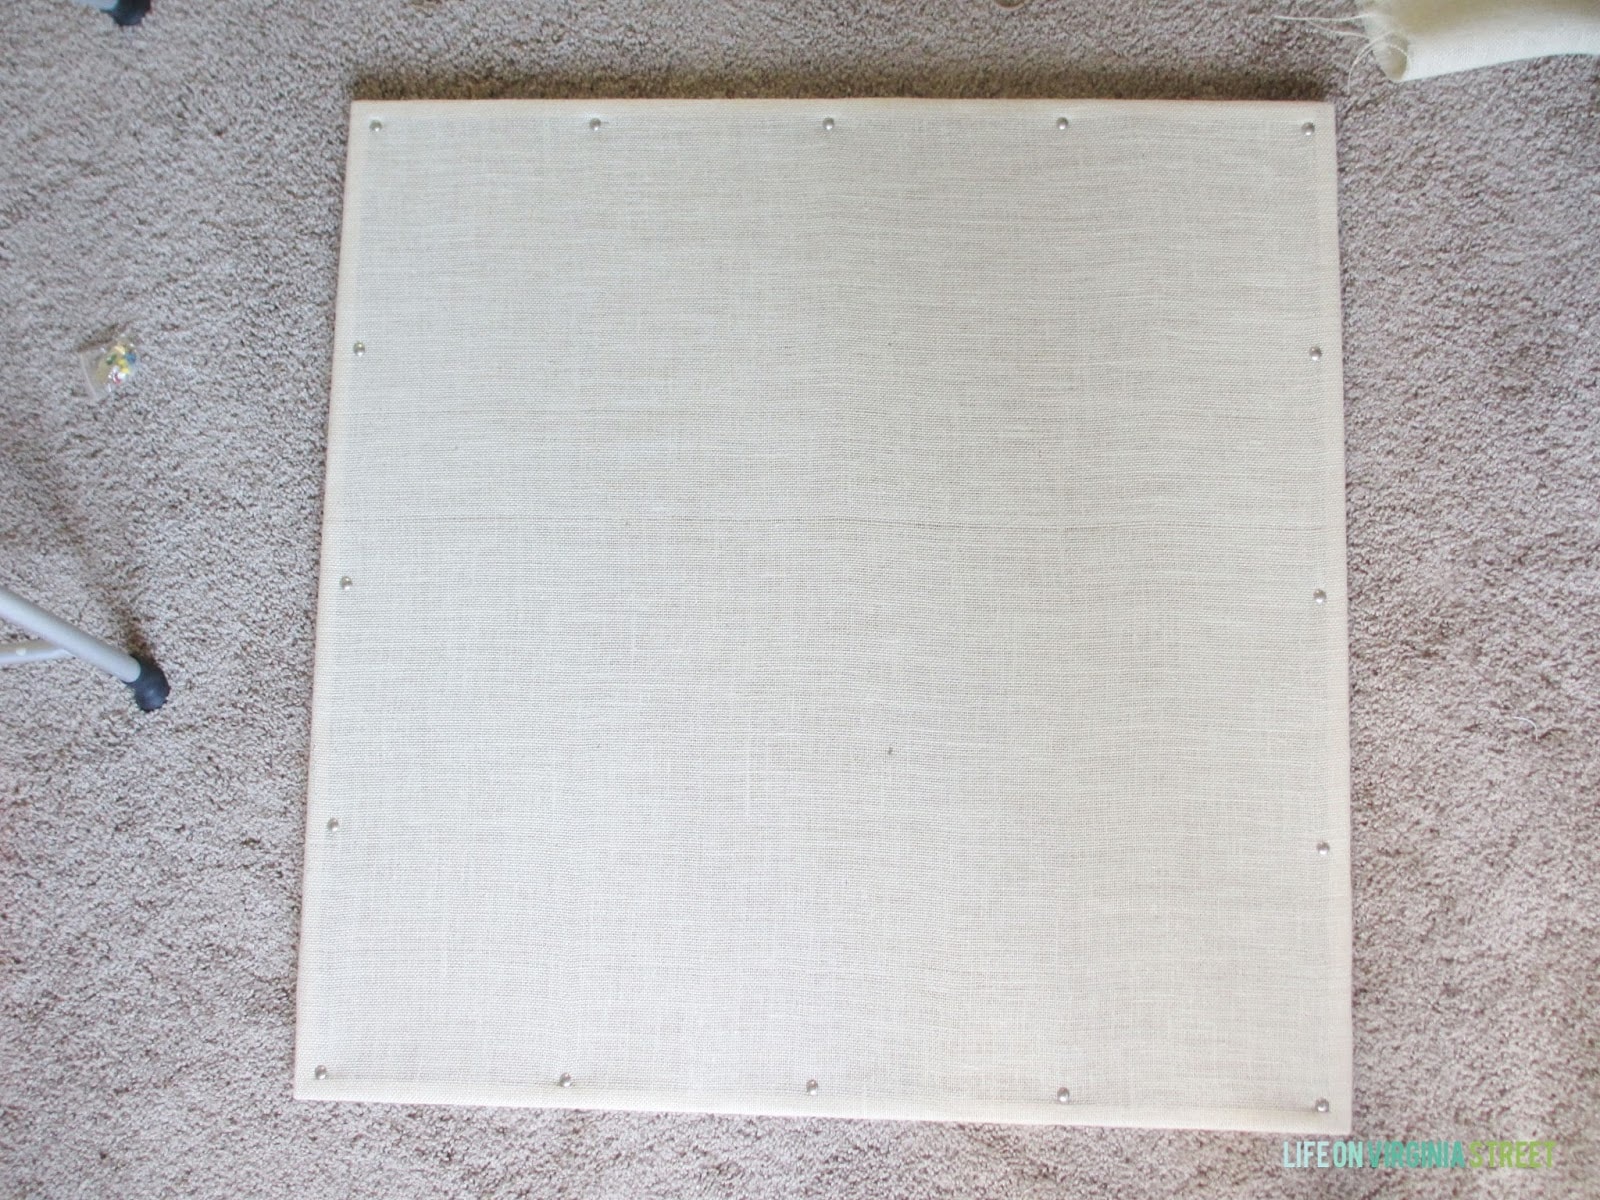
First, I stretched out the burlap over the top of the bulletin board. Mine had a wood frame around the edge already which worked perfectly as my guide and added a little dimension to the final product. I simply started in one corner and pushed one of the upholstery tacks in the burlap through the corkboard. ThenI tried to line it up exactly on the inner edge of the frame. I then went to the adjoining corner, pulling the burlap fabric tight, and added another. Also I then added one to the center of those two splitting the difference, and pulling the fabric as I went, until an entire side was done. I would then move on to the next side. Once the front side was done, it looked like this:
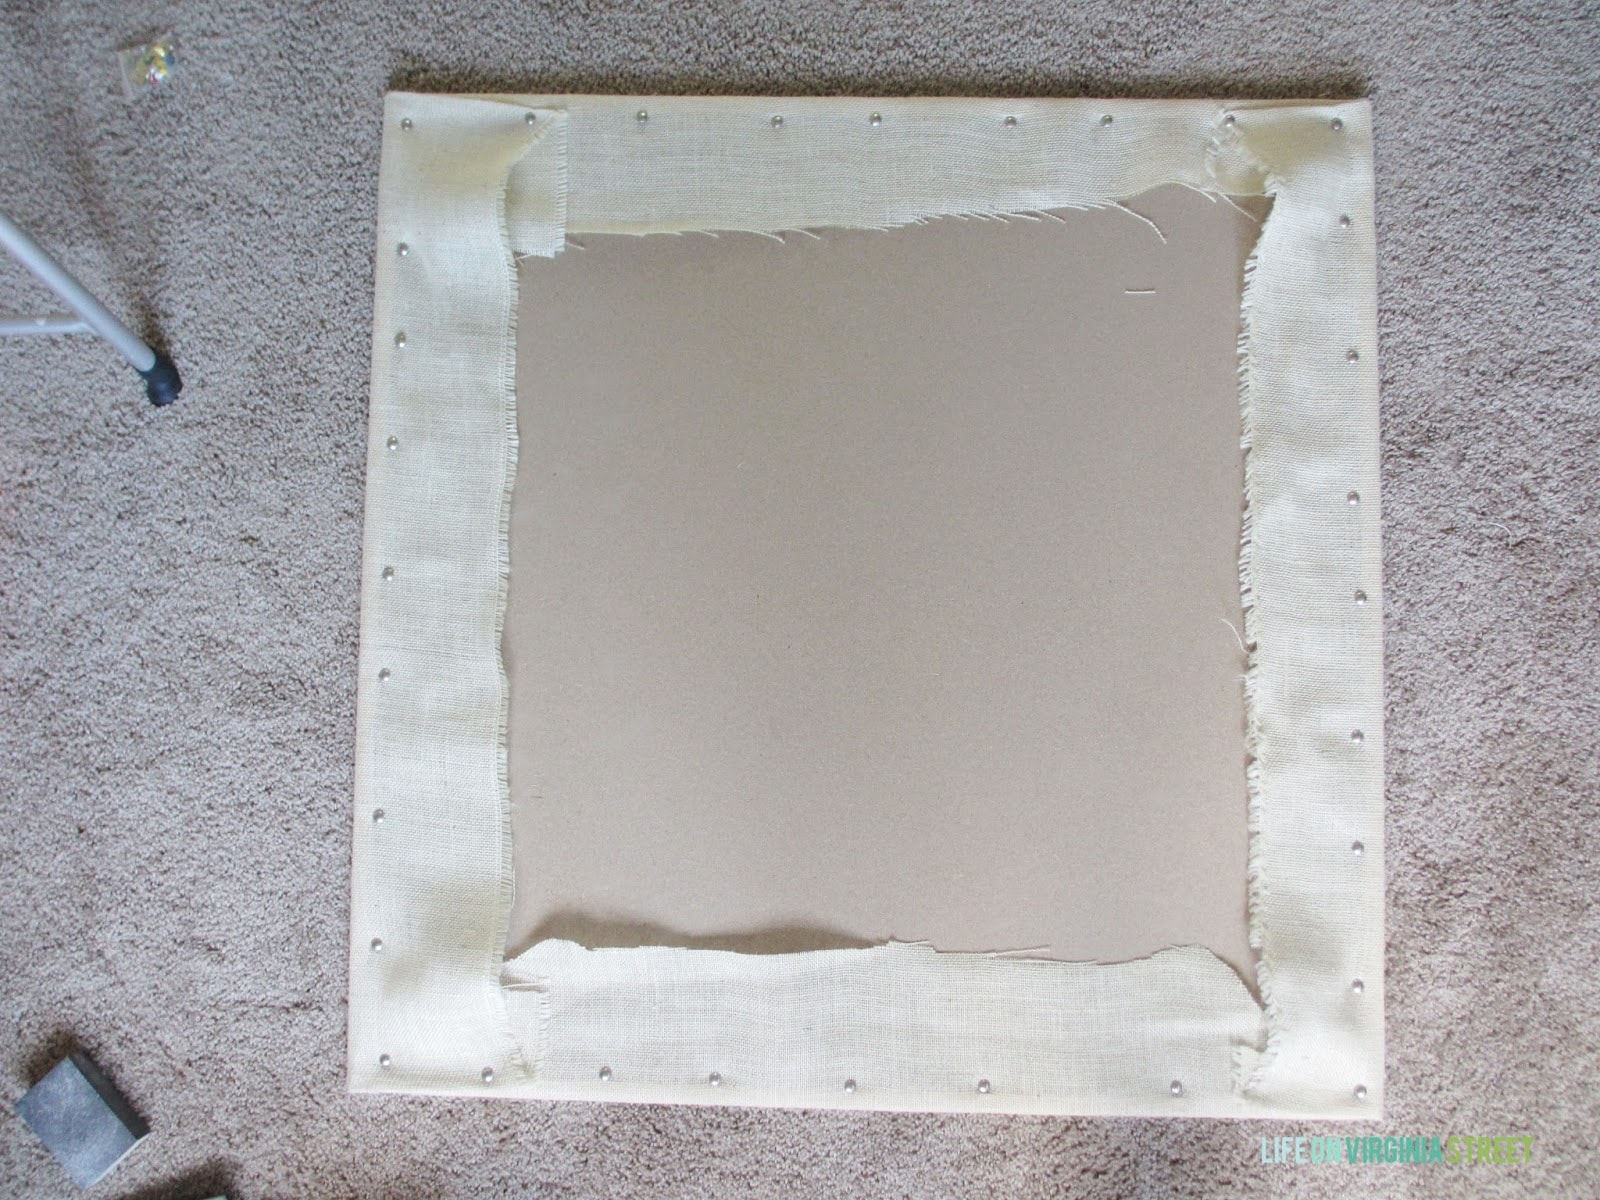
I then flipped the board over. And carefully folded my corners under {see the photo below}. My upholstery tacks happened to be just slightly longer than the cork depth. Which panicked me at first, but ended up working out perfectly. I simply pushed another tack in on the backside wherever I felt the point from the one on the front, so the tack on the back covered the point on the back from the tack on the front. I worked around the board much like I did on the front, again tightening the fabric as I went around. You can see I also added more tacks on the back to keep the fabric as tight as possible {spacing was not nearly as important on the back since you won’t see it}. In some instances I would need a hammer to gently tap the tack in.
Once all the tacks were done, I cut away some of the extra fabric to avoid bulges when I hung it on the wall. This particular board came with it’s own mounting kit, so a few minutes later and it was already hanging on the wall. I couldn’t be happier with the end result!
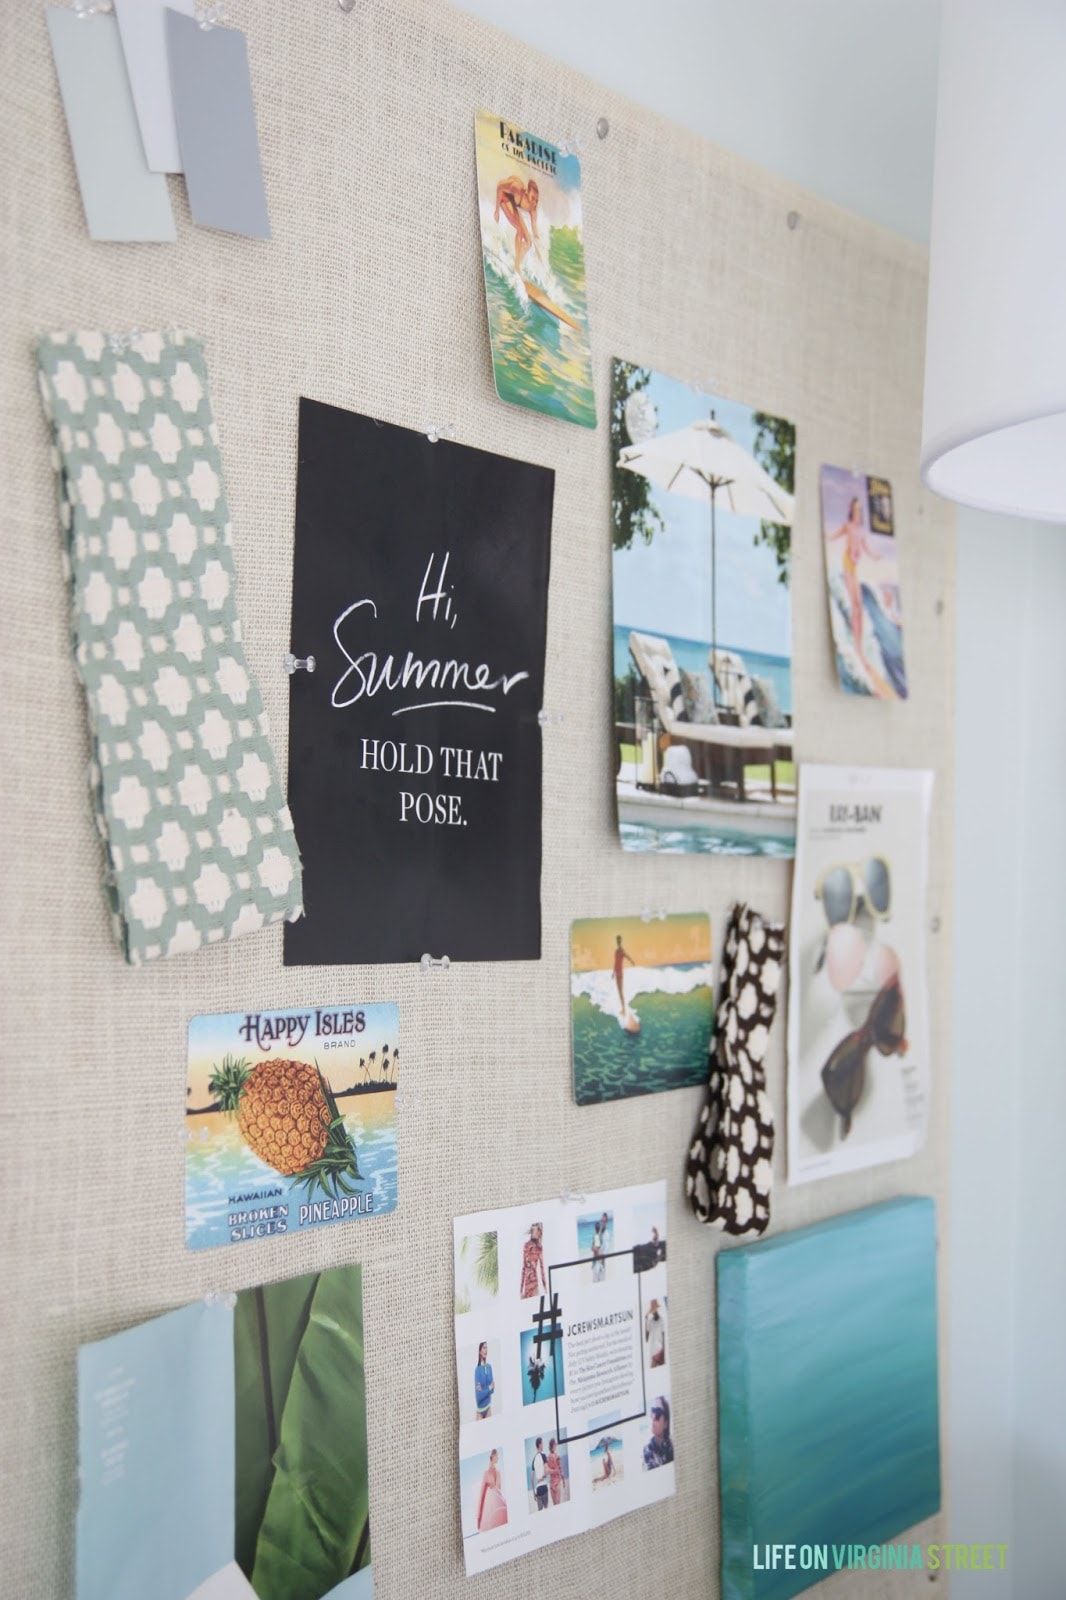
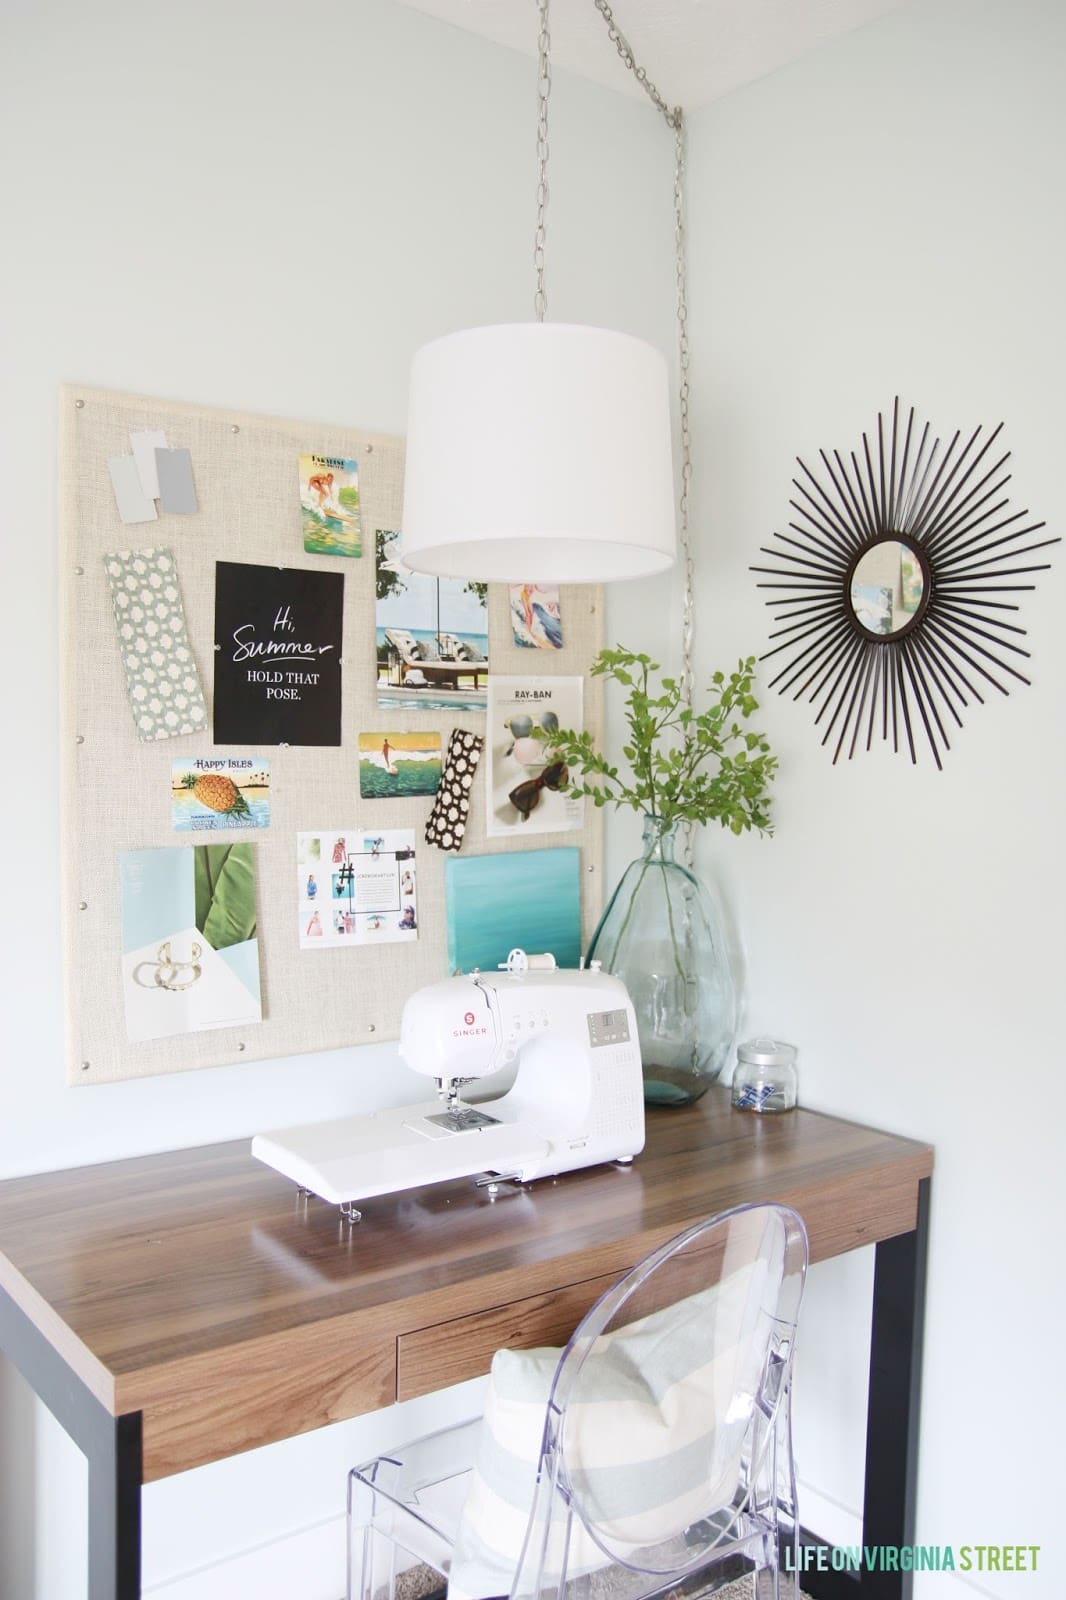
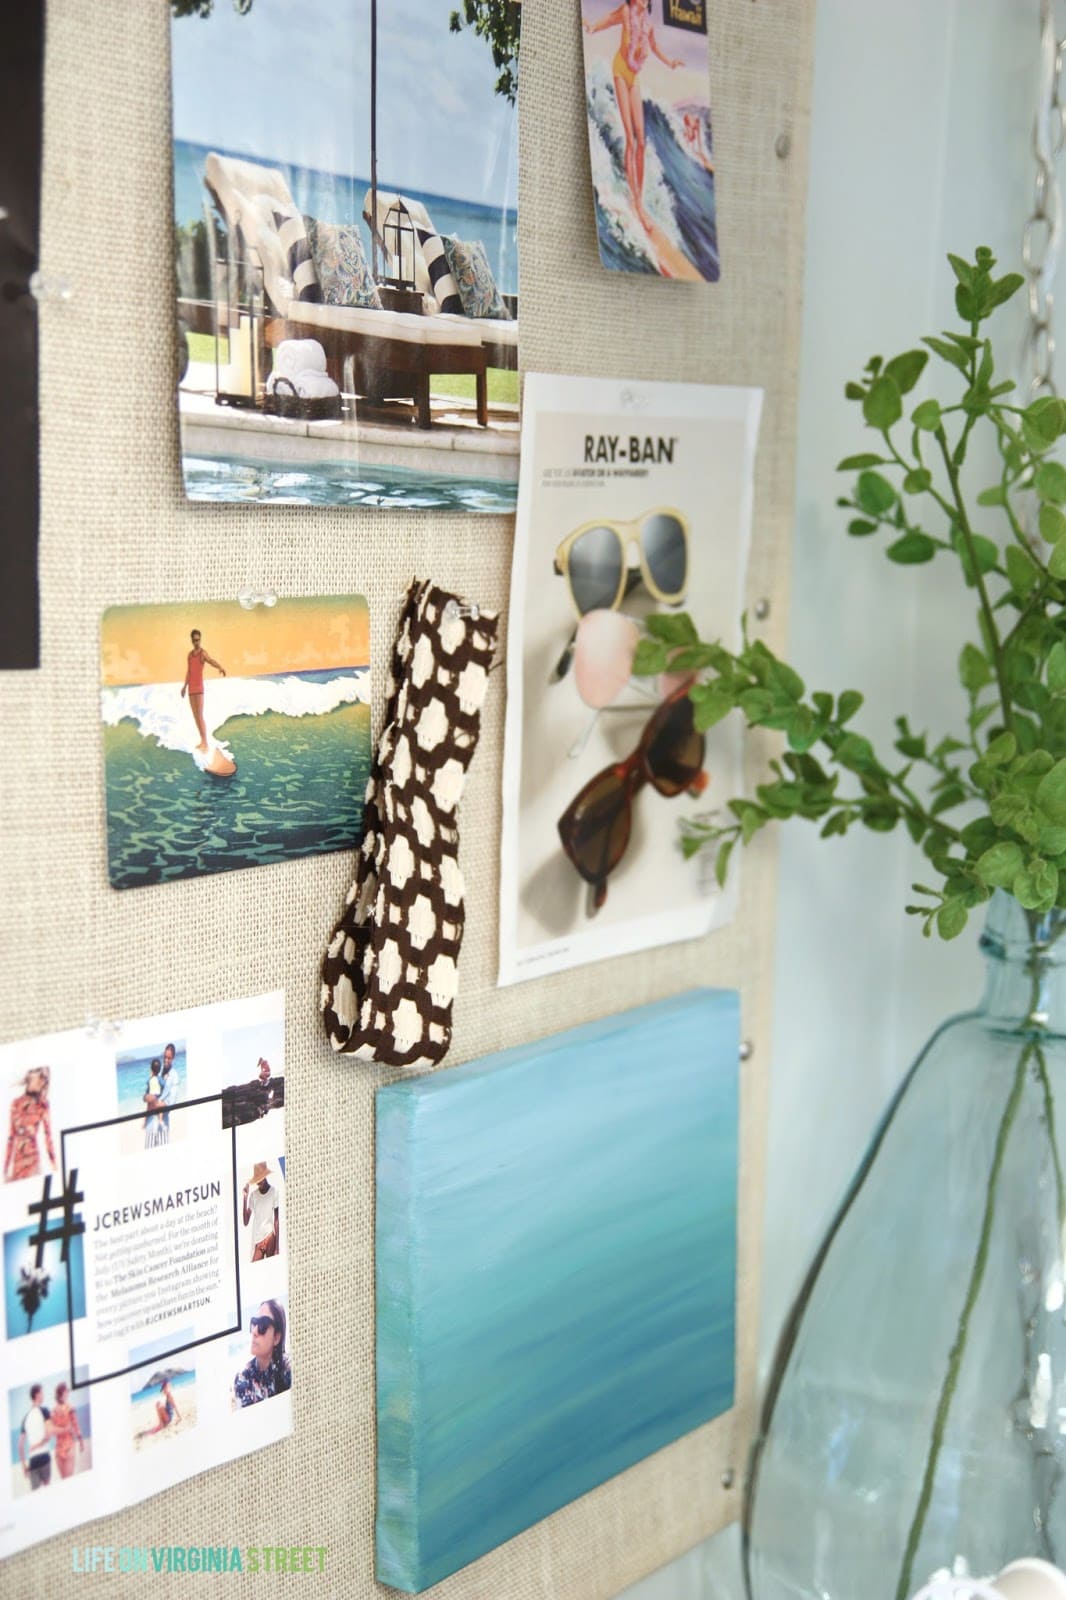
I’m totally a California-surfer-chic wannabe at heart, so I filled the board with lots of fun summer-related items that I shopped around my house to find. I included Restoration Hardware paint samples, some Celerie Kemble Betwixt fabric scraps, pages of a recent J. Crew catalog and some “vintage” surf postcards we had picked up in Maui a few years back. I love this little inspiration area so much!
And speaking of summer, I have three giveaways that end this week, so be sure you don’t miss out on either of them: $310 Target giftcard, $600 Paypal Cash and the TIKI Brand Outdoor Summer Pack!
If you would like to follow along on more of my home decor, DIY and random posts, I’d love to have you follow me on any of the following:
disclosure: some affiliate links used
This is great, thanks for sharing.
Compliance Hong Kong
Quick, easy and pretty, my kinda project sarah! thanks!