I was able to finalize all the work on the board and batten in our queen guest bedroom this weekend, as well as paint all of the baseboards in the room. Slowly but surely it is all coming together!
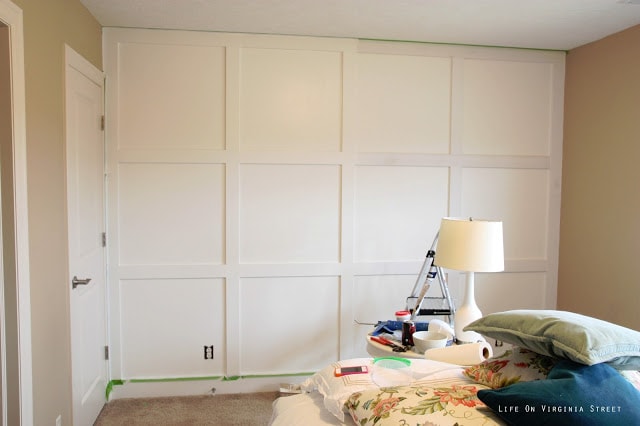
I very meticulously filled the nail holes and sanded on Friday – and then Saturday it was time for some paint. The wall had always looked nearly finished because the boards were pre-primed. However, you can see in this photo how dramatic the change was once the paint was applied to the left half of the boards.
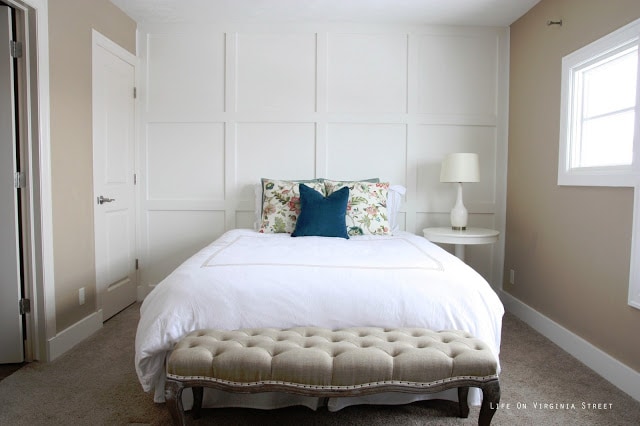
And here is how the room looks now. Like I said – slowly but surely, progress is being made! You can see the bench also made it’s debut and I think it is going to work perfectly in the room.
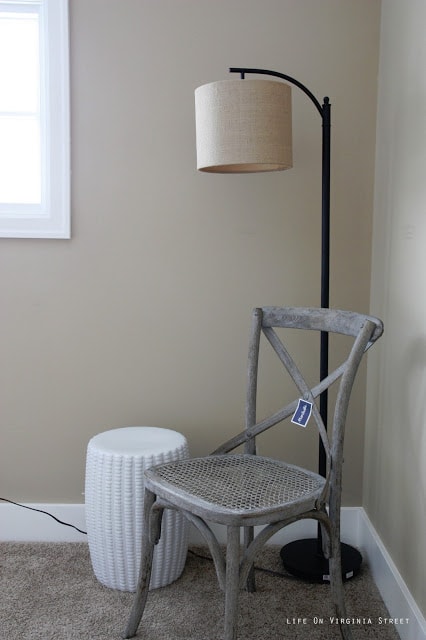
I have also opted to make use of this corner in the room. Since the room won’t need a dresser, I thought it would be a nice little reading/sitting nook. The lamp is Threshold from Target and the chair and garden stool are from Marshall’s. I will still need to style this corner and figure out the best way to hide the lamp cord, but I like how it is coming along.
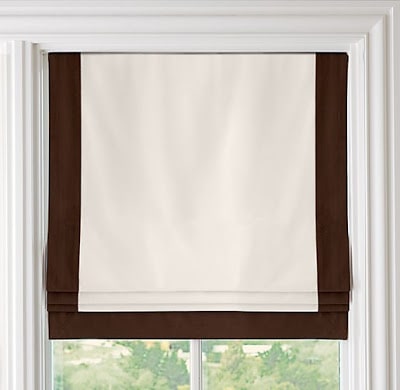
I have scoured the internet to find a good window covering solution. I want to hang roman shades 6-12″ higher than the window, to create the illusion of taller windows {they are very squatty in this room}. I found the perfect solution from Restoration Hardware Baby&Child of all places. They were clearance shades with blackout liners – and they are the cordless version which is perfect with our cats. The Bordered Cotton Canvas Cordless Roman Shade. At under $100 {plus an extra 10% off the clearance prices} these were a much more economical option to other versions out there that can be well over $300 per window on the low end.
I also found very cool lights there that are SO much more affordable than the “adult” store. It’s worth checking out if you haven’t before.
The window trim and baseboards seem to glow now that it is all painted white – it just looked grungy and dingy before.
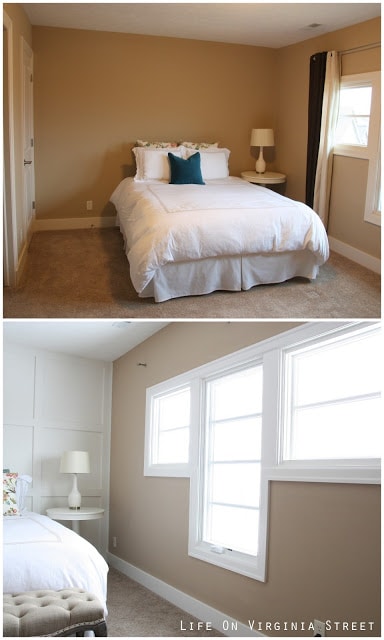
I still have quite the laundry list of task to completed, but I feel the progress has been good. As a reminder, this is how the room started when we moved in back in December. Full room tour found here.

Queen Guest Room To-Do List:
- Paint window trim
- Paint baseboards
- Paint door casings and doors
- Board and batten wall behind bed
- Find headboard {the DIY version no longer works with the board & batten}
- Add seating to room
- Find a larger bedside lamp {since the room can only accommodate one nightstand}
- Order roman shades
- Find drapes
- Find fabric for throw pillows
- Make throw pillows
- Change out all the outlets/light switches to white
- New chandelier to replace the boob light
- Paint walls
This looks awesome!
It looks great, Sarah! I am seriously impressed with your DIY skills. And I want that bench!
Sarah – your guest room looks amazing! I absolutely love the board and batten on the headboard wall and can almost see a gorgeous sunburst right in the center of that wall over the bed! Thanks so much for the recent Liebster Award nomination! I’ve been so busy lately that I haven’t been able to blog about it and pass the award along, but will be sure to do so soon!
Nicole
http://www.nicoleodettedesigns.wordpress.com
That is so funny you mention a sunburst mirror – I ordered one two weeks ago from One Kings Lane because I had the same thought. I am hoping it arrives any day now! 🙂
I hope you post pix when it arrives! I’m sure it will look gorgeous!
It looks great Sarah! Really coming together.
This comment has been removed by the author.
The board & batten looks awesome! Such a great feature!
Newest follower here! I found you though the blog hop. You have a wonderful blog, I can’t wait to read more. You can find me at meandmr.com
-Melanie @meandmr.com
Your room is looking really great!
Jeanette @ Creating a Life
Great job! I’m impressed. I love tackling DIY projects that are fairly inexpensive and add so much character to a room. Thanks so much for linking up to ITS PARTY TIME! Hugs, Clydia
Wow! what a difference! awesome job! 🙂 Michelle
love i love i love it. i want to do that same thing in my master. we just added some to our entry and i’m totally hooked
Wow! The board and batten makes a HUGE difference. Great vision.
I’d love if you shared these at my Show & Tell party this week. http://www.gingerlymade.com/2013/04/show-tell-20.html
Thanks Ginger! And thanks for the invite. I was able to link up just in time 🙂
Thank you for linking up to Gingerly Made’s Show & Tell. You’ve been featured! http://www.gingerlymade.com/2013/04/show-tell-features_9.html
This is so pretty! a beautiful transformation! Thanks for linking up.
This is absolutely stunning!! What a difference it made to the room. Thank you for linking up. I believe this is my first time here 🙂 I will be featuring this a little later today.
XO
Kristin
Amazing! I love what you did! The board and batten makes the room feel so fresh, love it!
I love the board and batten! I just finished mine in my huge living room. What a meticulous DIY project, huh? 🙂 Yours is gorgeous!
This is just beautiful in a stunningly simple way! Saw this over at Living Well Spending Less! 🙂
I love the board and batten, after seeing how stunning it looks in your home I think I will need to do the same.
-Stephanie @ TwoZeroOne.ca
Hi Sarah! I desperately need your board and batten tutorial to give to my painter! I had it “pinned” but since you moved the link no longer works. PLEASE repost/re-link
Thanks in advance!
-k
Here you go! https://lifeonvirginiastreet.com/2013/07/tutorial-board-and-batten-grid-html/