Sharing all the details on our garage makeover and new garage floor coating we chose!
Today’s makeover is a fun one! Our garage has always been on Kurtis’ wish list for makeovers, but it never really took priority over some of our interior projects. But, the time has finally come, and as of today, our garage is 100% complete and exactly what we had hoped it could be! Let’s dig into the details and part one of our full garage makeover, including the details on our new garage floor coating.
This post is in partnership with Hello Garage. As always, all thoughts and opinions are my own! Click here to read my full disclosure policy.
Our Garage Floors: Before
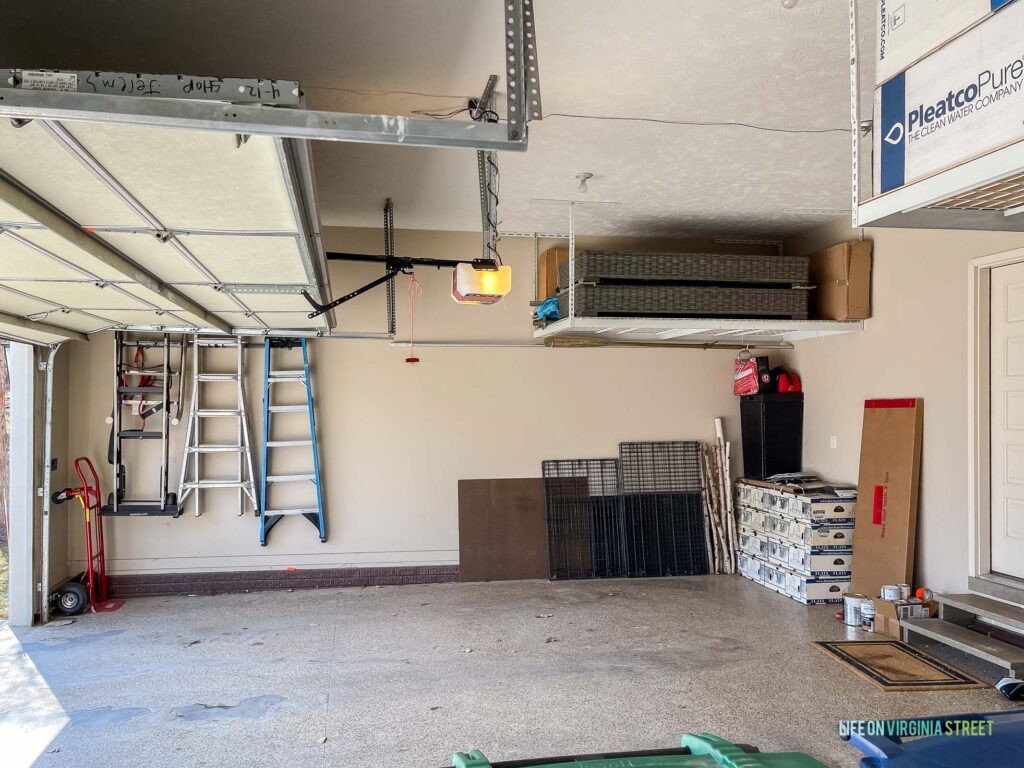
Our garage has always been one of those spaces we’ve known we need to work on, but honestly, it felt overwhelming. Any attempts we had made to improve or organize the space in the past seemed to quickly be erased, because we never actually did it properly.
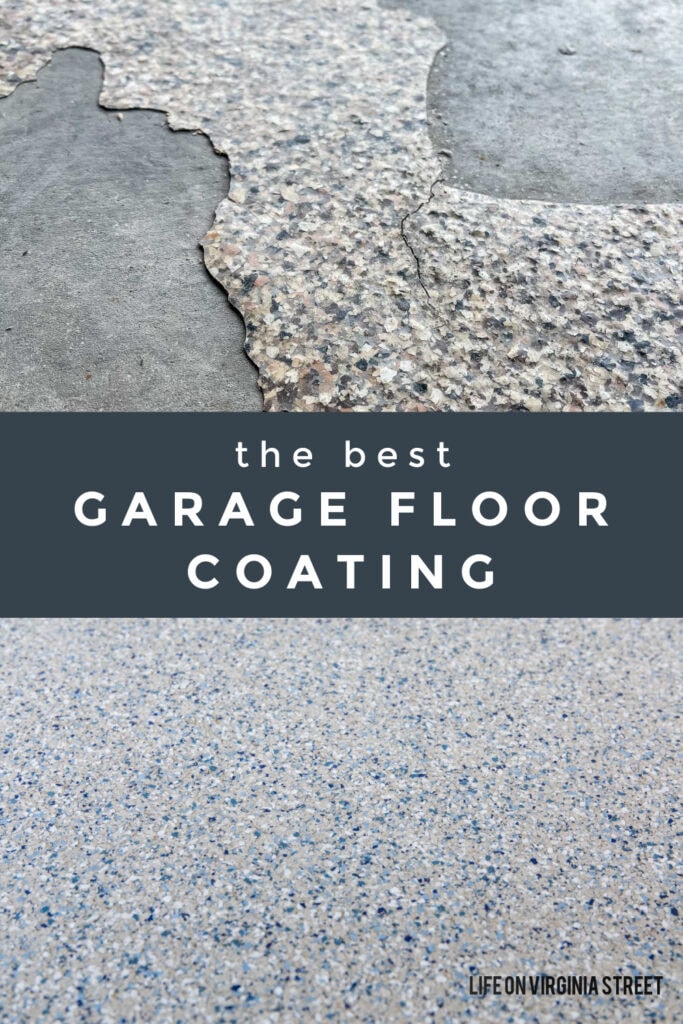
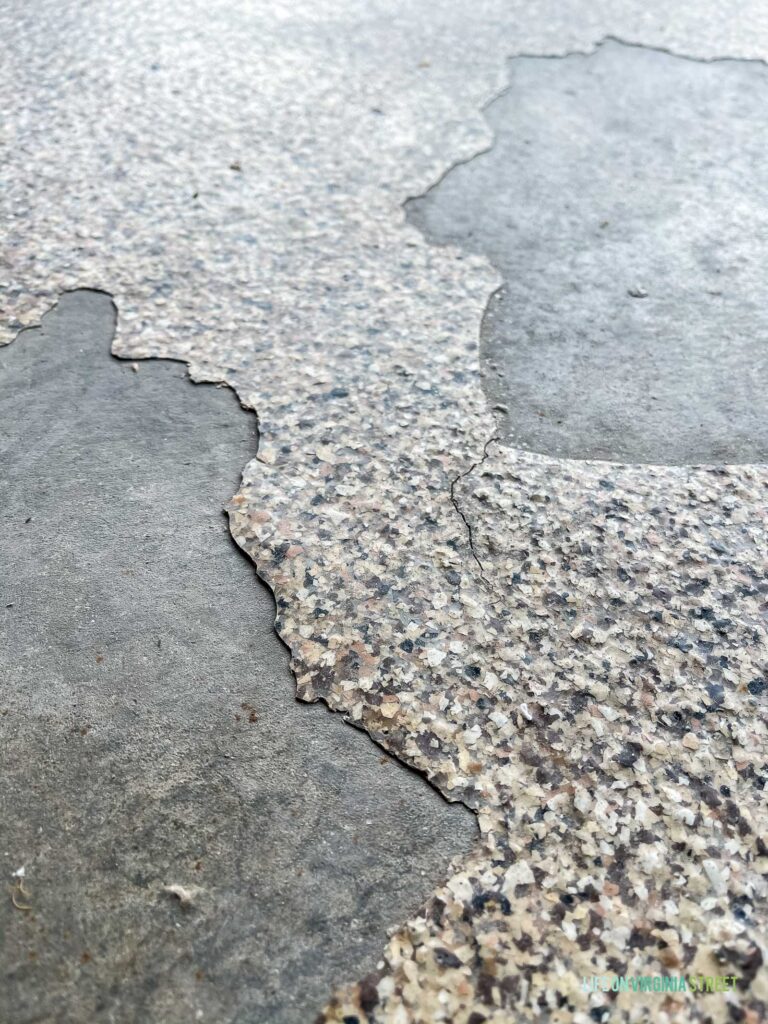
We’ve also known for some time now that we were going to have to address our garage floors. The epoxy that was applied before we moved in was deteriorating badly in some places and completely gone in others.
From farther away, our floors could pass as simply “dirty”.
However, upon closer inspection, you could see the existing epoxy flooring was peeling and cracking rather significantly in many places. The problem seemed to get worse with each passing year.
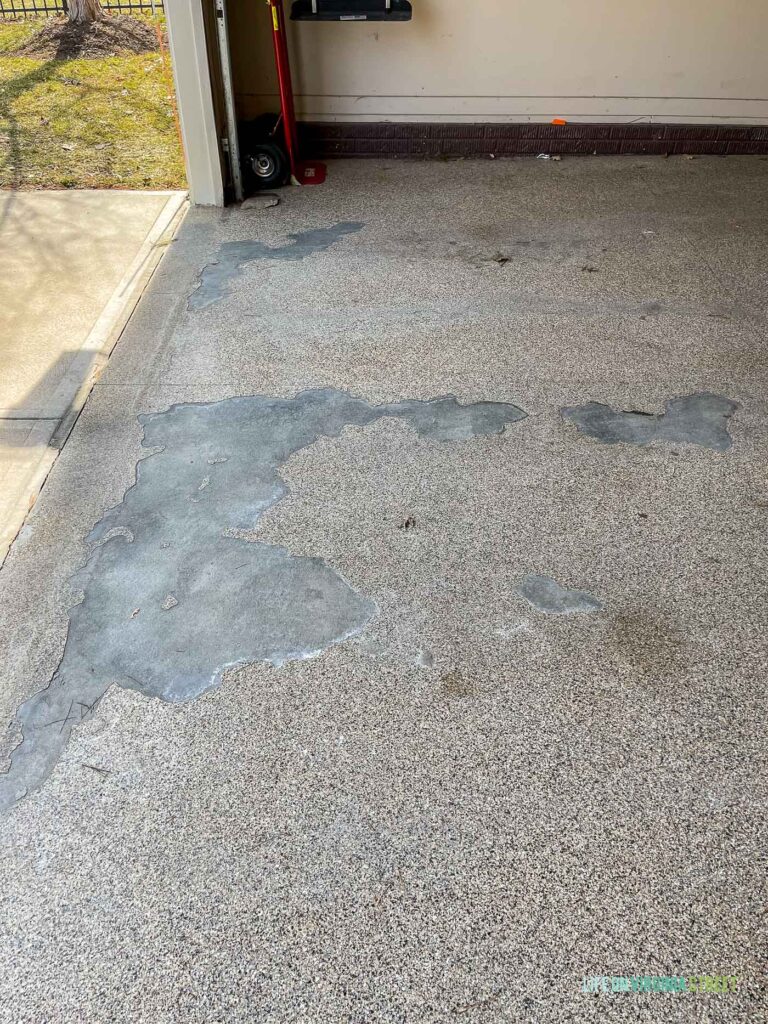
With the sections that were cracking, you can see it was also allowing water to get under the surface, further causing issues to the overall durability and adhesion.
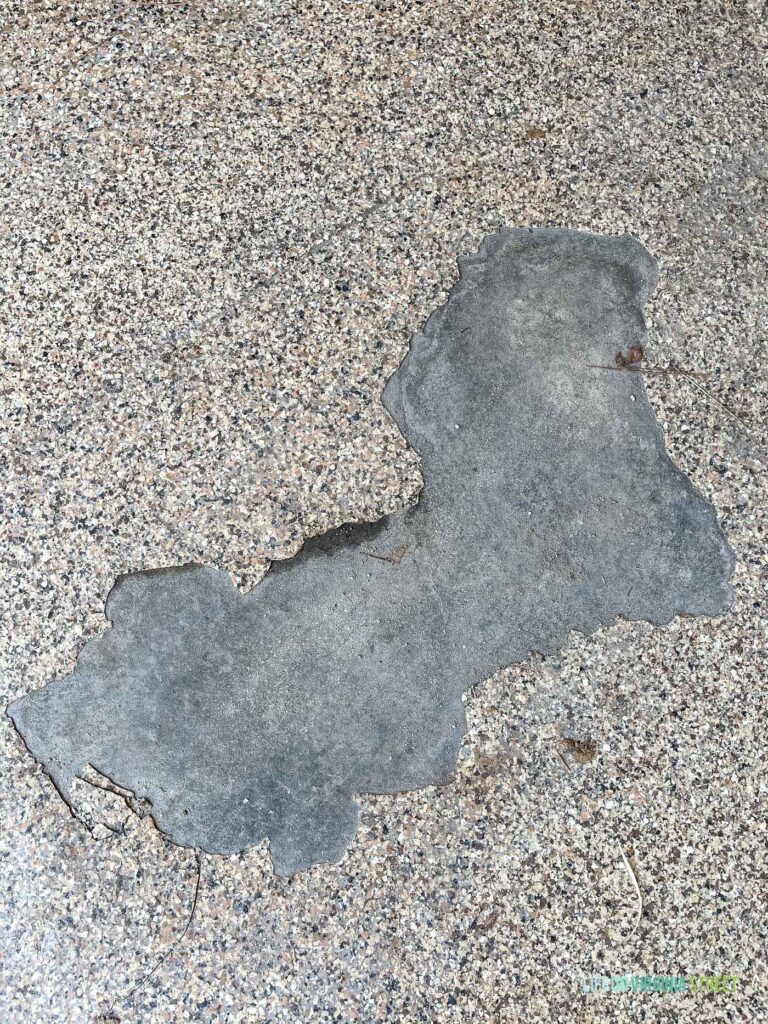
In some areas that the epoxy was essentially just floating on the concrete and I could literally pull it off with my hands.
Not only that, our garage had become an embarrassment when people came over. Garage organization is clearly not a talent that Kurtis or I possess, so we knew we needed to address that, as well. Our garage is the main entrance to our home used by friends and family and where we store pool drinks in the summer months. It was time to tackle the chaos! You will be blown away when I share how much our garage has changed from the image below, taken just a few short months ago!
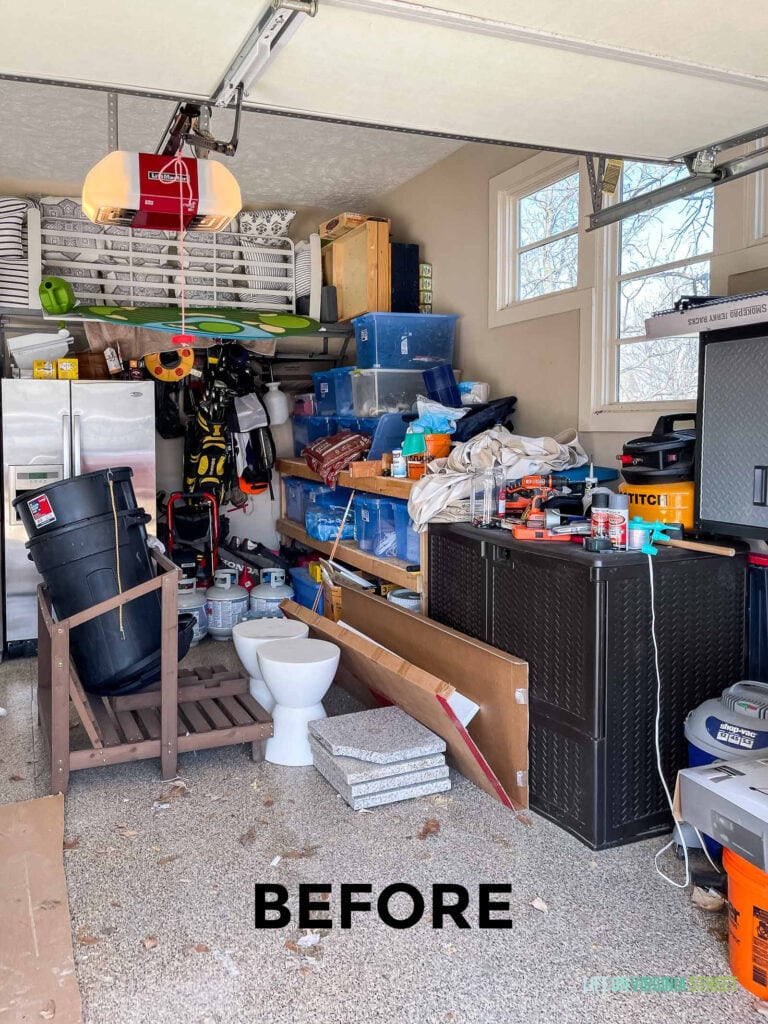
During our unusually cold temps this winter, we also discovered that our garage was not fully insulated. In fact, we had a number of items freeze multiple times (including our refrigerator).
Ultimately, we had a discussion and decided that if we had to empty the garage regardless, we wanted to tackle everything that needed to be done all at once. That included:
- Purging and donating unused items
- Insulating the garage
- Painting the garage walls
- Replacing the floors
- Getting things organized once and for all!
Most of those items weren’t exactly “fun” to handle but now that it’s all done, we are so happy we didn’t try and do it in stages. The truth is, we likely never would have gotten around to emptying the garage again for paint or insulation if we didn’t address those items right away! Now that we see the end results, this is one of our favorite makeovers to date!
When Hello Garage reached out about a potential partnership, we were both immediately intrigued. The timing was right and we knew we had to make some changes rather quickly. Thankfully, the pros at Hello Garage handle both flooring as well as storage and organizational needs! I’ll be addressing the storage units in a later post, but wanted to mention it now if you’re looking for a full-service garage rehab! Today we’ll be focusing on the flooring process.
Why Polyaspartic Floors vs. Epoxy Floors?
We clearly hadn’t been impressed with our old epoxy floors. So, when Hello Garage mentioned they had an epoxy floor alternative, we wanted to hear more. Unlike most garage floors, Hello Garage uses a polyaspartic garage floor coating. I thought I’d share a few of our favorite characteristics of this alternative garage floor option that helped us make the decision to go this direction. Hello Garage’s polyaspartic garage flooring is a garage floor coating with a granite-like look and durability that can be installed in just one day! And, unlike epoxy it:
- Is environmentally friendly (unlike epoxy or most other DIY solutions)
- Resists peeling
- Won’t yellow
- Has excellent abrasion resistance
- Not susceptible to hot-tire pickup
- Lasts 4-5x longer than epoxy
- Comes with a limited lifetime warranty!
Add in the fact that it’s easy to clean and would completely give us a new look, we were sold pretty quickly!
Although we worked with the local Hello Garage team, they do have franchises in many states around the country. They offer free bids and consults for those that may be interested. You can see all their locations here. Their experts are incredibly knowledgeable, friendly and helpful and we really enjoyed working with them throughout this process!
After an initial consult with one of the Hello Garage gurus, we picked out the flooring options and storage/organizational components we thought would best meet our needs. We then set the wheels in motion pretty quickly!
Removing Our Old Epoxy Floors
In order to remove our old epoxy floors, there were two major steps involved. The first required some work on our end, and the second required the work of the pros at Hello Garage!
The Prep Work Required on Our End
I thought it would helpful to first outline some of the prep work we had to do on our end in order to have the old floors removed, and the new garage floor coating installed. We obviously added a few additional steps on our own (like the insulation and painting) but wanted to include everything in the outline below.
In order to remove the old floors so Hello Garage could do their part, we had to remove every single thing out of the garage. To do so, we rented a POD since we knew we’d need to keep the garage empty for at least two weeks while we got the other work done. The good news is, by fully emptying the garage, that helped reduce the cost of insulation and painting because they didn’t have to work around our junk or tape off as many areas. As we brought every item from the garage to the POD, we tried to decide if we really needed it going forward.
We ended up gifting some items to family members and donating everything else that we no longer used or needed. I also took a trip to Under the Sink (a free service in Omaha) to drop off old paint, chemicals, etc. that can’t be tossed in the trash. It’s always such a quick process, but for some reason we had accumulated another pile for a year or two and never ran it down to be handled. I love when bigger projects force us to handle these smaller tasks that have been on our to-do list for ages!
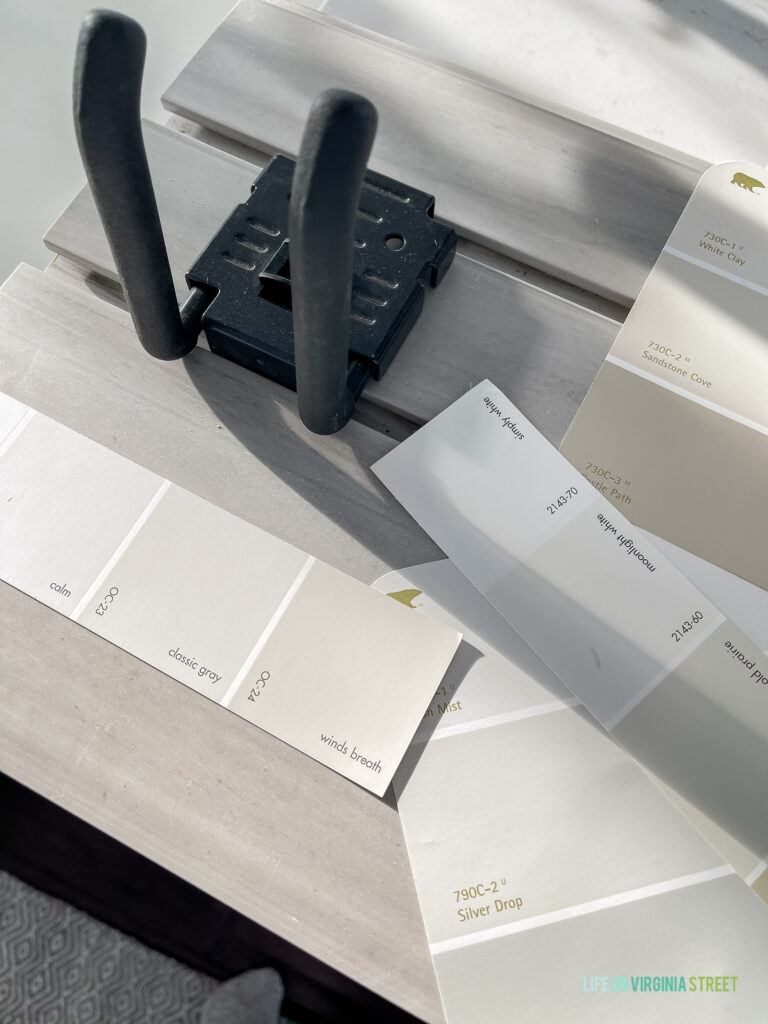
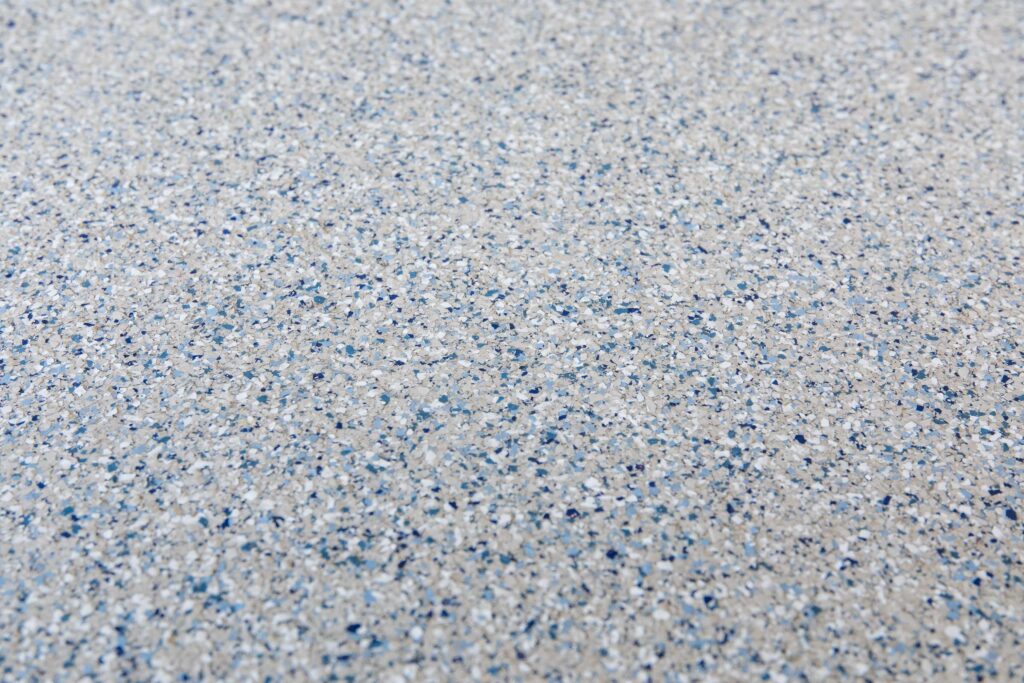
Once the garage was emptied, we quickly had insulation blown-in and the walls painted two days later. The blown-in insulation created holes in the wall in between every set of studs, so with the mud job, painting was inevitable. But, it also allowed me to select a new paint color that would work well with the floors and slat wall we chose! We ultimately landed on the color “Cotton Candy” for the garage floor coating (top left sample in the image below) and “Snickerdoodle” for the garage slat wall. We love that the garage floor coating color had flecks of sand tones, blues and other neutrals. Despite the blue you can see up close, it very much reads as a neutral overall! I actually think we would have loved every single color option that Hello Garage has to offer. They take the guesswork out of it by offering a perfectly curated look of flake options that work with a variety of color schemes and styles that all end up being the perfect neutral for your needs!
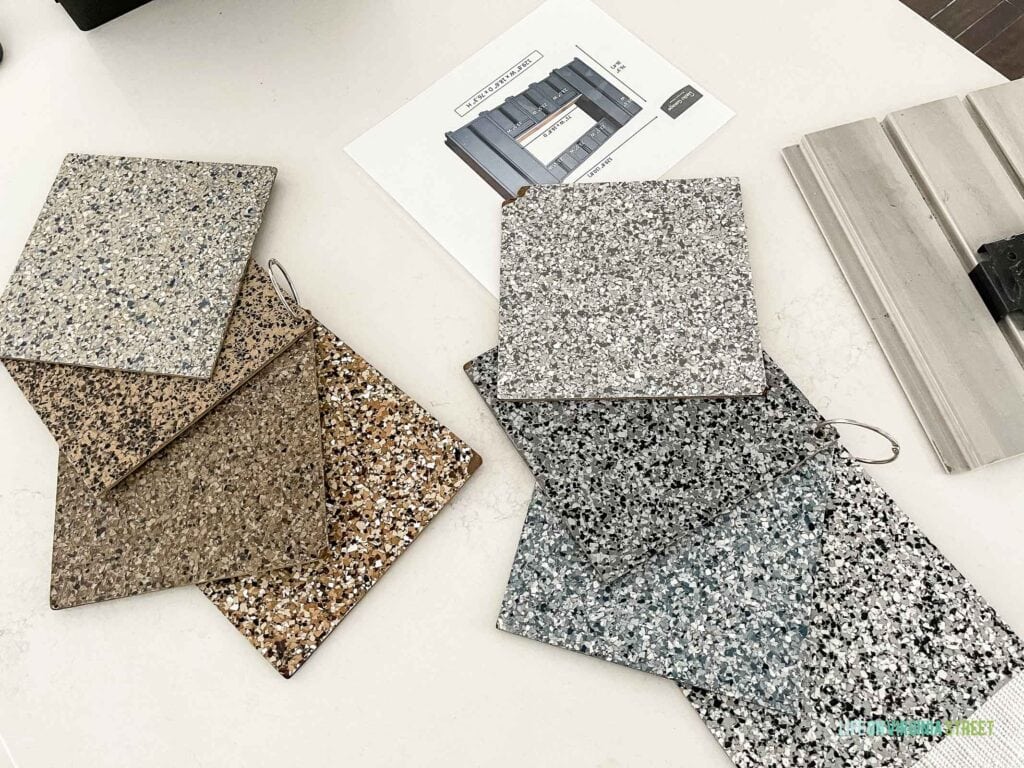
I quickly chose Benjamin Moore Classic Gray to complement the new Snickerdoodle slat wall.
With our selections made, we placed the order and got to work!
The Hello Garage Floor Removal & Installation Process
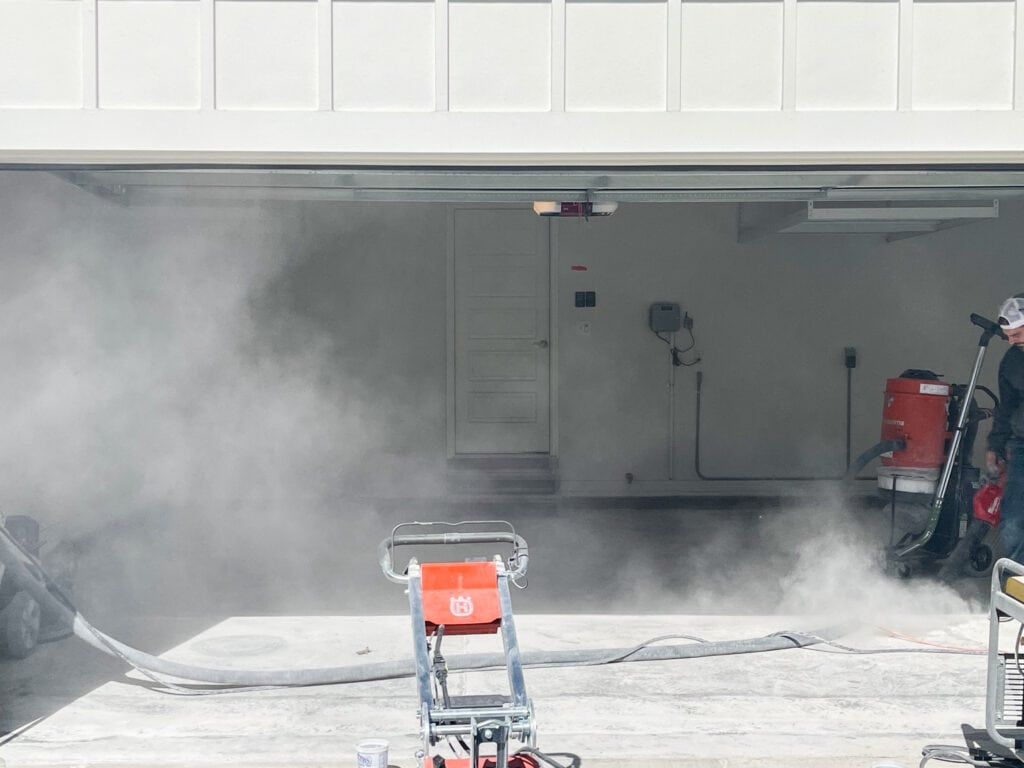
Despite the fact that our floors were peeling and flaking in many areas, the team at Hello Garage had to grind out the remaining epoxy. It is not a clean process and I’m grateful we didn’t attempt it on our own! I think these photos underscore what a mess it can be to fix improperly installed floors or ones that aren’t intended to last more than a few years!
The grinder the team uses is not one you can get at the store, so I can’t imagine how involved the process would be with a less industrial-strength option!
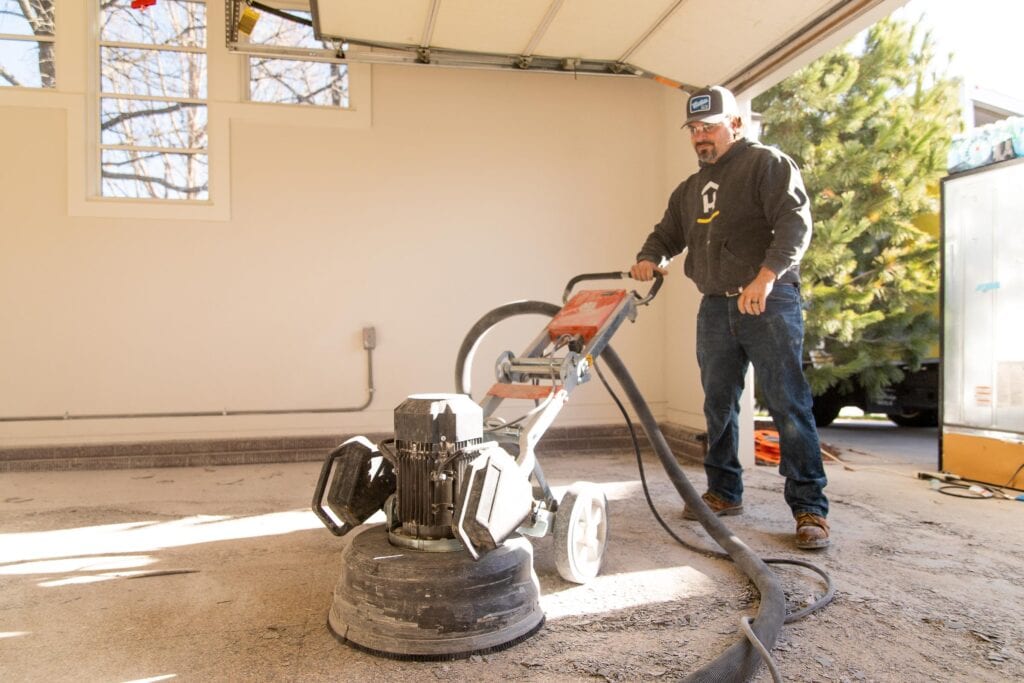
Lots of dust, but with the right tools, they had the old floor out fairly quickly!
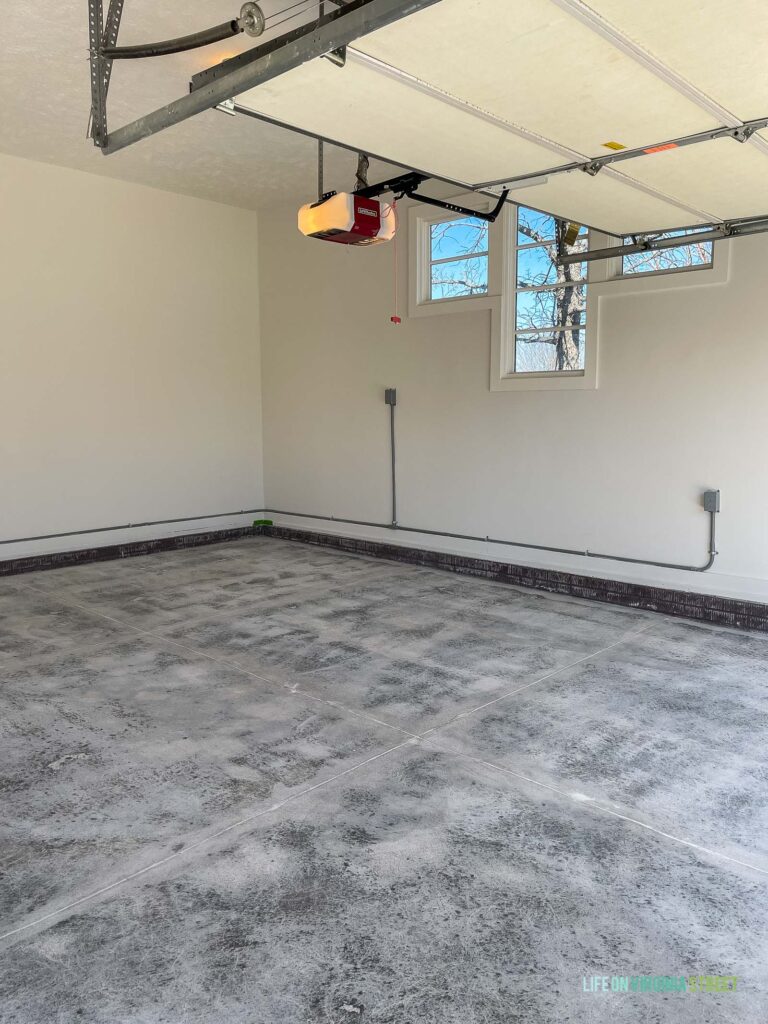
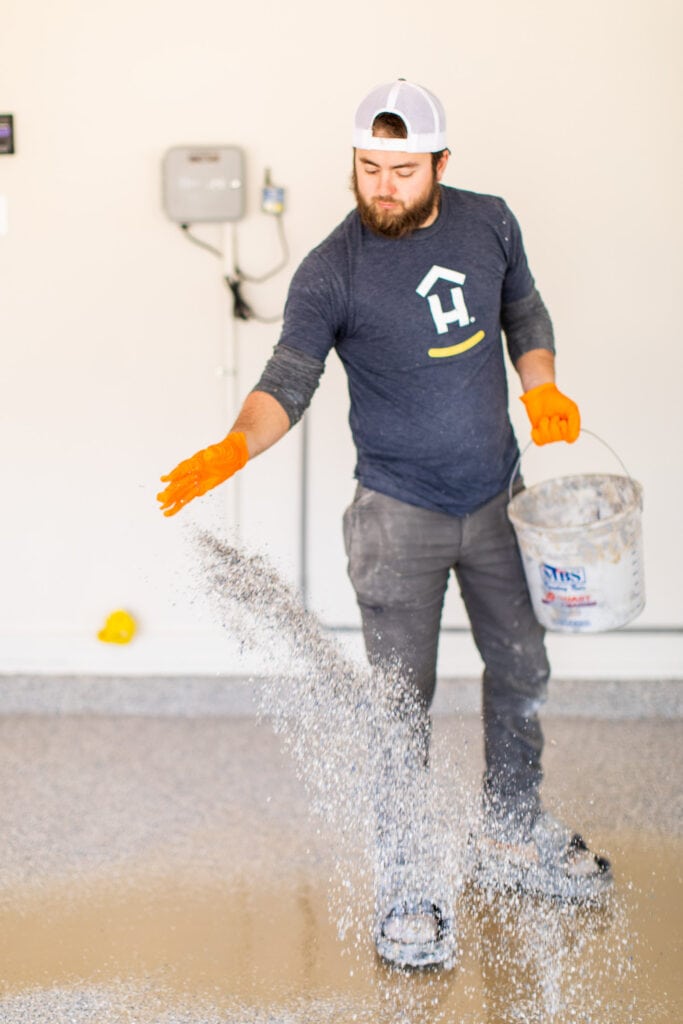
They then have a secondary process where they open up the pores in the concrete to prepare it for the polyaspartic garage floor coating application. They also filled the seams in our concrete so we’d be left with a fully smooth surface! Previously, extra dirt and dust would collect in those crevices so we were glad they suggested having them filled!
 Here’s a better look at the work in progress! The back has the colored flakes installed, the middle has the coating, and the front is only the prepped concrete!
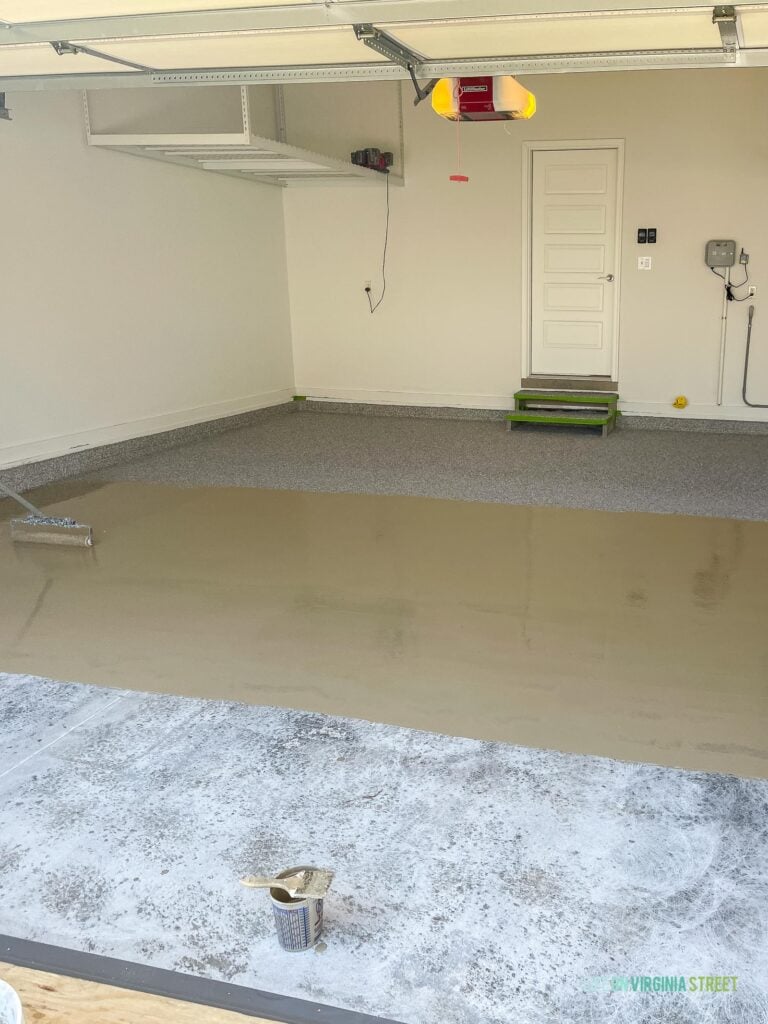
It was actually a lot of fun to watch them install the colored flakes! Kurtis and I popped outside multiple times throughout the day to watch the progress.
Here’s how it all looked as it was drying shortly after they left for the evening. Can you believe they got all of this done in one day?! You want to keep heavy weight off it while it cures (24-48 hours), so they kept our garage doors partially open, but then closed it all off so leaves and other debris couldn’t blow in.
They were able to come back the next morning and get to work on installing or storage and organizational pieces! I’ll be sharing all of those with you soon!
Our New Polyaspartic Garage Floor Coating
Okay! Are you guys ready to see the incredible before and after photos?
Here’s a quick reminder of the before.
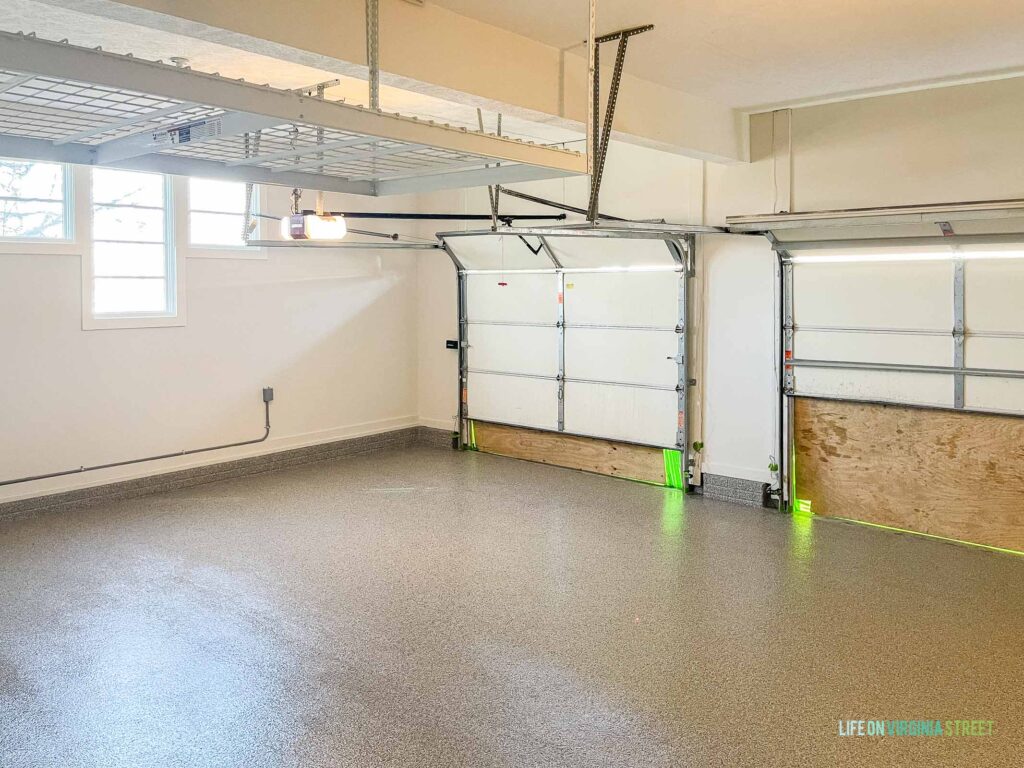
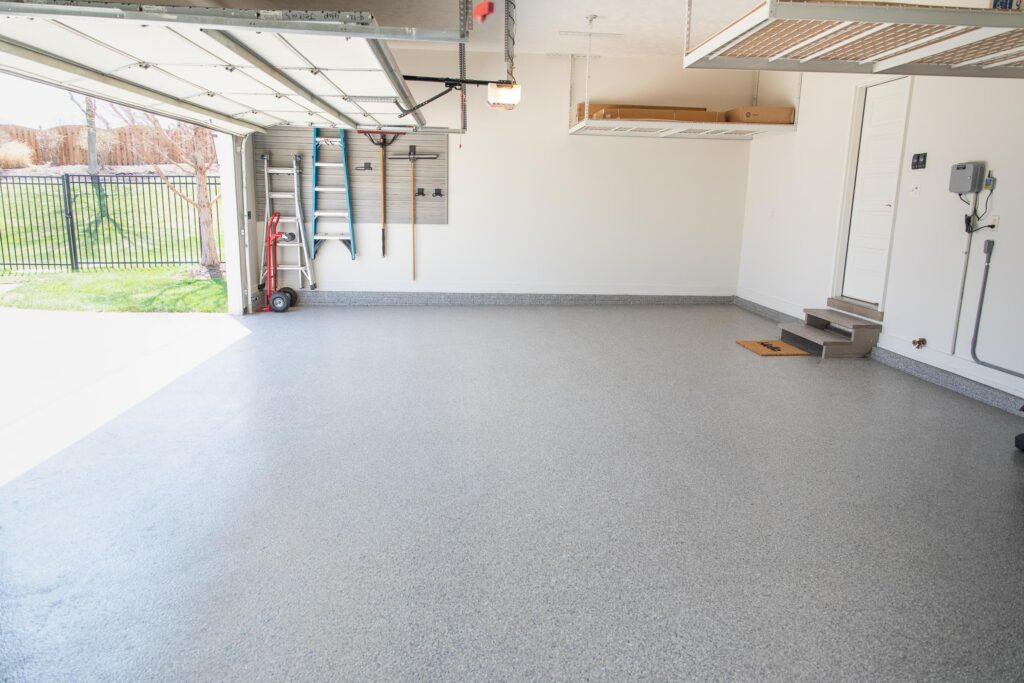
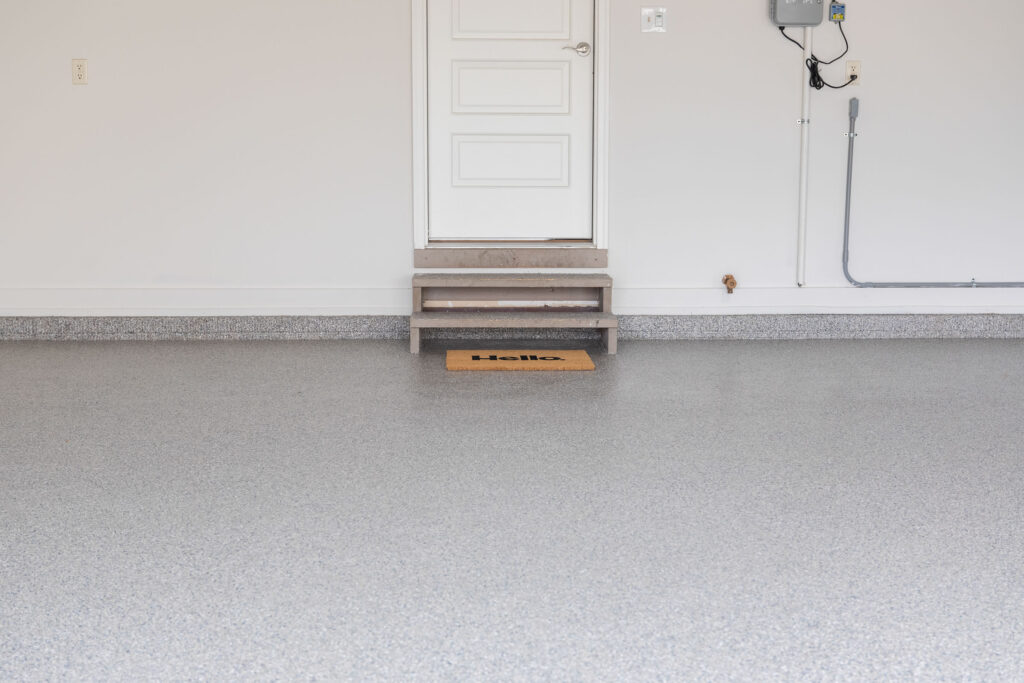
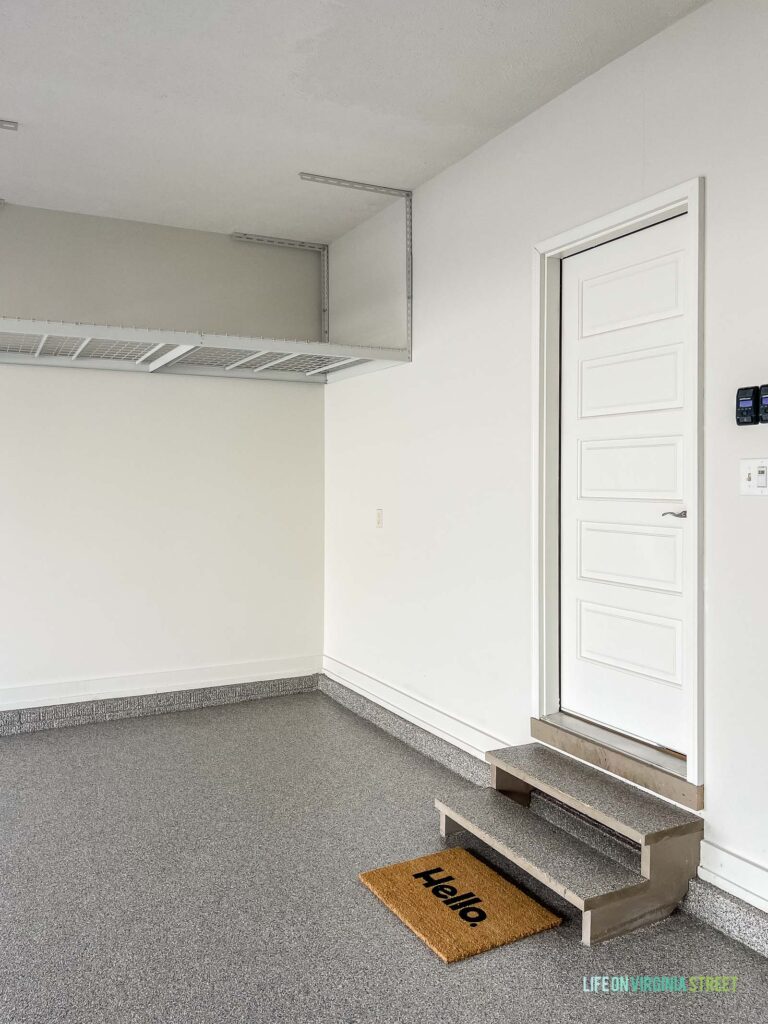
And here’s the after! You’re getting a sneak peek of one of the smaller slat walls we had Hello Garage install, as well 😉 But can you even believe how much better it looks?! Granted, this is prior to us bringing everything back in. However, I think you’ll be shocked at how great it all looks with the new storage pieces that keep most of our things behind closed doors!
Not only did we have the stem wall coated (that faux brick section between the floor and wall), but we also had the top of our steps coated!
It made us realize just how badly we now need to paint the face and frame of the steps 😉
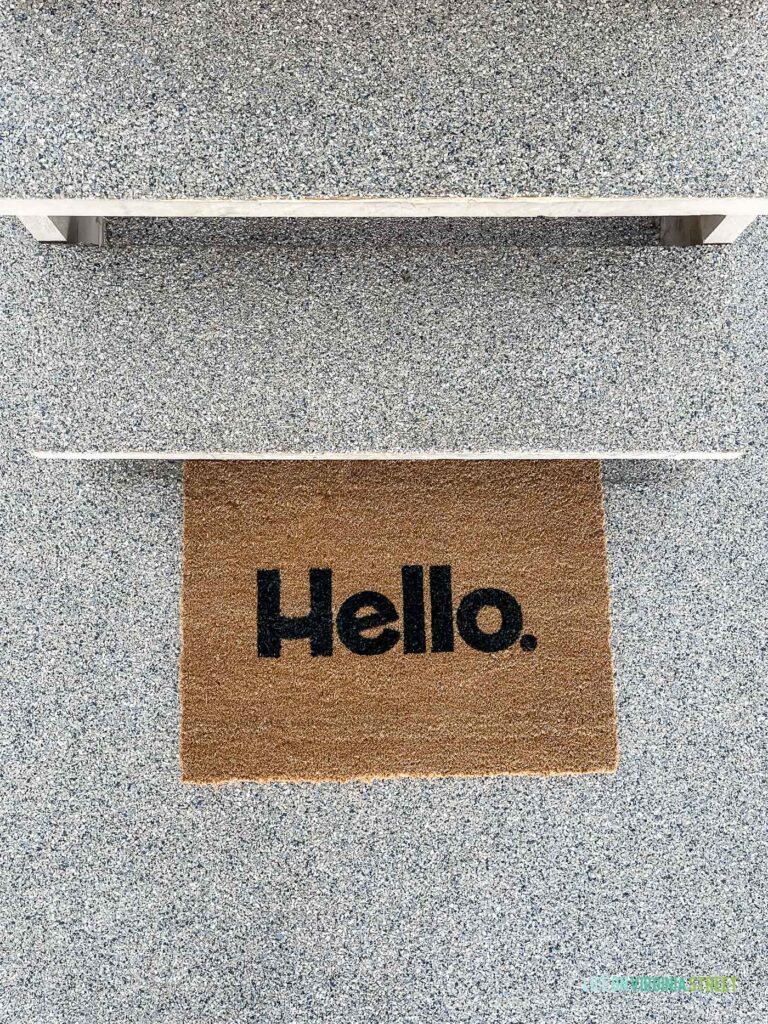
Here’s a close-up of the Cotton Candy color we chose. Like I mentioned, when standing in the space, it all just looks like a neutral with some flecks. But it’s cool to get up close and see the individual colors in all the flakes! And although it’s difficult to see in photos, it definitely has some “grit” to it to add some traction.
We loved the team that did all the work for us! They were all so knowledgeable and answered any questions we had that came up throughout the day! We couldn’t be happier with how our floors turned out!
I’ll be back soon to show you the dramatic before and after once Hello Garage installed all the new garage storage units and we brought everything back inside. Each day we step into the garage, we’re still in stock it could ever look so good! Kurtis said he can’t help but smile every time he heads out. Stay tuned for the final reveal soon! In the meantime, if you have any questions for me on the process I’d be happy to answer them!
If you would like to follow along on more of my home decor, DIY, lifestyle, travel and other posts, I’d love to have you follow me on any of the following:
Ah! It’s so good Sarah 💙💙💙
Another amazing post as always. Thanks for sharing and good luck.