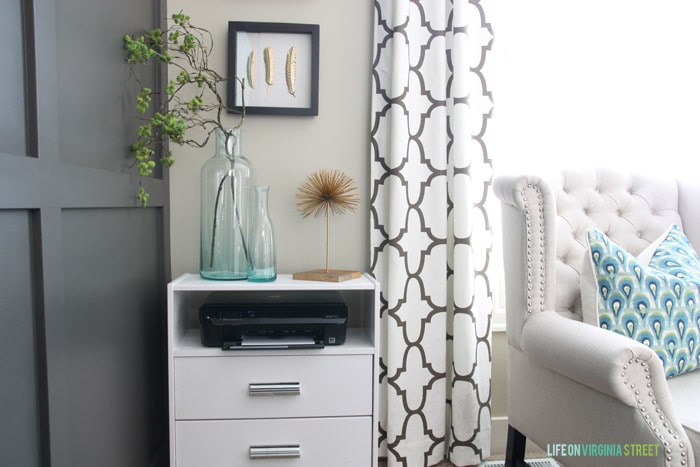
Today I’m sharing with you my Ikea Rast hack printer stand tutorial.
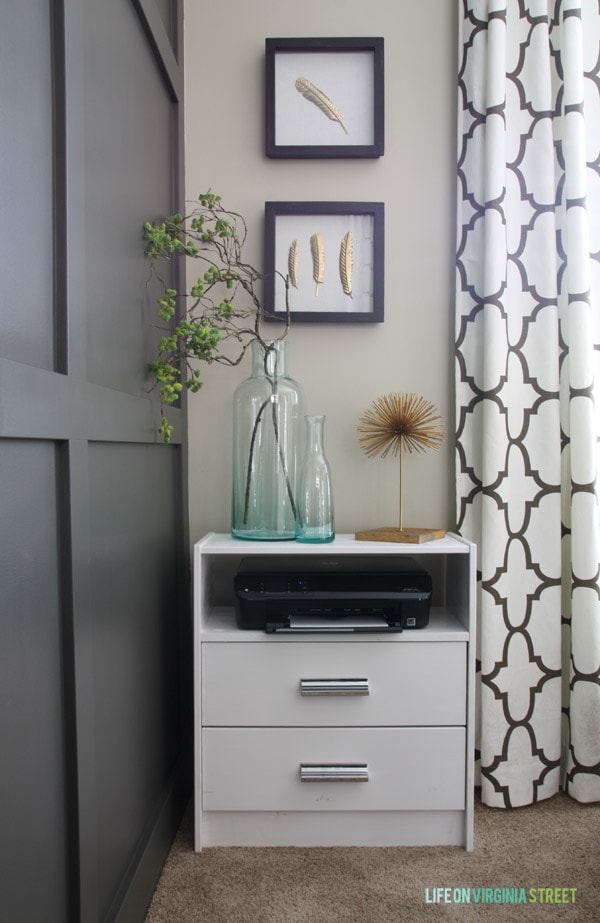
I mentioned last week a fun project I was working on for the office. If you recall, our home printer/scanner has been housed on the carpet in my office for at least a year. When I was contacted by Hickory Hardware and Pittsburgh Paints to participate as part of a blogger IKEA Rast hack challenge, I thought this was be the perfect opportunity to remedy “the situation”. You will find the full IKEA Rast Hack: Printer Stand tutorial below.
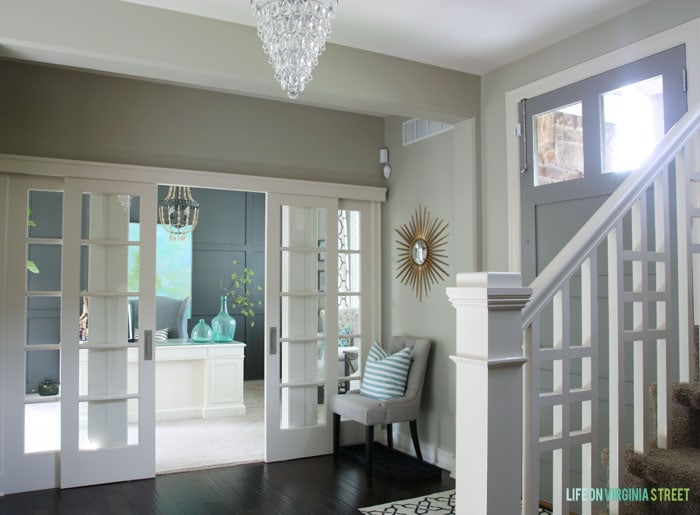
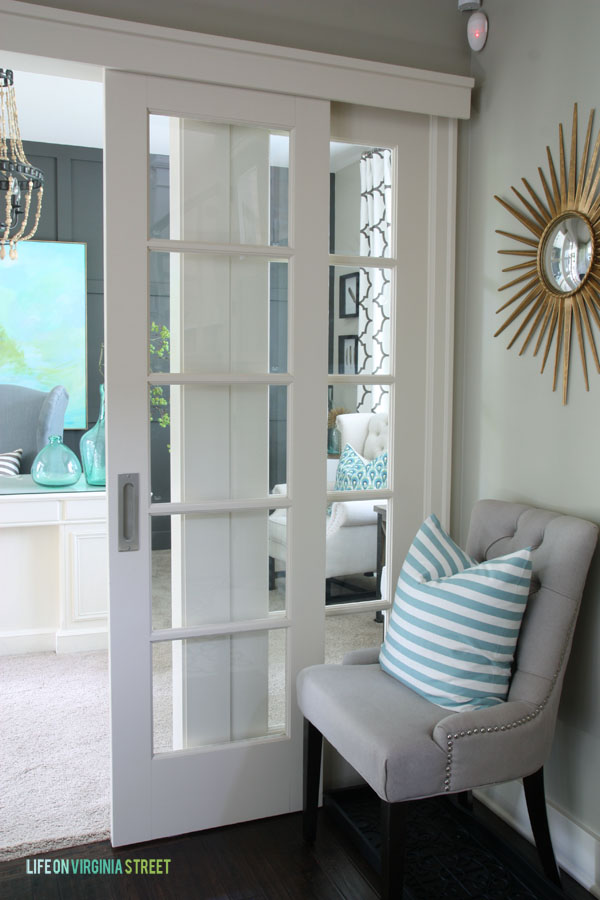
Step into my office and we’ll check out the update! I’ll share the pretty pictures before we get to all the dirty details and the tutorial.
You can see sneak peaks of the DIY printer project as we near the sliding doors.
SHOP THE LOOK OF OUR HOME OFFICE:

It really is amazing how such a simple and easy project can change day-to-day function in a room. Not only is the printer no longer sitting on the floor (and the cats can no longer sleep on it), I now have two drawers freed up in my desk that were previously housing printer paper, toner cartridges and other miscellaneous office supplies I don’t use daily.
SUPPLIES USED FOR THIS PROJECT (some clickable affiliate links are listed for your shopping convenience below):
Pittsburgh Paints & Stains Trim Door and Furniture Paint (Bright White)
Hickory Hardware P3332-SS Cup Cabinet Pull – mine is actually the chrome finish which I found at Menard’s, but the stainless finish is equally as beautiful
Wood for shelf (Paint grade 21/32″ x 12″ x 36″ cut to size for the shelf to house printer)
Dowels (optional)
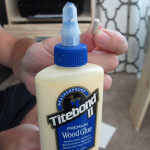
Titebond Wood Glue (optional)
Here’s how we did it, along with a few notes:
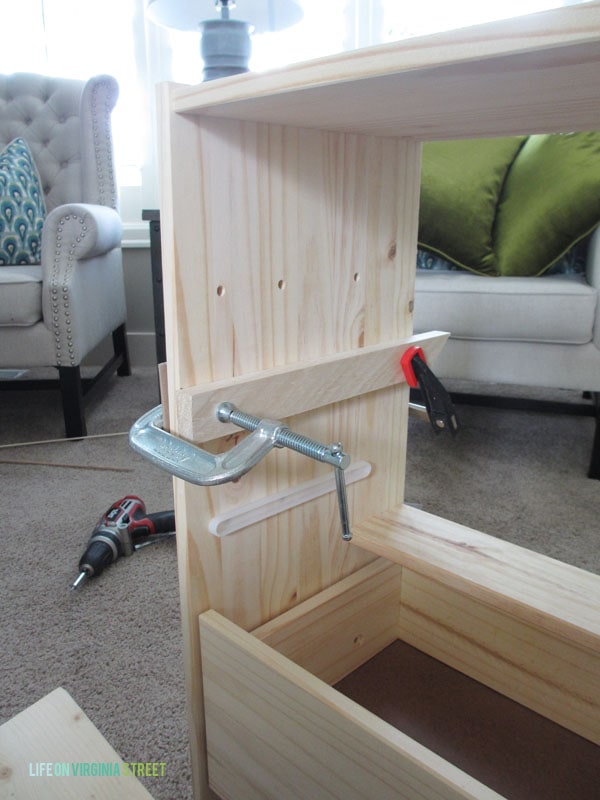
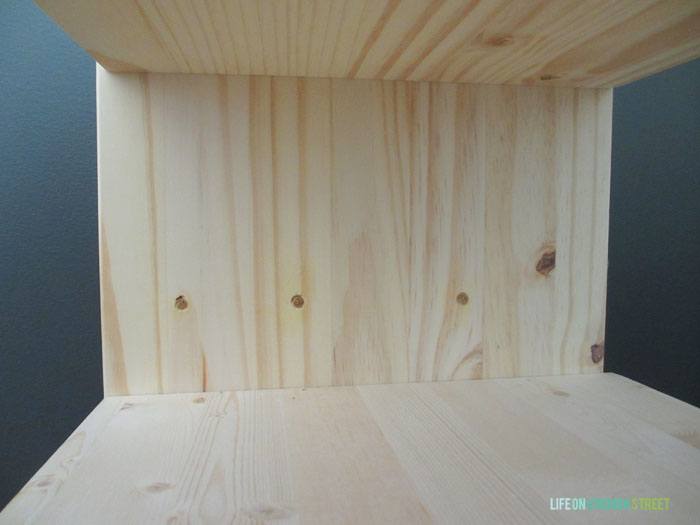
I knew I wanted the shelf to rest just above the second drawer. I fully assembled the entire RAST and then disassembled as needed so we could get precise measurements. In the image below, we had just removed the second drawer, but prior to that the drawer was there and I held the shelf where I wanted it to rest. We then penciled in marks on the front and back (on both sides of the dresser) for the base of the shelf.
From there, we used some scrap wood and clamped it to the dresser just below those pencil lines to act as a temporary brace for the shelf while we drilled it in place. Because the wood is so soft, we used cardboard scraps on the exterior in between the wood and the clamps to avoid an dents. You can see more below.
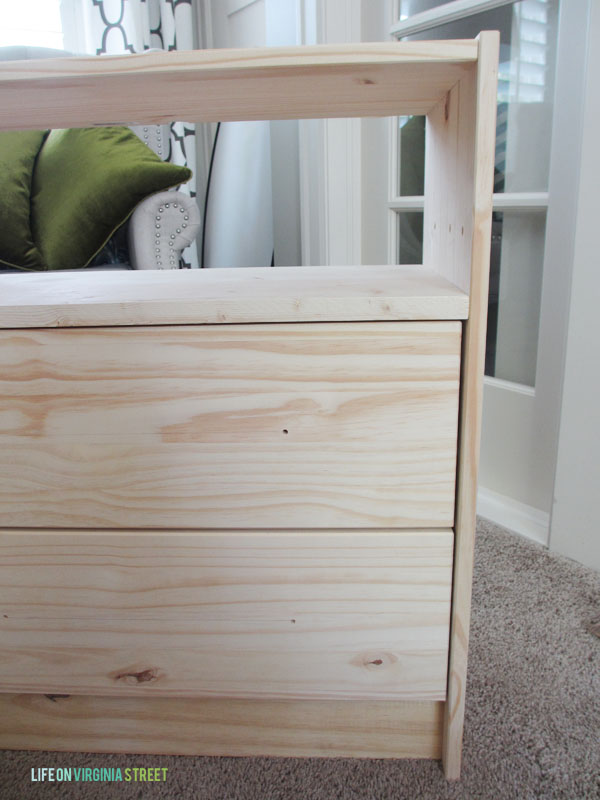
Following are the tools we used. We set the shelf on our temporary braces, drilled a pilot hole with the drill bit you see in the drill and then followed up with finish nails in the pilot holes.

The shelf fit perfectly! The next step was to drill new holes for the hardware I had selected and we were good to go!
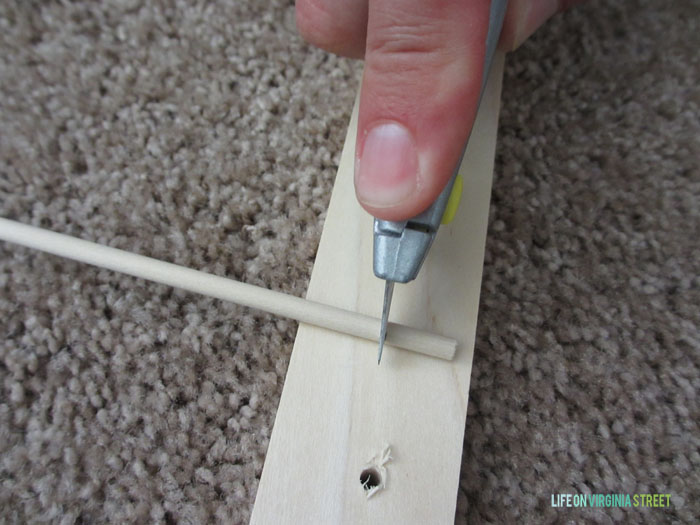
At this point, I was ready to fill holes. You have two options for this. We opted to buy some dowels that fit tightly in the remaining holes (we needed one size for the drawer pull holes and another for the holes on the interior sides where the top drawer was to have gone). With the dowels, we cut them to size with an exacto knife and then used wood glue to hold them in place. I then used wood putty to patch the remaining space once dried, and followed with sanding. The dowels allow for you to use a lot less wood putty. But, the other option would be to putty the holes in their entirety. We just found the dowels to work well as plugs for the space.
Once everything had dried, it was time to paint. I would highly recommend you prime this piece before painting. I was short on time and didn’t and I’ll need to go back with another coat of paint now. If you prime and properly cover the knots you’ll be in better shape – if you don’t, they will definitely bleed through. Additionally, I would prime and then lightly sand with a finish-grit sand paper. This would is so soft and fibrous so sanding will do wonders for the piece. I sanded mine well before painting, but those knots are starting to show through now that the paint has dried.
Some notes on the paint: I had never actually used a gel consistency paint before, but I absolutely loved using it. Granted, an IKEA raw wood surface is probably not the best surface for something that goes on so smooth (the Rasts are known for their knots and rough surfaces), but I could quickly tell this paint would be amazing on trim. I basically consider myself an expert on trim paint after spending the last month working on trim in the dining room 😉
The gel consistency is really thick and I actually thought something was wrong with it when I first opened it. But once I started working with it, it really was amazing. The brush strokes melted away. The only downsides I saw were the lack of color options if you need something specific and the fumes were strong. Otherwise, the finish was beautiful and literally left zero brush stroke marks!

The hardware ups the glam factor on this new piece and it is definitely my favorite element!
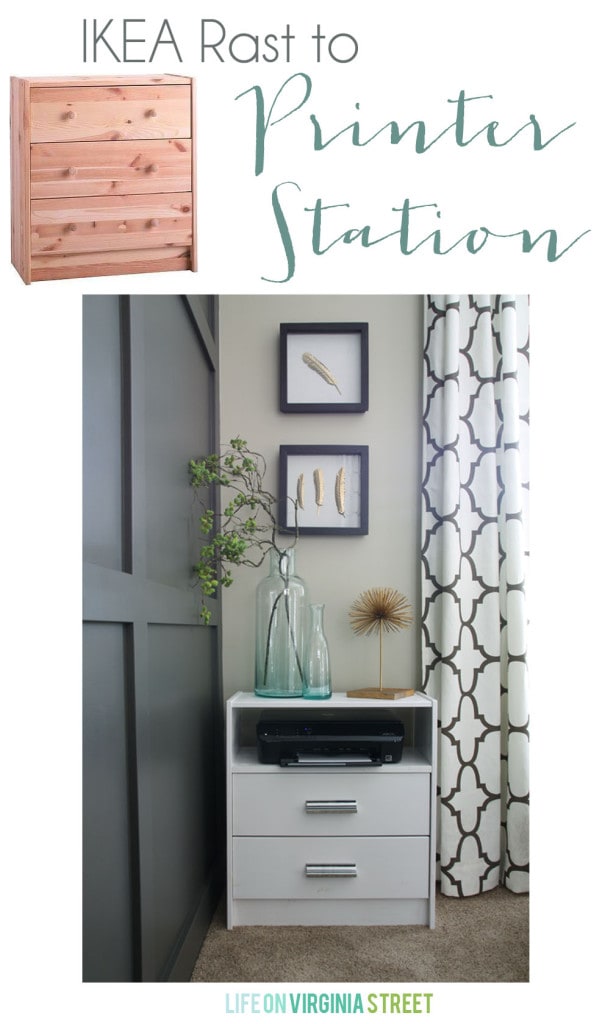
I’m so excited I finally have a home for our printer. It was also fun to add a custom touch to a piece of furniture – something I’m not sure we had ever done before! Thank you to Pittsburgh Paints and Hickory Hardware for including me on this fun challenge!
If you would like to follow along on more of my home decor, DIY, lifestyle, travel and other posts, I’d love to have you follow me on any of the following:
Pinterest / Instagram / Facebook / Twitter / Bloglovin’ / Google
Disclosure: This is not a sponsored post. However, as part of the challenge, I was provided the IKEA Rast and Menard’s gift cards to purchase supplies for this project. Thank you to Pittsburgh Paints and Hickory Hardware for allowing me to participate in this fun challenge! Affiliate links are included for your shopping convenience!
Love it, what a great solution, and stylish too! Love those drawer pulls.
I need to do this! Our printer sits on the floor and it drives me crazy!! I love the way it turned out 🙂
Love it! But where did you get those doors for your office, they are exactly what I want for mine!
Did you ever find doors like the ones here. I’m looking for something similar.
What a great hack! It really turned out fabulous 🙂
Nicely done–pinning!
Hi Sarah! We met briefly at Haven, and I was excited to see you were one of the IKEA hack bloggers – I always love what you create! The small IKEA Rast makes the perfect printer stand. Nicely done!
Sarah, great job on a gorgeous office! Did you use 2” x 1” boards for your accent wall grid? And what brand of paint and color did you paint it? I love the contrast and want to do this myself for my office. Thanks!
Thank you! They’re actually 3.5″ wide MDF boards from Lowe’s 🙂