A detailed and easy-to-follow tutorial on how to whitewash a stone fireplace. Follow these steps to transform your fireplace stone from blah to beautiful!

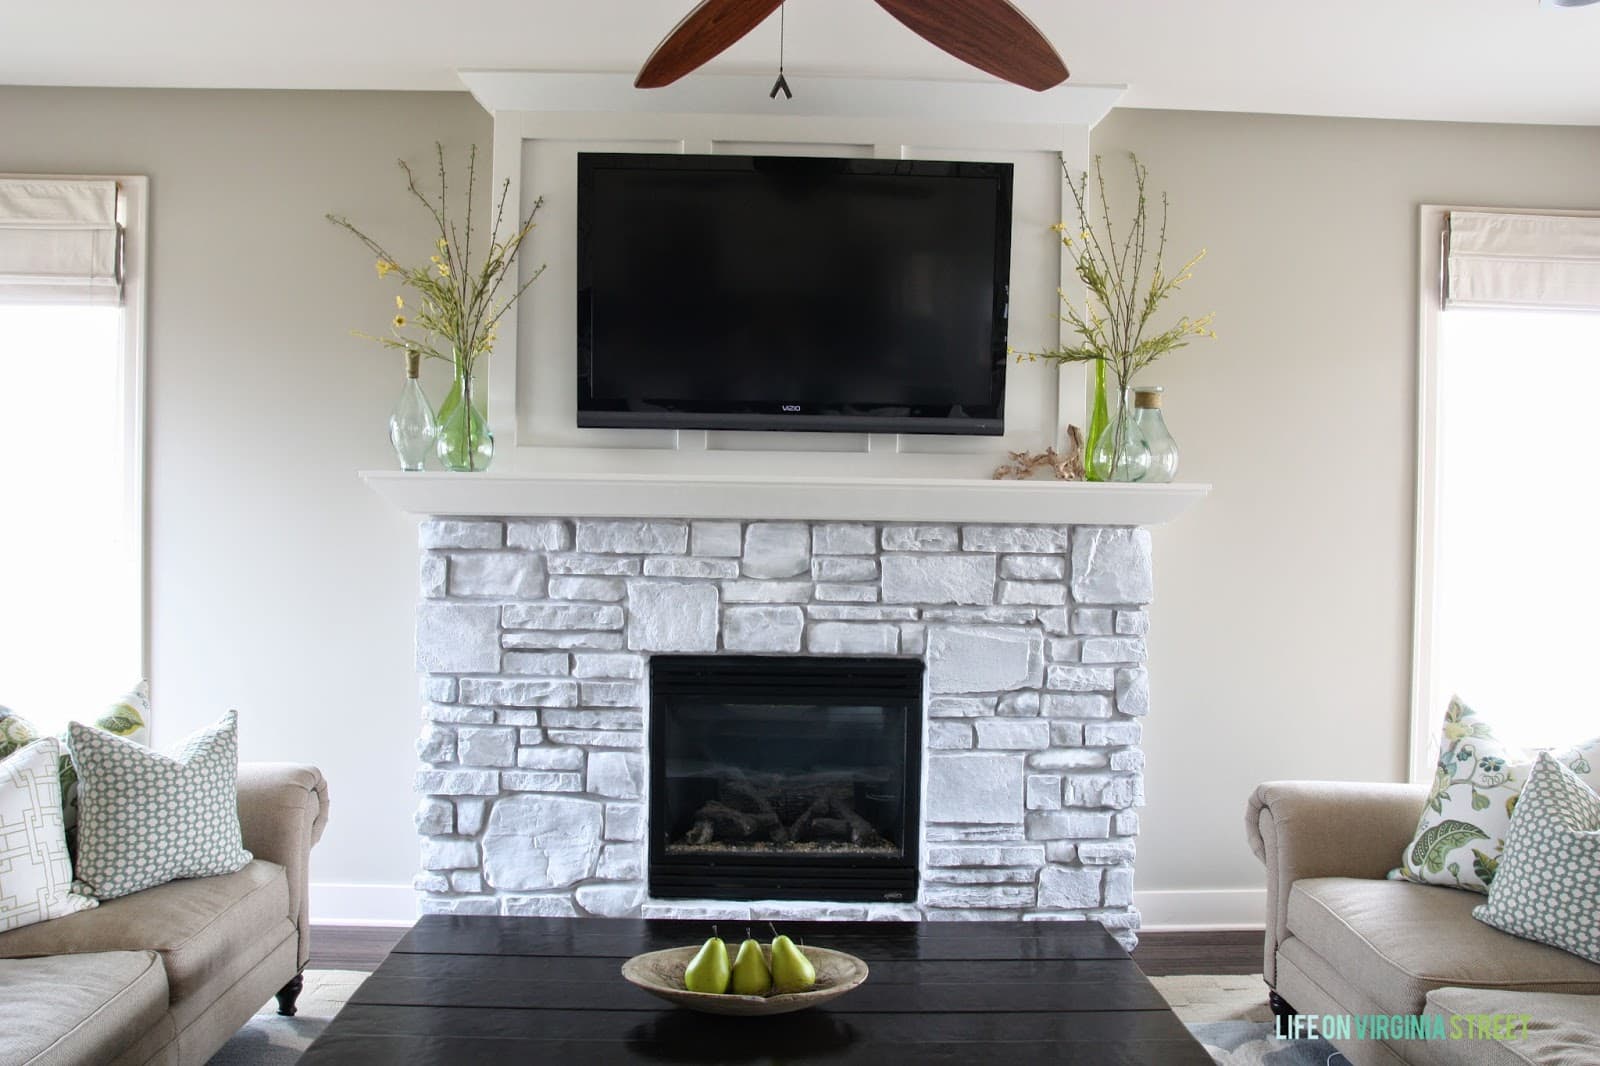
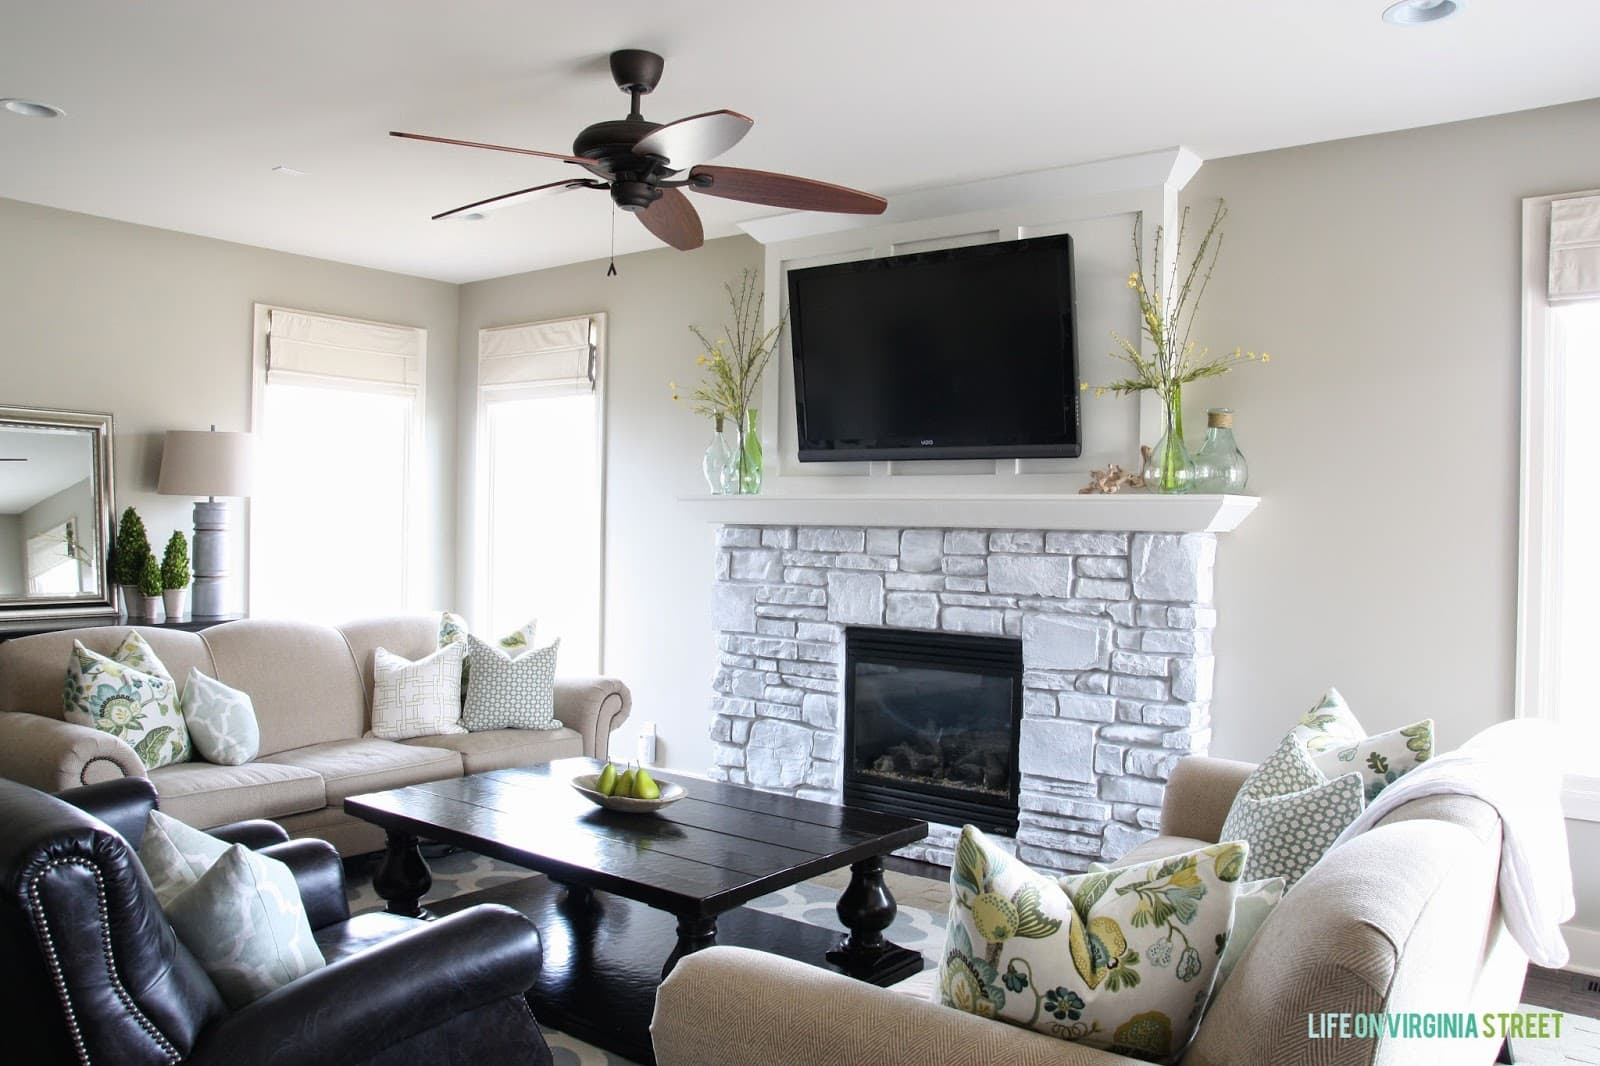
I finally finished my customized whitewashed stone fireplace! Without any further delay, here is how it looks now:
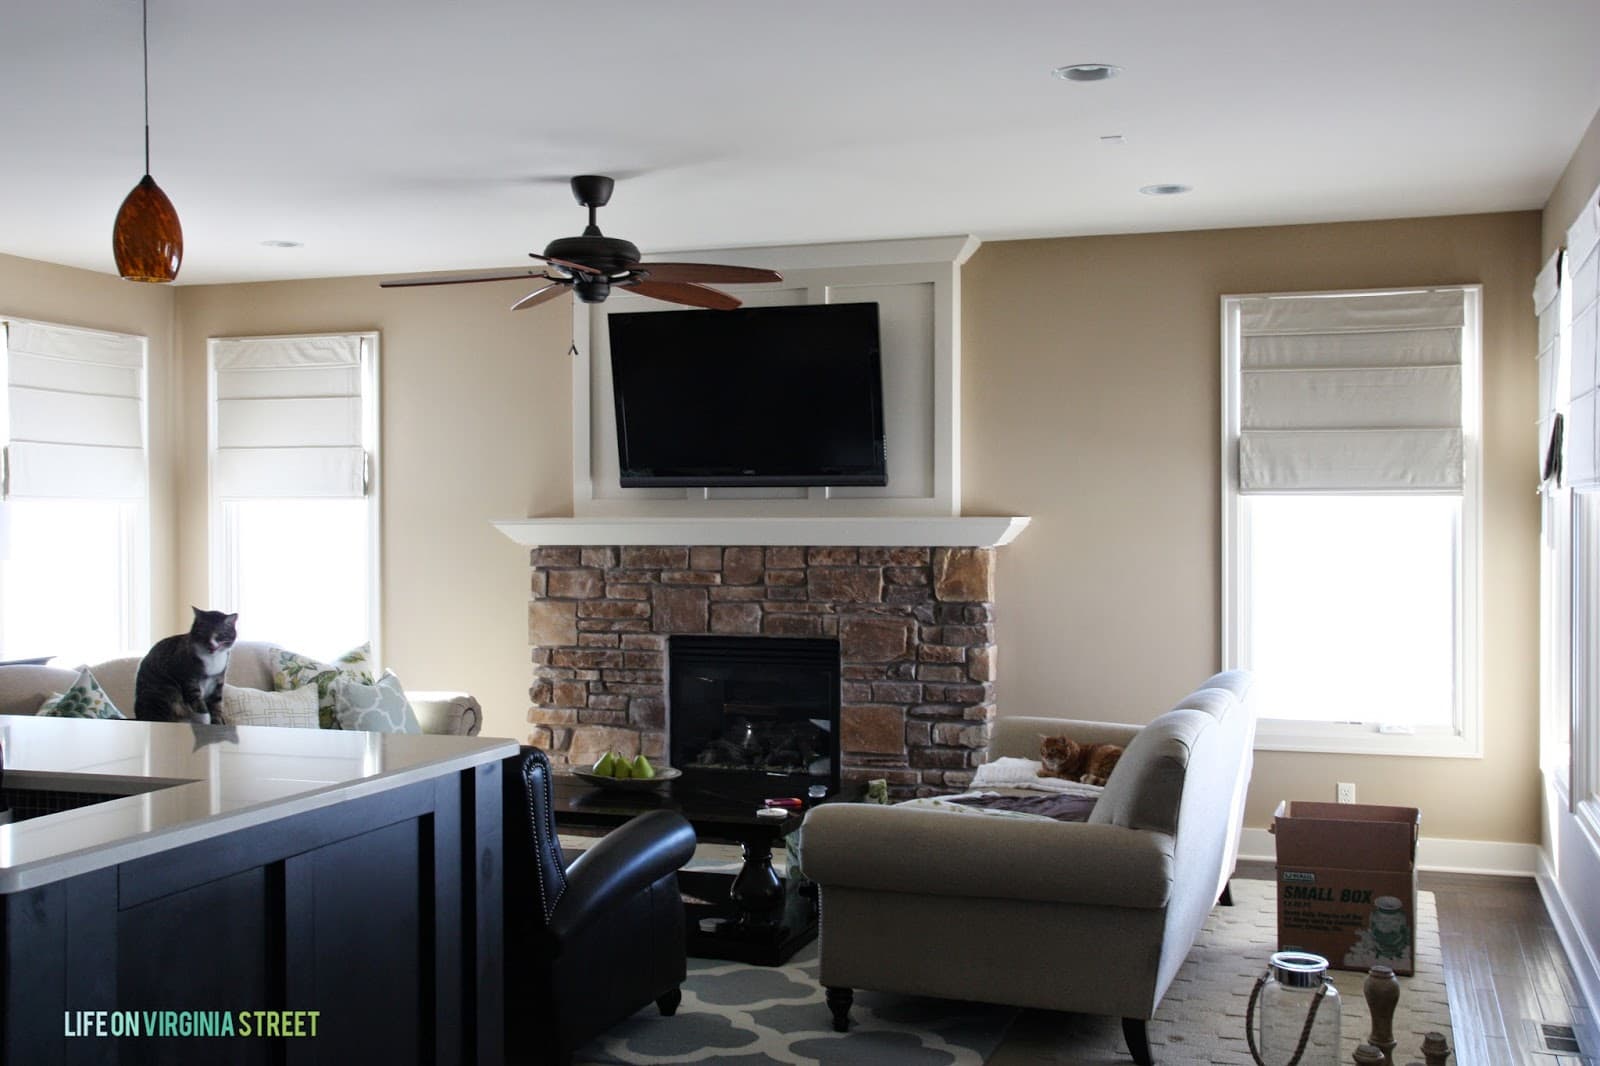
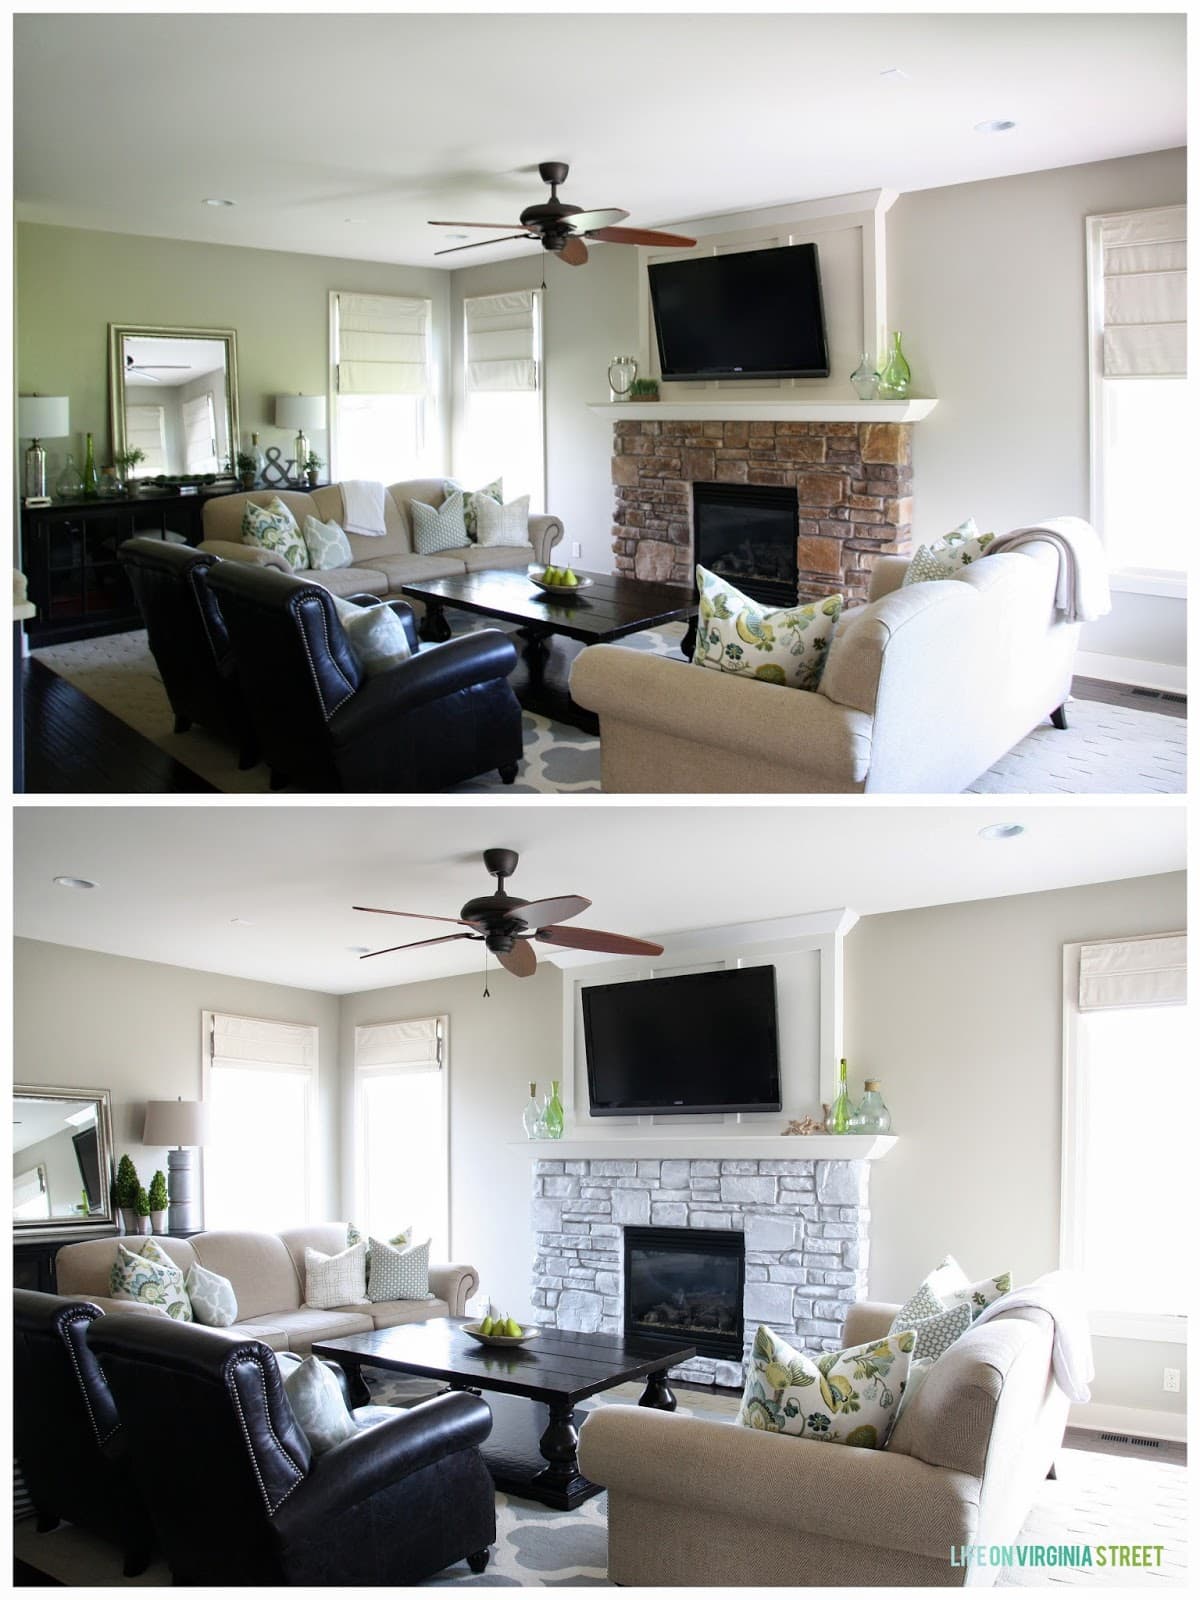
But first, a little history. The photo below shows our living room and the fireplace shortly after we moved in. Original pendant lights, paint color, etc. As you can see, our fireplace stone was originally varying shades of orange, beige and brown. It did not fit the light and bright coastal look we were after!
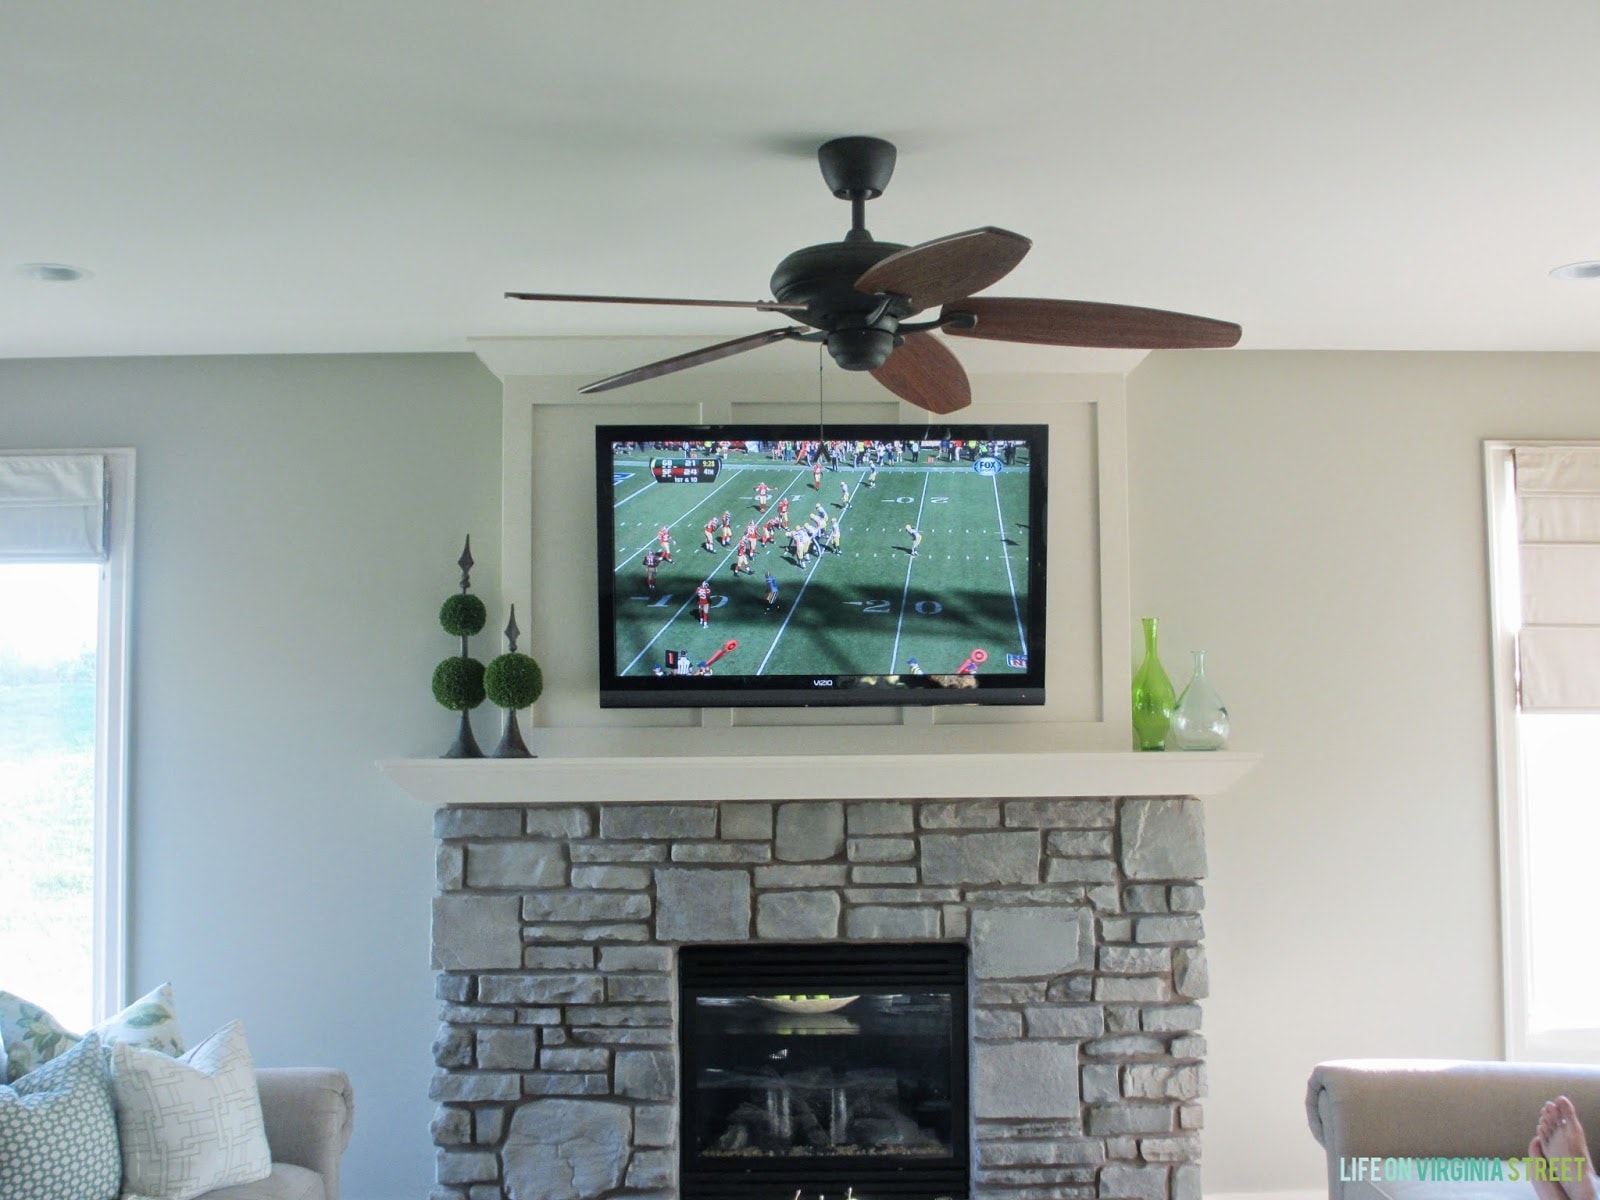
Last fall, I had some Annie Sloan Chalk Paint in French Linen on hand from my buffet and desk makeover and decided to graywash our stone fireplace. You can get even further details on the stone painting process in that post as well. The subtle gray color worked for awhile, but was still darker than I had originally hoped for. Here’s the results of our graywashed fireplace stone.
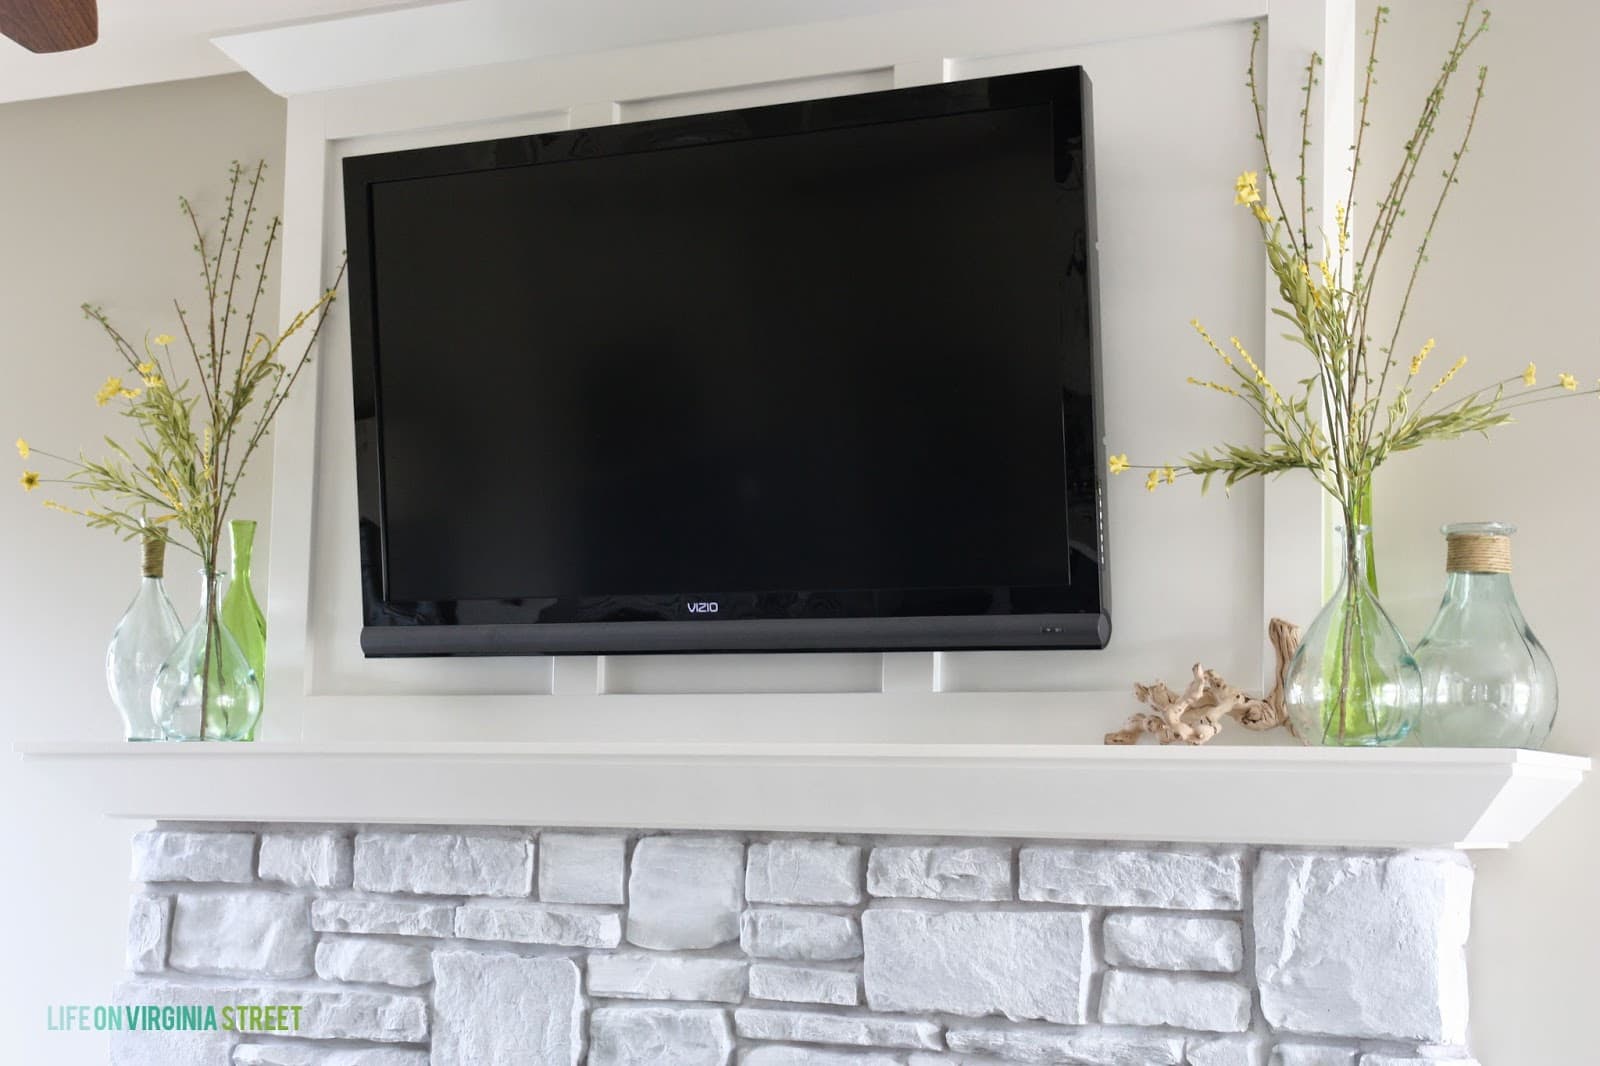
And here is how it looks now after a bold whitewashed over the gray paint! There were several other steps to get it from the photo above to the photo below that may not be readily apparent. Bottom line: I think this is the perfect fix until I decide if we need to do a full overhaul on the stone down the road. Continue reading below for more details.
This post contains affiliate links for your shopping convenience. You can read my full disclosure policy here.
Supplies Needed to Whitewash a Stone Fireplace
Following are the supplies I recommend to whitewash a stone fireplace. Please note the supplies are clickable if you want to purchase directly:
- White Chalk Paint
- Gray Chalk Paint – recommended if your stone has pink or orange undertones, to ensure the finished look doesn’t have a pink effect
- A sponge brush and/or stiff bristle chip brush (you do not need anything fancy!)
- Water
How To Whitewash Stone Fireplaces
Here are the details on how I got the whitewashed stone fireplace look.
One day while I was working on another project with Country Chic Paint’s Simplicity (a white chalk paint) I decided to attack the fireplace again. Keep in mind it had already been graywashed at this point. If you’re wishing to achieve a similar look, I would recommend following the steps I took in this post with a gray chalk paint and then following the remainder of this tutorial. I believe if I had skipped straight to the the white paint, the stone would have had a pink or peach undertone due to the original color.
I used a 50/50 mix of water and Simplicity. I didn’t measure it out, but rather eye-balled it, so there isn’t an exact science to it. Previously I had used a sponge brush to apply the gray layer, but this time around I used a stiff-bristle chip brush and it was SO much easier.
The major tip I have for this project is protect your floors. Because the mix is so watery you drip everywhere. But I wanted there to be some deep dimension and not just a flat, painted look – hence the reason I added the water to make it less opaque.
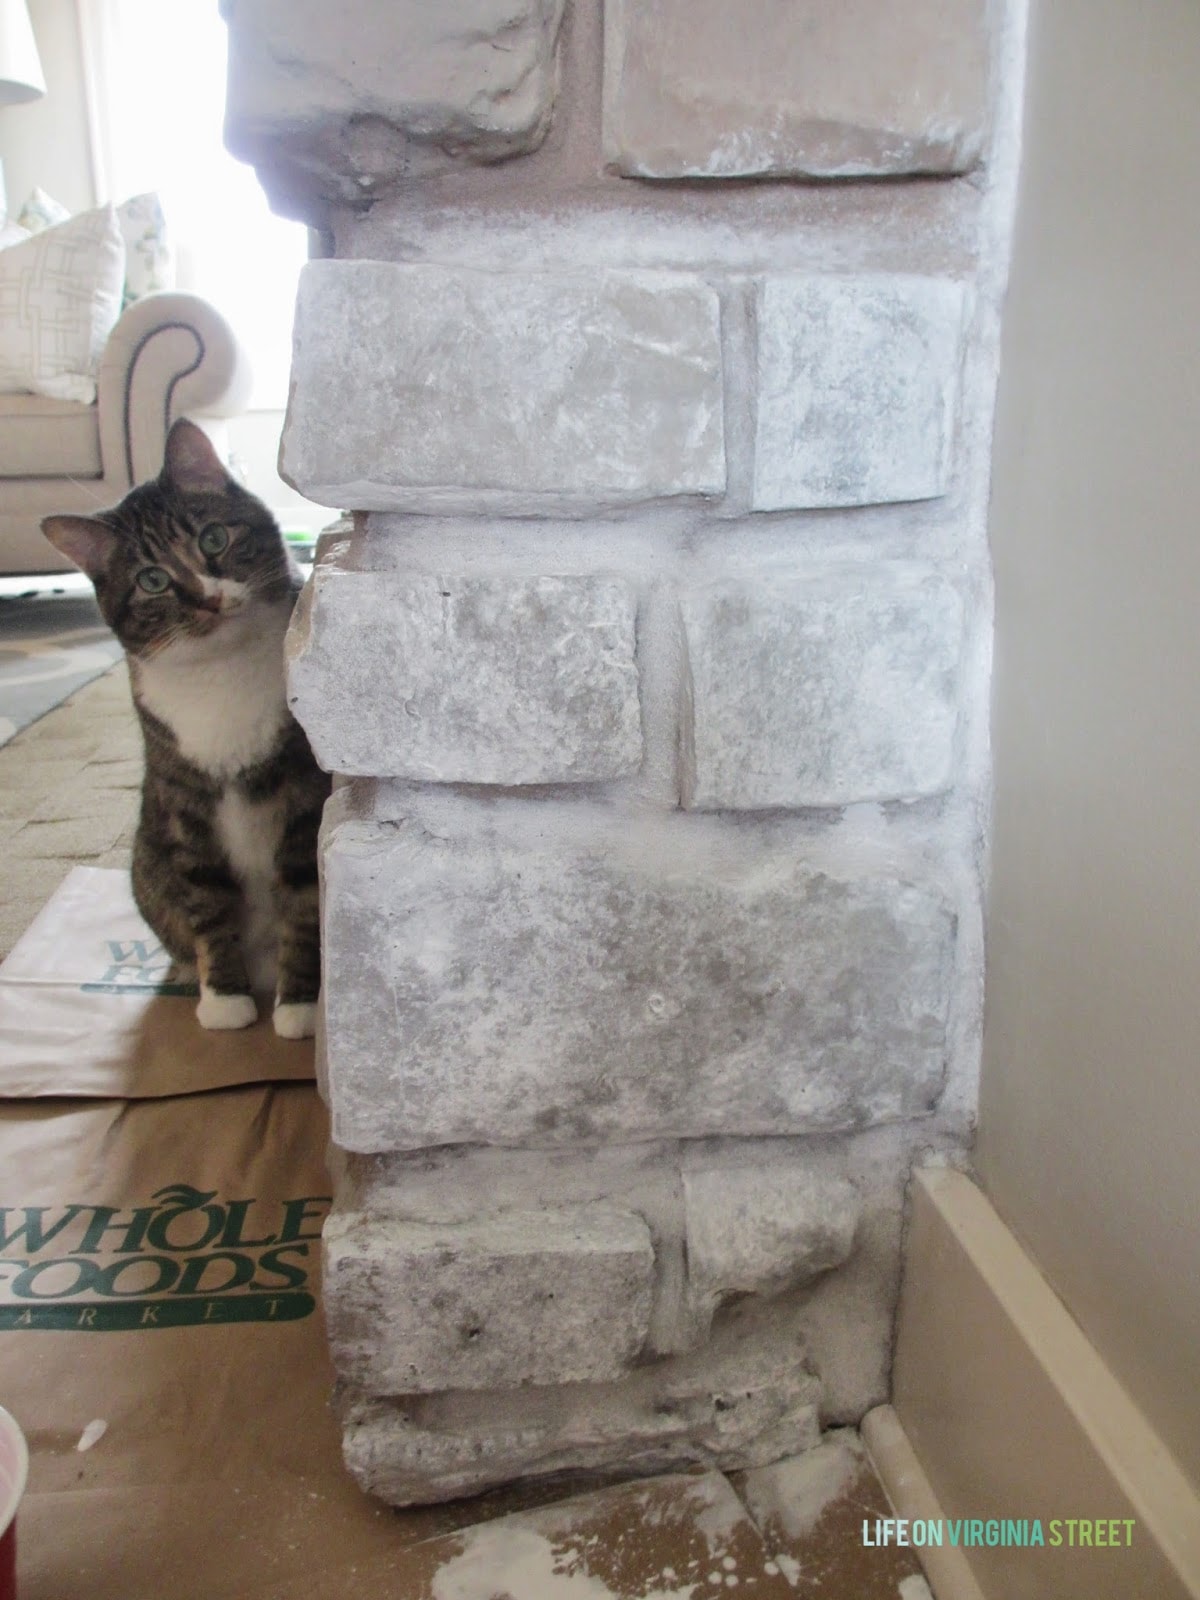
Start by painting a stone or two at a time. I also painted my grout/mortar because I didn’t like the color of it. Most stones are super porous and will soak up your paint/water combo rather quickly. Occasionally I would blot the stone with a paper towel to help pull some gray through, helping to add the dimension I was looking for. The extra mess is worth the extra effort!
One additional bonus of adding water? There are absolutely no issues with brushstrokes. By blotting the stones you also help add a bit of lovely depth and texture so the overall look tends to mimic natural stone so much more!
My best little helper/supervisor, Henley, gets partial credit for this work. Plus, she’s even cuter than the end result so you can stop reading now if you want 😉
Continue all the way around your fireplace until you are finished!
Once I painted the stones however, the board and batten above our mantle looked awful. Like 100% pink/yellow and horrible (it was an almond color paint). Don’t believe me? Here is a shot of the old paint with the painted stone. My cats are ridiculous when the cameras/ladders come out – they magically show up.
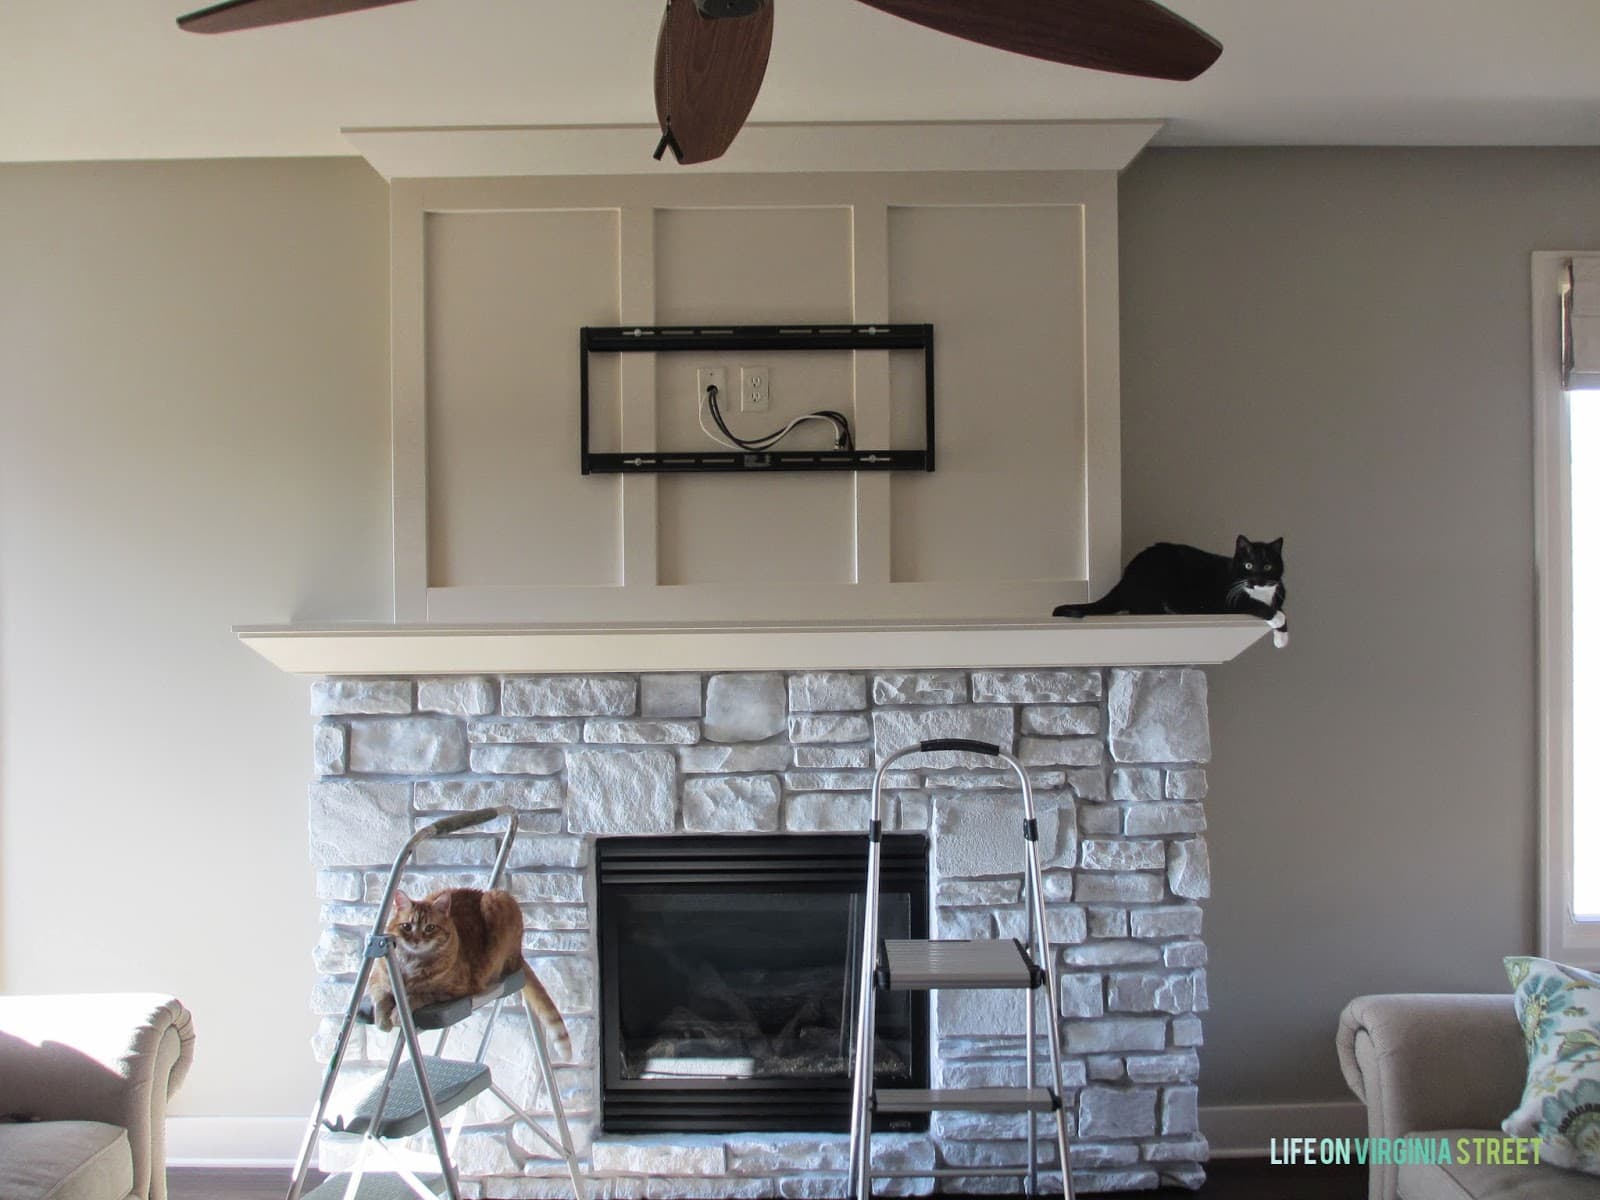
Now look at the area compared to the same paint and a very light coat of white primer on the right hand side. Even with the light coat of primer, the difference is dramatic.

So, a few weekends back, I painted the board and batten and mantle. It just happened to be fantasy baseball draft weekend for my husband so I was finally allowed to unplug the precious television – or I would have done it much sooner! I started with a coat of Kilz primer to ensure adhesion and then followed with two coats of Behr Swiss Coffee in a semi-gloss finish.
Whitewashed Stone Fireplace Results
I love the end result!! Doesn’t it just seem to glow now?!
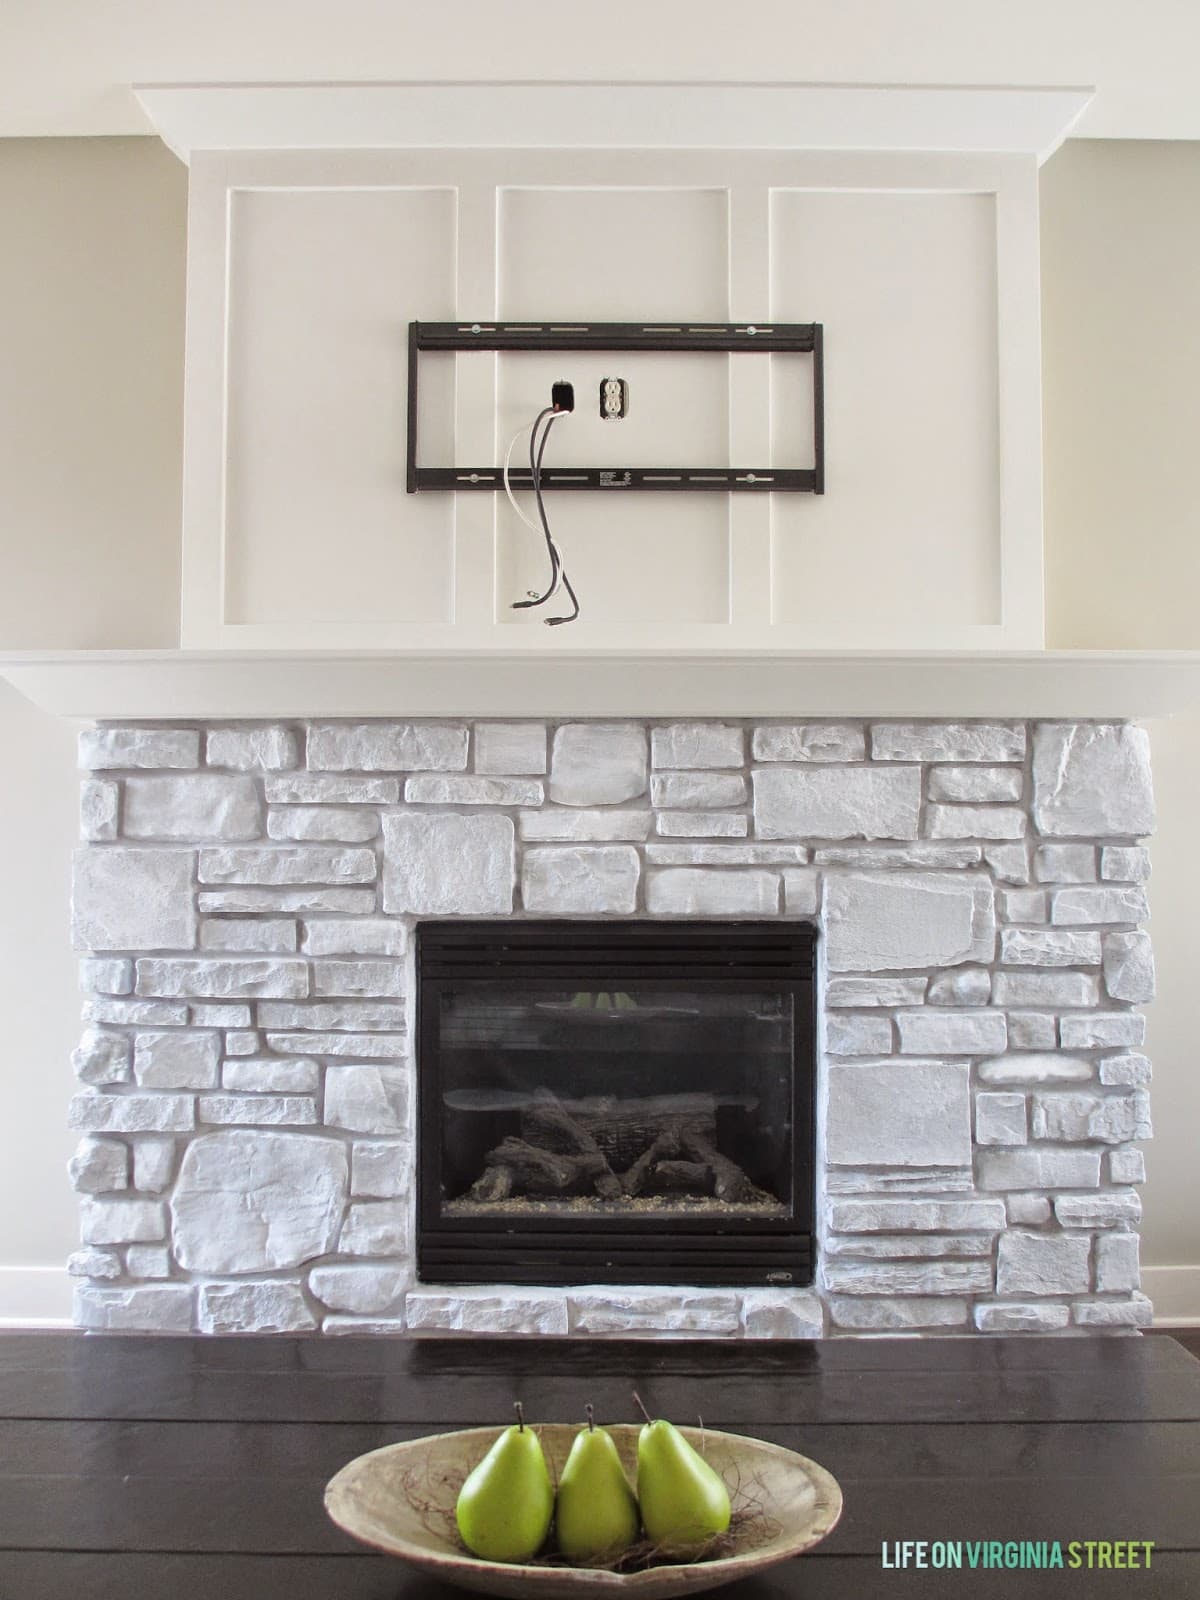
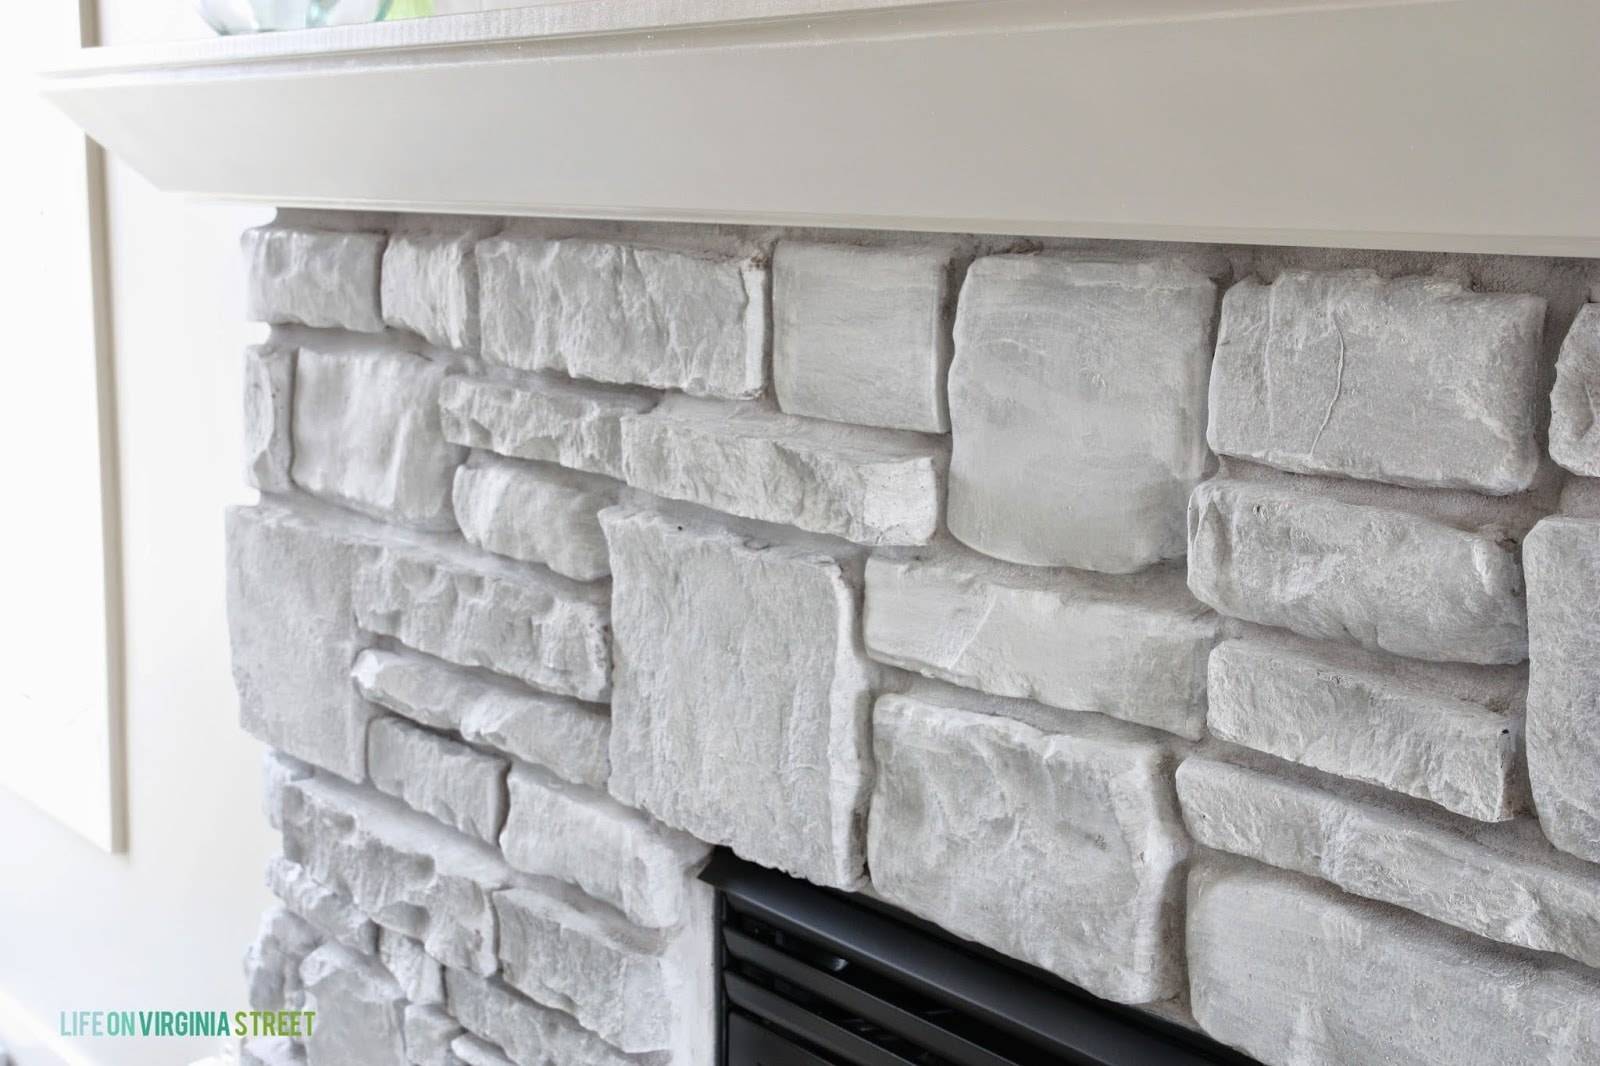
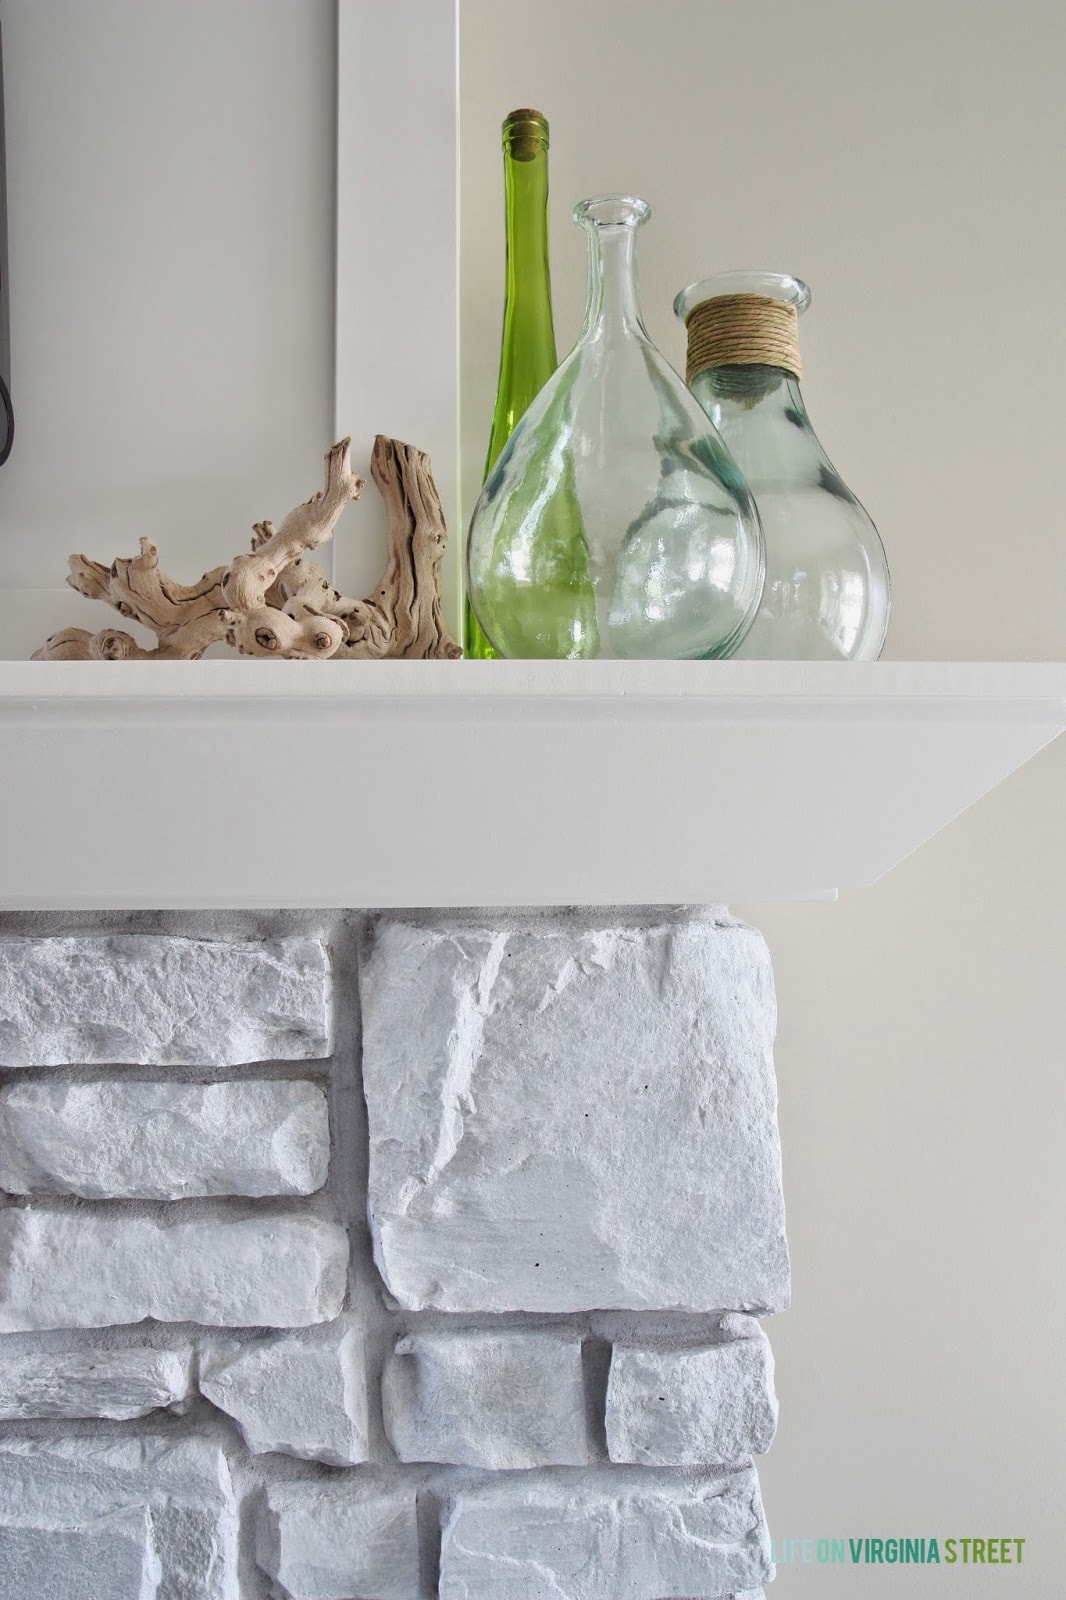
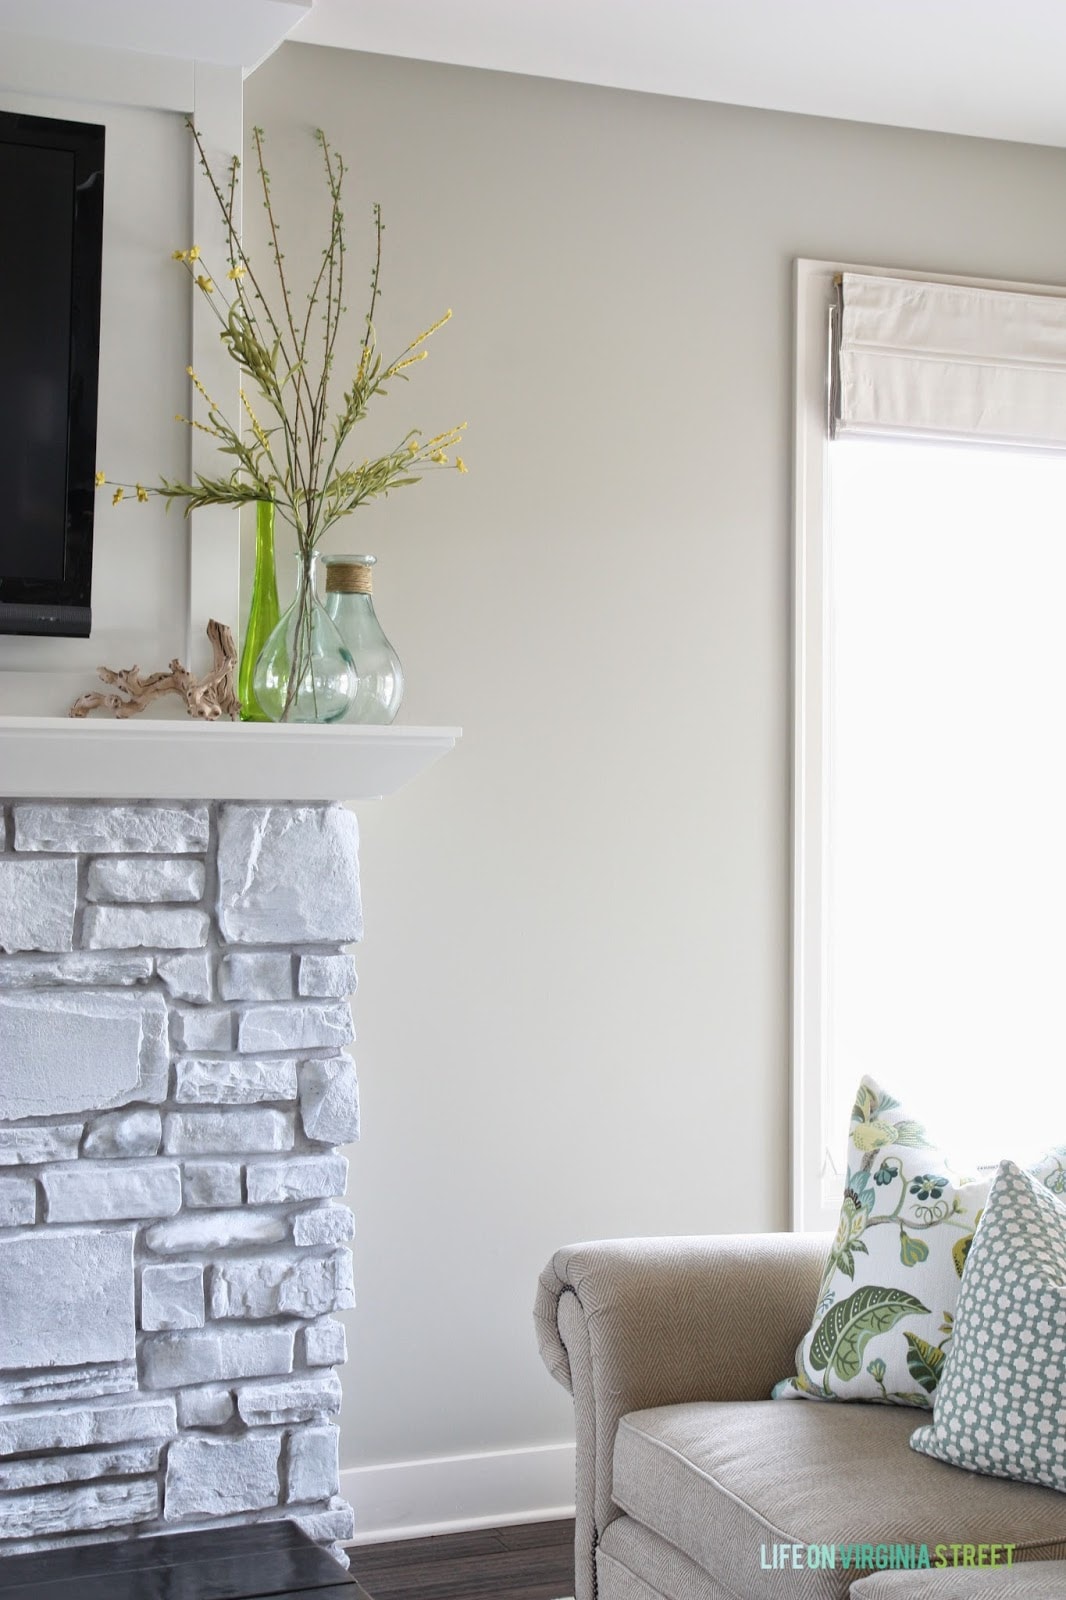
The stone still has some variation due to the mix with water and the trim all looks much crisper with the white paint. I love that the gray still shows through in some areas on the stone, but the orange and dark gray tones are gone. Definitely the fresher, lighter and airier vibe I was going for!
I couldn’t be happier with the end result! Here’s a little before and after comparison of how the space looks now with the new whitewashed stone fireplace!
Next project? Painting the window trim and baseboards and likely changing out the roman shades that came with the house. Oh, and for sure that ceiling fan…it never ends!


If you would like to follow along on more of my home decor, DIY, lifestyle, travel and other posts, I’d love to have you join me on any of the below channels:
Great transformation! I love how you kept pluggin’ away until you got to a look you were happy with.
wow, great job! I could seriously do this to my stone fireplace 🙂
Looks sooo much better!!!
This looks absolutely amazing!
The result is fantastic! Really brightens the room!
Awesome transformation Sarah! I love it- wish we had a stunning fireplace like that… maybe one day?!?!
I love it whitewashed. It really does make a huge difference. Thanks tons for linking to Inspire Me.
Really pretty. We have a large stone fireplace that sucks the light out of our livingroom. This gives me motivation to fix it.
Fantastic! I would love it if you joined and contribute your awesome posts at my link party at City of Creative Dreams, starts on Fridays 😀 Hope to see you there at City of Creative Dreams Link Party.
It looks great. And the pic with the cat is adorable. Hope you have a great day.
Terrific way of explaining things. I loved the way you transformed look of that fireplace. In fact, you decorated everything very beautifully. I’m gonna follow all the steps. However, I don’t have to do much with my Fireplace. Strippadoor’s fireplace.
That looks amazing! We hold painting classes at our home decor store in SC and love to see what other bloggers are doing around the country. Thanks for sharing. The white looks fresh and clean in your living room.
Love the both stages of the transformation, and the kittehs are adorable. Mine are ridiculous with ladders and any DIY, too. No project is complete without inspection from a supervisor kitty or 2.
Wondering what the status is on your fireplace. Is it still white washed? And do you still love it?
Yes, it is, and we love it! The white wash is a bit cooler tone than our walls, so down the road I may paint our living room but that is really an entirely different issue 😉
Ifs it’s cooler as it looks to me you can definitely fix that. Think there’s that balance in between .
Sarah,
This looks great. I was curious to know where you’ve hidden your input sources, i.e. dvd player, home theater, etc. How long are the hdmi cables? I’m looking to do something similar but have little room next to the fireplace for electronic equipment. Any ideas will help. Also, have you notice any affect on the TV from the heat of the fireplace?
Thanks,
CS
Thank you! We are the second owners of the house, but the builder had an cable/electrical outlet installed above the fireplace (where the TV sits). There is then an outlet on the wall to the far left where the cables come out and we have our equipment hooked up. The HDMI cables run down the wall, into the unfinished basement, and then over to the other outlet where everything is hooked up. As far as heat goes, we haven’t noticed an issue with the television. I hope that helps!
Hi, can I ask you how much paint you ended up needing of both the gray and the white? I’d like to do this same thing to our stone fireplace and I want to have enough paint. I’m going to get the Country Chic colors you mentioned. Thank you!
Honestly it was very little at all. I actually just used leftover paint that I had painted a large L-shaped desk with, and I still have paint leftover from all of it (and I only started with the quart size). I hope that helps!
This is so fantastic! I have already ordered the paint for both the gray wash and white wash but was wondering how much paint you think we will need (same size fireplace for the most part). Thanks!
Thanks! I only used less than half a quart of each color 🙂
Hello, we have a similar style fireplace but the stone is not as orange, do you think I can just get away with doing the white wash and get the same effect?
I think it could definitely work! My friend actually had a more subdued fireplace and it worked on hers too!
We are currently trying to figure out what to do with our fireplace and I am curious how the paint on yours is holding up after a couple of years of use. Any issues with paint chipping or peeling or anything like that?
No issues at all! I think since the stone is so porous it just stains the stone if that makes sense? It’s not really like a layer of paint so there is no chipping or anything. It has worked out really well for us!
Oh lovely. I am going to do the same to my fireplace. Have you had any issues with smoke or ashes discoloring parts of it?
Thank you! Honestly we haven’t had any discoloration at all, but ours is a gas fireplace so that may make a difference. But we do run it quite a bit in the winter months and have never had issues!
I did a white wash over my solid burgundy/maroon brick fireplace and the first coat looked nice, but still too much red. I did a second coat then it just looked pink. Then came the third coat, now I’m afraid it looks too white and there’s still a pink blush to it.
I’m pretty disappointed with the outcome and wish I stopped with the first coat. I bought some sand paper today hoping to distress it a little. Husband thinks the grout lines are too white, so I am trying to think of a solution to that.
Do you know of any ideas to create a little more balance. With the white mantle, buttery yellow paint, and gray blue decor the room feels a little too cool. Contemplating doing my walls in Behr Perfect Taupe to warm the space up.
Hi. Love your fireplace and am considering doing the same to my lava rock fireplace ….only question or concerns I have is using a flat (chalk) paint vs a semi gloss (as I’ve read some other people have done).! I think I’d prefer the chalk, but was wondering if, now that you’ve had it for quite a while, you notice the flat paint looking dirty or dusty at all? I’m worried that with my porous /rough rock, the flat might attract dirt/dust and look dingy over time?
I’d appreciate your thoughts!
Sorry for the delay! It has actually worn really well. It pretty much looks the same as the day I painted it and we use our (gas) fireplace fairly regular in the colder months.
Hi Sarah, room looks great! What color is on the walls in living room with fireplace? I have a large floor to ceiling dark gray stack stone fireplace and am afraid to go with a true gray on the walls. TIA
Kim
Thank you! The walls are Behr Castle Path.
HI! I did everything on this page except that I forgot to dab with paper towel to let some of the grey come through to add texture, so now the fireplace looks more painted that I had wanted. Is there a way for me to fix this without having to start all over? I have a bit of grey left is there a way to add texture by using that after doing the white wash?
Sorry for the delay. I’m not 100% sure, but you could try a watered down version of gray and blot some on with a sponge? That may help to add a bit of dimension. Good luck!
I love this look! I just have a quick question about the steps you took. Please correct me if I’m wrong on the steps you took to achieve the look on this fireplace
Step one / First Coat:
Annie Sloan Chalk Paint in French Linen
Step two/ Second Coat:
Country Chic Pebble Beach paint
Step three / Final Coat:
50/50 mix of water & Country Chic Simplicity
Please let me know! I love how this fireplace does look completely stark white and still shows some color through it.
Which is the gray (chalk?) paint? Country chic pebble beach? And how did you apply it? Just sobbing the brush on the stone over the white linen? I believe you said you had already grey washed the stone. So wouldn’t step 1 be using a gray wash to cover the stone, the step 2, the linen white. Just want to be sure I get it right. I’m starting with almost the identical brown stone fireplace as yours.
Does the paint tolerate heat well? I have been warned my a decorator that the heat may affect the color.
Yes! We run our fireplace four hours each day during the fall and winter and never once had an issue with it. I think it’s because our stone was so porous!
It looks so perfect with the gray undertone…
The mantle is great in Swiss Coffee. I love that color with the gray/white overlay,
I took some doors from my family estate home that my father had made in 1980 out of oak. I stained gray and 50/50 or 90/10 white over the top. In my case I got a worn blue jean, which was the coolest thing I have ever done. The house is in Morro Bay Calif, and I built every centimeter with my own hands,
I am going too do what you did to a rough slate fireplace.
You did exactly what I want to do to my fireplace. Can you tell me the specific paints you used and their colors. I don’t want to pick the wrong ones. Thxs
I loved the photos. I am a master stone mason in heritage restoration work. (a very narrow field in north America). Have you considered using a whitewash in the old school way? No paint, just hydrated lime and a few other things. Very pleasing to the eye and easy to apply – although caustic. It is anti-bacterial and basically sterilizes everything. Email me if you are interested in a recipe. Old clothes, mask and goggles recommended!!
The gray color looked/matched much better, great job ty for sharing your nice work and idea for that type of stone. The white wash did just that, washed out the wall/room, looked like whiteout to cover typos.
Oh boo! Seriously?!? Go rain on your own parade. There is NO REASON for you to say something like that, especially anonymously, other than to be a turd. Wish I could white out your comment, oh faceless keyboard warrior. Keep your negative energy to your negative self. I LOVE what she did and will be giving it a shot this weekend!!
Gorgeous work, Sarah! Thanks for taking the time and energy to create posts to inspire others!
Love the new look. The Grey was very nice vs the orange but the white took it to a whole new level. I was wondering how you painted the grout? We are in process of buying our first home and have a similar ugly orange fireplace.
Thanks Jenn! And I actually followed the exact same steps for the grout too 🙂
It is beautiful. You said you also painted the grout. How did you keep it looking a little darker than the stone?
I didn’t do anything differently, actually. Since it was naturally darker on its own, with the transparent wash, it also stayed darker. You could also try diluting the paint further so make it thinner. I hope that helps!
I have a Bedford stone fireplace , Will the whitewash work on it ?
There is no pink an orange undertones so just use white chalk paint half water. Does the paint have to be Simplicity? I need something on the wall behind as the TV is elsewhere