I’ve seen a lot of buzz around the internet lately about people using chalk-based paint to paint upholstery. I had read mixed reviews about the process but knew this was a project I definitely wanted to give a try! Today I’m sharing my easing tutorial for my painted fabric and wood chair.
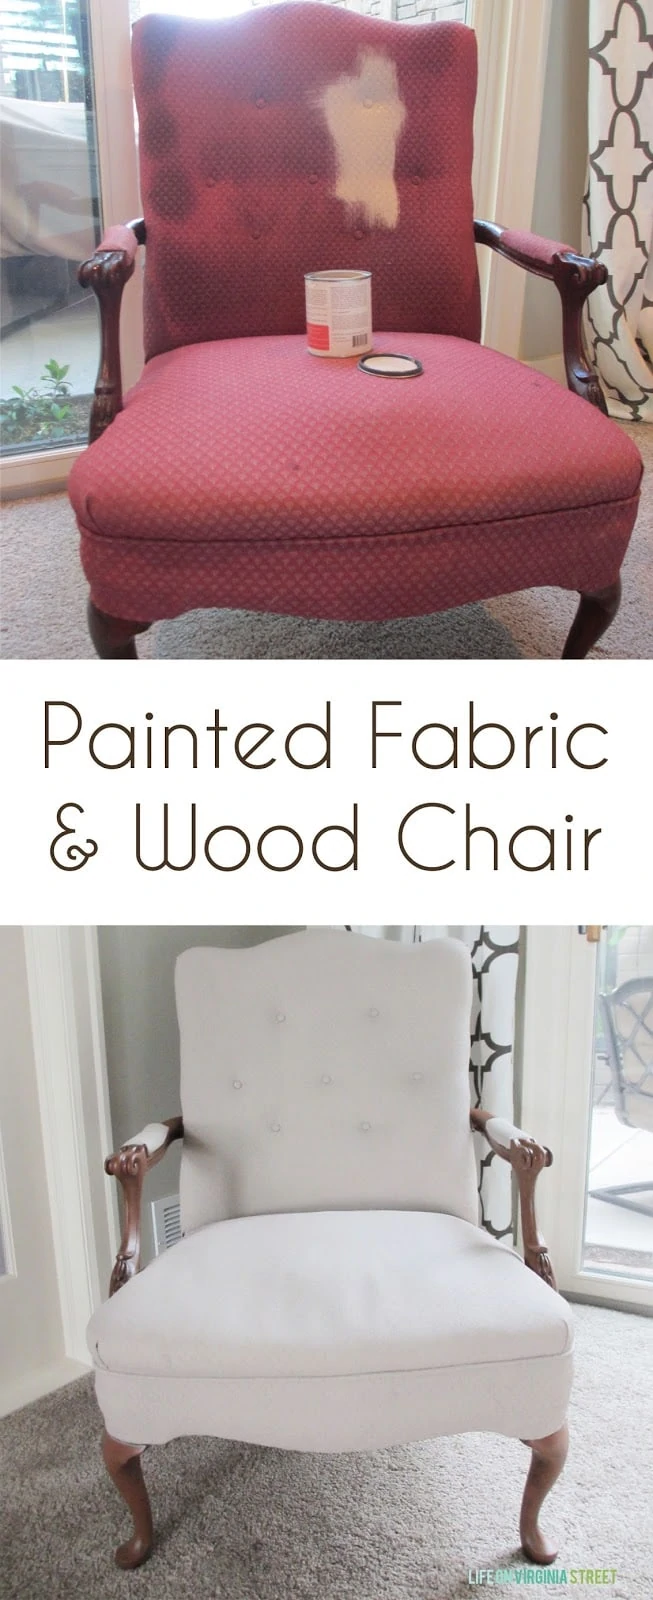
I started with an old $15 Craig’s List find. A few years back I had good intentions of reupholstering it and refinishing all the wood. And then it sat in my basement…for at least the last two years. By that point, Bearcat had claimed it as his own {as he has done with most things in our house} so I knew there was no chance I could take it away from him. But, I figured he wouldn’t mind a little makeover!
SUPPLIES USED:
- Country Chic Paint in Harmony {on the fabric} – {this paint is similar, it would just have more of a gray-tone}
- Country Chic Paint in Brandy {on the wood portions} – {this paint is similar}
- Country Chic Paint Antiquing Wax – {this wax is similar}
- Country Chic Paint Waxing Brush {similar found here}
- A soft bristle paint brush
- A spray bottle filled with water
- If you plan to have real people {not cats} use the chair, I would also recommended using a fabric medium to soften up the fabric as it gets painted. The water helps, but my fabric was still very firm {slightly firmer than canvas}. This one seems like a popular and affordable one.
Unfortunately I didn’t get a “before” shot of the chair until I had sprayed it with some water and added a little paint.
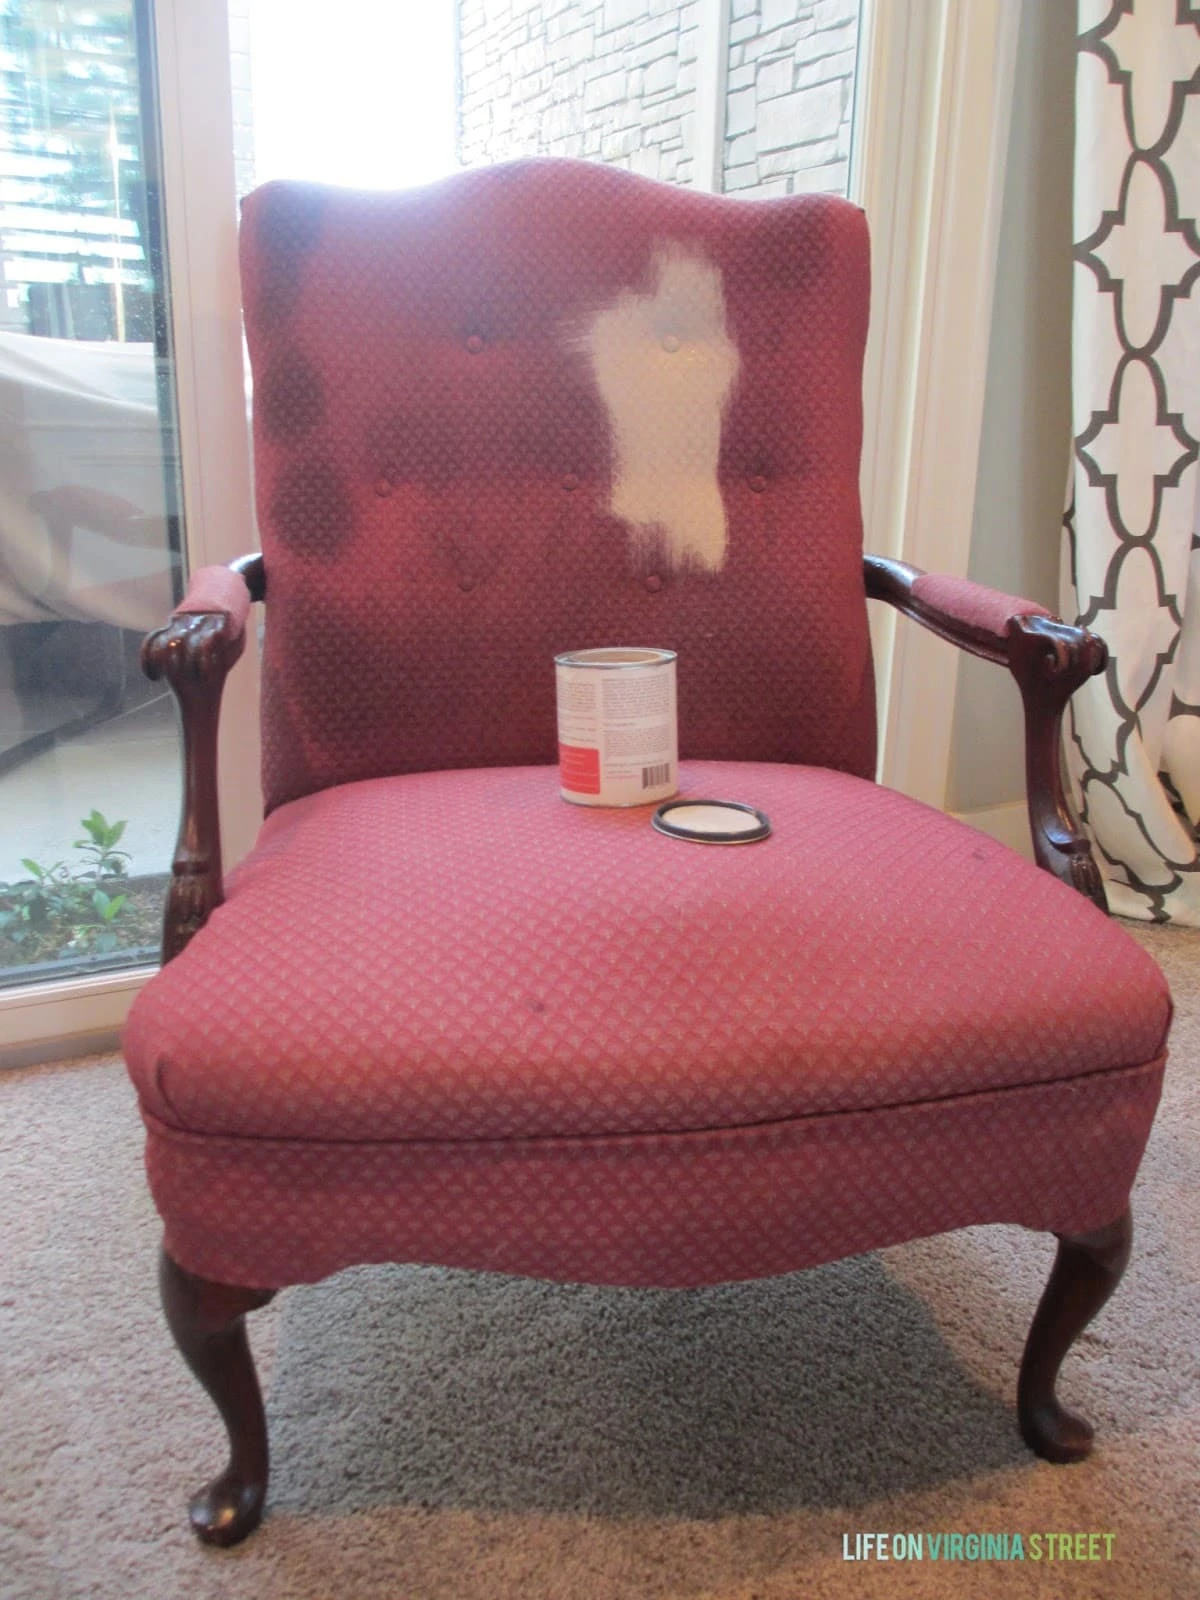
I sprayed the fabric down with water in each area prior to painting it. I found that this fabric actually bled into the paint during the first coat {likely due to me spraying it with water}. After one coat, the coverage was slightly streaky, but overall still good.
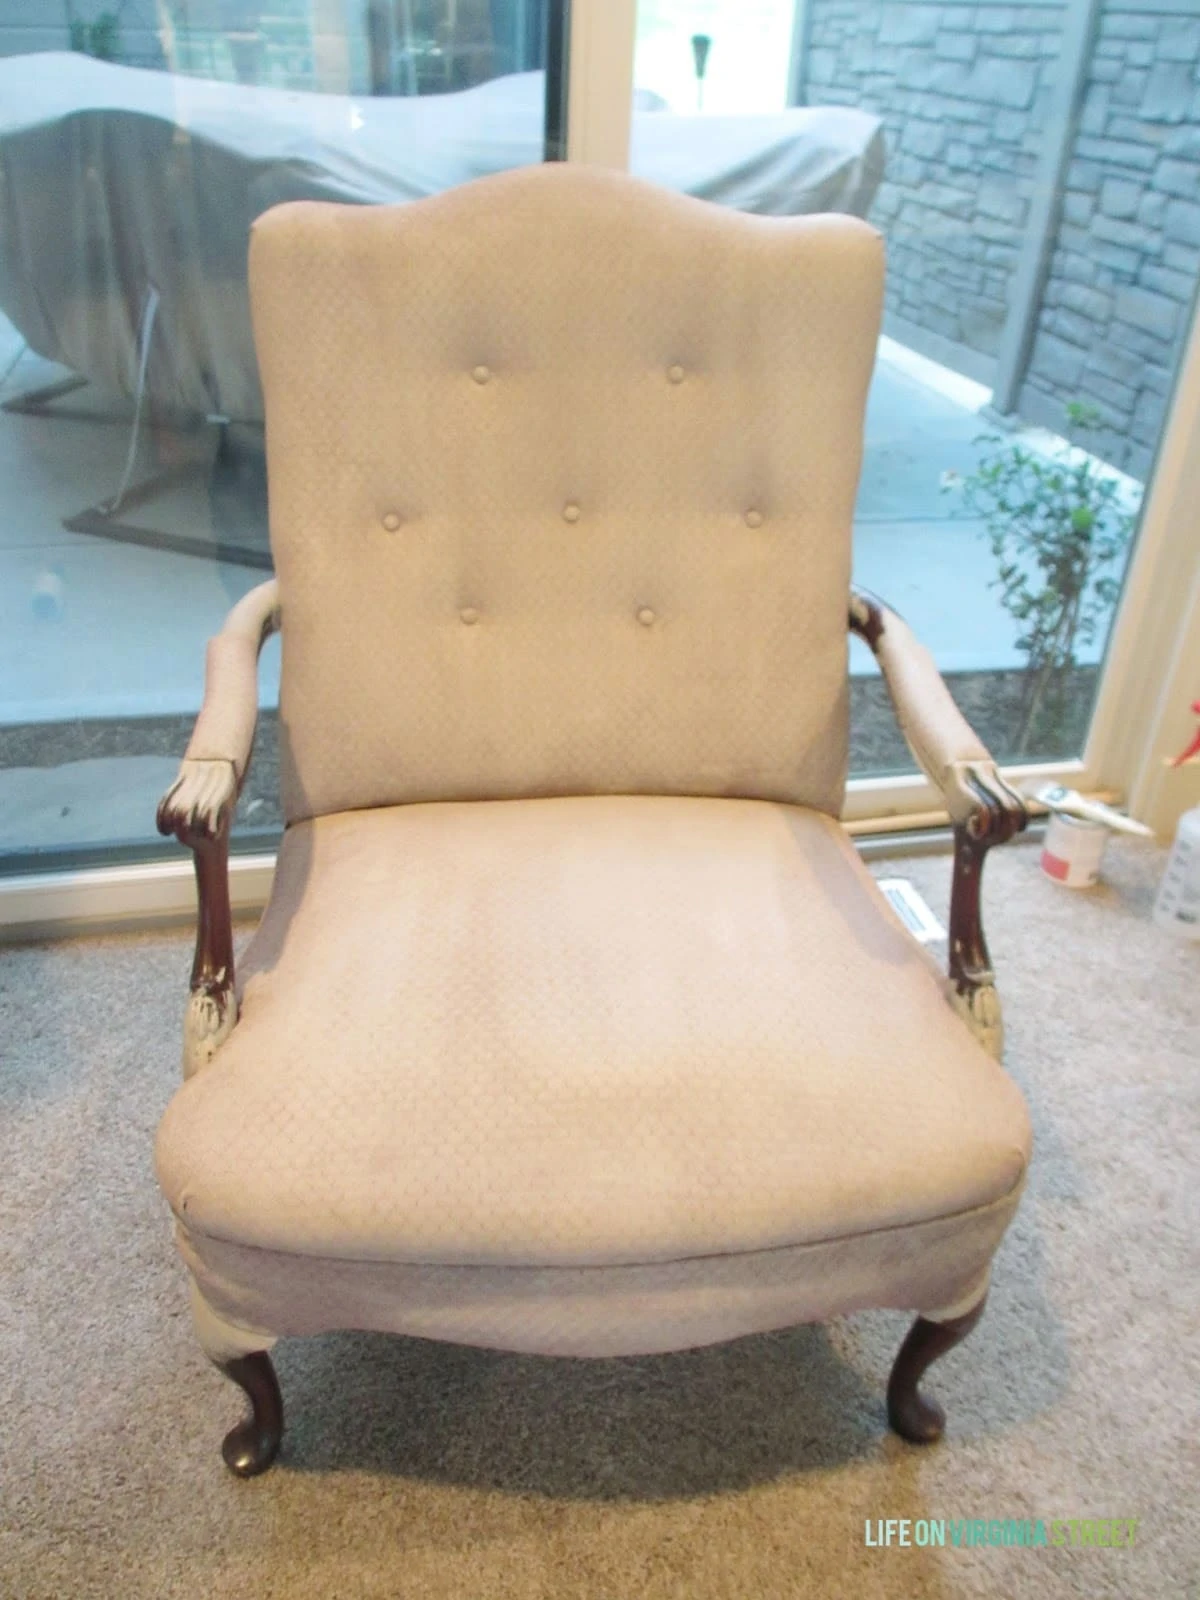
But, after a second coat of paint, the maroon/mauve fabric was fully covered. You’ll note that since I was using a chalk-based paint, I wasn’t too concerned about the paint for the fabric getting on the wood during either of the coats because I knew the next step would take care of it.
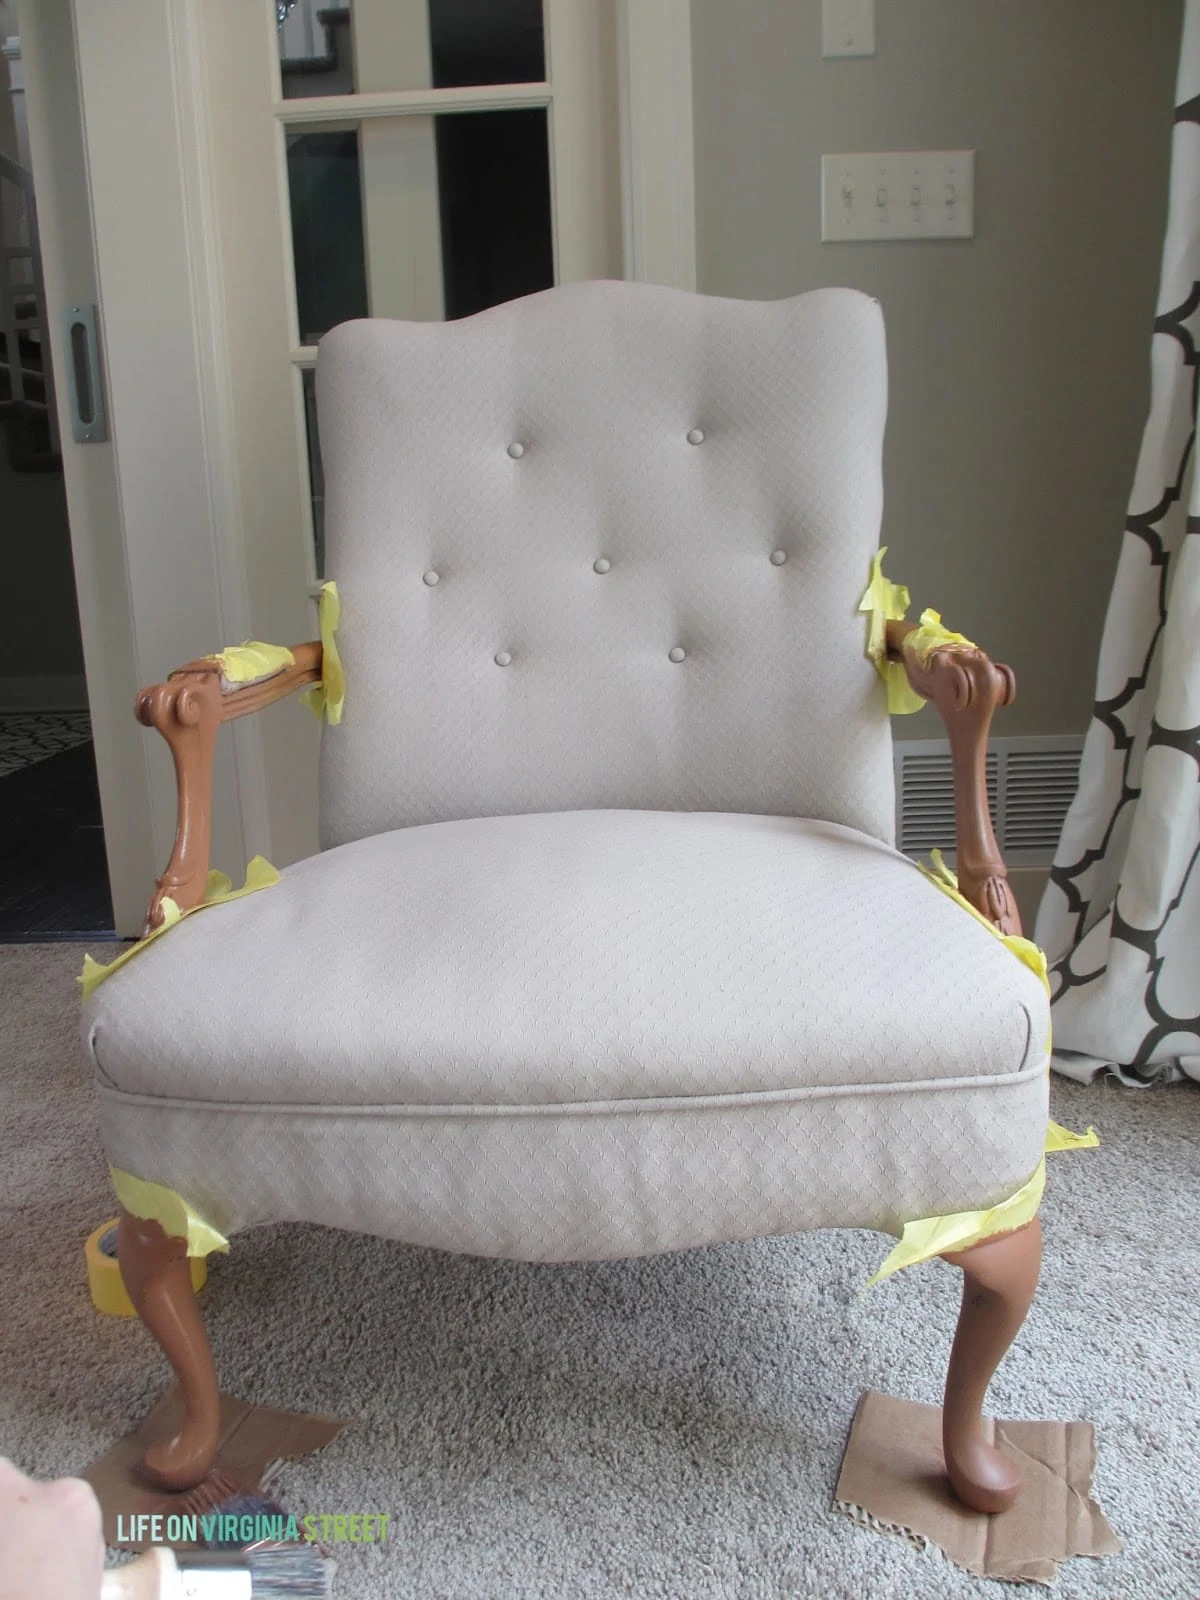
After the second coat had fully dried, I taped off the fabric to paint the wood. I used a ‘delicate surface’ painters tape for fear the paint would pull off the fabric. However, that was not the case at all, and I would actually recommend regular painter’s tape {the delicate had a hard time sticking}.
I applied one coat of Brandy to all of the wood surfaces. I was going for a wood-like look, so I didn’t want a solid layer of paint – more of a streaky look to imitate wood grain.
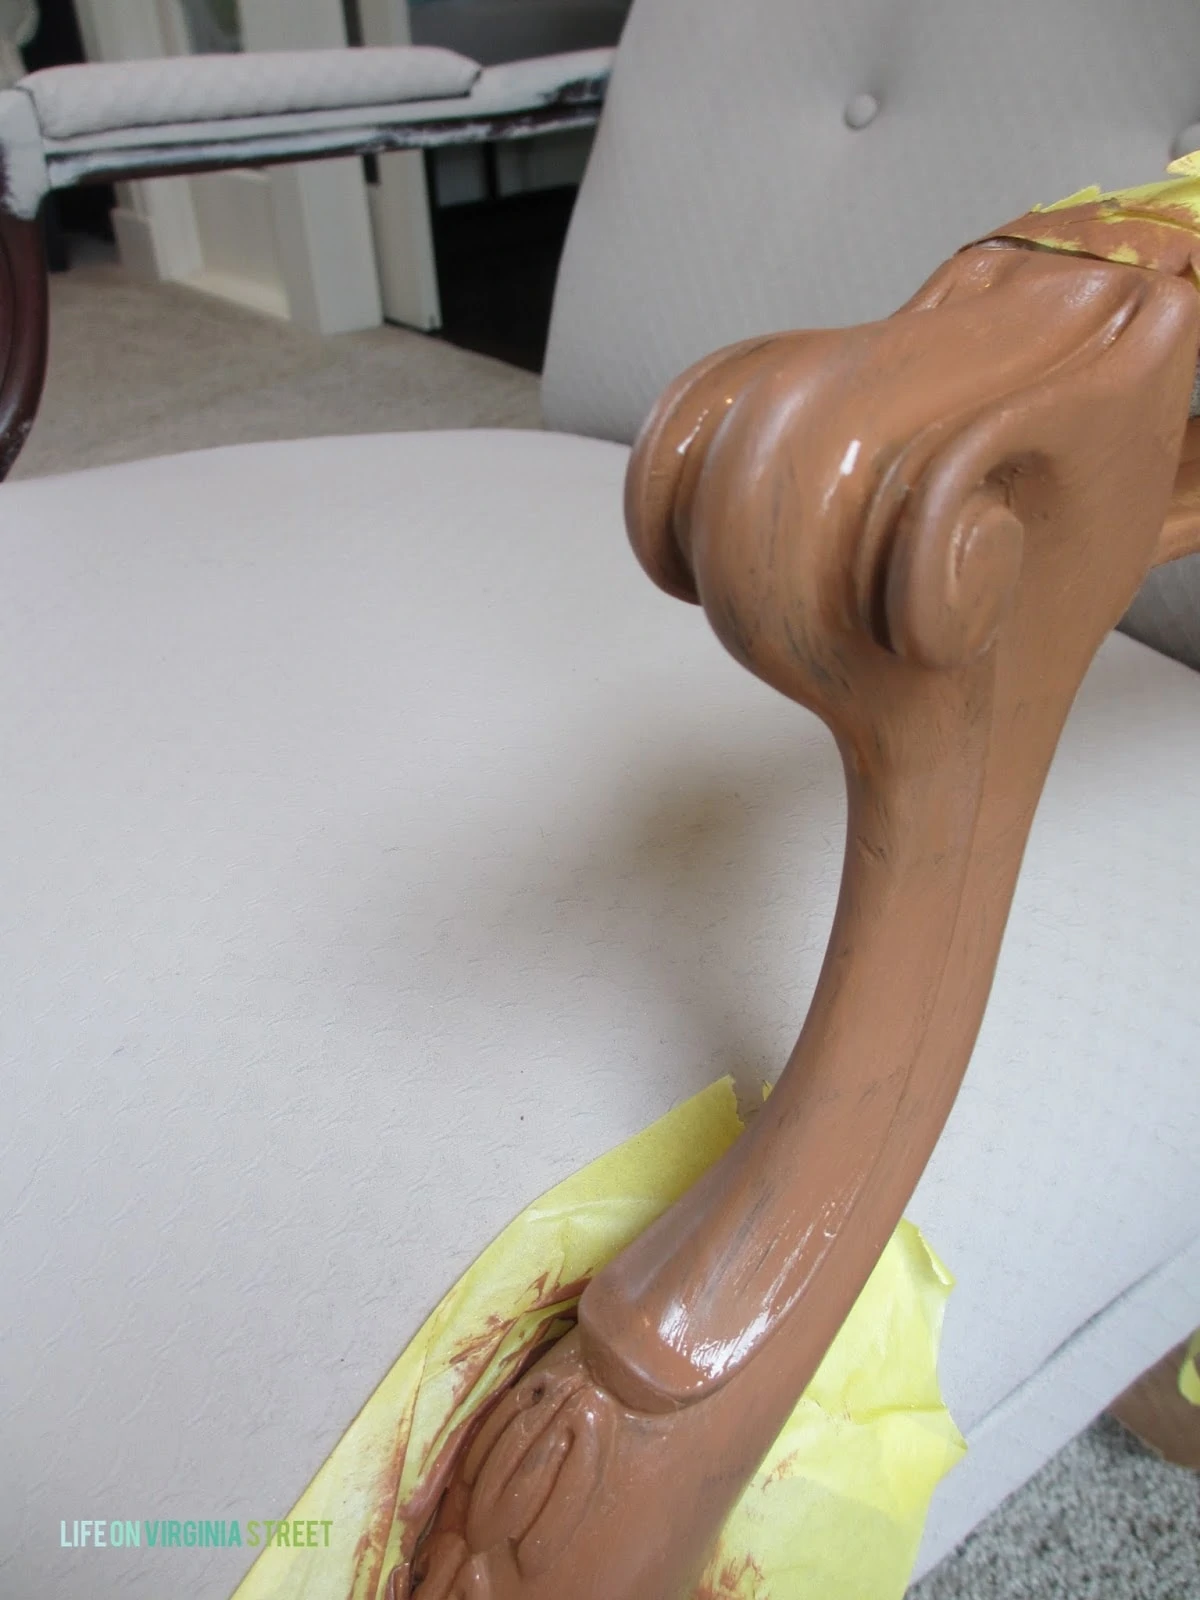
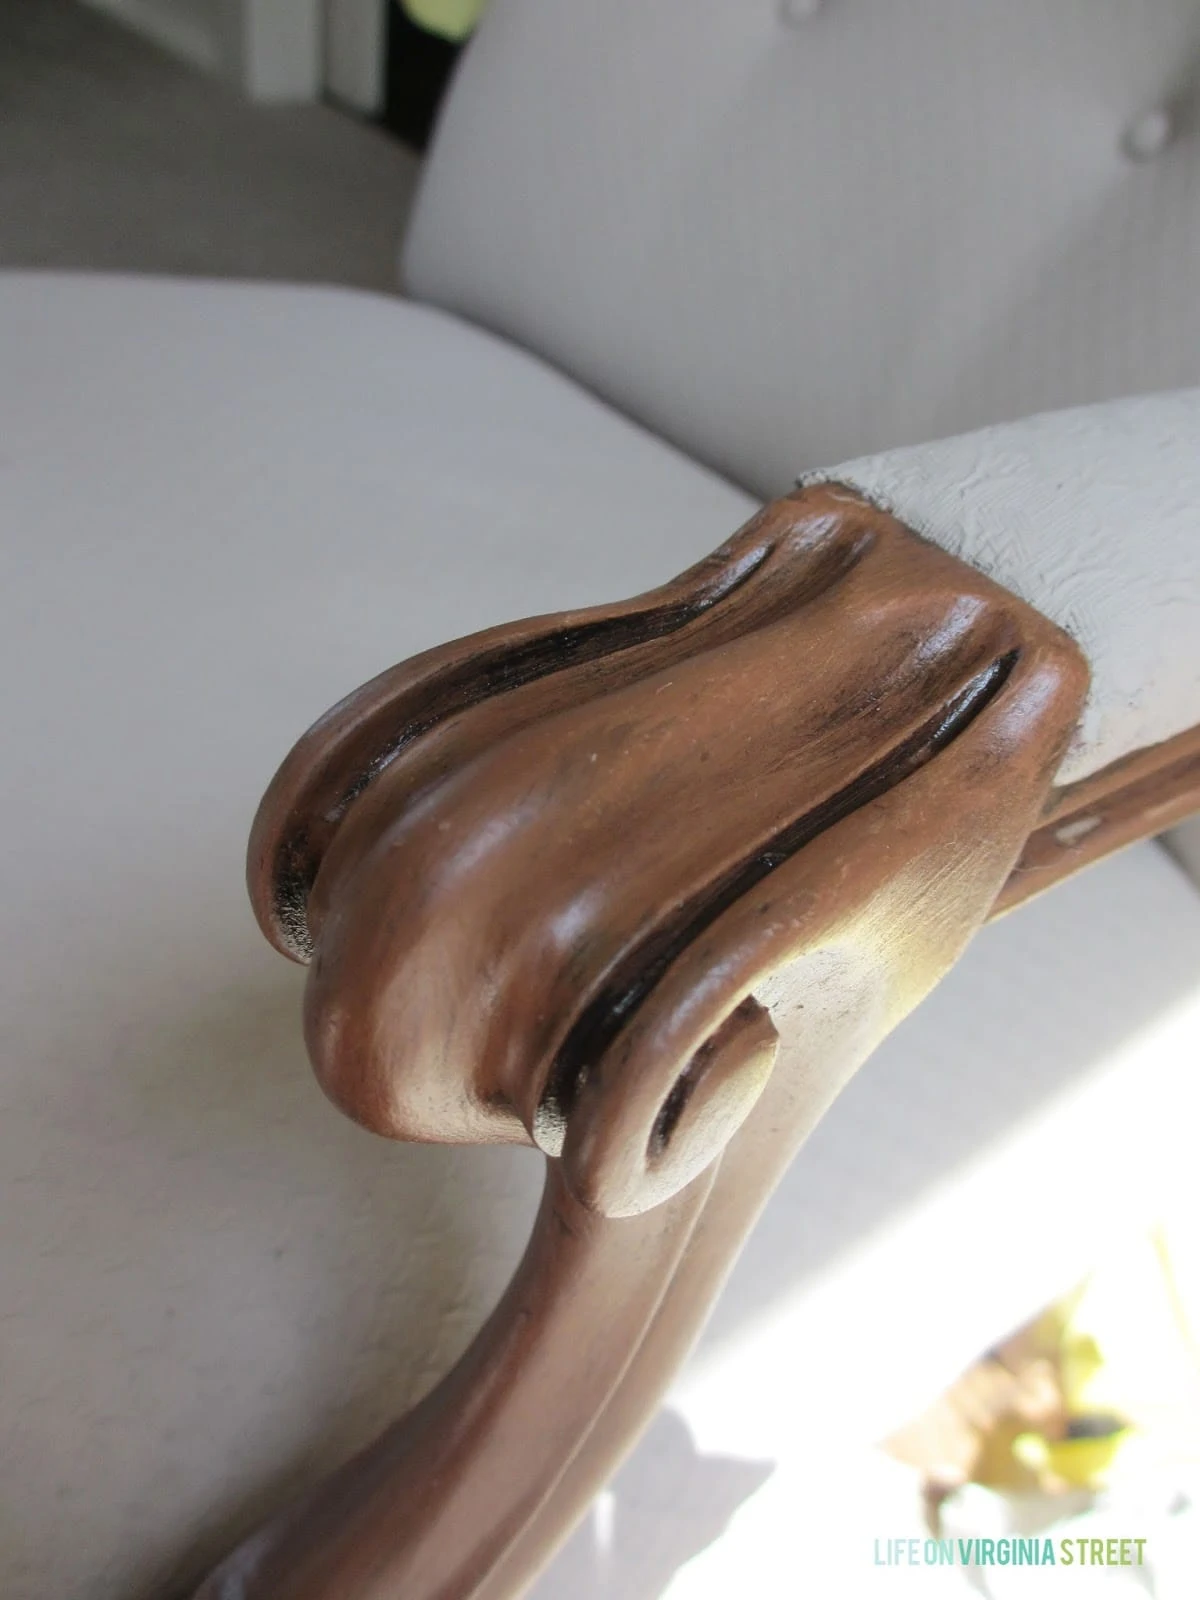
Once the paint on the wood had fully dried, I applied a heavy coat of the Antiquing Wax. I loved the richness this added when paired with the Brandy paint. I took special care to ensure the wax was fully in the grooves of the detail-work on the chair.
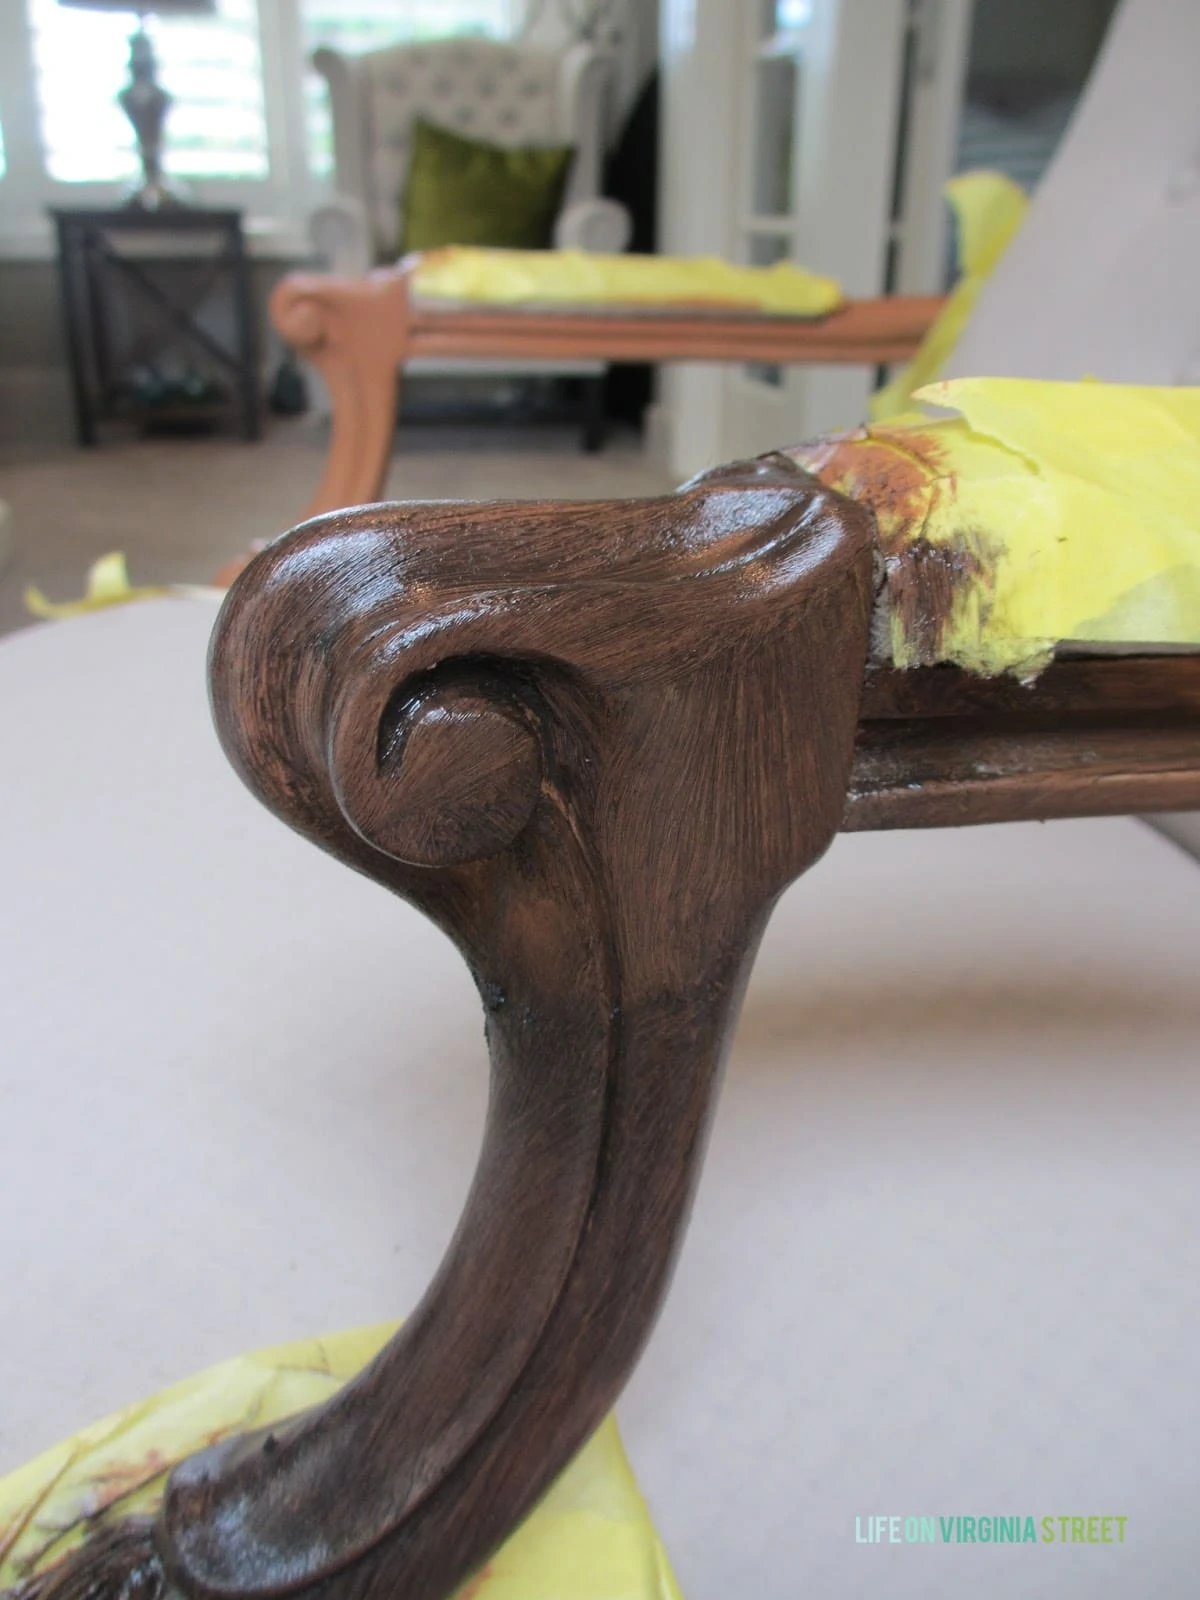
I allowed it to sit for about an hour before buffing it off. I left a cleaner look on the main areas of the woodwork, but left a little wax behind in the grooves to add additional character and depth to the piece.
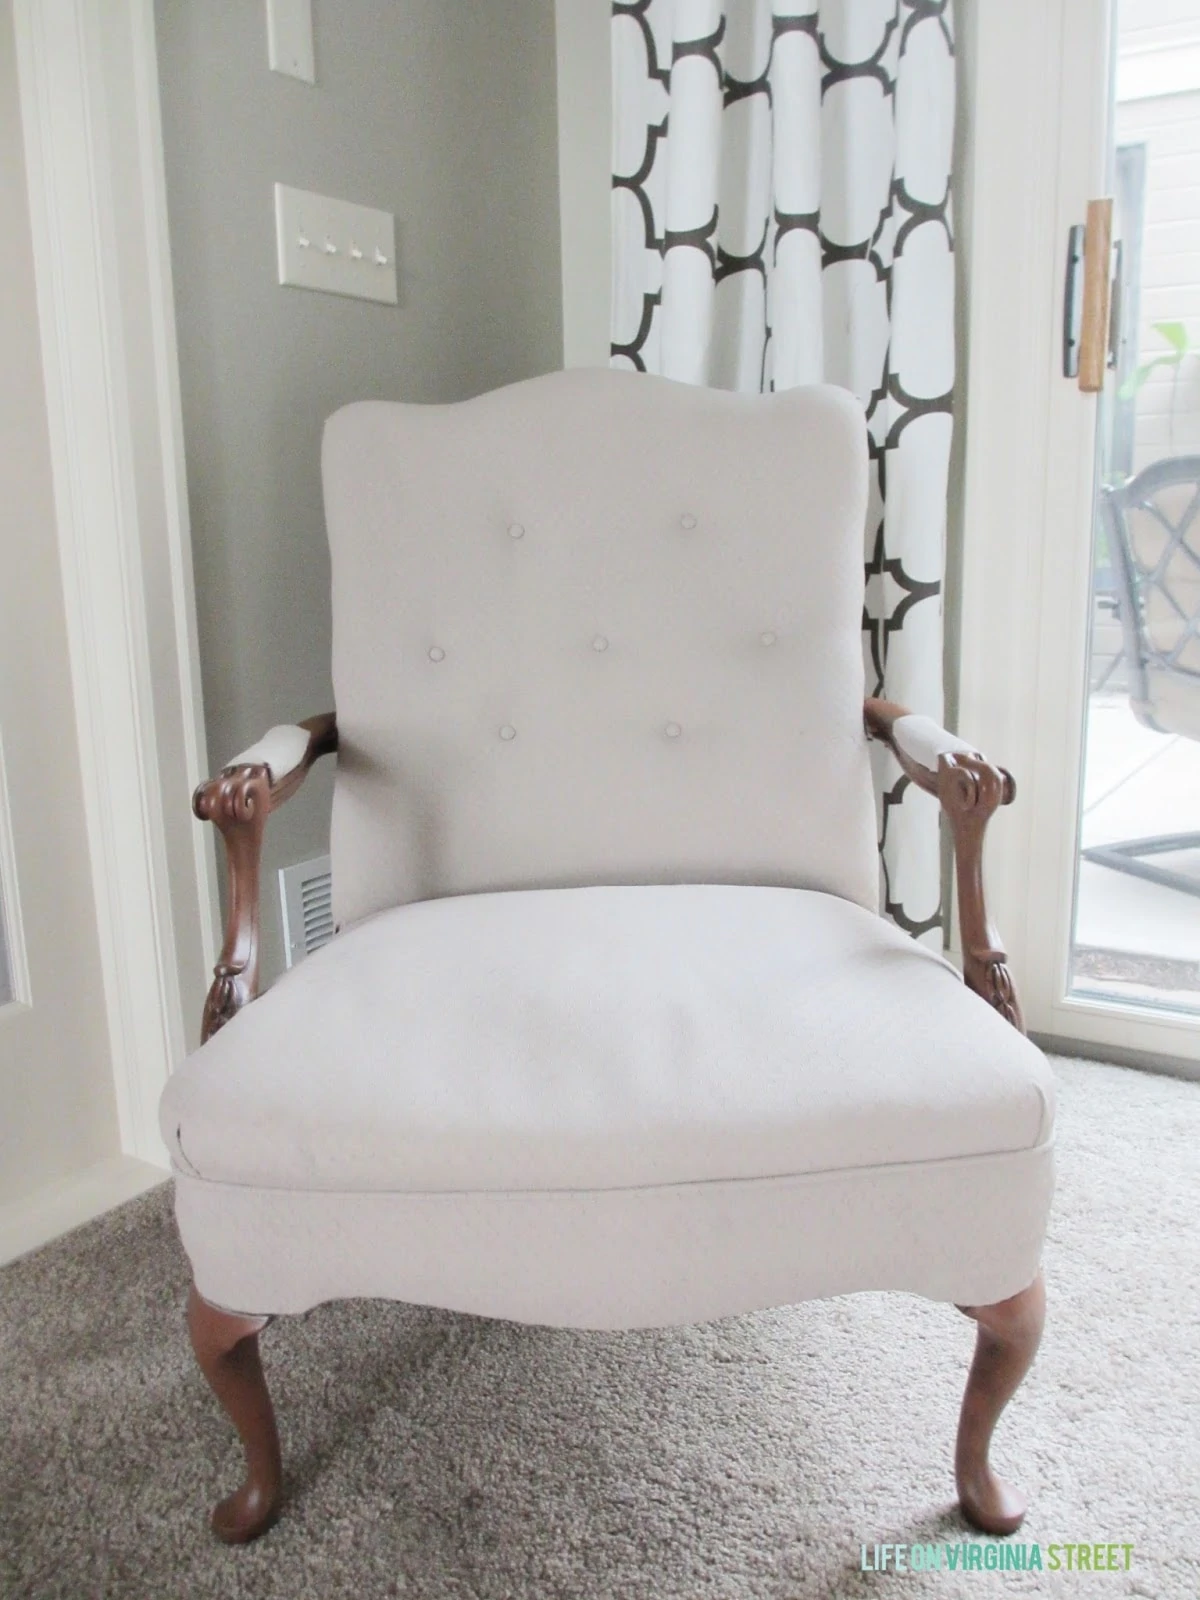
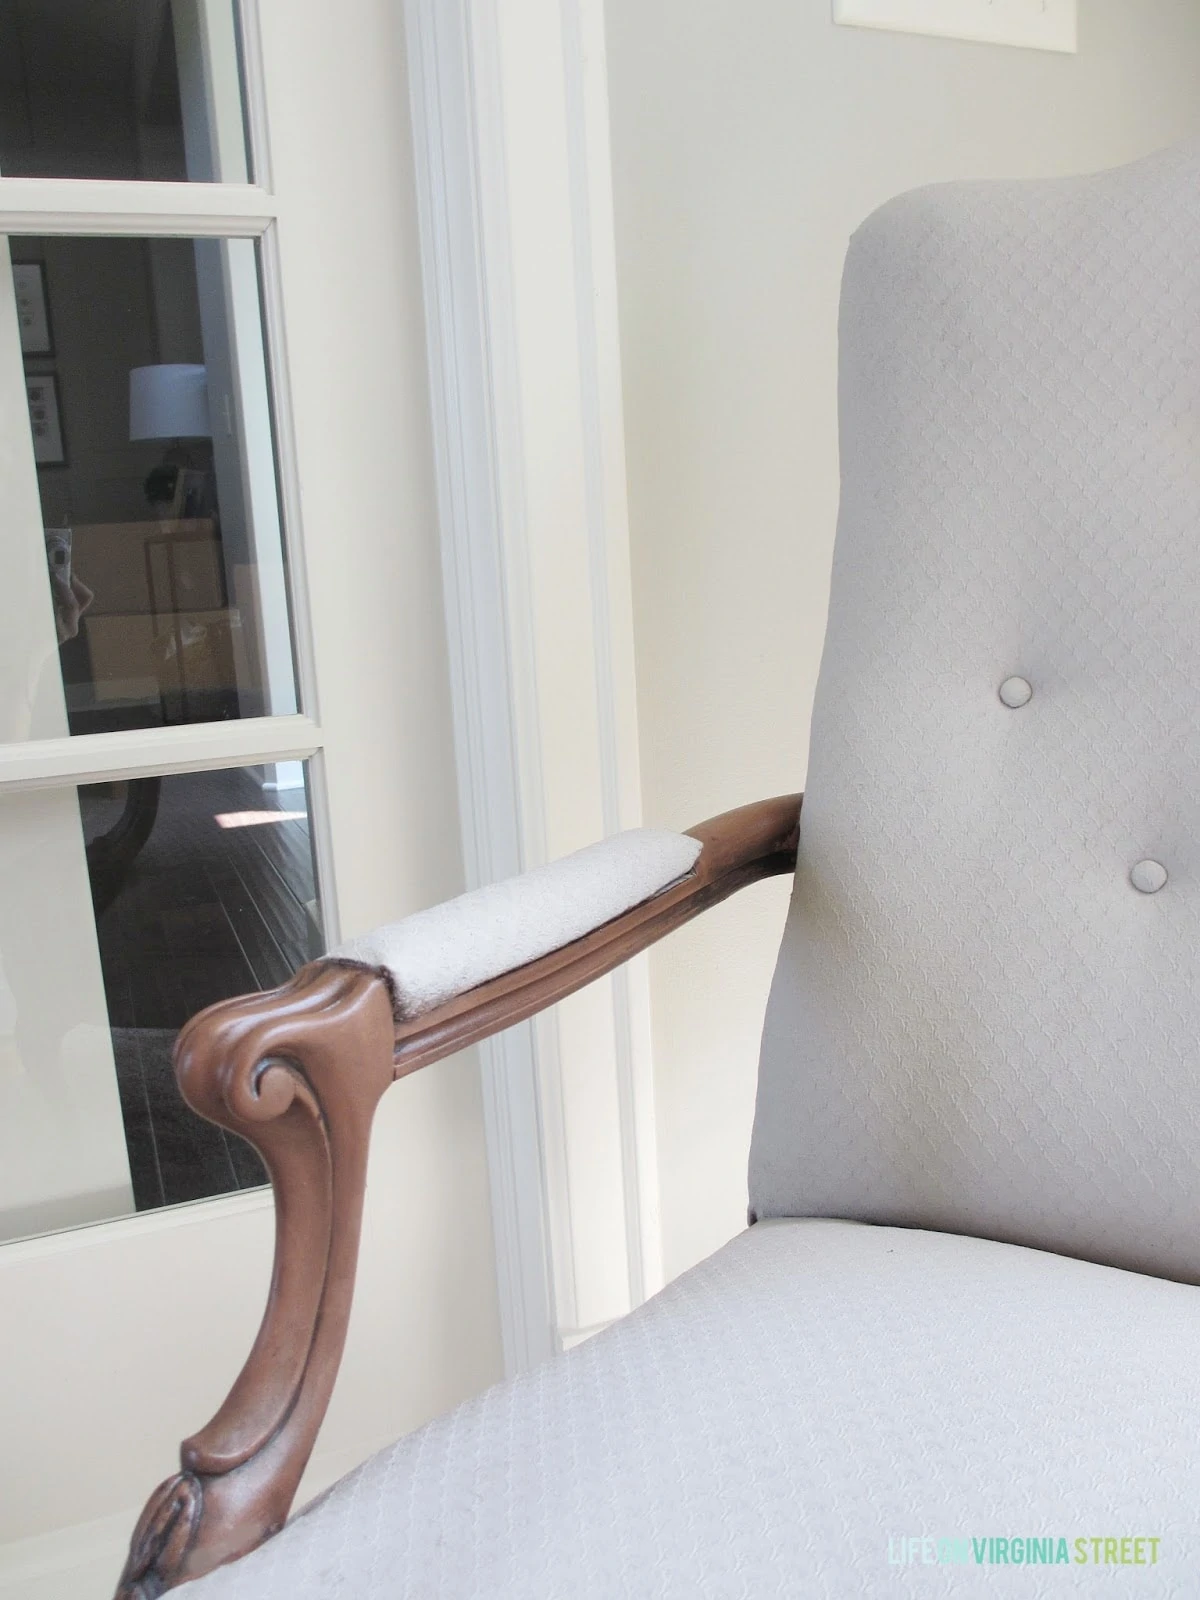
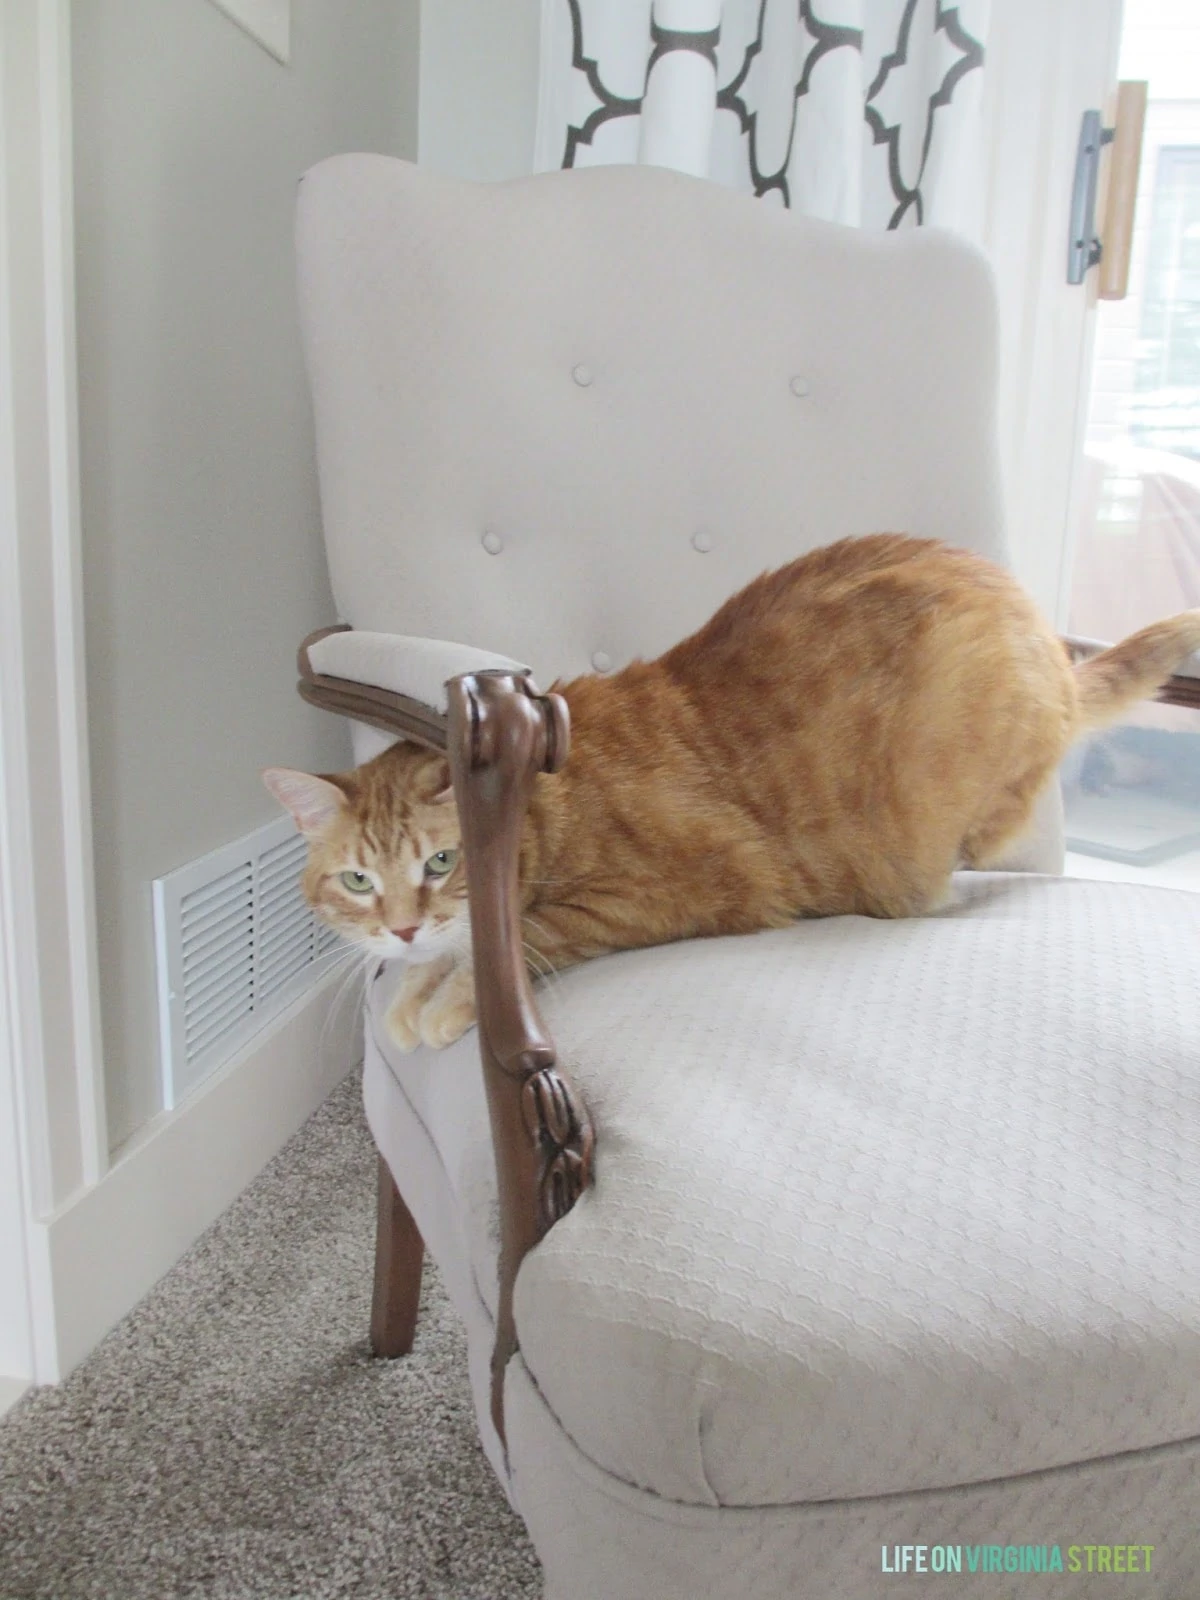
I love how it turned out and I’m fairly certain it no longer looks like a $15 chair! And a big thanks to Country Chic Paint for providing me with the paint, wax and wax brush for this little project. It has been so fun to be part of their blog squad this year!
The good news is that Bearcat is still a fan of his new chair too, even if he wasn’t super excited about me taking his picture on it. 😉
My final thoughts on the process. Would I paint an heirloom or expensive chair with this method? Probably not until I had at least tested some fabric with the fabric medium. Would I try it out on another cheap find? Absolutely!
If you would like to follow along on more of my home decor, DIY and random posts, I’d love to have you follow me on any of the following:
Disclosure: affiliate link used

This is awesome! I’ve been wanting to try this for months on an old ratty chair I got at a garage sale. I know I will never reupholster it so this seems like a harmless option! Thanks, Sarah!
xo,
Kylie
Where do I buy fabric medium? Would I spray that on my chairs instead of water then??
I’ve added a link to a popular fabric medium in the supply list above (I think you can get it at local craft stores as well). There’s a lot of tutorials online that use the fabric medium, but many recommend a 1 to 1 ratio of water and medium – typically mixed right in with the paint. It will make the paint much runnier but will also help to soften it quite a bit. I would just sample the ratios on some scrap fabric until you get the texture the way you want it before trying it on an actual piece of furniture.
Sarah, I love the chair with it’s new colors! You did a great job! I’ve always wondered, does the paint make the fabric on the chair feel stiff?
It definitely feels stiff on mine because I didn’t add the fabric medium (I’ve heard that helps out a lot). Mine is slightly stiffer than canvas right now.
Wow Sarah, this looks fabulous – what a difference! I haven’t tried Brandy yet but you’ve inspired me to add a can to my next Country Chic Paint order.
Marie@The Interior Frugalista
Amazing! Wondering where you can get the paint and also curious if the color Harmony is more cream or more tan? The color chart I found online looks very different than your chair.
The Harmony on my chair is definitely lighter than it appears on the sample online. Not sure if that’s because I watered it down? On my monitor, it looks closer to the Cheesecake color once it dried on my chair. Here’s a link to the store locator: http://www.countrychicpaint.com/storelocator/index/index/. Otherwise, I believe you can order it directly from Country Chic Paint on their website if you don’t have a store nearby.
Looks fabulous, and great tutorial too.
What a pretty chair. So much better then before:)
Love your results! I am sitting right now on an old desk chair that needs either recovered or painted. Hmm…
I thought about painting our ultra suede sofa but decided it would be too stiff. Instead we sold it and went another direction – perhaps I was too hasty and should have tried to paint it! Nice transformation.
That is amazing! I can’t believe that is just painted. It looks brand new. I’m going to have to try this for sure.
Corey @ TinySidekick.com
question: will this paint peel or chip off after a while?
I haven’t had it long enough to say for sure. However, I don’t believe it would since it just acting as a stain on the fabric. It isn’t thick so I don’t think there is any way for it to peel off. As far on the wood, I have tried scratching it with my fingernail, and with the wax on top, it does not come of. Left unwaxed, you are able to scratch it off.
Hi Sarah – I have a very old chair that I would like to try this technique. Is there any preparation that needs to be done to the wood, prior to painting?
If you use a chalk-based paint, you really shouldn’t need to do any prep work (unless it happens to be laminate and not real wood). I literally did no prep work (other than taping off the areas for different colors). No sanding or anything. One of the best features of chalk-based paints!
Hello, Sarah I was wondering on most of the other blogs I have read they use a wax to seal the chair as well. Did you use a wax on the the fabric and wood or just the wood? TIA
I only waxed the wood, not the fabric. Thanks!
Love this! All of the tutorials I’ve seen use the fabric medium; using chalk based seems so much easier. How many cans did it take to cover the fabric?
I was actually able to cover the fabric with a small can of paint (15.62 fl. oz). There is even a little bit still left in the can. It seems like chalk-based paints go a LOT further than a latex.
I have a chair similar, but my seat cushion is removable and filled with down. What do you suggest when it comes to painting that? Do I remove the down insert and paint the upholstery alone, or put a barrier between the upholstery and the downy insert? Or does it even matter? I don’t want to ruin the cushiony part of the chair…
Honestly – I’m not 100% sure on the down, since mine just had a foam padding. At minimum, I would remove the down so it isn’t damaged and then perhaps use a cardboard insert so it doesn’t bleed through?
Hi there! I’m trying this technique tomorrow and I can’t wait to see how it turns out! Now that you’ve had the chair done for a while, how has it held up?
Thanks!
Gina
It has held up really well, but honestly, the chair gets little to no use, so it is hard to gauge for certain. One of our cats mostly uses it currently 🙂
Hi
This is awesome news so glade I caught this.
One Q is it uncomfortable to sit on I would imagine it would be very rough?
gorgeous job well done x
Without the fabric medium, it is definitely stiff but I haven’t tried out a version that uses it (I’ve heard it helps a lot in terms of comfort though). I hope that helps!
Hi, I want to paint a chair that is covered with vinyl – do you think it can work?
That’s a really great question! I honestly don’t know the answer. Perhaps if you gave the vinyl a light sanding first to add some grit so it would stick better? I don’t want to lead you astray though so if its a piece you aren’t that worried about I would say try it. Otherwise, it might make me a bit nervous.
Hi. This is fabulous! I know just what chair of use it on. Question though.. I wonder would there be a chance of the paint on your clothes, especially in the humid summer months?
I haven’t had any issues with it bleeding yet, and it gets really humid here in Nebraska. As firm as the paint is, I don’t know that it would but if you had concerns, I probably wouldn’t move forward with it (or you could do a test on a scrap piece of fabric to test out on humid days).
I absolutly love this. Thank you for making this tutorial simple. I have been looking for the perfect chairs to go in our master bedroom. I just have not been able to find the perfect price tag. I have always seen the perfect character of chairs at yard sales or second hand stores. Looking forward to finding my diamond in a rough and getting started!
I need to do something to my outdoor cushions. Do you think this method would hold up outside. I love to work with chalk paint and I make up my own. Your chair looks great!
Thanks
Susan
Thanks! Honestly, I’m not sure how it would hold up, especially if it rained. I didn’t wax my chalk paint on the fabric (wax is usually what “seals” it) so I imagine if it got wet, the paint may come off some. I would probably just double-check the directions from the paint (depending on brand you use) as it should indicate if it is washable or not. I’d love to know if you try it!
I am not familiar with chalk based paint. It doesn’t rub off onto other fabrics, does it? If I sat in it wearing black pants, it wouldn’t be like sitting in chalk?
No – we have never had an issue with it rubbing off on fabric. It is actually more like the chalkboard than the actual chalk itself, if that makes sense? It allows you to write on it with chalk (if you don’t wax it). So, on the fabric, if anything, it dries rather hard (especially if you don’t use a fabric medium). I hope that helps!
What a great idea! I’ve got a leather chair which is a bit damaged. Do you think I could use your awesome technique on this chair? Thanks!
Honestly, I’m not 100% sure, but I think it could definitely be an option. It may be worth it to try painting a swatch of leather (you could probably get one for a few dollars at a craft store). I’d love to hear how it turns out!
Great job! Do you think the paint will seal in old odors such as smoke or mildew so common on old furniture? I’d love to try this on an old chair I inherited instead of having it reupholstered. Also, are any texture patterns in the fabric obliterated by the paint or do they show through?
I think it would definitely help with odors! Ours was old and musty and I feel like its a lot better now. You can still see the texture of my fabric, but I do definitely feel like it lost some of the texture as well. I hope that helps!
This beautiful. I have a chair that I got at a yard sale for $ 10.00 I just might have to try this.
I wonder how the paint would do on a velour or velvet type fabric? Would it be ‘crunchy’? Love the idea of painting, but worry about the result on this type of fabric. Your thoughts?
It may be a bit tougher on velour or velvet because the weave isn’t as tight. I would recommend getting a scrap of a similar type fabric from the fabric store and testing it before you paint a full piece of furniture! It could definitely be beautiful though!! 🙂
When do you add the medium to fabric?
I didn’t use the fabric medium, so I’m not 100% sure. The directions on the bottle should tell you when (I believe you actually mix it in with your paint). Thanks!
Could you tell me what is the purpose of wetting down the fabric before painting? Thank you in advance.
Honestly, I’m not 100% sure but I had read it on several other tutorials. I will say that the chalk paint is incredibly thick and saturated, so for my project, I think it helped the paint to soak in a little better and not be so thick and clumpy on the fabric surface. By absorbing a little more, I think it also helped to make it a bit softer. I hope that helps!