I am excited to share with you my fresh master bedroom progress and also a tutorial on how to paint baseboards.
This post is sponsored by FrogTape and contains affiliate links for your shopping convenience. As always, all thoughts and opinions are my own. Click here to read my full disclosure policy.
In case you missed last week’s post, I’m so excited to announce I’ve been chosen as a FrogTape® Paintover Challenge participant! You can get more specifics in that post because today I’m going to jump right into the progress in our master bedroom. Not only that, I’m finally sharing a tutorial that many have asked for over the years: how to paint baseboards and trim!
Master Bedroom Progress
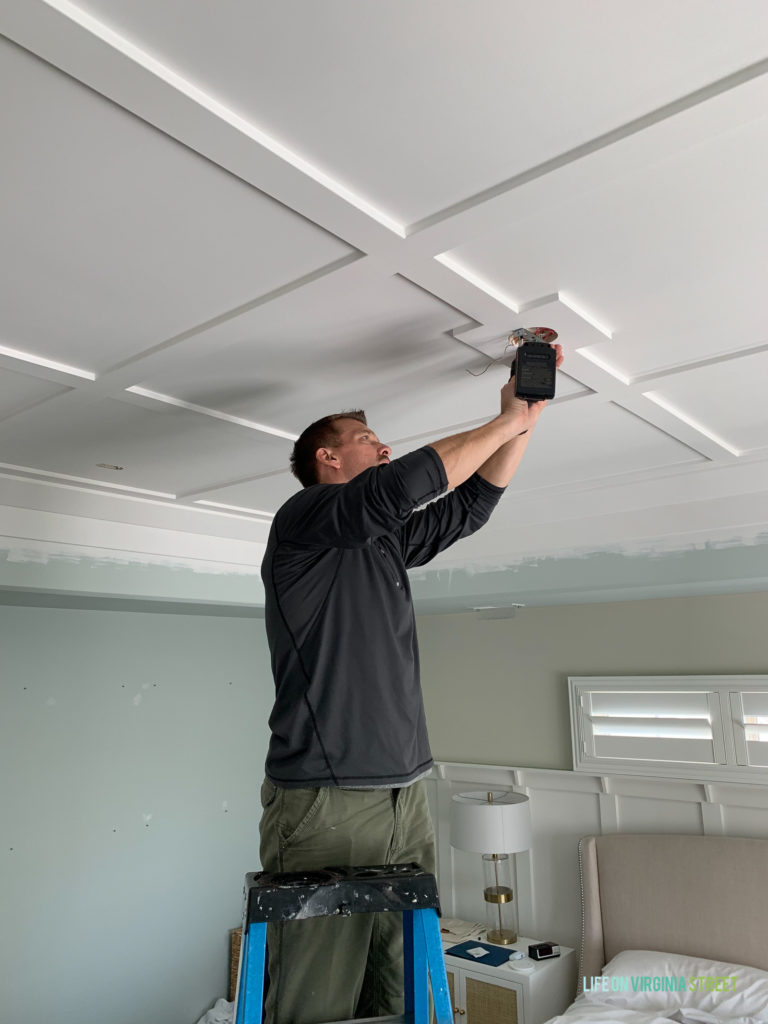
So, let’s jump right into the design progress. Guys, I can’t even begin to tell you how much time I have invested in painting this space. It honestly felt like it would never end! There were days I could barely walk or lift my arms over my head because of all the time I spent on a ladder painting over my head. I’m pretty sure I used muscles I didn’t even know existed 😉
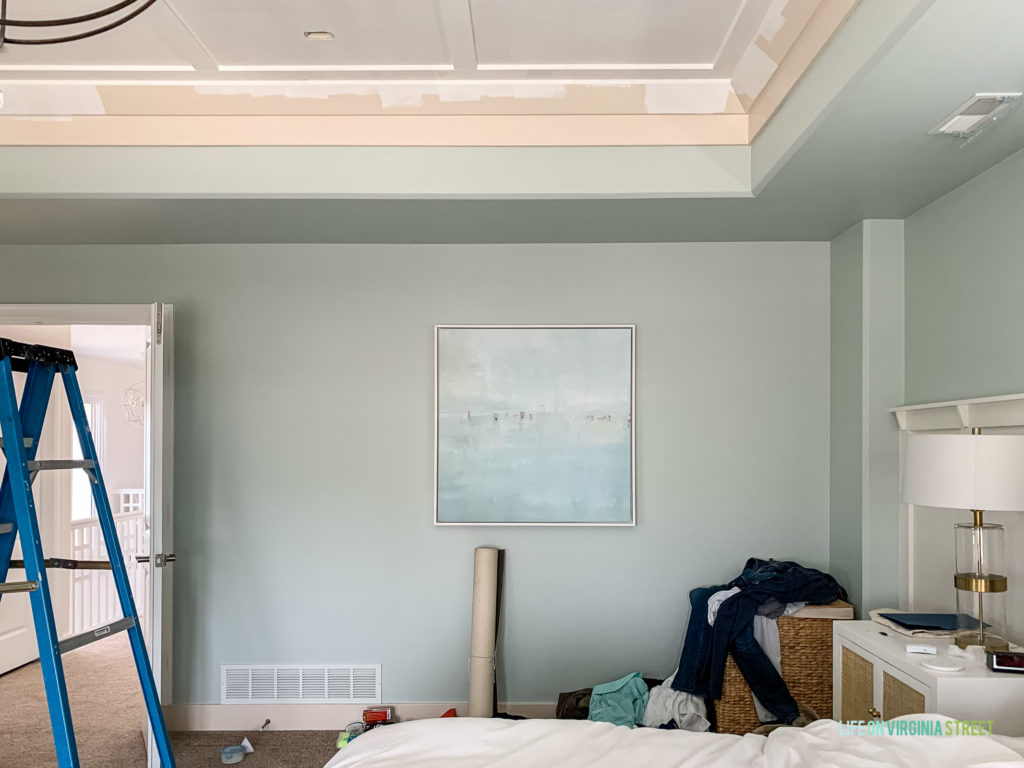
But, it’s pretty thrilling (at least for me) when you get to see just how dramatic the fresh paint looks! It was my motivation to power through! Even with only one coat of the Benjamin Moore Simply White, I could see the power of paint once again! It got even better and more saturated after I did two coats! The below picture is after one coat on a dark and gloomy day when the contrast is even scarier! You can also see just how off the trim color looked with the Sea Salt walls.
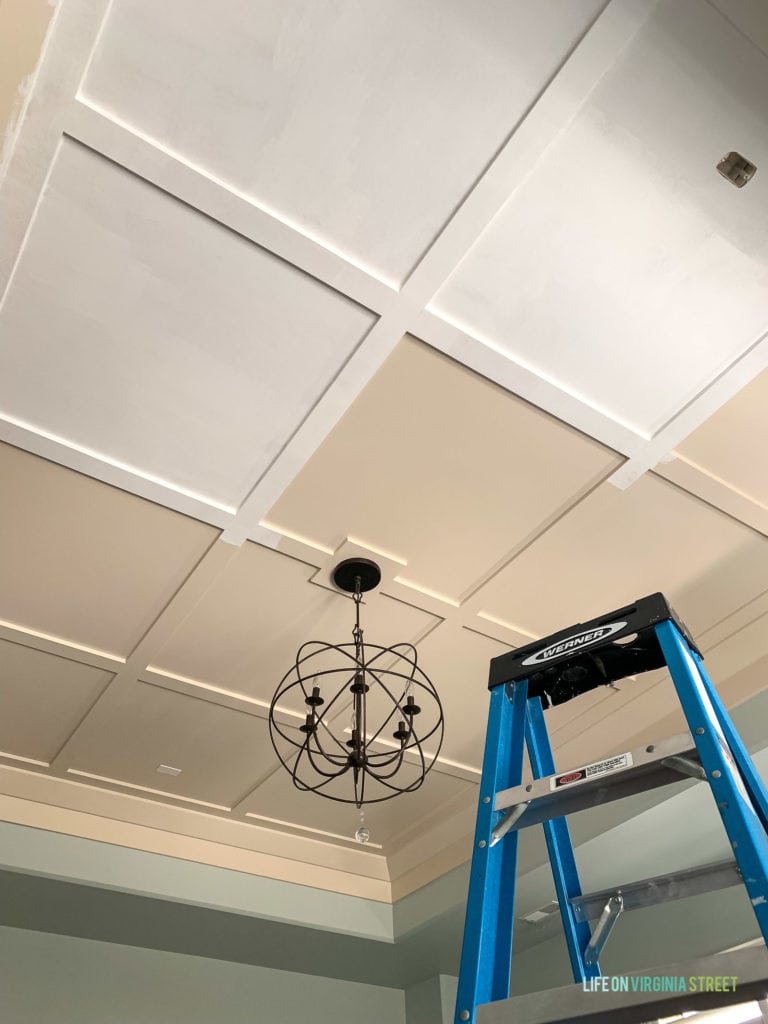
I started by painting the ceiling then working my way down to the walls and then lastly did the baseboards and trim. Here you can see all the variety of contrasting paint colors in one image. The set of old colors, and the set of new!
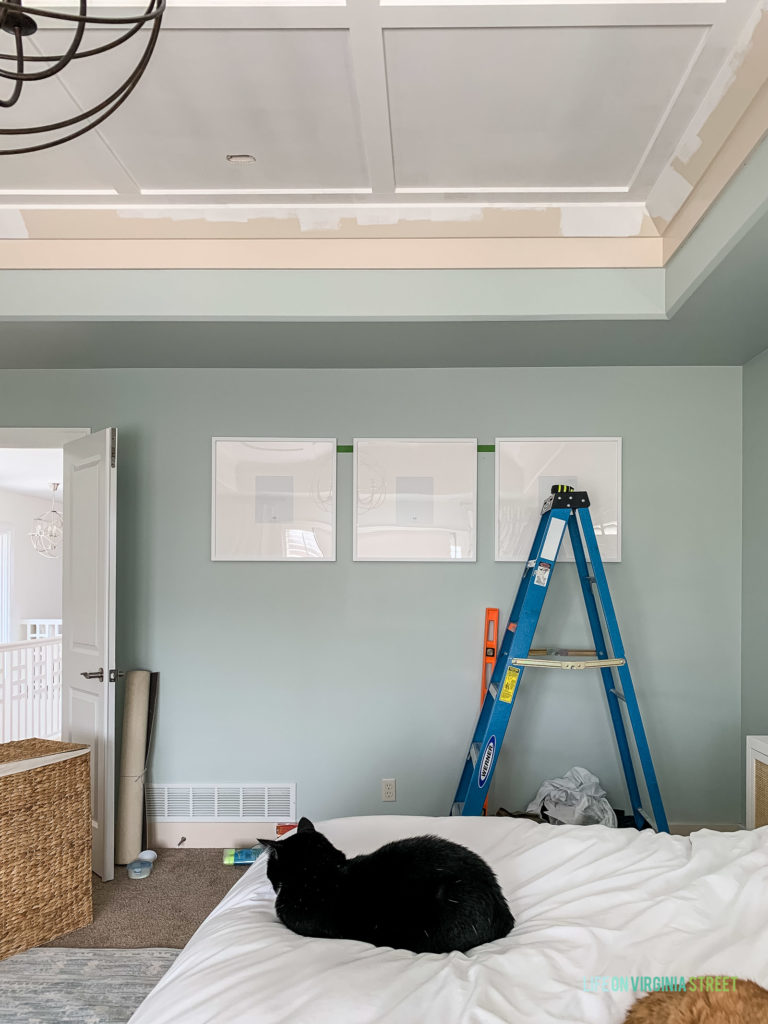
I never really showed this side of our bedroom before because any art I hung in the space always looked too small! And….Kurtis’ laundry situation 😉
I decided an oversized gallery wall was the way to go! I found an easy new way to get your frames lined up! I simply taped a level piece of FrogTape® Multi-Surface tape on the wall and measured and marked all my nail holes with a pencil. I then just nailed right through the tape before taking it down. It took a fraction of the time it usually takes me! I opted to get all the nails in before I painted the walls in case I needed to do any patch work. I have another row of frames but don’t want to give too much away before the big reveal next week! But let’s just say, I’m obsessed with how it turned out!
We took the old orb chandelier down and installed the new one. I can’t wait to share how gorgeous it looks in the inviting and bright space! You can see here the ceiling is now officially white too!
How to Paint Baseboards and Trim
Baseboards and trim are my least favorite items to paint. I’d paint a wall any day! But, with a fresh coat of paint, it’s pretty amazing just how much better and more fresh your trim can look! The biggest scare for most people when it comes to painting trim is the fear of brushstrokes. And understandably so! But by following the steps below, you can achieve a smooth finish with little to no brushstrokes at all.
Supplies Needed to Paint Baseboards and Trim
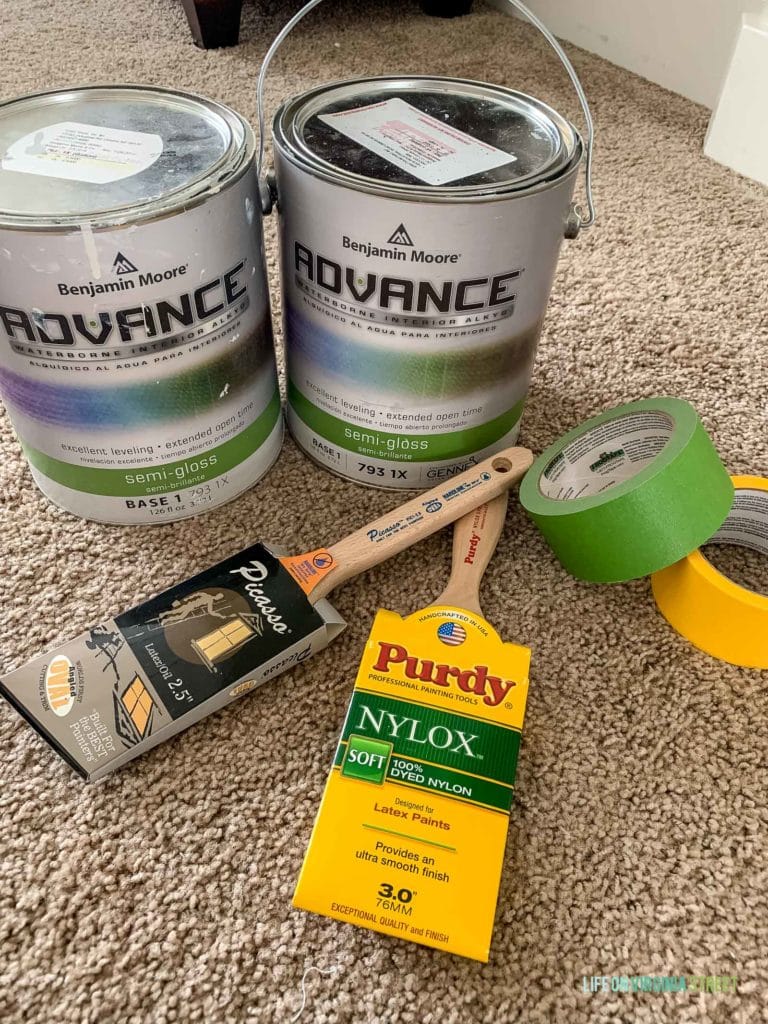
- Paint – I have been very happy with Benjamin Moore’s Advance line for trim. It is self-leveling which means far less brushstrokes!
- High-Quality Brush – My Benjamin Moore store always recommends Picasso brushes, and my local Lowe’s recommended the Purdy Nylox shown below. I ended up using the Picasso version because it was angled and I was painting both trim and baseboards.
- FrogTape® Multi-Surface (if walls are cured) and FrogTape® Delicate Surface (if you’re taping on newly painted walls or trim)
- Basic cleaning supplies. A paper towel and water work, as well.
Prep Your Baseboards and Trim
The truth is, I hate prep work. I always want to get right to the fun painting part! But to ensure the smoothest finish possible, the prep work is critical! You will want to thoroughly wipe down your baseboards to remove all dust, grime and dirt. Then allow for everything to fully dry before moving to the next step.
Tape Off Your Walls and Floors
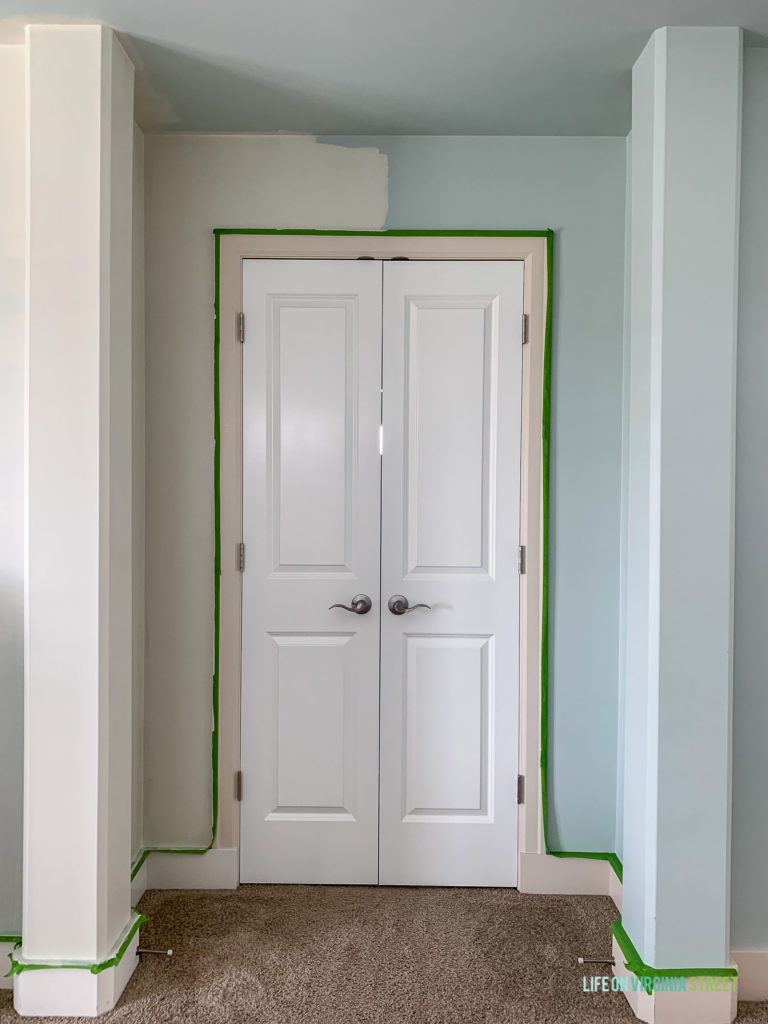
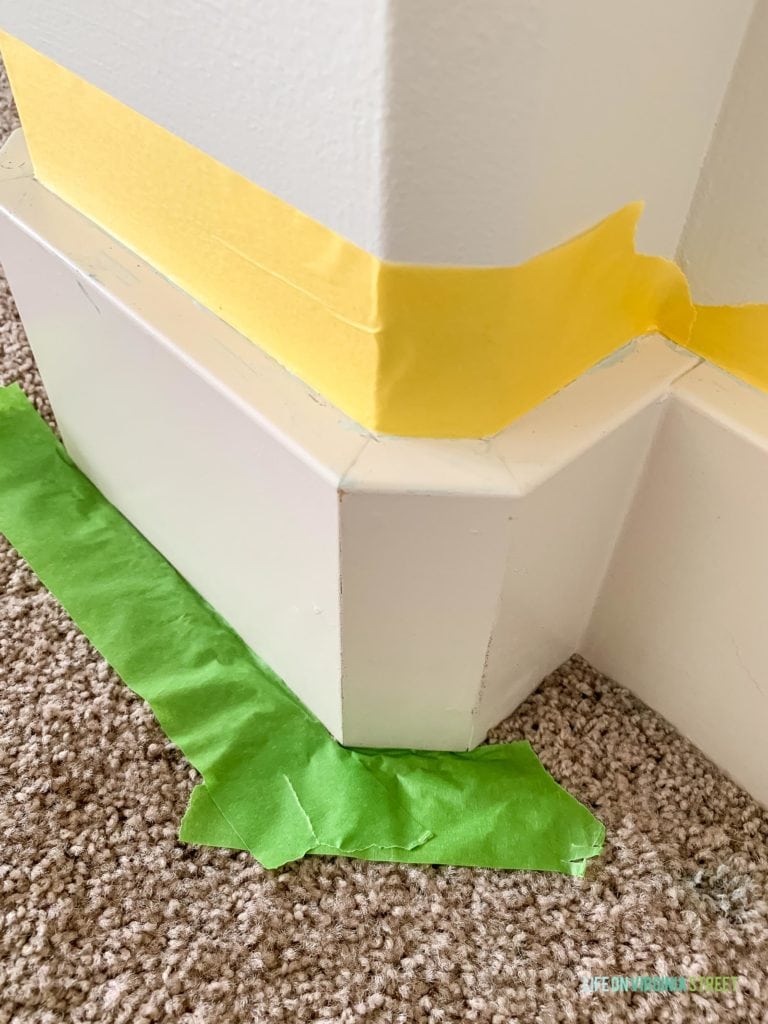
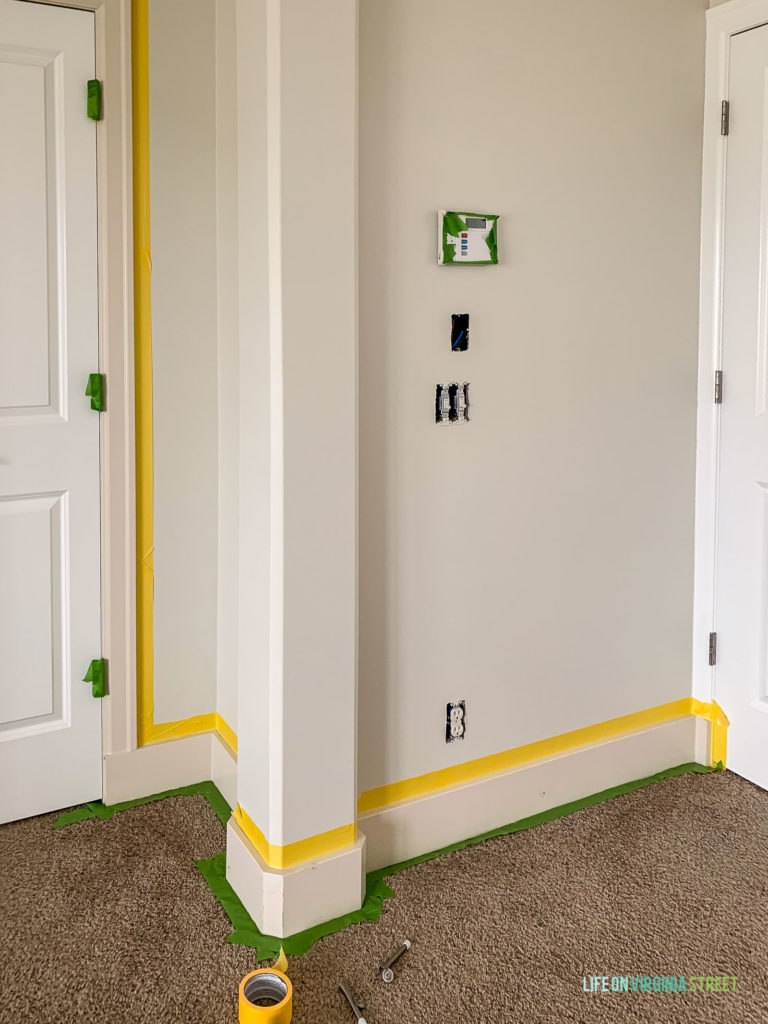
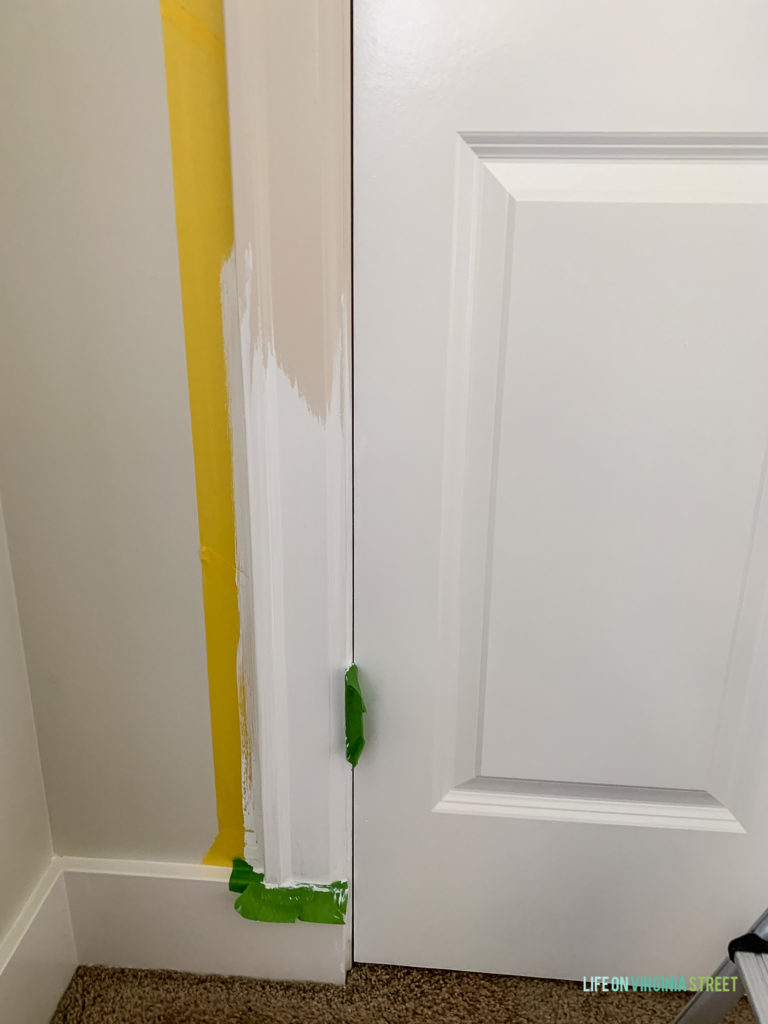
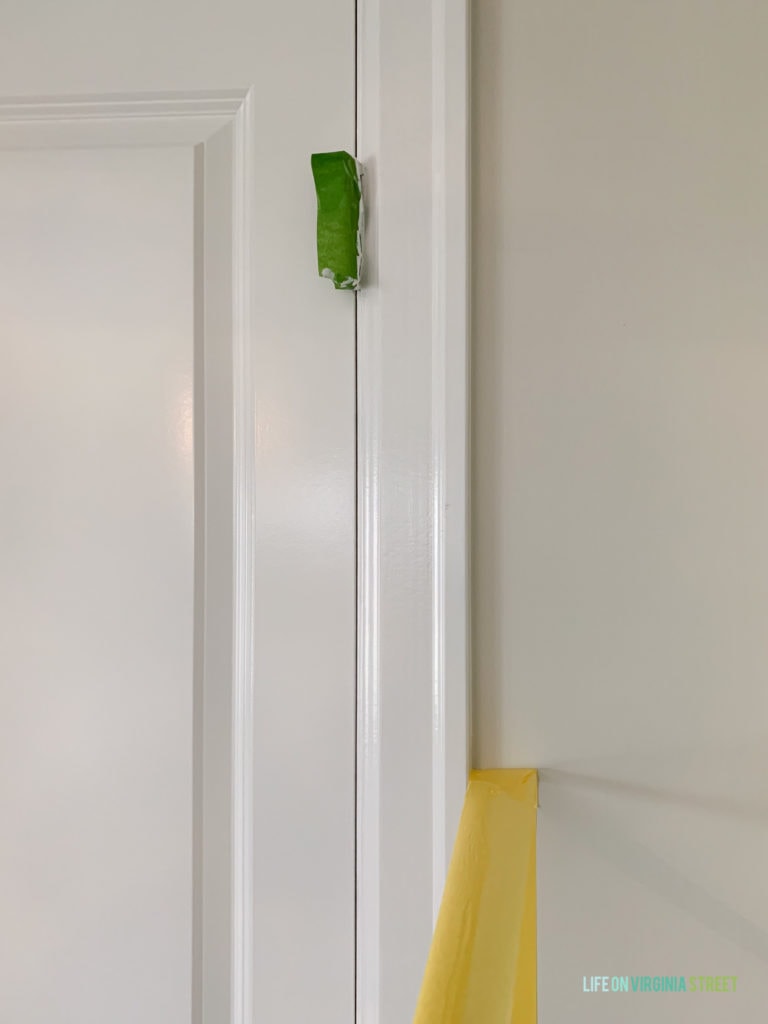
This step is critical in ensuring a crisp line along your wall and paint-free floors! I used wide FrogTape® Multi-Surface along the carpet, pressing and tucking under the baseboards as I go. And then, because my walls were freshly painted, I used FrogTape® Delicate Surface. Both versions have PaintBlock® Technology that keep paint out and lines as sharp as possible. Although you may want to rush this step, take time to make sure your paint lines along the bottom are as straight as possible. On corners and turns (like below) you can cut or tear smaller pieces to make the fit as customized as possible! You can see our trim previously was pretty beat up and had paint from the walls all over it because it wasn’t taped properly before!
Here’s how the area by the door looked once I had the baseboards and trim fully taped off! You’ll also want to remove any doorstops that may be attached to your baseboards. It’s much easier to just remove them than trying to paint around them.
Painting Baseboards and Trim
Since I’m right-handed, I prefer to start on the left-hand side of my project and work to the right. Or in the case of door trim, the bottom left working up and over to the bottom right. I use a light hand when it comes to painting. I find my finish is much more smooth in the end if I work in about one foot sections (like below), use a light feather-like hand, and not load too much paint on the paint brush.
The other vital key to success is to keep moving and not go back over spaces after more than a few minutes have passed. If you go back over areas as they’re drying, you’ll basically guarantee you have brush marks. Keep in my that the first coat of paint will likely look a bit streaky, but allow the paint time to self-level. And remember, the second coat will look so much better and make your paint much more opaque!
Re-coat as Needed
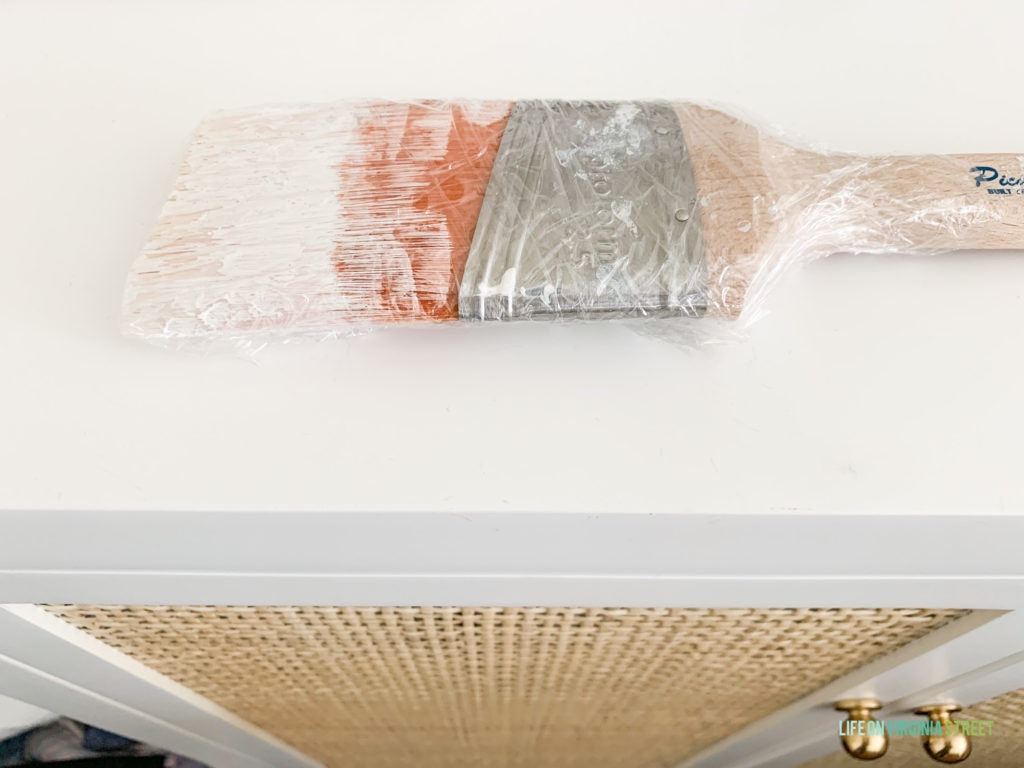
Because I believe in lighter coats to avoid brushstrokes as much as possible, I typically apply 2-3 coats. The paint I used requires a 16 hour wait time between coats, so I always wrap my brush up with a piece of Saran wrap and keep it at room temperature or store in the fridge until I use it the next day. There is no need to wash it out between coats. Re-coat your baseboards and trim in the same manner as coat one.
Remove Tape From Walls and Floors
I usually let my paint dry for 30-60 minutes and then remove the tape. You won’t want to allow the paint to fully cure, as that can sometimes make it a lot more difficult to remove the tape. Since the paint isn’t cured at this point, you’ll want to use caution and not bump the trim with your hands or the tape!

Just look at those beautiful, sharp lines and the glossy finish!
I hope you found this painting tutorial helpful! I can’t wait to share the big room reveal with you all next week!
If you would like to follow along on more of my home decor, DIY, lifestyle, travel and other posts, I’d love to have you follow me on any of the following:
Pinterest | Instagram | Facebook | Twitter
disclosure: some affiliate links used
Hey Sarah, these are all really great tips! I am about to tackle my bedroom and I haven’t painted in awhile. Here’s a silly question, if you are doing multiple coats on your baseboards and you have to remove the tape after 30-60 minutes, does that mean you have to re-tape in between coats? I painted my front door last year and left the tape on between coats and it ended up peeling away the paint in some spots. Taping is so tedious, the thought of doing it between coats makes me tired, lol.
Sorry I wasn’t clear on that! I leave the tape on between coats. You’ll just want to remove it fairly soon after doing the second coat 🙂 I find that if it wants to stick, if I use a razor blade to light score the edge it comes off easily. But, that usually is only necessary if I don’t do the second coat for several days (or weeks) later.
Thank you for this tutorial. My baseboards need painting and I have been putting this off for a long time. I have a question though. You stated that you remove the tape after 30-60 minutes of drying. I assume this is after the final coat. How long can you wait between coats? I am afraid I might need a day or two to get the energy for the second coat. Would this mean there would be a problem when removing the tape?
Thanks for your help.
Monica Dameron
Yes! Sorry I wasn’t clear on that. I only remove after the second coat. I typically just follow the re-coat guidelines on the paint can. I believe this particular paint required a minimum of 16 hours between coats. I try not to wait for too many days past, in order to avoid the tape sticking.