• Skip to primary navigation
  • Skip to main content
  • Skip to primary sidebar
  • Skip to footer
  • About
  • Home Tours
  • Read By Category
  • Sources
    • Life On Virginia Street Paint Colors
    • Shop Our Home
  • Contact
  • Nav Social Menu

    • Amazon
    • Facebook
    • Instagram
    • Pinterest
    • Twitter
  • HOME DECOR
    • Decorating Ideas, Tips and Trends
    • Home Tours
    • Look for Less
    • Outdoor Spaces
    • Room Makeovers + Design Plans
  • DIY Projects
    • Cleaning and Organization Tips
    • Crafts
    • Paint Projects
    • Rental Properties
    • Room Makeovers
    • Tutorials
  • TRAVEL
    • 30A Florida
    • Cruises
    • European Travel
    • Mexico & The Caribbean
    • U.S. Travel
    • Packing Ideas
  • Fashion & Beauty
    • Fashion Posts
    • Hair & Beauty Posts
    • Recent Outfit Ideas
  • Entertaining
    • Entertaining and Party Ideas
    • Food & Drink Recipes
    • Tablescapes
  • Shop
    • Shop Our Home
    • Shop My Instagram Feed
    • Gift Guides
    • My Amazon Storefront
    • Sale Alerts
    • Wednesday Watch List
Life On Virginia Street

Life On Virginia Street

DIY . Home Decor . Travel . Style . Life

Guest Post: The Happy Housie

Uncategorized

4 shares
  • Share
  • Tweet

Today Krista from The Happy Housie is here to share an easy envelope style lumbar pillow tutorial. Krista has one of the most cheerful and happy looking homes I’ve seen. She does an amazing job of incorporating neutrals with bright, bold colors and I love her style!

Hello readers of Life On Virginia Street!

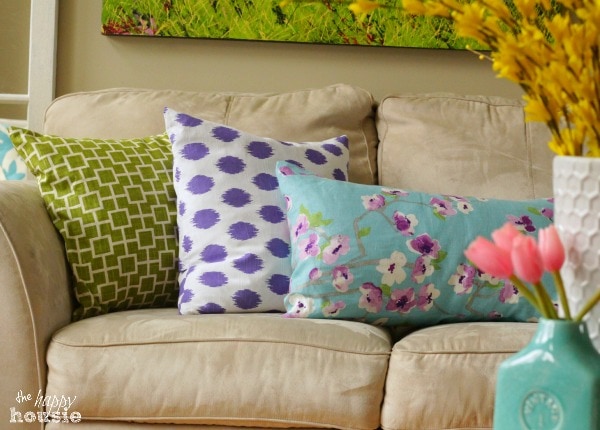
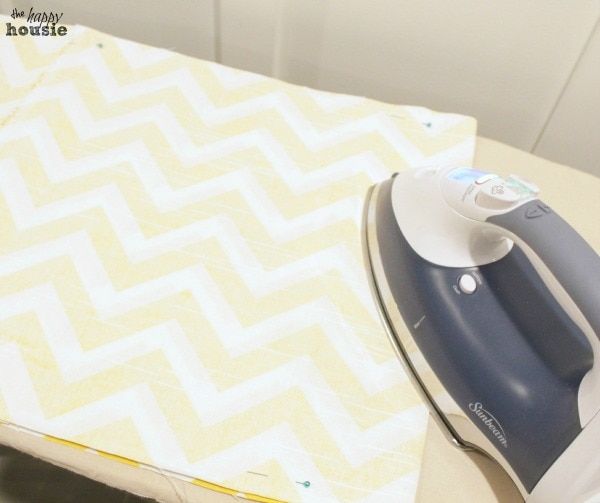
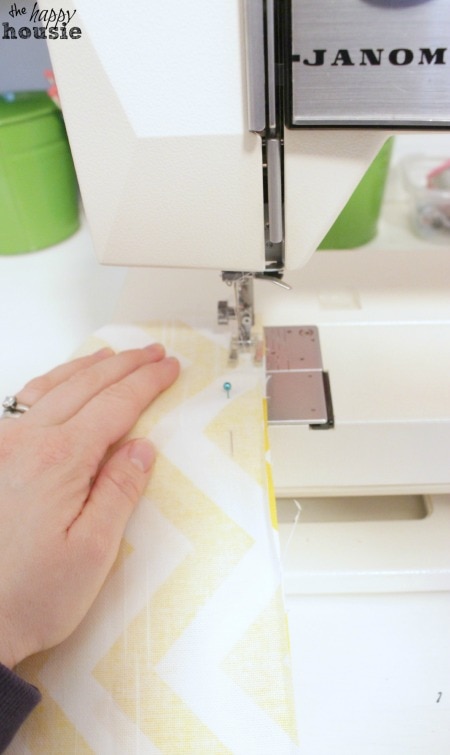
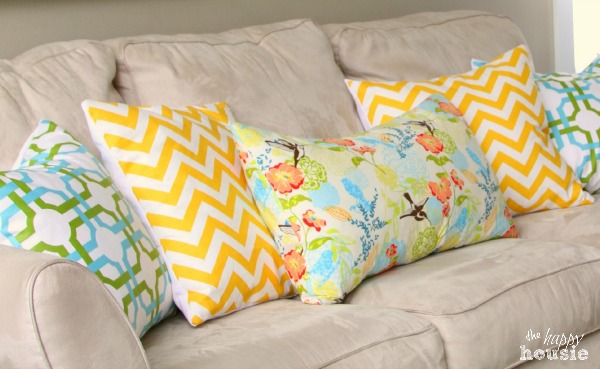
I’m Krista from The Happy Housie and I am so excited to be here today sharing a simple sewing project for making your own Envelope Style Lumbar Pillows. These are the perfect shape for using as a featured pillow on a sofa or a bed.

Simple Stunning DIY Envelope Pillow Tutorial 3 at The Happy Housie

I am beyond thrilled to be here at Life on Virginia Street today sharing this project. I have been a big fan of Sarah’s stunning decorating style for many months now. As I said, I spend most of my bloggy time over at The Happy Housie . I called my blog this because I think of myself as a “housie”; someone whose hobby and passion is all kinds of house related stuff like decorating, crafting, organizing, and DIY projects… like these easy DIY Envelope Pillows.

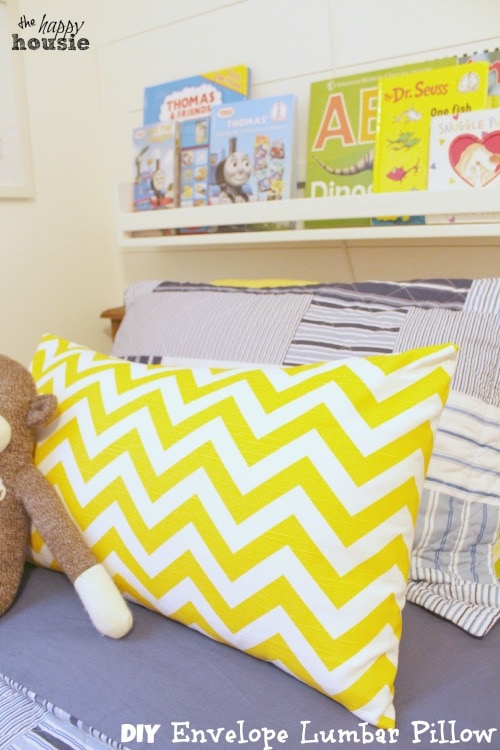
The pillow below that I am showing you how to make was made for my son’s twin bed as part of an ongoing bedroom revamp for our boys’ bedroom. 

To make this pillow I used:
– piece of fabric – rotary cutter and mat (you could also just use a straight edge and scissors) – sewing machine, sewing scissors, and thread – iron and ironing board – measuring tape
DIY Envelope Lumbar Pillow tutorial measure your pillow at the happy housie
The trickiest part is figuring out the size that your fabric should be. First measure your pillow form. Mine was 14″ x 24″ so I cut my fabric to 15″ x 56″. You want to add about 1/2 inch for the seams along the non-envelope part and you add about 8″ for the overlap for the back.
Choosing your fabric size also depends on how full the form is you are using. For a full discussion of this, see my other envelope pillow tutorials here and here.
DIY Envelope Lumbar Pillows cut fabric to size at the happy housie
I used my rotary mat and cutter to help me slice up my fabric but you can just as easily measure it with your measuring tape, use a straight edge or ruler to mark it lightly on the back and cut it with some sewing scissors.
Next, you may wish to take the ends and iron a hem and run it through your sewing machine so that you will have nice clean edges on the back of your envelope pillow where the fabric overlaps..
DIY Envelope Lumbar Pillow seam and pin at the happy housie

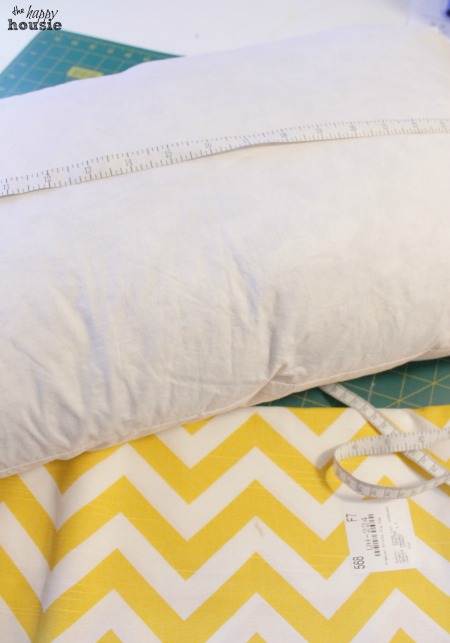
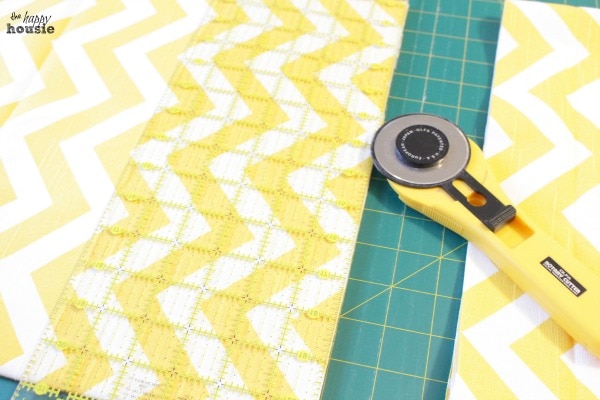
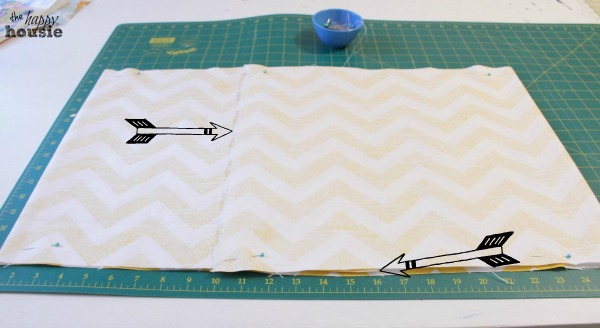
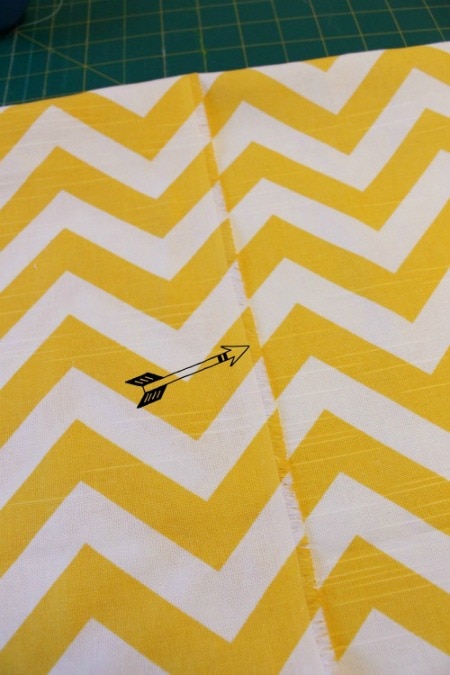
I actually skipped this step and just used the rough sewn edge that the fabric came with as it was a 56″ width of fabric

DIY Envelope Lumbar Pillow rough edge at the happy housie

Once my piece of fabric was cut (and you have hemmed the two edges if you are doing so) lay the fabric out the right side (or pretty patterned side) facing IN on itself. I measured to make sure it was the dimensions I wanted (15″ x 56″) and then pinned it lightly.
I ironed it lightly to the correct size…
DIY Envelope Lumbar Pillow ironing at The Happy Housie
And then ran the open, pinned sides through my sewing machine…
DIY Envelope Lumbar Pillow sewing at the happy housie
Flipped it inside out…
DIY Envelope Lumbar Pillow turn outside in at the happy housie

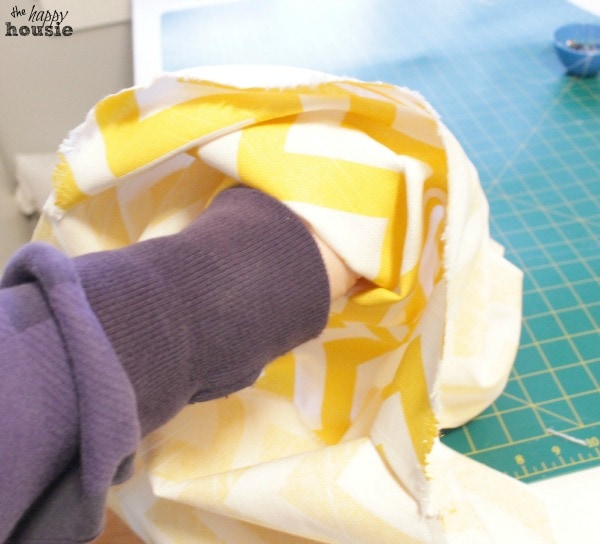
And stuffed the pillow form inside of it.

DIY Envelope Luymbar Pillow easy at the happy housie
These, literally, take minutes. I love making new pillows for all around our house. This is another lumbar pillow I made last spring…
DIY Envelope Lumbar Pillow spring pillow at The Happy Housie
Or the ones I made this spring…
Simple Stunning DIY Envelope Pillow Tutorial 1 at The Happy Housie
Over on my blog I shared the tutorial for making the regular ol’ square envelope pillows the other day… I’d love it if you swung by for a visit!
Simple & Stunning DIY Envelope Pillows:
Or do you fancy a Spring House Tour? I have that for ya too!!
Spring Home Tour Living Room Overall at The Happy Housie
Thanks again to Sarah for having me here today!! I always love to sign off with…
Thanks for reading. And remember, my housie friends, HOME isn’t built in a day. Enjoy the journey.
image signature
bloglovin facebook google+ instagram twitter rss pinterest

Thank you so much to Krista for sharing this tutorial! You all know I’m a pillow junkie so I always love to find new ways to simplify the pillow making process. Definitely giving this a try!

4 shares
  • Share
  • Tweet

May 5, 2014 · 4 Comments

free email course!

5 Secrets to Re-Designing a Room You Love

Learn my foolproof system for designing a room you’ll love that you can enjoy for many years to come!

Previous Post: « A Year of Change: May’s Project
Next Post: Guest Post: Migonis Home »

Reader Interactions

Leave a Reply Cancel reply

Your email address will not be published. Required fields are marked *

Recipe Rating


Comments

  1. Kathy @ Creative Home Expressions says

    May 5, 2014 at 4:20 pm

    Great tutorial! I’ve pinned this since I want to start making pillow covers with an envelope closure.
    I have way too many pillows and this will help.

    Reply
    • Krista thehappyhousie says

      May 6, 2014 at 5:03 am

      Great Kathy! I hope you find the tutorial easy to follow and good luck with your project!

      Reply
  2. Vel Criste says

    May 5, 2014 at 8:56 pm

    You are my guru for sewing projects Krista! you make it look so easy and always beautifiul in the end!

    Reply
    • Krista thehappyhousie says

      May 6, 2014 at 5:03 am

      Aw, thanks Vel! It really is easy, especially after you do it a few times:) I have a bit of a pillow cover addiction….

      Reply

Primary Sidebar

Welcome To Life On Virginia Street!

Let’s Get Social!

  • Amazon
  • Facebook
  • Instagram
  • Pinterest
  • Twitter

Subscribe By Email

Receive an email each time a new post goes live on Life On Virginia Street!

Tour Our Home

Footer

Disclosures + Photo Usage Policies
Privacy Policy

Copyright © 2025 · Farmhouse Theme by Restored 316

This website uses cookies to improve your experience. We'll assume you're ok with this, but you can opt-out if you wish.Accept Read More
Privacy & Cookies Policy

Privacy Overview

This website uses cookies to improve your experience while you navigate through the website. Out of these cookies, the cookies that are categorized as necessary are stored on your browser as they are as essential for the working of basic functionalities of the website. We also use third-party cookies that help us analyze and understand how you use this website. These cookies will be stored in your browser only with your consent. You also have the option to opt-out of these cookies. But opting out of some of these cookies may have an effect on your browsing experience.
Necessary
Always Enabled
Necessary cookies are absolutely essential for the website to function properly. This category only includes cookies that ensures basic functionalities and security features of the website. These cookies do not store any personal information.
SAVE & ACCEPT