Get all the details on this gray-washed stone fireplace makeover using chalk paint and a little water! Such an easy project that completely transforms the look of your fireplace!
I mentioned here that our fireplace stone was really orange. It just stuck out a little too much in our living room and I felt it was a little too orange and rustic for my style. Today I’m going to share a tutorial for DIY gray-washed fireplace stone.
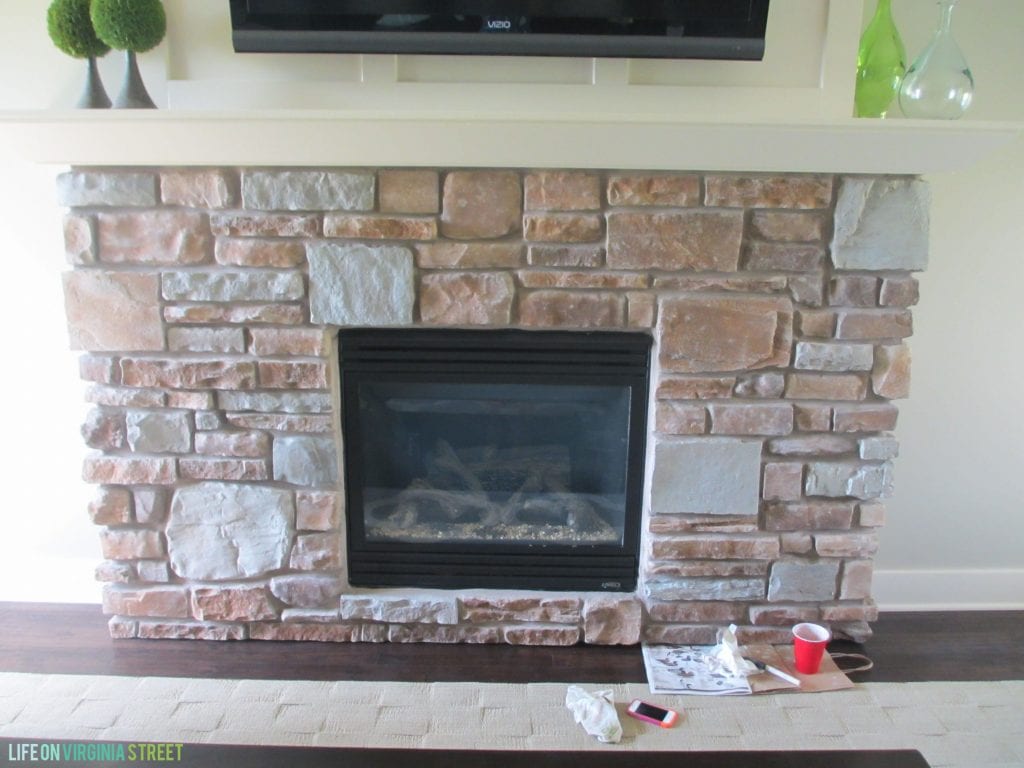
Here is how the room used to look. As I’m sure you can guess by the title, I went ahead and painted the stones this weekend using Annie Sloan Chalk Paint in French Linen {leftover from this and this project}.
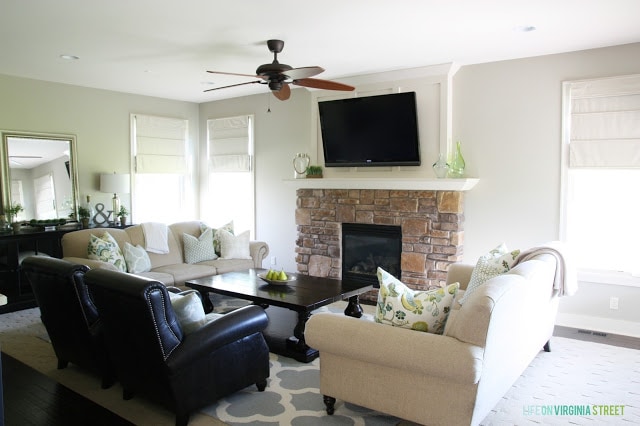
I included the photo above to show the true color of the stone as the ‘before’ below is a little washed out due to all the sunlight that was coming in Saturday morning.
This post contains affiliate links for your shopping convenience. You can read my full disclosure policy here.
Supplies Needed to Create A Gray-Washed Stone Fireplace
- Chalk-based paint in color of your choice. I used Annie Sloan’s French Linen. This Country Gray Chalked Paint is very similar.
- Large Foam Paint Brush
- Disposable Cup
- Water
How To Gray-Wash Your Fireplace Stone
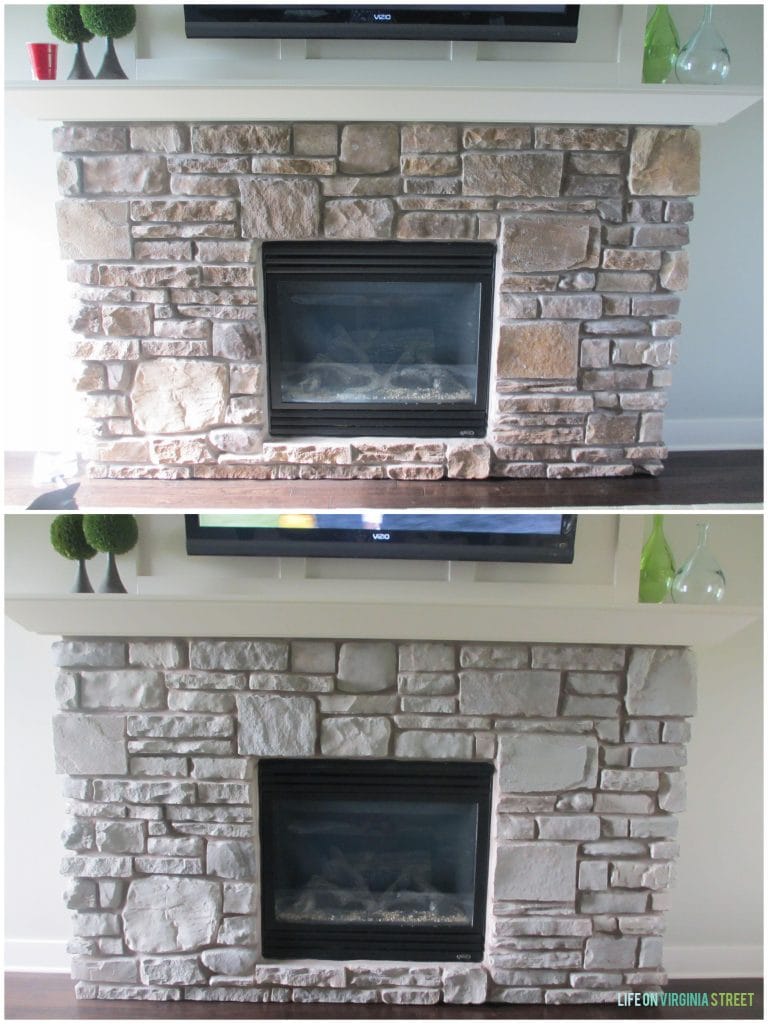
I used a 50/50 mixture of tap water and the paint to create more of the “washed” effect so that it didn’t all look like a flat, painted surface. I honestly would have done even more water, but it was already really messy and wet to apply. Some of the natural variations in the stone still come through with this 50/50 mix. But here’s a little before and after before we get to all the steps.
I still have work to do. At this point, the whole area looks pink to me. The board and batten as well as the mantel need a fresh coat of white paint. It’s currently the same cream color I’ve despised in all our other rooms. Additionally, the grout looks really pink now that the stones are gray. So I still need to paint that. From there, I’ll decide if I need to try any additional techniques to the stone itself. Perhaps I’ll try a whitewash over some of them to create a little more variation.
At this point, I can’t really say that I love it yet. There’s still entirely too much pink and cream. But, I do think that by next weekend when I have more time to work on it, I really will love it.
Here are a few progress pictures. You can see I skipped around so that if my additional batches of paint/water mixture had slightly different dilution levels, it wouldn’t be blatantly obvious or isolated to one section of the fireplace.
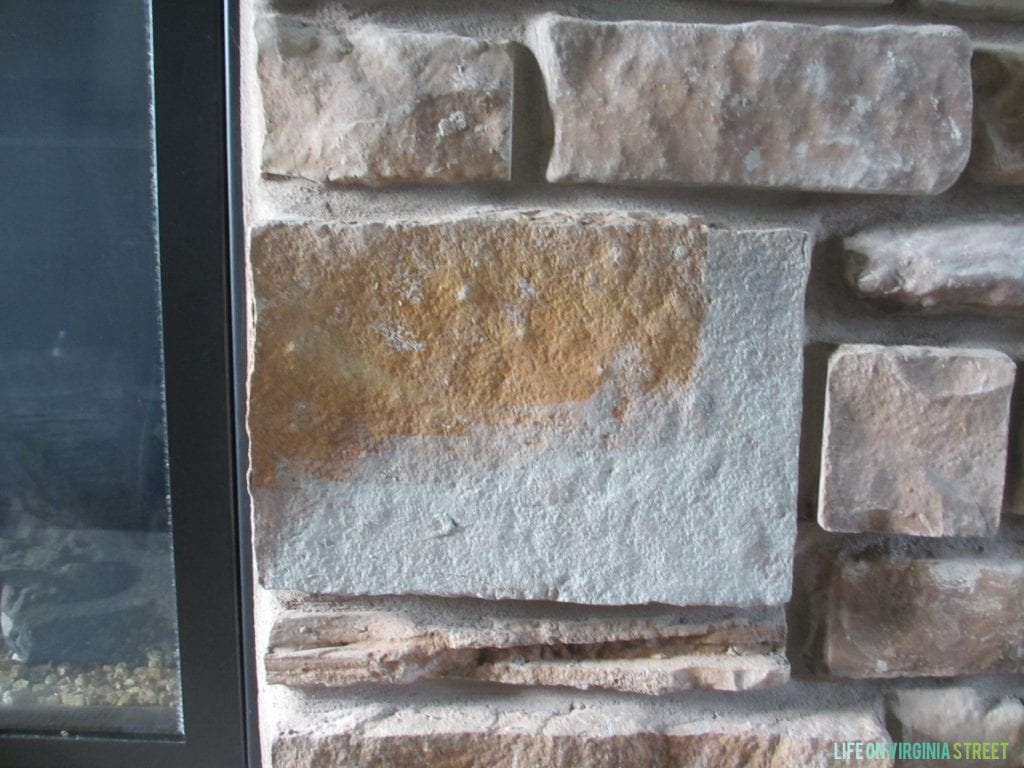
The first stone – also my least favorite/most orange. I simply applied the paint/water mix to the stone with the foam brush, moving quickly to cover the entire surface. If you want a bit of the original stone character to show through, simply blot a bit of the paint with a paper towel while it’s still wet.
Let’s pretend my husband’s feet aren’t in this photo…since he wouldn’t budge for my photo shoot. Apparently football is more important than my blog 😉

**UPDATE: I ended-up adding an additional white-washed effect to our fireplace about six months after this post to further improve the look. You can see it here.**
Once all the trim is a crisp white and the pink/mauvish grout is covered, I think it will be perfect. At least as a free and temporary solution to updating the look of our living room. Definitely much more convenient that tearing off all the stone and trying something else.


So, what do you think? Was this a completely crazy move? I’ll do some more before and after photos once the look is totally finished. And when my husband isn’t watching TV and sticking his big feet in the photos!
If you would like to follow along on more of my home decor, DIY, lifestyle, travel and other posts, I’d love to have you join me on any of the below channels:
Oh how the smallest things make the biggest impact.
love the new look! I have an ugly fireplace that no amount of coloring can fix I think (think brick and glass blocks! yikes!), need to gut mine and start all over. 🙂
I think it looks amazing! Great job!
I love it. A little paint makes such a difference huh?
And what’s with men not appreciating our photo shoots when football is on?!??!
What a fantastic transformation!!!
Our fireplace was red brick – I painted it with ASCP Pure White !
3 years ago – still pure white 🙂
XOXO
looks amazing! great fix!
I think it looks great!! And, my hubby thinks football is more important then my blog as well.
Ok, seriously your house is amazing! I love this white wash fireplace. Its so light and airy!
Thanks for sharing at the Frugal Crafty Home Blog Hop! Have a wonderful day!
Katie
I love this, Sarah! Love it so much that I featured it today at Work It Wednesday! I’d love for you to come and grab a button. 🙂
Hope you’re having a good week!!
xo, Laura @ The Turquoise Home
Thanks so much Laura!
I am so loving this! This is simply awesome! This is definitely not a crazy move! This is awesome! I am glad you did this. I really am looking forward to more of this once it is finished. I am definitely sure that it would totally look great, i’m sure it would turn out really well.
DHLandscapeDesign.com
I was on another blog and saw yours on the whitewashed fireplace. You did a beautiful job. I would love to have you to link up at my weekly Clever Chicks Blog Hop: http://www.the-chicken-chick.com/2013/09/clever-chicks-blog-hop-54-with-two.html
I hope you can make it!
Cheers,
Kathy Shea Mormino
The Chicken Chick
http://www.the-chicken-chick.com/
I love your redone fireplace!!!! I am going to tackle my 70’s orange fireplace with the grey wash and then white wash… I was just wondering if you used a specific type of brush or just a rag?
Thank you!!!
I actually just used a foam craft brush – I found it soaked up the watery paint the best. I hope that helps!
Will heat from fireplace do anything to the paint? Have gas logs in there now but may add a wood stove.
Our gas fireplace gets rather warm, but it has not affected it at all. Not sure how it would be with a wood stove though. Sorry!
Hi, I know this is super late, but I was wondering if you could give me some guideance. I want to gray wash our old tudor fireplace. I understand you mix water and paint to achieve this look. But do you then literally just pain the rocks with a paintbrush? Or do you use a special brush or something? Do you avoid the grout, and then regrout separately? Also, did you apply the same color to all of your stones? Or did you vary the color at all? THank you so much!!!
Yes, I just painted on with a really cheap bristle brush from Lowe’s. It is really runny so you’ll just want to be sure to cover your floor so it doesn’t get wet. I used the same paint/water mix on the grout as well. Since it all is so porous it does soak it up rather quickly. I hope that helps!
Think I misunderstood…I saw mention of both paintbrush and foam craft brush. Did you use both?
We have native stone fireplace (dark with dark grout that has been resealed, so now darker. Also, our exterior is native stone and the grout has been repainted to dark. Do you think we could possibly get the same linen look (with possibly a heavier application)?
would you.seal for the exterior?
Many thanks.
I only used the foam craft brush. I just started to refer to it as a paintbrush. As far as use on the exterior goes, I am actually not sure on that. If you tried it, you would definitely want to try a sealant of sorts, as I know I could likely scrub some of my paint off if I really tried with water. It may be worth contacting the chalk paint company you use to see if it works outdoors.
One more question: How do you accomplish the high/low definition of the stone? Is that a characteristic if the chalk paint? I’ve seen many redone stone fireplaces that are hideous and have scared us away from attempting to do anything for years. I love the characteristic of the stone, just tired of the dark colors.
As far as the high/low definition goes, I believe that was just achieved with the characteristics of my stone as well as the water mixture with the paint so that some of the natural variations show through. I hope that helps!
As far as exterior use, I’ve research that it can be used for such application, but am interested to find the stone painted with the chalk paint on the exterior. We’ve seen so many hideous painted stone jobs, that it seriously made the hair on the back of my neck stand on end.
Yes, that is the definition we’re wanting that shows the natural variation of the stone, not just a latex ecru painted stone and grout. It’s so odd to me that I really like a painted brick exterior, yet the look of the painted stone looks so much different. I guess it’s because the stone and its grout are multi-dimensional and the brick and grout are more even and shallow. Curious.
Your fireplace looks great. Am nervous about it, but if we attempt, hope we achieve a great look, too. Many thanks.
i just found this on Pinterest and I’m so glad I did! I’m going to be graywashing my brick fireplace (which is actually a brick wall with a fireplace in the middle) within the next few days. All I’ve seen up until now is whitewash, and I’m so relieved that the graywash looks even better!
Glad you found it! Good luck – I’m sure you’ll love the results 🙂
Can you please tell me type/brand of paint you used for this? At the store, they told me to use primer, but I am hoping to just greywash it and have that me the only step. Thank you!
Yes – I simply used Annie Sloane Chalk Paint. I would recommend going to her website to find a local distributor 🙂
Hello,
This sounds too easy… Hope it works. Half paint and half water with the foam brush and u just paint? Any specific technique u used? How many layers did u need? Thank u so much for your help and advice!
Yes – that’s really all there is to it! The chalk paint is really thick, but it does get runny when you add the water, so many only advice is make sure your floors are covered well. It can get REALLY messy otherwise! I only did one coat 🙂
I love this. This is just what I would like to do with my fireplace. Mine is a brick fireplace from the 60’s that’s dark and dingy. This would really brighten the whole room.
I’m wondering what you used to clean the stones prior to painting.
Actually, I didn’t use anything. I painted right over them as they were.
so what if it doesn’t work out, then what? did you do a test area or did you just go for it? Wanting to change my stone fireplace colors as it is very earth tone, but I am nervous about how it will turn out!
I applied it initially a bit more watered down to test it. But, honestly, I kind of just went for it!
I realize this is an old post but I’m hoping to use AS chalk paint on my fireplace. I’ve painted a lot of furniture with it and have always had to put a few coats of wax to seal it. It doesn’t seem like anyone who has done this has sealed it.
Has the paint held up over time? Or does it wipe off?
I’ve used quite a bit of chalk paint in the past and know what you mean about the sealing. However, because my stones were so porous, I didn’t wax them and the paint just soaked right in (especially with the water). After several years, the color hasn’t budged at all. In fact, I’m not sure I could get it off if I tried 😉 I hope that helps!
Hello! I am wanting to do this same thing to a very similar orange-y/pink stone fireplace. Yours looks wonderful. I didn’t know if you have any thoughts on using a different brand of chalk paint? Wanting to get something I can buy locally and get quick without waiting for it to be delivered. Any thoughts are appreciated!
The only other brand I’ve tried is Annie Sloan and I’ve been happy with that too. I can’t speak to any other brands, but it may be worth a shot!
Hello Sarah!
Pretty good work!!
Sorry for my « bad english », I speak French…
We want to use chalk paint on our fireplace. We have log home and the fireplace is with round stones. We decorate our home slowly to have an « industrial look » with the wood (log home). Our «stones » are beige, light brown and « brown rose ». Too much rose and really too « champere » for us, for the look we want.
We are hesitating between a dark chalk paint (graphite) or a light (paris grey or 50 Pure White and 50 Paris Grey) for all the fireplace. The brown-rose will still be apparent with a light color like Paris Grey, as your first step, right? Do you have a suggestion if I want to have different tones…?
Thank you!!
Hi looks great! I too have an ugly outdated stone wall behind our wood stove. What AS color did you use for the gray wash?
Thanks
Thank you! I used French Linen 🙂
Hi there –
Have you heard of any sealers for exterior stone? Or do you think it needs a sealer?
I don’t know of any, but I’m fairly sure it is recommended for exteriors. You may be able to use something similar used to seal exterior brick! I’m guessing a local paint store could guide you to the right option!
Nice but how did you do the grout lines or did you just grey wash them also
I left them initially, but ultimately put the wash on the grout too 🙂
I am going to do this, too! But first, is this really French Linen? It looks more like Paris Gray on my screen.
It was definitely French Linen! I think because it was watered down it looks different (and keep in mind the existing stone color could then cast other undertones).
love it! Thank you for posting.