Here is an update on my kitchen demo, and how much progress has been made!
It seems like since this time last week, the kitchen demo progress has been flying by! I have lots to fill you in on!
If you’re new around here you can get caught up by reading some of the following posts (listed in order from oldest to newest):
- Kitchen Thoughts
- White Kitchen Inspiration & Initial Design Thoughts
- Kitchen Renovation Design Desicions
- Kitchen Renovation Progress
Let’s dig in to where we stand today and what’s happened over the past two weeks since my last kitchen update!
Kitchen Demo
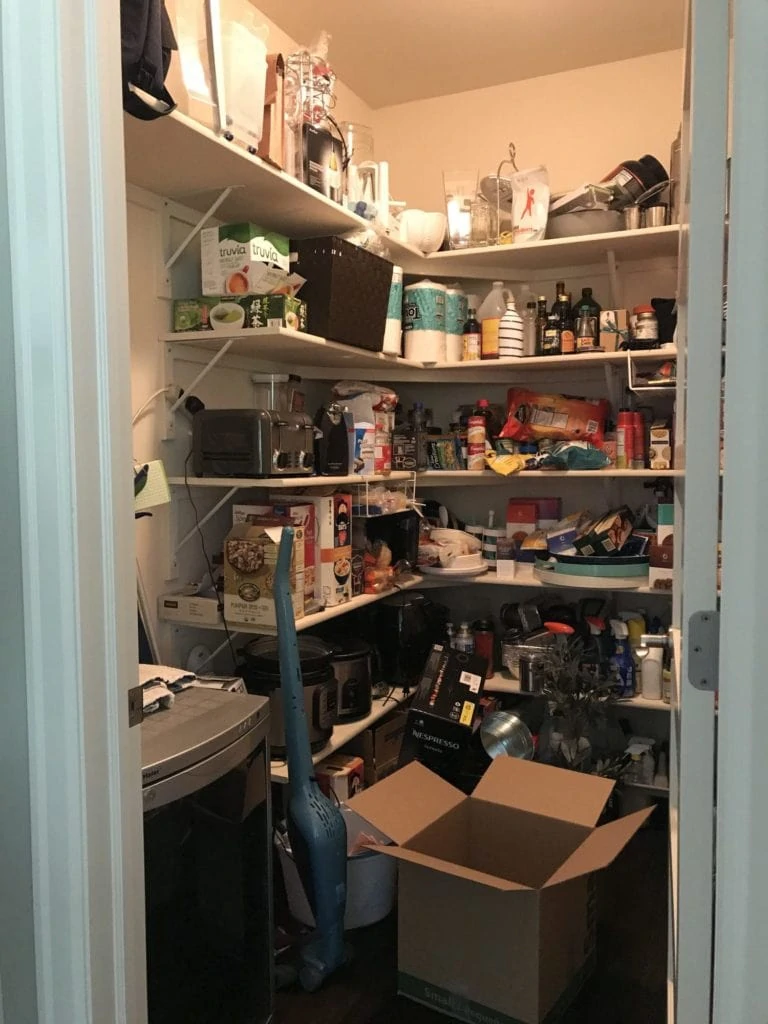
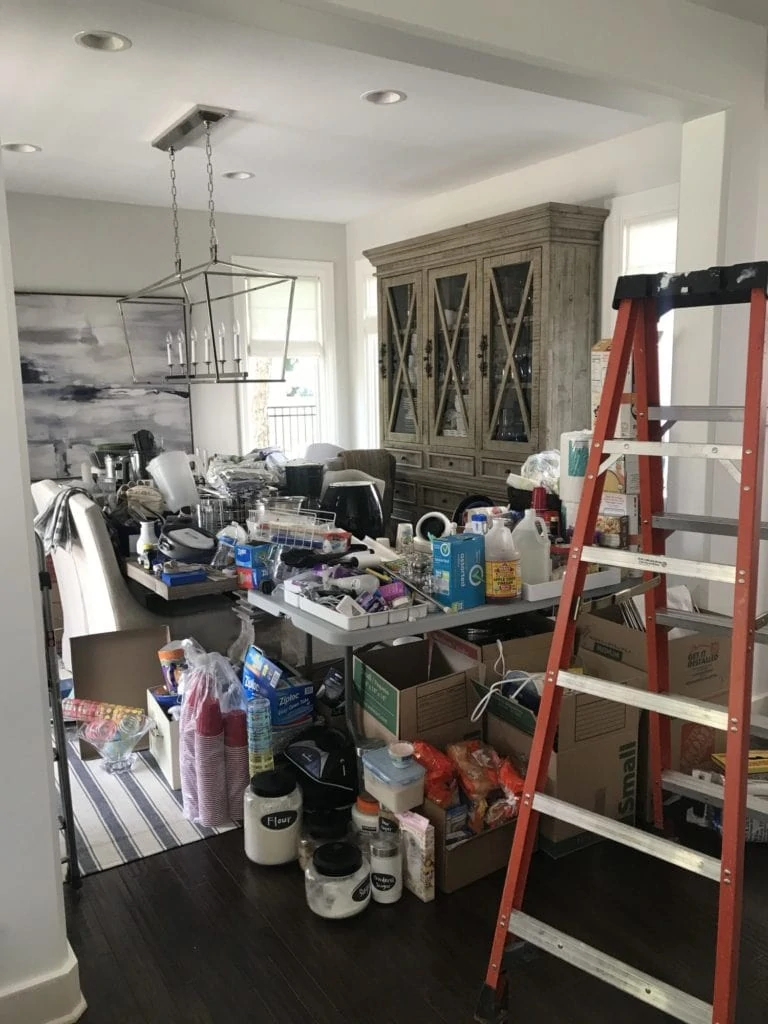
As I mentioned in my weekend recap, we spent nearly two full days last week emptying our kitchen cabinets and pantry. It always seems to take a lot longer than anticipated!
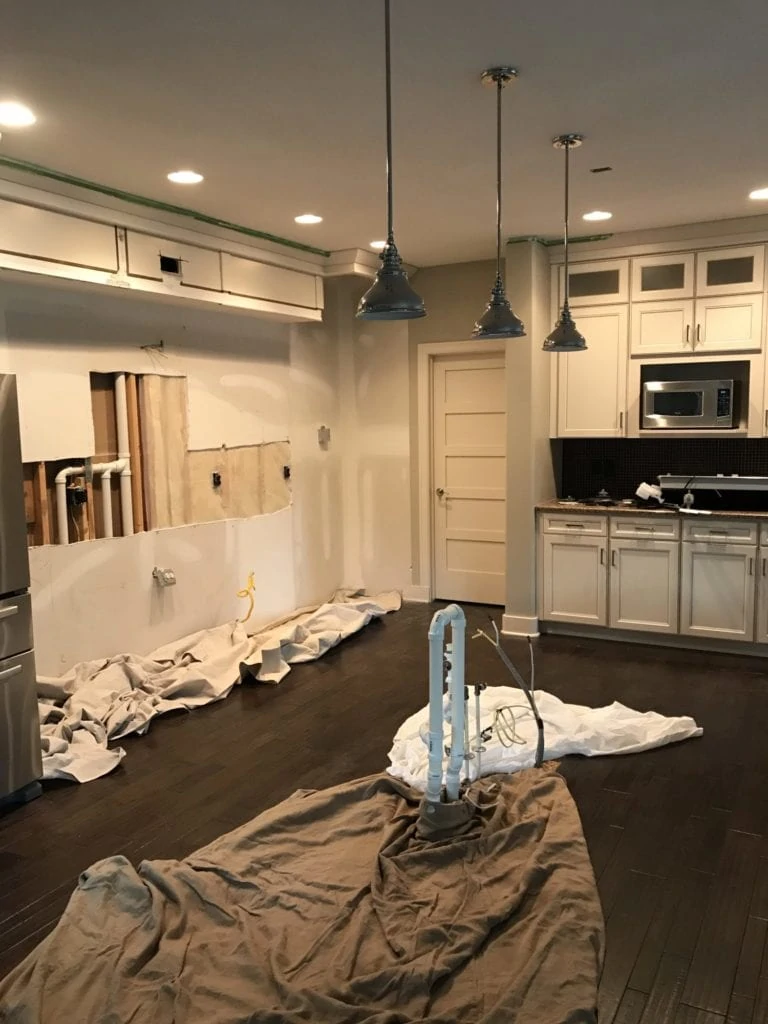
By Thursday night, half of our cabinets and our island had been torn out! Things started to feel pretty real at this point!
Sadly, our dining room took the brunt of all the moving. Thankfully it’s only for a two week period or so.
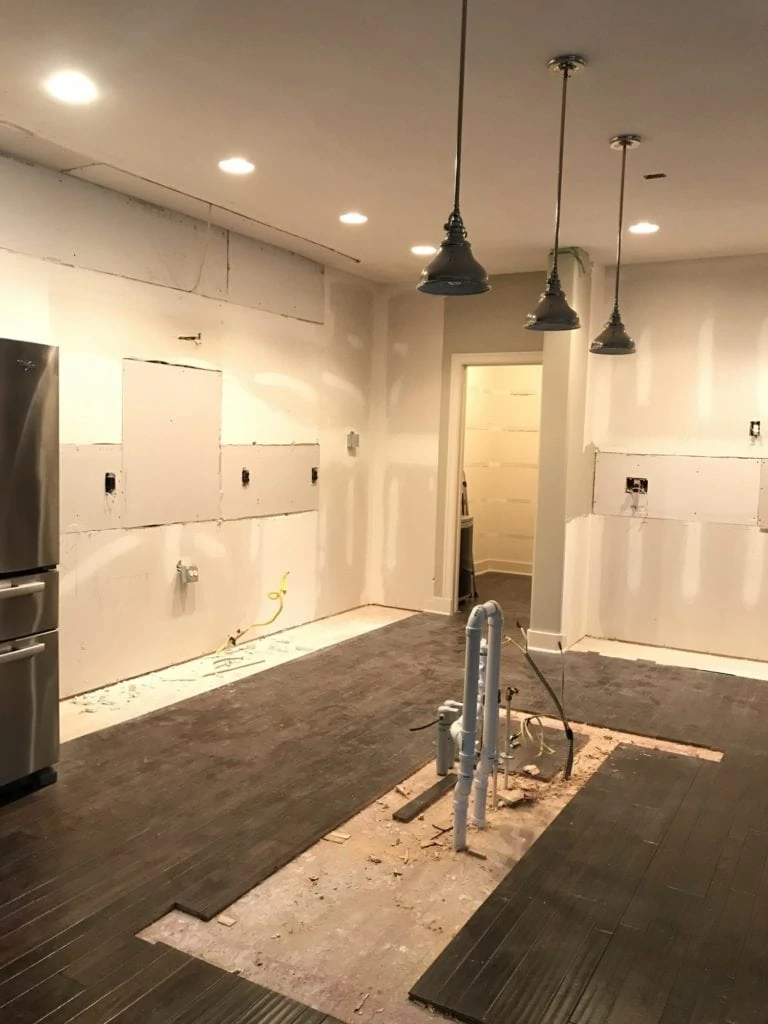
And as of last night, our kitchen and pantry are now completely bare! No shelves, cabinets, countertops or appliances (other than our refrigerator).
Is anyone else freaking out that our niece and her friends will be here this weekend?! And my family is all coming into town next weekend?!
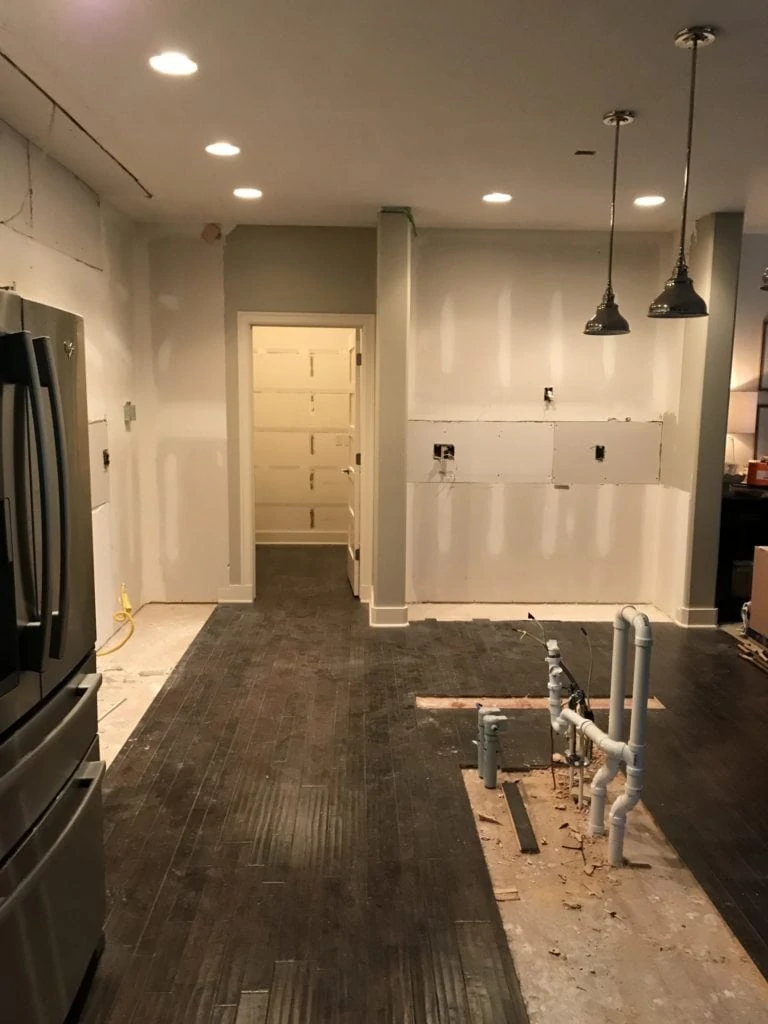
Thankfully I think things should be progressing fairly quickly at this point. The only demo left to do is for the windows, which won’t start until the windows have arrived in the carpenter’s hands. Hopefully in the next week or so!
Cabinet Progress
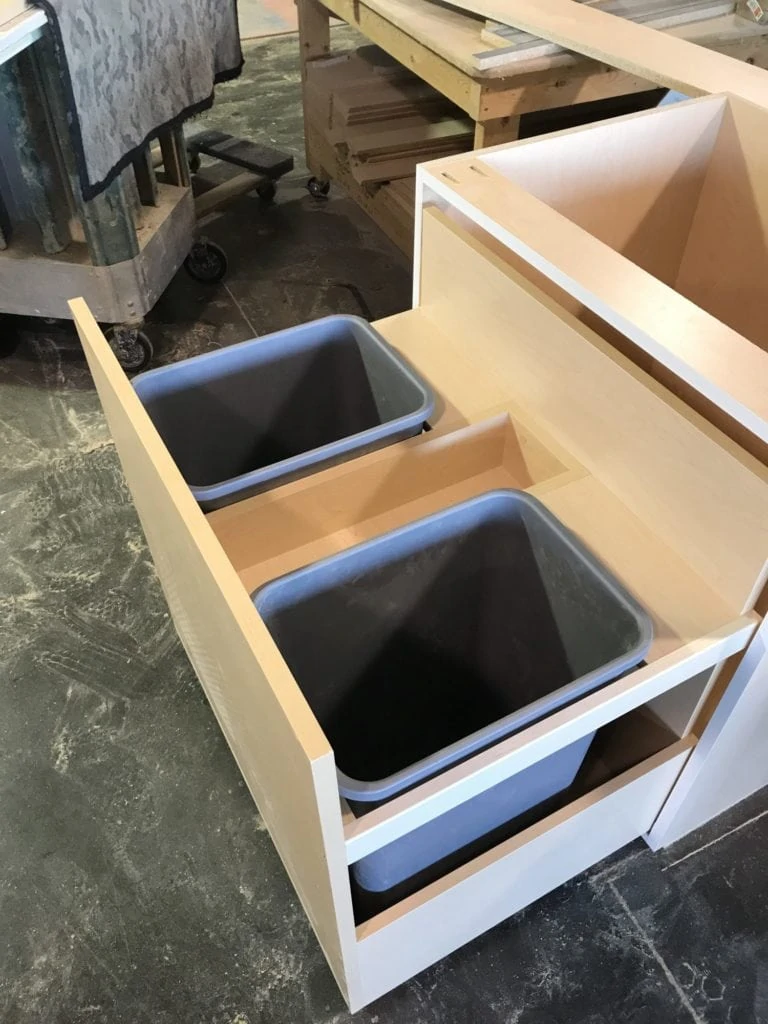
Our cabinet makers, McClain Custom Cabinets, have been amazing to work with. Not only that, I’ve been getting text image updates of our project this past week, and it’s basically made my entire life! Last week, there was a concern about the handy pull-out garbage bin space we requested. We’re trying to keep everything symmetrical around the range, and the way it stood, the garbage space was way bigger than what was actually needed. So, they surprised us with this solution (see image below). A bin for our garbage and recycling, as well as a spot to store our garbage bags! Kurtis said he couldn’t stop thinking about it all day at work because he was so excited. I can’t make this up!
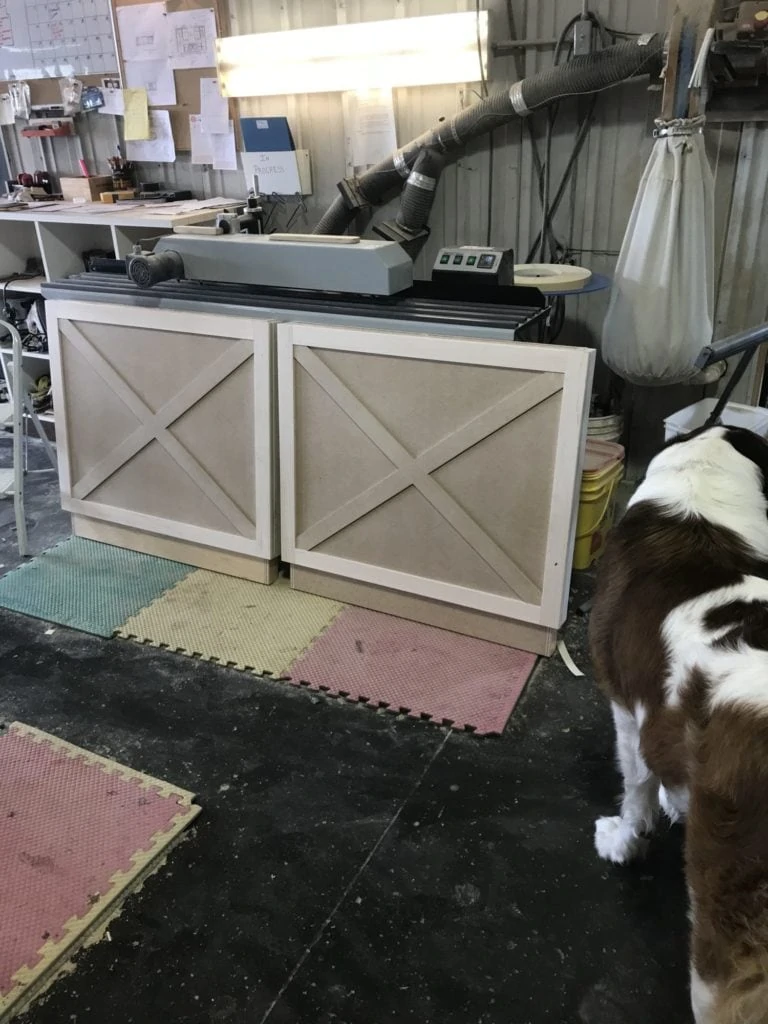
Later in the week I got a text with the completed island end caps. Technically, I got a picture of them all painted on Friday, as well, but I don’t want to reveal the fresh color yet. Regardless, we are in love with how the design turned out and can’t wait to see them in our space next to the white cabinets!
This post contains affiliate links for your shopping convenience. Click here to read my full disclosure policy.
Design Details
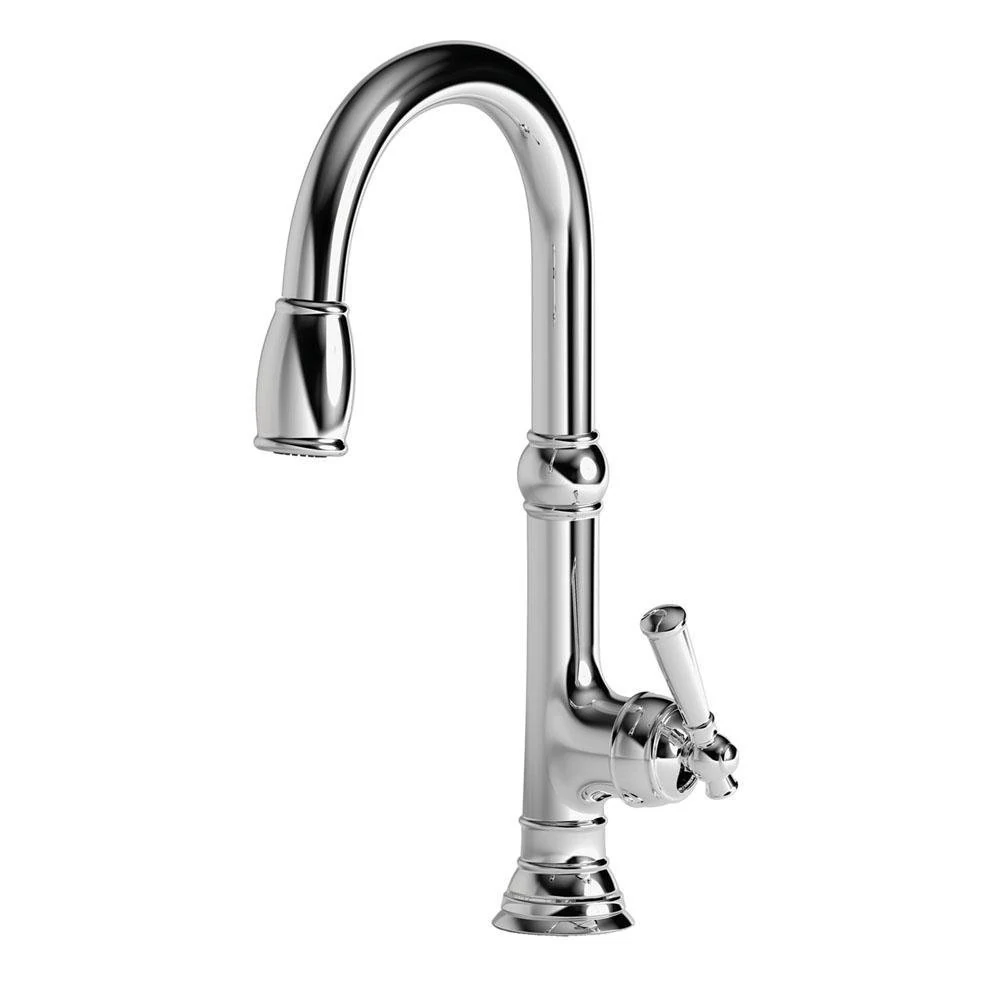
This past week, we’ve had to really dig into the final details. It actually feels like everything has been moving so quickly and so much else has been going on, I haven’t really had time to research tons of options. Thankfully, Erica from Erica Bryant Design has been texting me her thoughts and ideas and I’ve basically just said yes to everything she has selected because it’s all so good! The faucet we ordered is the Newport Brass Jacobean.
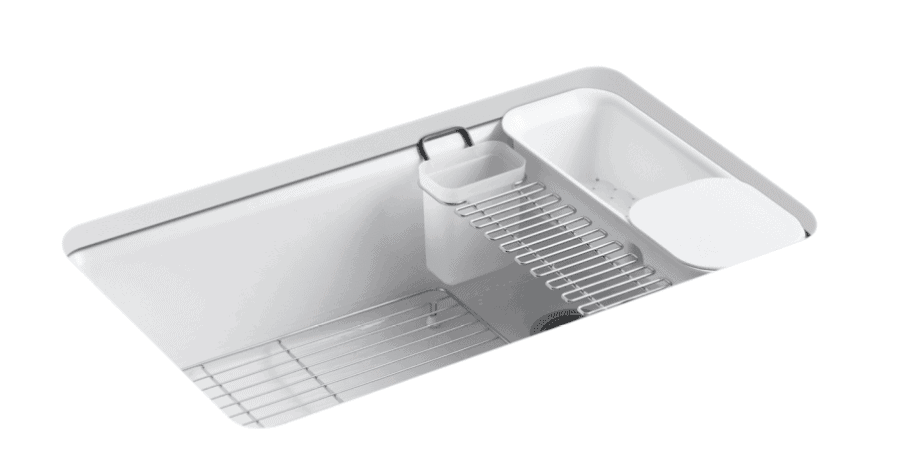
We also had to get our sink order placed last week. After going back and forth for what felt like eternity, I ultimately decided not to do an apron front farmhouse sink. Instead, we went with an undermount single basin cast iron sink called the Kohler Riverby. It’s one of Erica’s favorites and as soon as she sent it to me I knew it would be perfect! It also comes with several accessory caddies to store utensils, act as a colander, etc. I ultimately decided I didn’t want the kitchen sink to be the focus of our island, especially with the beautiful cabinets we’re putting it. I’m excited to go to a single basin option!
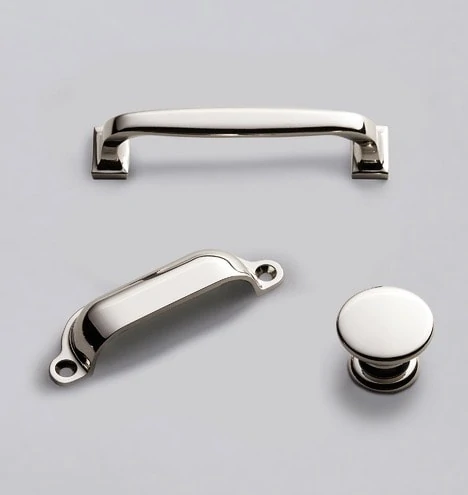
We’re currently considering this hardware right now as an option. I told Erica I wanted a mix of bin pulls and knobs and then regular pulls if needed. She sent me this collection and Kurtis and I both loved it! We haven’t officially ordered it yet, but we need to decide either today or tomorrow so that it arrives in time.
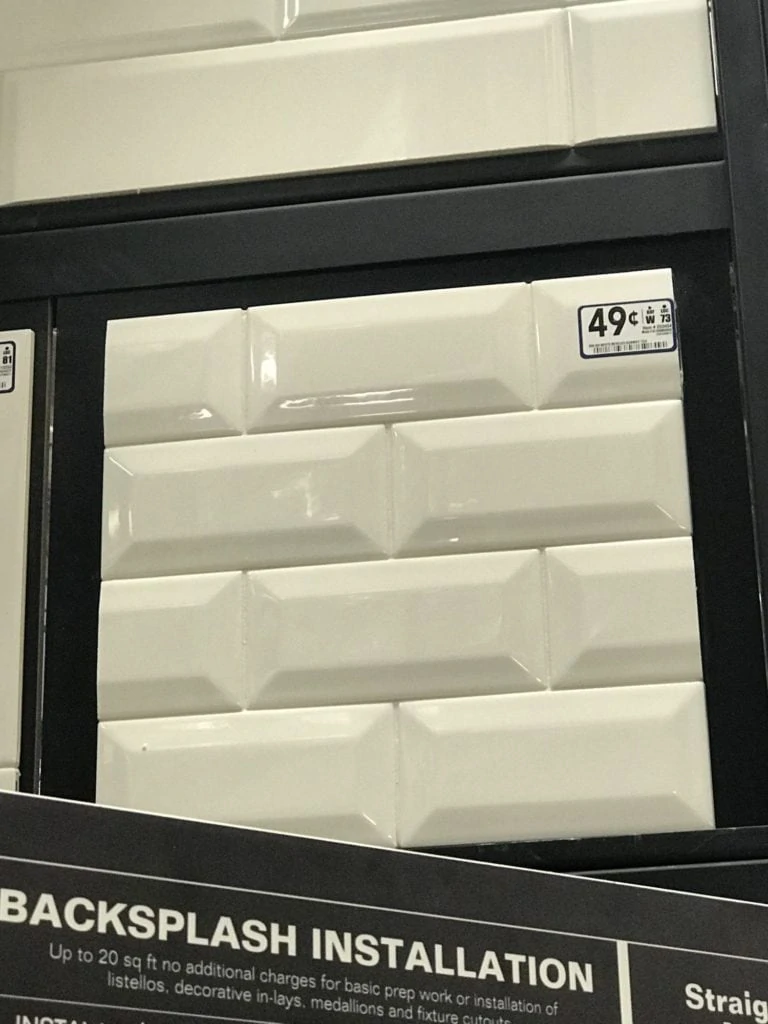
We’ve also made the decision to go with a classic beveled white subway tile for our backsplash. It’s something we’ve both loved for a long time and it feels like the best choice for a long-term decision. We’re certainly not looking to do anything revolutionary with our kitchen design, so we think this will be perfect for us. The beveled edges add a bit of texture and character to an otherwise basic subway tile.
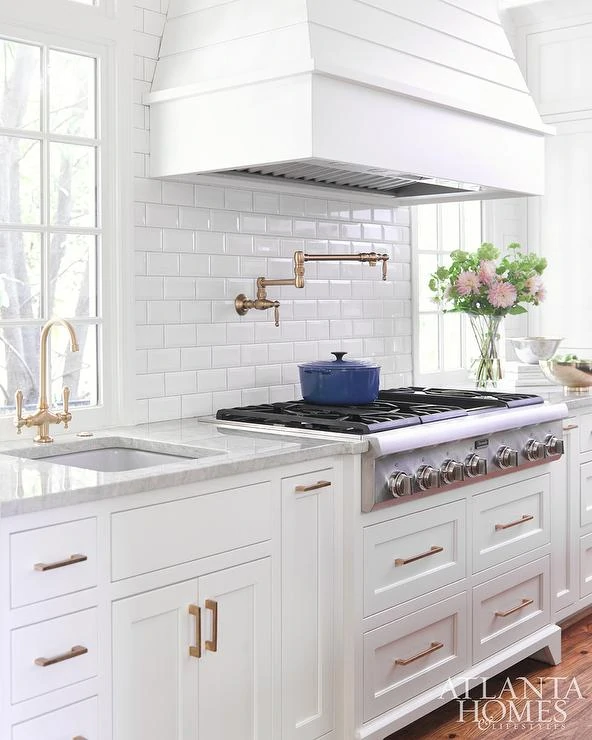
How great is this inspiration photo showing the classic beveled subway tile look?!
Erica recommended the Jeffrey Court Vintage Studio in Starry White. The only downside is that it requires a 2-3 week lead time. And given that I haven’t selected anything yet, that puts us well past our tentative 6/30 deadline.
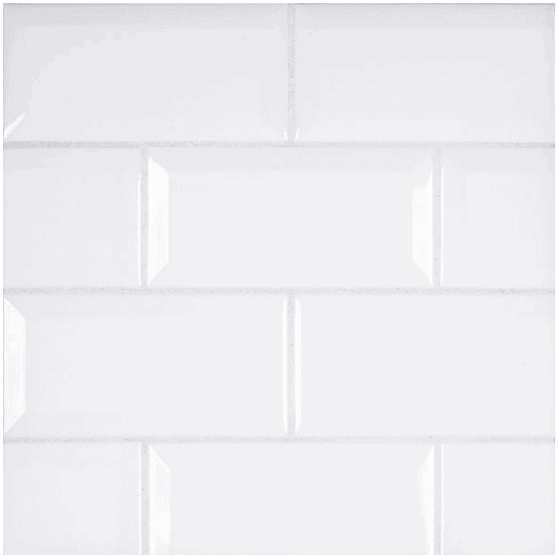
I also ran to Lowe’s and they have a great affordable option that runs $.49 per piece and is in stock immediately. So, I’m a bit torn on which route to go. Have any of you personally used either of these options or seen them in person? I’d love to hear!
And following is a little design board I put together so I could see everything in action in one spot! Some items are just representative of what I’m looking for, but it should give you a good overall idea of the design! All sources are listed under the image:
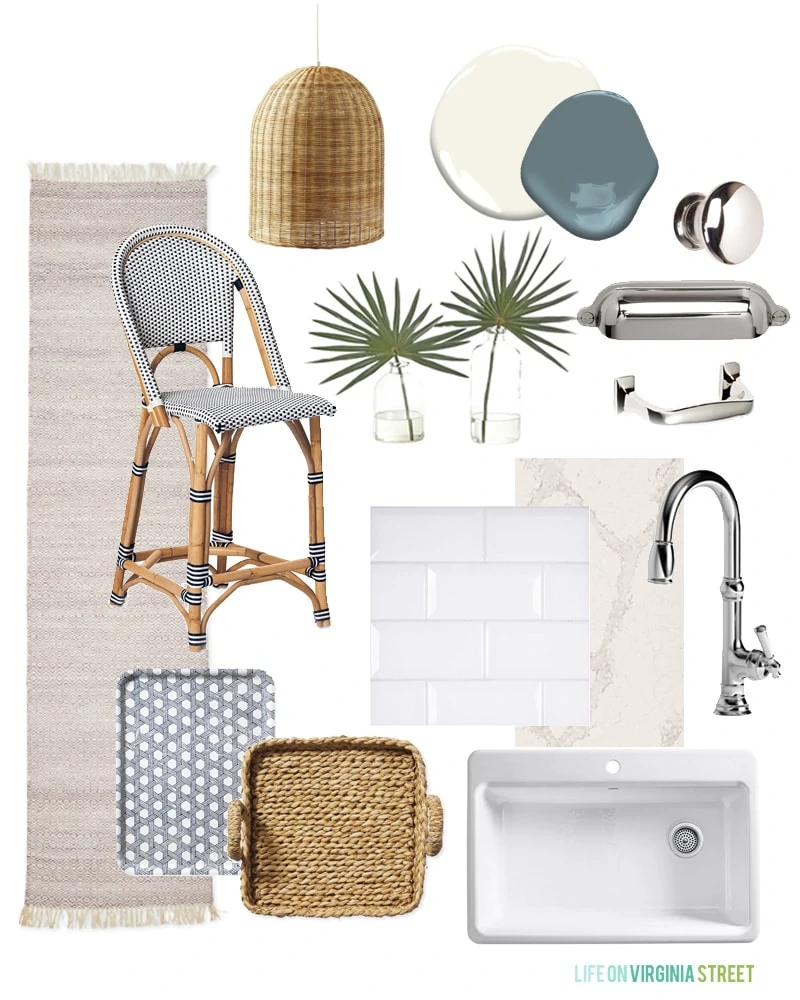
Faucet | Sink | Subway Tile | Caesarstone Countertops | Counter Stools | Indoor/Outdoor Runner | Hardware Collection | Basket Pendants | Graphic Tray | Woven Tray | Faux Fan Palm Arrangements
The cabinet guys are coming today to start install – which is a bit surreal! But I’m so excited to see how they look in person! We have a potential delay in our countertops that I’m hoping to resolve this morning, but other than that, come next week, we’re hoping for a functional kitchen again! My next kitchen update may be the actual reveal. Fingers crossed! A huge thanks to Erica for making sure everything has flown so smoothly and for helping me narrow down so many design decisions!
If you would like to follow along on more of my home decor, DIY, lifestyle, travel and other posts, I’d love to have you follow me on any of the following:
Pinterest / Instagram / Facebook / Twitter / Google+
disclosure: some affiliate links used
Awesome progress!! Hoping you’ll share the feedback you get on the tile choice – facing that same dilemma and having a hard time figuring out how to justify the time/cost for the more expensive option … I have heard more breakage/discarded pieces when you go the cheaper route, but it’s a big difference …
Thanks for letting us ride along!
Beveled subway tiles in a kitchen are hard to clean because the edges pick up stuff.. If you want classic, yet modern, you might consider an oversized subway tile with the classic straight edge. They have a cleaner look than beveled, are less busy looking, and will keep the attèntion on the cabinets.
We installed the Lowes Beveled Subway tile in our kitchen and LOVE IT! It looks so sharp. Good quality. I don’t think it’s hard to clean at all. Can’t wait to see the finished product!
We used the Lowe’s tile on a nice sized kitchen and it turned out great. We didn’t have any problems with it. There were maybe 4-5 pieces out of all the boxes that were not perfect but Lowe’s exchanged them, no problem. The only visual difference I can see between the two are maybe the Lowe’s tile bevel isn’t quite as defined or sharp but that’s just going by photos. I can’t wait to watch the progress and reveal!
Oh I can’t wait to see it all come together
I used Home Depot tile subway in my shower and looks great. But for my kitchen I splurged and used Ann Sasks. Beautiful tile makes my kitchen. The color choices are amazing but lead time is like 3 weeks. Also very expensive. But don’t regret it.
We used Lowe’s tile in our bathroom renos and they were great! With any white though, I would recommend getting samples. The white points can very greatly from a bright white to a yellow to a beige or gray.
We used the Lowe’s stock beveled tile for our backsplash. No cleaning problems, but how to handle the edges was a little interesting. We ended up taking a section out of the little of the tiles so both ends were still beveled on a half tile. The seams are pretty small and disappear, but not something I thought of before hand.
Good know! Thankfully we won’t have any exposed edges, as ours will all butt up to a perpendicular wall. But I’m glad you mentioned that, as I’m not sure I would have even thought about that otherwise!
We considered the beveled, but ran into issues because of the trim pieces. We really wanted to go that route. If you don’t need to have a trim piece anywhere, I think it would look amazing! We ended up with a larger, handmade, white subway tile that we could get trim pieces for. Unless you are able to find trim pieces. We built 2 years ago and we weren’t able to find a solution. We went through The Floor Club in Omaha.
We went with the Lowes tile in a bathroom and have loved it. No issues yet and it’s been almost 4 years.
It’s going to be beautiful, Sarah!! Excited for you!
We used the Lowe’s beveled tile for our backsplash 3 years ago. I have not had any problem cleaning it, but instillation was a bit trickle. We wanted to ensure that the ends of the tile were all beveled, so we ended up taking slices out of the center of tiles and butting them together as tightly as possible. Just a head up about a possible issue you might run into. I still love them.
Beautiful! What grout color did you use?
Thank you! We used a color called Super White 🙂