I recently shared changes in our other guest bedroom. That one was very much intentional, as I’d known for about a year that the striped walls need to go. However, the makeover I’m sharing today is very much unplanned (or at least I hadn’t planned on starting it just yet). I’ll get into the details below. But, I think the plans I’m sharing today will definitely get me closer to the coastal bedroom I had planned years ago when we started the very first makeover in this guest room!
This post contains affiliate links for your shopping convenience. Click here to read my full disclosure policy.
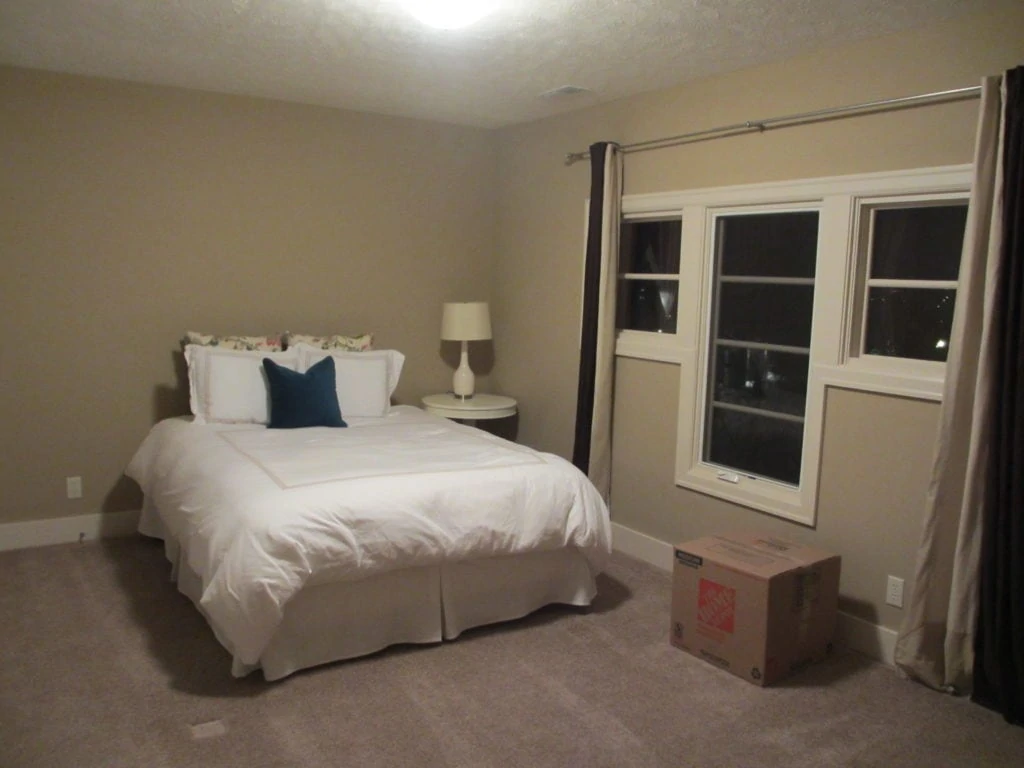
As a reminder, here was how the space looked when we first moved in. Not all that impressive, right?
Shortly after moving in, we installed the board and batten grid wall and the room ultimately looked like this. You can see the full reveal here:
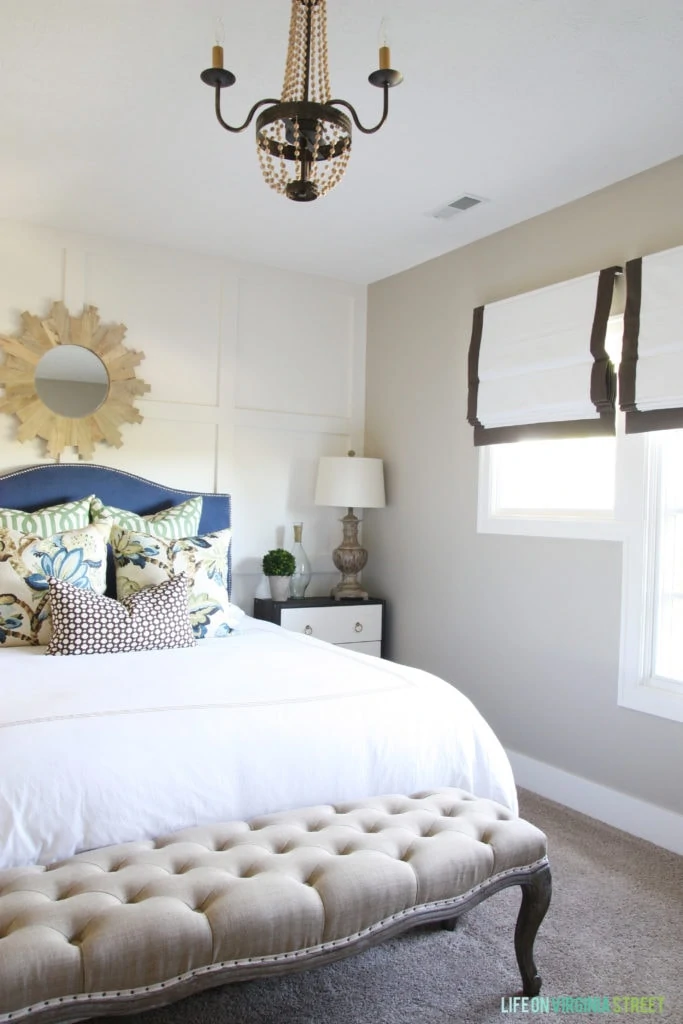


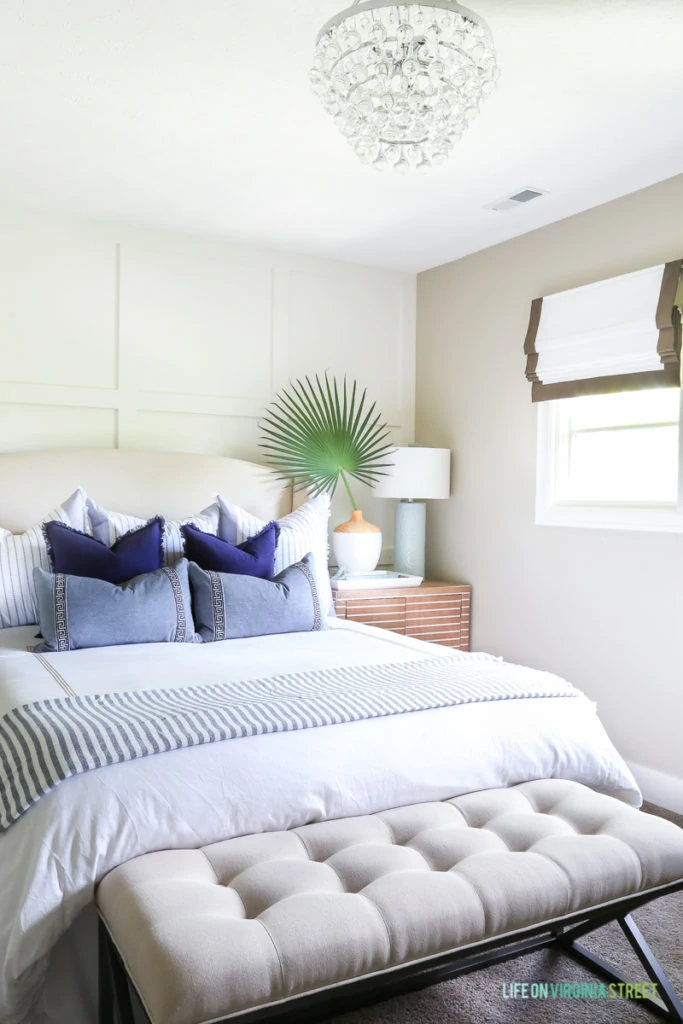
And here is how the guest room looked in my summer home tour this year. Not far from the vision I have for the space, but as you may know, the striped cabinet got moved to the entryway because it was too large in here. I also sold the headboard recently because it was too large for the width of the room (mostly due to the wings) and it made the neighboring closet door nearly impossible to fully open. Not only that, since it truly only was a headboard, the bed itself was on a $20 Costco frame and was never actually a ‘bed’.
I absolutely love using our local Facebook sale page to list furniture when I want to start a room makeover. I can honestly say that most times, it will fund 40-75% of all of my expenses for the new designs, depending upon the room. That’s huge! And it’s so perfect for people like me that genuinely love room makeovers and changing things up.
So, I started planning ways to slightly change up the layout, starting with the bed. Following is my latest plan for the space (and all the details on the hows and whys follow after).
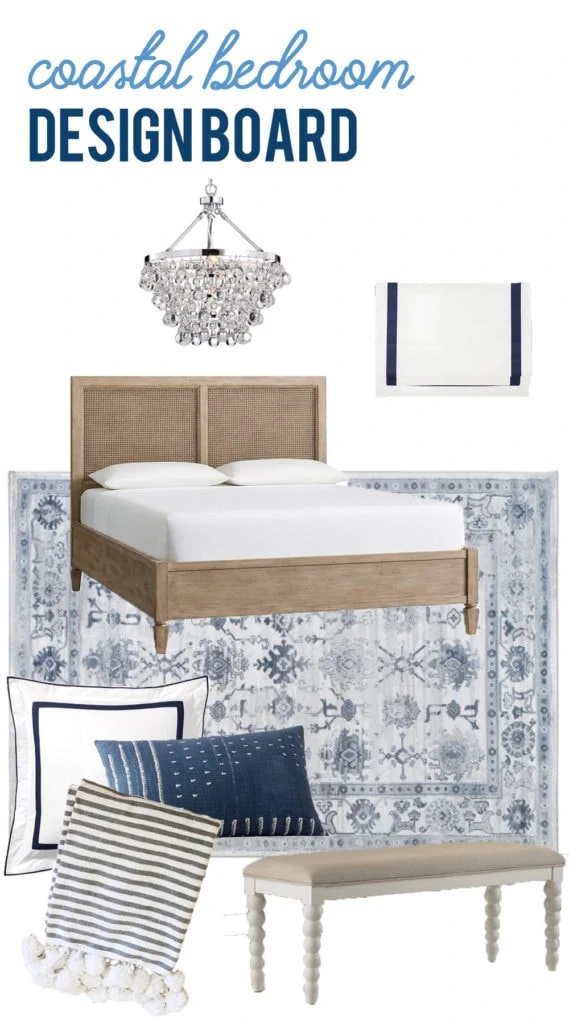
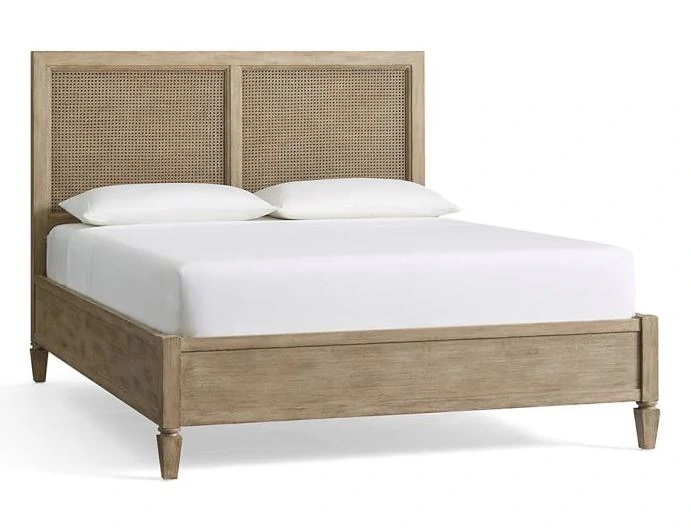
Wood & Cane Bed | Chandelier | Rug | Roman Shades | Spindle Bench | Striped Tassel Blanket (similar duvet cover) | Navy Border Euro Shams | Shibori Lumbar Pillow Cover
I ended up buying the floor sample of this bed at our local store. They were running a sale that weekend too for an additional 20% off, so in addition to the floor sample price, I saved even more. It made the bed nearly 70% off! Plus, we gained about 8″ in space in the room at the head of the bed without having the large wings of the prior headboard.
I bought this striped duvet cover as an open-package item recently for under $30. I think it will look really cute for the new plans I have for the space! But I’m also obsessed with this striped tassel blanket.
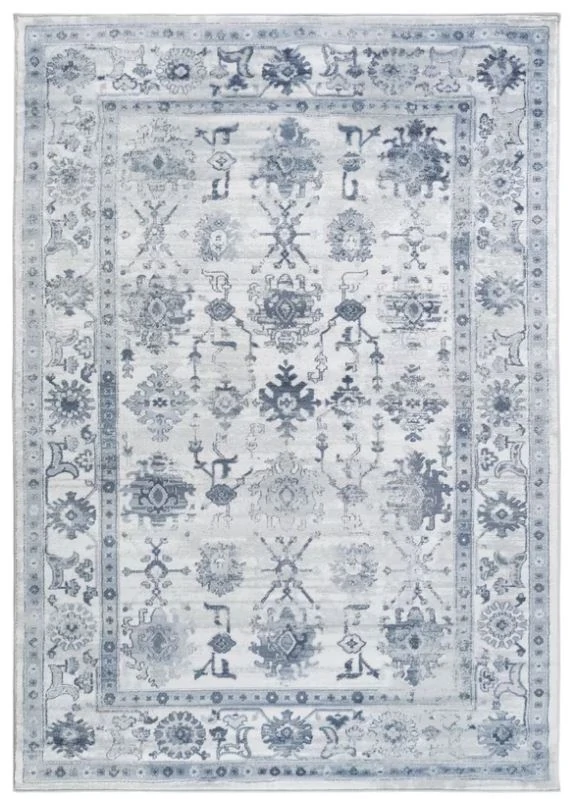
Because the contrast is lacking now with the bed frame and our very warm-toned carpet, I ordered this rug for the space. I’ve loved the pattern for some time when I’ve seen it in other places and it’s relatively affordable for the size I got.
I’m still trying to figure out a pillow combination for the space, and I may still paint the walls. They are currently the same color as the color in our living room that I just painted over, and because this room faces north, it doesn’t get a lot of great natural light. The current light fixture would stay, as I’m still really happy with it and I think it will still work well with this new design plan. I’ll also likely still keep the roman shades even though they’re brown. They are a super old purchase from Restoration Baby & Child and no longer in stock. But this version from Pottery Barn is really close and actually comes in navy blue, in addition to other colors. I actually have an extra set of pillow covers that look just like these navy border Euro shams, but in standard pillow size, that came with our duvet cover in our bedroom. I think they’ll work perfectly in here! I may also order the white version of the bench I just got for our bedroom, to place at the end of the bed.
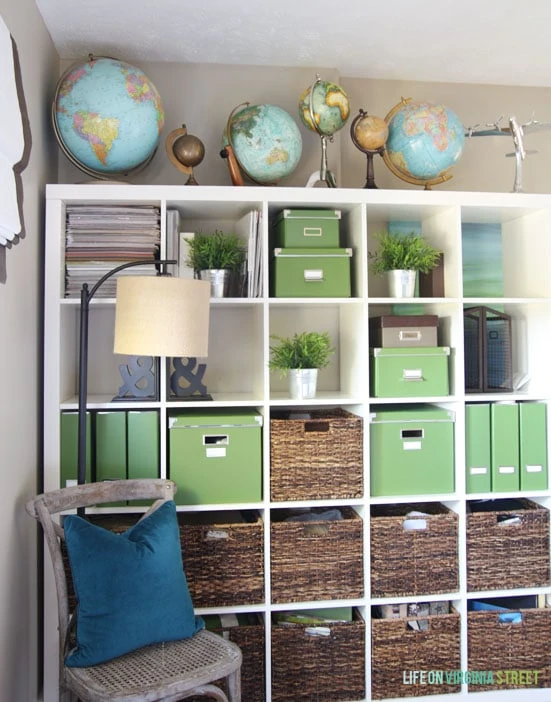
I also want to get the Expedit out of this room. I rarely, if ever, show this side of the room because it looks so cluttered! The Expedit was leftover from the craft room in our old house (when I had a desk attached) and then I used it temporarily in my craft room in this house. But, it’s a total junk collector. When I did my first craft room makeover here, I took it out and moved it to this guest bedroom. The walls are uneven though (look closely behind the tall globe with the chrome stand to see the jut), so it takes up even more space than it really should. So, we’re working on clearing out every single basket and either moving the unit to the basement or selling it. I’d ideally like to find a small desk to place in here that would work for guests as well as a temporary second office when we’re both at home working.
I haven’t really started to look at nightstands yet, and will probably continue to use our DIY nightstand for some time until I know exactly what I want in here. I’ll also be adding in some greenery in the decor (you know I have to have my greenery)! The board just shows the larger items for now.
I’ll share more on the space once I start to finalize the plans. But, I’m excited with the direction everything is headed!
If you would like to follow along on more of my home decor, DIY, lifestyle, travel and other posts, I’d love to have you follow me on any of the following:
Pinterest / Instagram / Facebook / Twitter / Google+
disclosure: some affiliate links used
Love this look, especially the rug! You are really a good shopper, getting discounts on most items. We are currently redecorating our bedroom so I’ll be sure to pin this!
Since your current shades are still functional and pretty, could you just use some stitch witch or something to iron on a new border color over the top of the brown? Not that there’s anything wrong with the brown, but you have an almost identical one in navy shown on your mood board. Love the changes you are making!
I agree with Jamie about reworking the currrent shade. And I gotta say I’m very impressed with how thrifty you were with the other selections. SCORE on the bed!! It’s going to look fabulous! Excited to see the finished product!