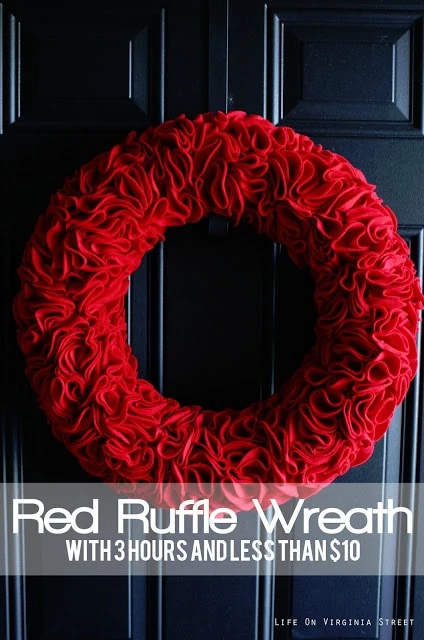
Learn how to create this stunning red felt ruffle wreath that works well for a variety of holidays!
This post contains affiliate links for your shopping convenience. You can read my full disclosure policy here.
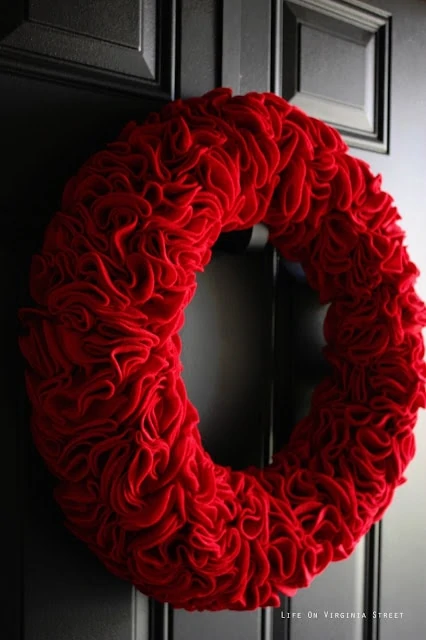
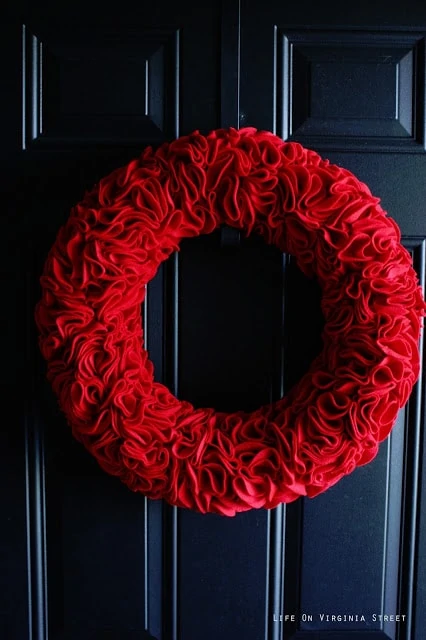
Try saying Red Ruffle Wreath three times fast! I made another felt DIY ruffle wreath over the past week. You can read this post with my first wreath to read more about the secret weapon which made it go MUCH faster than when I started. This time I opted to make the wreath in a deep crimson red for Christmas (but know it will also work for Valentine’s Day, Fourth of July and more)! I wish I could say I was being proactive, but the truth is I went to the fabric store to get a pumpkin colored felt and all they had was a bright orange that looked a little too neon for my liking. Since it was on sale for $2.99 a yard, I went with the vibrant red.
Total cost for the wreath? $1.98 for the base from Hobby Lobby and 2 yards of felt at $2.99 = $7.96 + tax (keep in mind these are 2010 prices). And I still have about 1/2 a yard of felt left {keep in mind the felt I used is 72″ wide so it may require more if your bolt isn’t as wide}. This time around, I finished in about three hours total. MUCH better than before! It also helped that the red felt was much thicker than the the white felt.
Supply List For The Felt Ruffle Wreath
- Felt – amount varies depending on size of wreath and density of ruffles, but 2 yards is more than enough if you buy the kind that is 70+ inches wide
- Stick Pins – 250 to 400 depending upon wreath size and density of ruffles
- Circle Rotary Cutter (This is a game-changer for this project. If you see how long my original wreath took when cutting circles with a template by hand, you’ll understand why!)
- Straw Wreath Form in your preferred size. I used an 18″ wreath, but you can use anywhere from 12″ wreaths to 24″ wreaths, depending upon the look you’re going for.
How to Make a Felt Ruffle Wreath
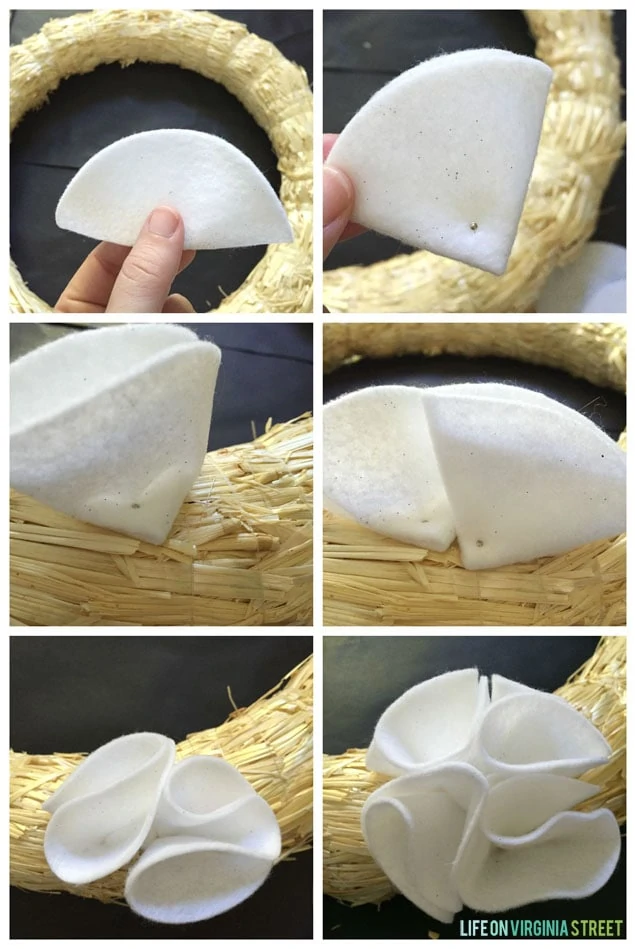
Start by using the circle rotary cutter to cut your felt circles. For this particular wreath, I made my circles 2″ wide for this project. I cut approximately 30-50 at a time and then would apply them to the wreath before moving on an cutting more circles.
To affix the felt circles to the wreath, simply fold the felt circle in half, and then in half again. Your piece should essential be a quarter-pie shape. Use a stick pin and push it through the felt, just up from the “pie piece” bottom and then push the felt into the wreath. Repeat this process, overlapping your ruffles so that the straw does not show through. Note that I usually leave the plastic on the wreath, but in this case I did not. It’s just a cleaner process if you leave it intact.
Start to fluff and open your ruffles as you go along. See the images from my white felt ruffle wreath below, as I continued to add additional pieces of felt.
Keep in mind, you don’t have to cover the door wreath with felt on all sides (unless you’re hanging it on a window or somewhere you will actually see the back side). The back of mine was left fairly empty since I knew it would be laying against our front door.
Continue to add felt circles until you are happy with the look and overall coverage of the wreath. It’s simply a matter of preference.
This is a hard color of red to capture in photos (it looks a little bright) but I think it will be darling once December rolls around (and Valentines Day and the Fourth of July, etc.)!
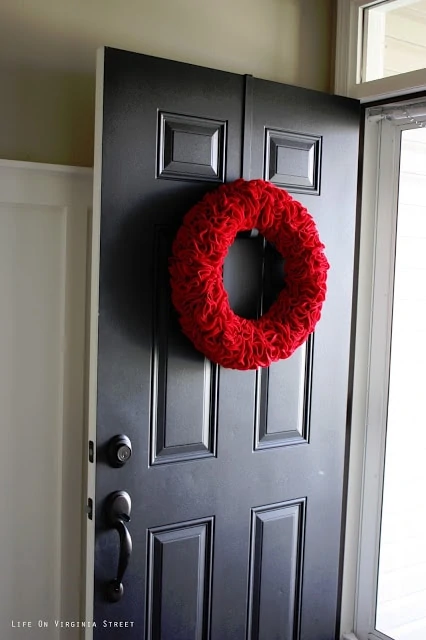
As a side-note, this serves as a reminder that I desperately need to put a fresh coat of paint on our front door – oh and the inside of it too!
Basically, without this tool, I never would have made it this far in completing this project. It is an absolute dream when working with a project that requires this many circles. I couldn’t be happier with how these gorgeous unique textured wreaths turned out!
If you would like to follow along on more of my home decor, DIY, lifestyle, travel and other posts, I’d love to have you join me on any of the below channels:
Your wreath is so pretty, love intensity of your felt. Did you make bunches of little flowers from circles and put them on wreath base? It’s really full so must have taken lots of little bunches. Love simplicity of your wreath.
Happy days
Thank you! I just applied one circle at a time. They take more space than you would expect, likely due to the weight of the felt.
I love the drama and simplicity of it against your black door – gorgeous!
The felt was 3.99 a yard (bought 3 yards for doing back of wreath)stick pins 6.00 a box of 400, wreath was 5.99 ( hobby lobby) circle rotary cutter 18.00. So definitely more than 10.00. Love the wreath
Oh that is gorgeous! Can’t wait to link to your past posts to read about how you did it!
So pretty and it looks so elegant against your black door. Great job!
Katie @ Addicted2diy.com
Sarah, I love this! Stopping by to let you know I featured your beautiful wreath at tonight’s Get Your DIY on party! http://www.confessionsofaserialdiyer.com/get-your-diy-on-christmas-ornaments-features/
Thanks so much for sharing! XO
Thanks so much Christy!
Your wreath is beautiful! I would love if you would show it off at our All Things Christmas Link Party! It would be a beautiful addition! This is a great idea for a Valentine wreath as well! Trisha
Thanks Trisha! I linked up and look forward to following your party!
Gorgeous! And totally repurpose-able- Valentine’s day? 🙂
Your wreath was one of my favorite projects from the link up party – so simple and lovely – and it looks amazing against the black door! I actually featured them today on my blog 🙂
xo
Becky
http://cuphalffull-sf.blogspot.com/
So beautiful! It looks so elegant in red 🙂
Visiting from Inspire Me Please and started following you on Pinterest and Bloglovin.
Have a fabulous weekend!
Okay, the wreath is pretty. But the point of Pinterest is to include on your blog the step by step directions on how it was made.
I see the directions hopefully are listed with the white wreath.
Stopping by from Nester’s… I love your ruffly red wreath! The circle cutter is a new gadget for me, but I can see how it’s a “must” for this project. I’ll have to check it out…
Striking colors! It’s simple but festive.
Do you remember how many circles you cut?
Do you remember about how many circles you cut?
Honestly no idea since it’s been a few years – but it was a LOT! 🙂
I cut a 2in circle and seems to be too small….is it 2in folded or 2in of the actual circle? Thanks
It should be a 2″ radius (or a 4″ circle). If you got the rotary cutter, you set that to 2″. I hope that helps!
I love this idea but would put glue on the pins so the peddles don’t fall out. It will help preserve the wreath for many years. Happy Pinning!
Hi Sarah, this is a gorgeous decoration and I would love to do it. Just a question, though, about the felt. How thick is it?
In local stores (Italy) I found from 0.04in to 0.20in.
Thank you
Fabiana
I’ve actually done this project with both thicknesses. They both look great, but I prefer the look of the thicker felt (which is what is pictured in this post). Although, I will say, the thinner felt is a LOT easier to work with!
Thank you!
Based on your feedback I bought the thicker one… I’ll have my husband cutting it 😉
ciao
Did you do anything with the felt like cut it into 21/2″ strips before cutting it?
No, I actually left them in the full sheets so that I had more to grip onto and it wouldn’t move around as much. I hope that helps!
I may have overlooked what type pins to use. What size straight pins do it need to use? Can I use Styrofoam instead of the straw for.
Have you had any trouble with the pins coming out of the wreath? Beautiful wreath!
Mine are six plus years old and still haven’t had any issues with pins coming out 🙂
Sorry if someone else asked this but what about using hot glue instead of pins?