I am sharing a tutorial on how to change the stain on a chair from dark to a driftwood finish with chalk paint.
Today I’ve teamed up with an amazing group of ladies to share some pretty dramatic and clever chair makeovers each of us undertook recently! The Project Design challenge is hosted by the lovely Mary Ann of classic.casual.home and if you’re not following her blog, you need to be! Also, be sure to stop by each of their chair makeovers at the end of this post.
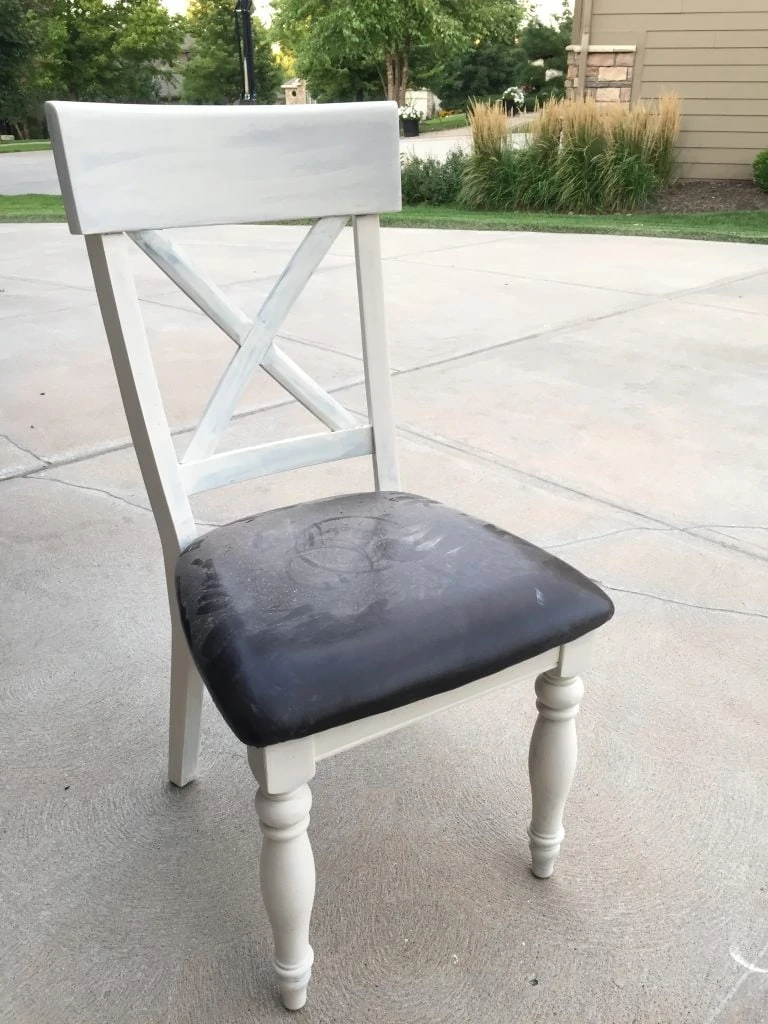
As I’ve mentioned in the past, I genuinely love our dining room set. But, I feel like it is a bit dark and heavy for the lighter, beachy vibe we have in the rest of our home. I knew I was either going to have to lighten up the chairs, the table, or the buffet table (or a combination) in order to get the coastal vibe look I really wanted.
Here’s a little video intro to my project.
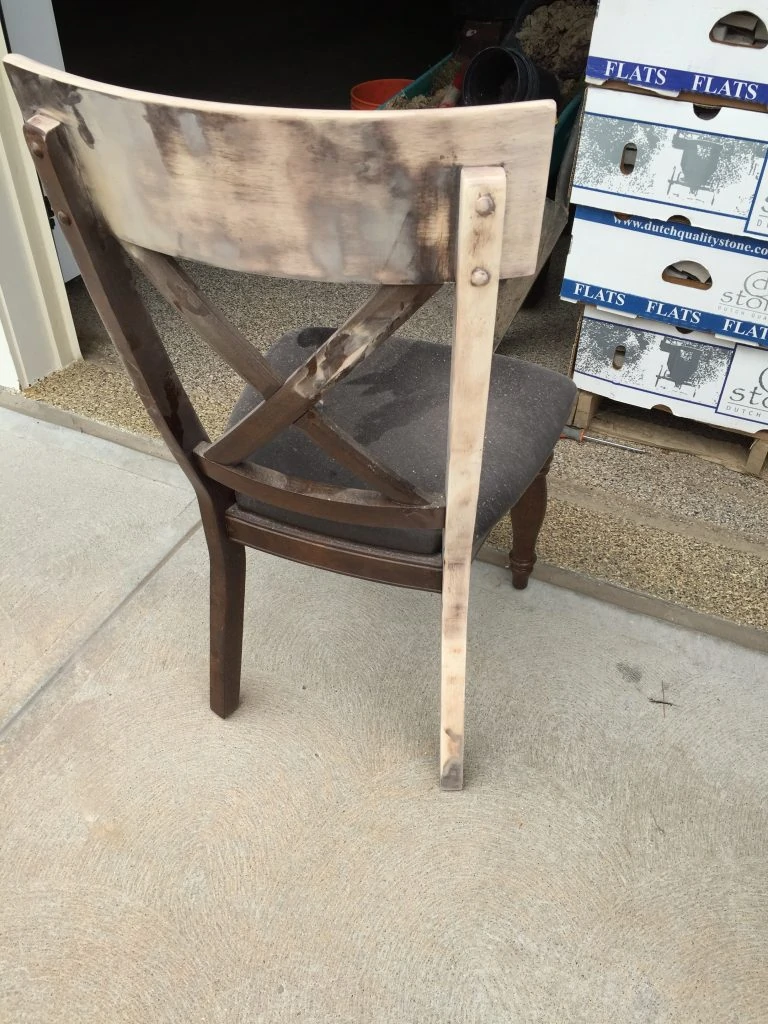
Bottom line – I wanted to take the heavy dark stain to a driftwood or much lighter-tone finish. I started out by sanding one of the chairs with my power sander and just sanding by hand. I spent 2+ hours sanding the one chair, and still didn’t get all of the stain off. Surprisingly though, the stain came off better than I expected.
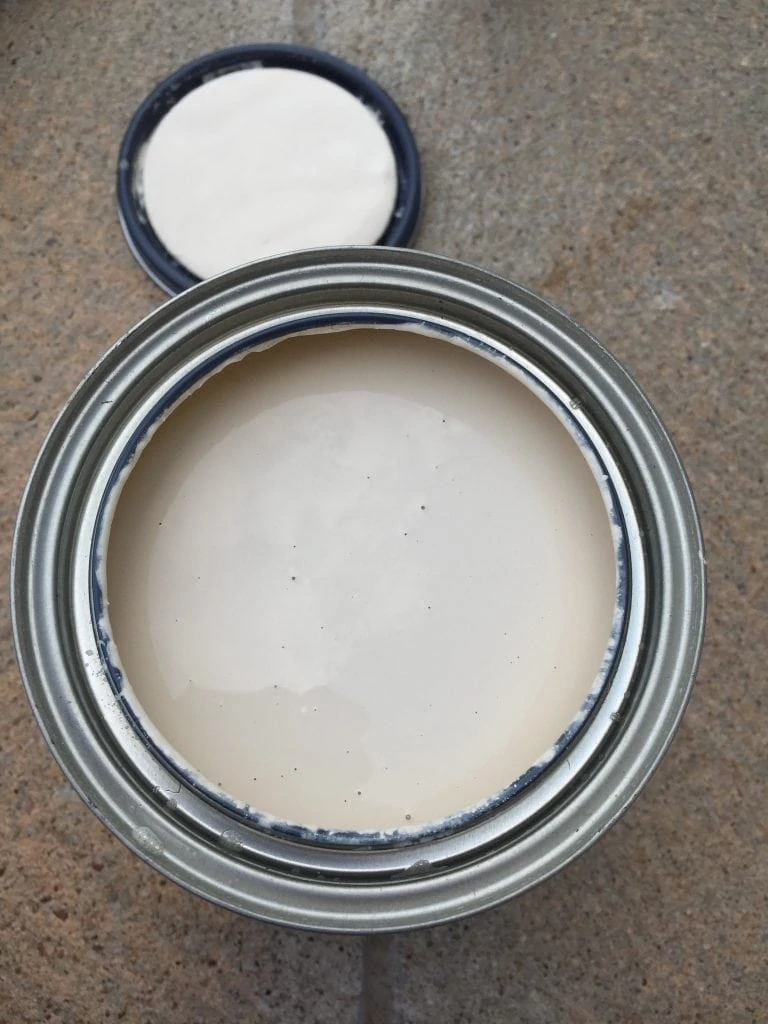
So, I decided to try the new stain color I had picked out in areas that had been fully sanded to make sure I really loved it. I ran to Lowe’s Tuesday night after work and picked up the Minwax Weathered Oak stain (it’s the one in the bottom left corner). I loved that it was washed out but still had a warm tone and some slight gray undertones. It seemed perfect.
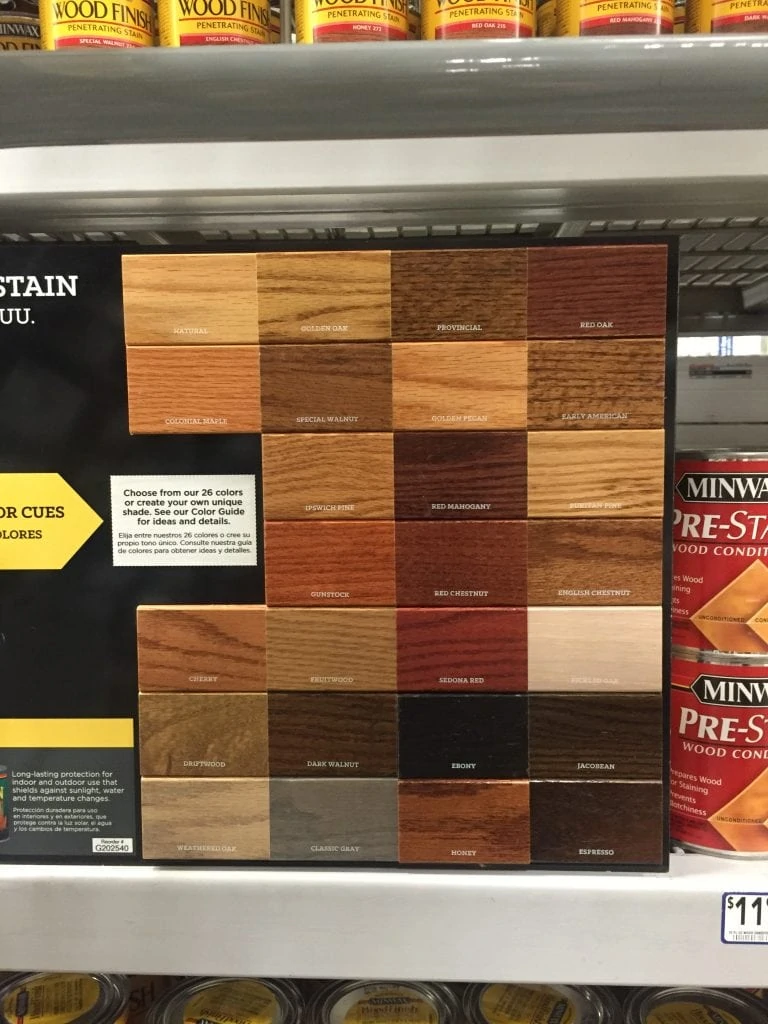
And guess what. I didn’t love it. I actually kinda hated it. In the picture below, the stain had been applied to the very top and the left leg. I felt like it didn’t absorb consistently between the two areas and was a much darker color than I had actually expected based upon the sample in the store. I was worried it would not be quite enough of a contrast with the table and make everything look really mismatched. I actually really liked how it took on the top part of the chair, but the legs just seemed really off to me, and way too dark. This route may work for you if your wood takes the stain more evenly and you find a stain you love!
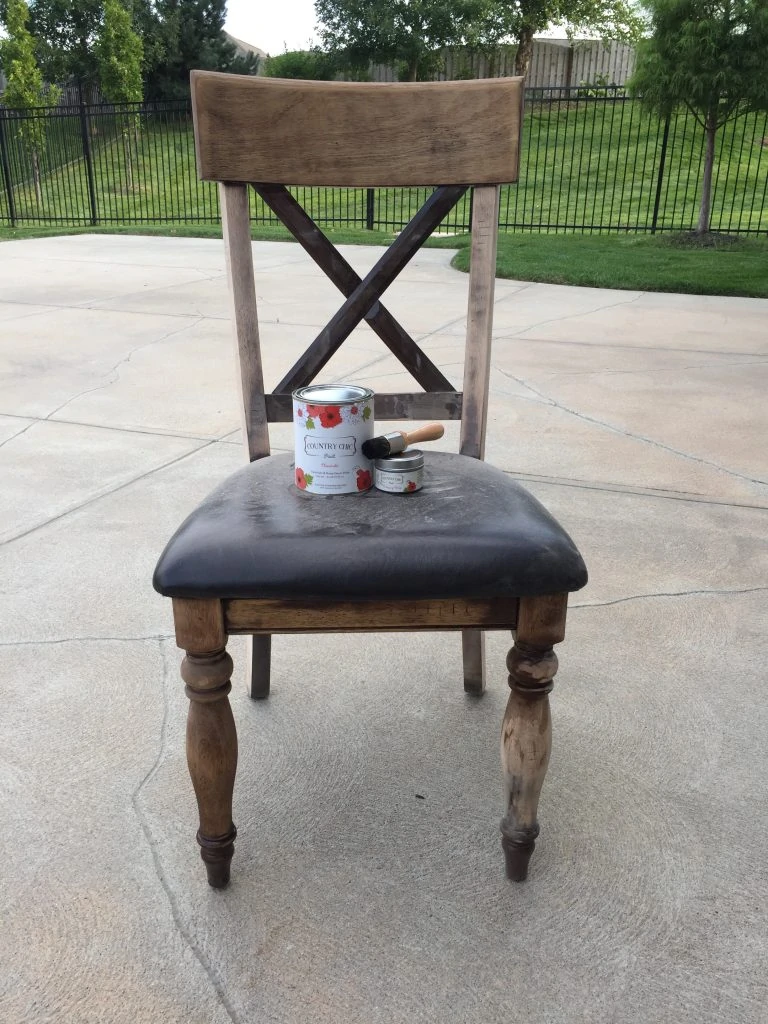
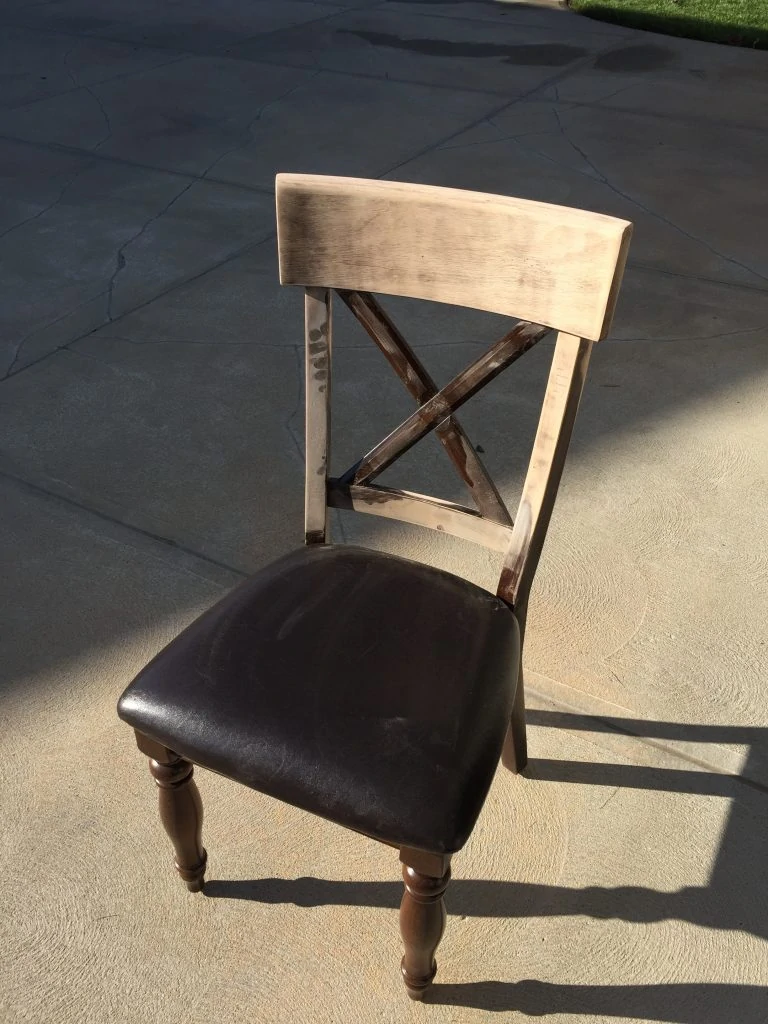
So, back to the drawing board! Last night after going out to dinner (I work best under pressure), I decided to give the chair a coat of chalk paint. I remembered I had made a similar wood-like finish with my DIY “Wood” Bead Chandelier a few years back and thought I would give it a try on the sanded chair. I gave the chair a quick coat of some Country Chic Paint in Cheesecake (a very creamy airy white color) that I’ve had on hand for a few years. I simply applied the paint using a foam brush. Some areas required a little bit extra paint and a second coat, but since chalk paint dries so quickly, it only took me about an hour to finish the whole chair.
It looks super light and not quite right, right? I didn’t want a fully solid whitish color because I still wanted the end result to look like natural wood with some slight variations. Once you have a fairly covered, but not perfect finish, that’s where the beauty of wax comes into play. I literally didn’t finish painting the chair until nearly 7:30 pm, so I only let it dry about an hour before I applied the wax. Not exactly ideal, but I knew I had to get it done last night so I could take some final photos first thing this morning. Why do I procrastinate again??
Tip: If you opt to go the chalk paint route, it would probably still be beneficial to lightly run some sand paper over the smooth surfaces. Nothing intense, but it will help the paint adhere before you paint. Once you add a bit of grit with the sand paper, be sure to wipe down your surface to remove the dust. Then you’re ready to paint!
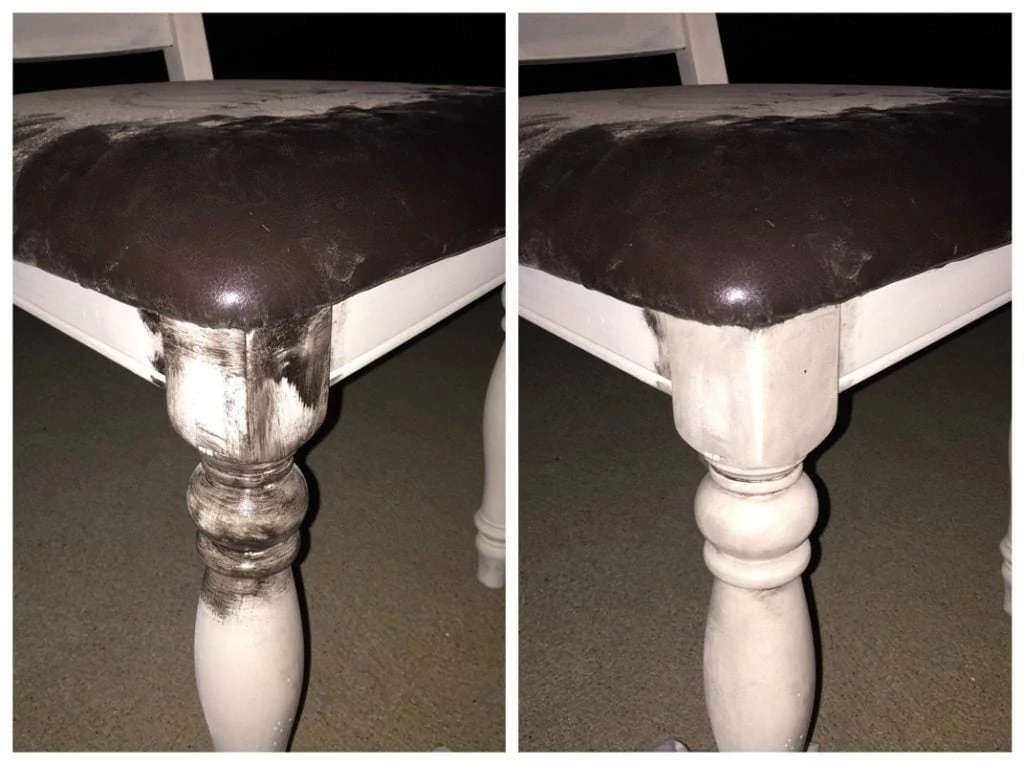
When applying the antique wax (also from Country Chic Paint), I work in smaller sections at a time, taking care to really work the wax into the cracks (and spindles) with the brush. The flat smooth areas, I’m a bit more reckless and don’t try to cover quite as much. By the time I’m done applying it (usually takes 3-5 minutes), I immediately rub the wax in with an old white cotton t-shirt. You borderline have to massage it and rub it. It’s kinda weird, but it totally works. I realized it is not super easy to see what I’m talking about, given that I took these photos when it was dark outside, but hopefully you can see how I apply and then a better look at how it appears once I rub the wax mostly off.
I literally woke up around 6 this morning to finish waxing and to take some photos. Obviously not the best time of day for interior shots, so I’ll be sure to add some lighter and bright ones later in the day once the sun is actually up 😉
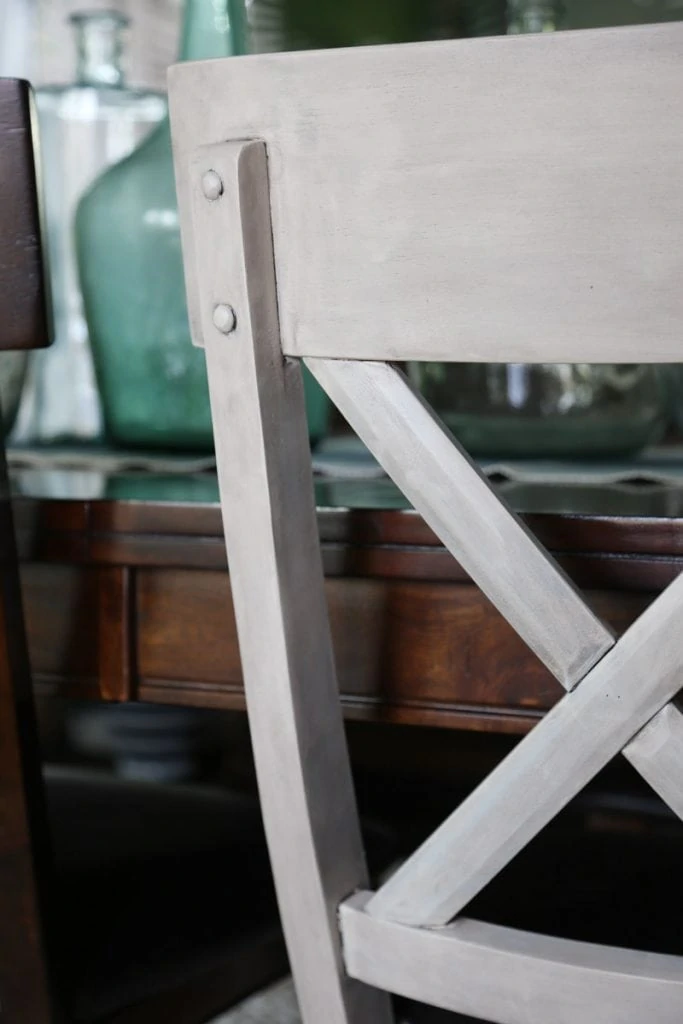
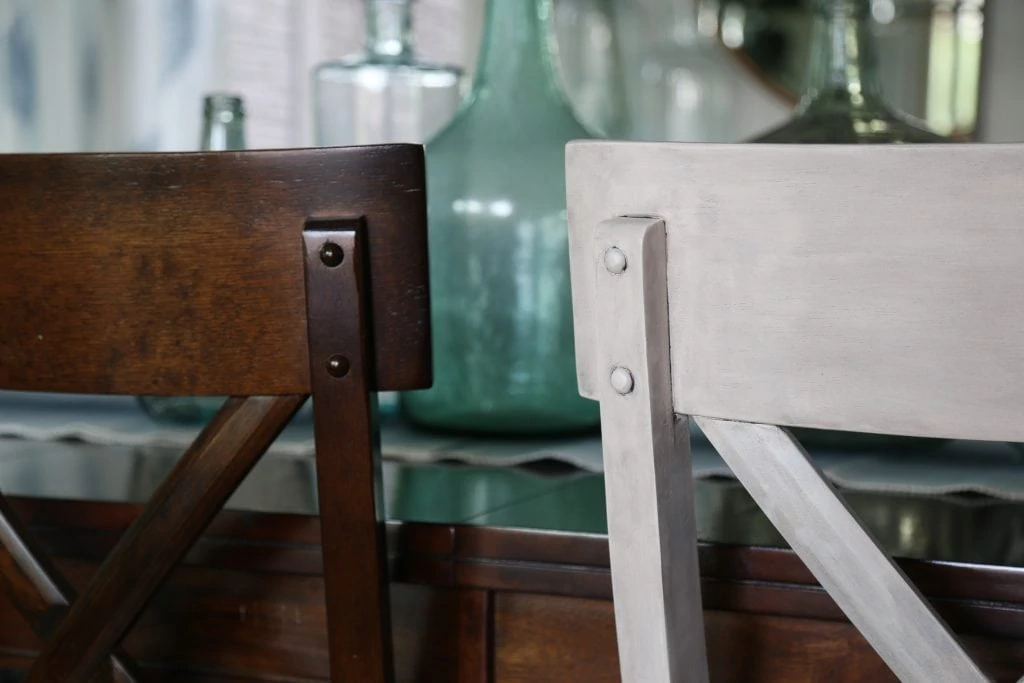
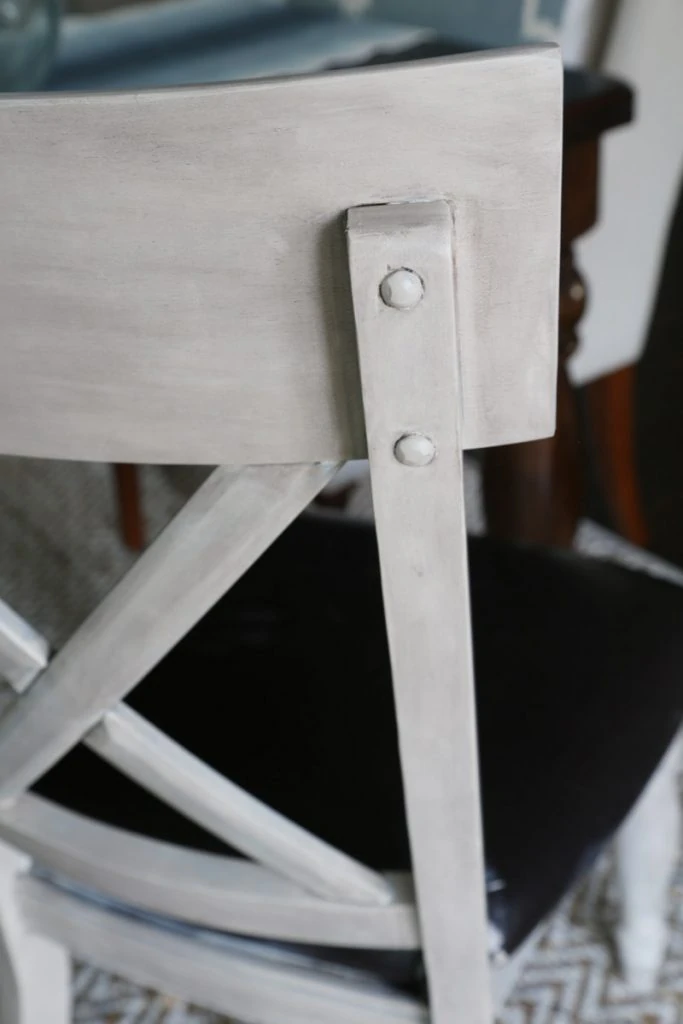
I think the photo below is a better representation of the true color. It isn’t quite as gray as the image above suggests but I had to lighten things quite a bit due to the time of day. I love the expanded shot below because it really helps me envision how everything will look once all the chairs are painted. So I feel like it’s a much less harsh contrast (especially when you can see the linen end chairs) than when you just see a close-up next to the dark wood.
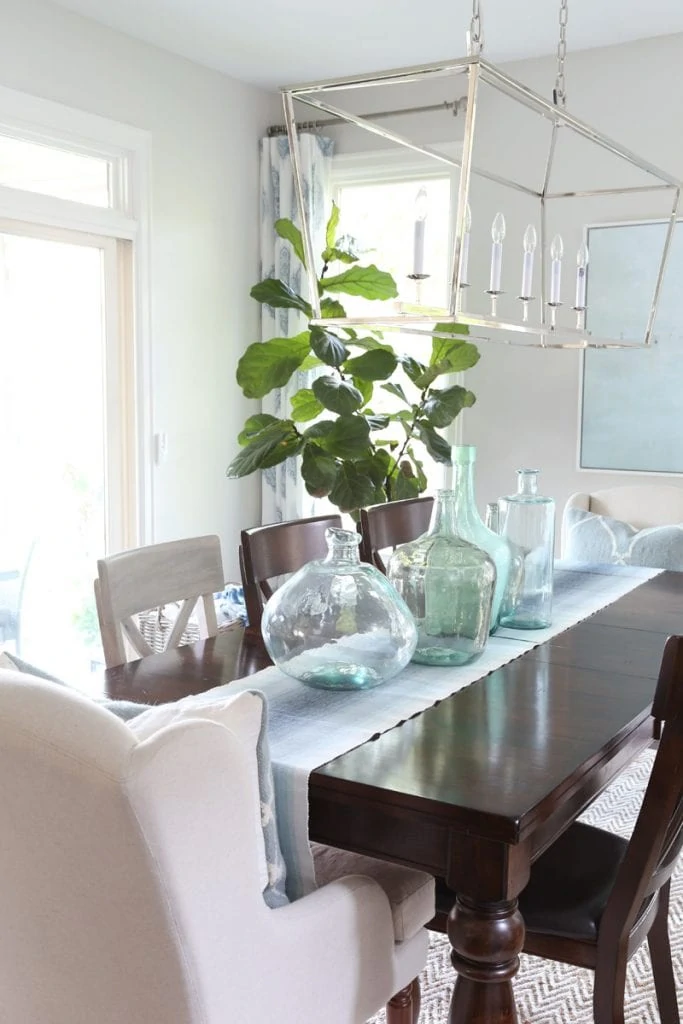
I love the result! It’s not the original look I had envisioned in my mind, but I still think it will look so much better once the other chairs are done. And honestly, I feel slightly relieved that I won’t have to spend 3+ hours sanding each of the remaining five chairs. I will happily take back those 15+ hours and spend five or less going the chalk paint and wax route. I’ll keep you posted as I wrap up the others and fully finish the dining room!
SHOP THE LOOK OF OUR DINING ROOM (CLICK ANY OF THE IMAGES BELOW):

Now, be sure to stop by all of the other gorgeous chair makeovers in the Project Design challenge tour. You’re going to be amazing by all of these talented women!

Have a great weekend friends!
If you would like to follow along on more of my home decor, DIY, lifestyle, travel and other posts, I’d love to have you follow me on any of the following:
Pinterest / Instagram / Facebook / Twitter / Bloglovin’ / Google
disclosure: some affiliate links used
The final result is really pretty Sarah! The color looks great in your light and bright dining room. Stripping with Citristrip would save eons on sanding if you want to go down to the bare wood in the future. Super messy but gets the job done the best and takes the finish off in a half hour or so.
I was going to suggest the same thing — use a furniture stripper instead of sanding.
What a transformation! They look lovely in your dining room. Thank you so much for being a part of our latest Project Design!
Love the lighter look. It is so pretty with the upholstered chairs.
Love the lighter color! Sanding is probably way too much labor. I have used liming wax to get the same effect on darker wood. Its sort of like white shoe polish. Briwax makes it. So happy to have found you via Cindy and Mary Ann xo Kelley
I thought I left a comment this morning. I am so impressed that you tried sanding first. I painted our dining room chairs with a type of chalk paint, too, and I am so glad I did. Should have done it sooner. I can’t wait to see them all finished. SUCH a pretty room. Thanks for participating in Project Design with Cindy and me!!! Have a wonderful weekend and don’t work too hard 🙂
Mary Ann
The thought of getting all of the stain off those chairs would put me in a bad mood….I think painting and staining was a much better idea:) Love the look!
That’s going to be so pretty! I love how it ties into the upholstered end chairs and lightens up the space!! DIY always seems to have twists and turns..way to push through and create a beautiful result!:-) p.s. Isn’t it amusing how our cats just have to be the center of attention sometimes (especially when the camera comes out), lol!
Such a pretty look, Sarah and it looks amazing with your dining room! Happy Sunday~
We have mango wood dining chairs and I feel the exact same way – beautiful, but too dark for the rest of the casa! Good to know that they can be sanded and/or painted! I see a project in my future…
Thank you!
Just stumbled across this post. Do you have an update on your dining area? I’m not too much of a fan on super distressed but I love how this turned out. I guess it’s more my taste when there’s very little dark wax?
Sorry! Just saw this! Based upon the amount of time it was taking, I never finished the set. I ended up selling the other chairs and then sold that one separately. And yes, less wax is key if you don’t want tons of contrast! You could also use a bit of clear was too if you want it even lighter!