I am sharing with you my tutorial for painting cabinets and making a roman shade!
Here are some steps for those of you that asked for tutorials in the last posts.
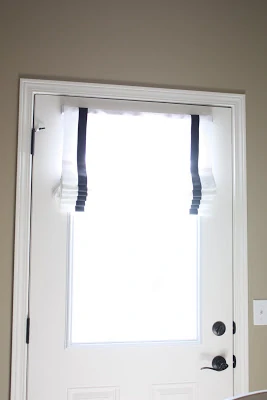
If you are interested in the roman shade, the details are here. This is such an easy project and requires no sewing! This is definitely one of those DIY projects that I will continue to do over and over again, since you can literally make one of these shades for under ten dollars and in less than an hour. To keep all the strings out of the way on the door, I simply got a 3M clear hook and stuck it to the door so I could wrap the strings out of the way {you can see them slightly on the left of the shade but this is mostly because I left the shade/strings so long so there is more to wrap}. On this particular shade, I then just used fabri-tac fabric glue {the same used on the shade itself} to glue the ribbon down the shade. So easy!
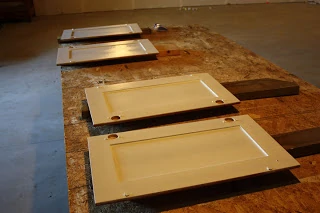
For the cabinets.
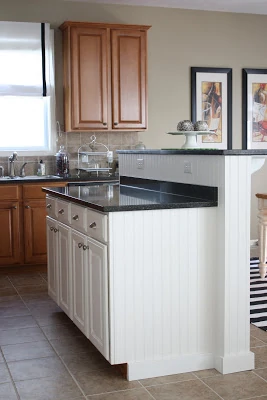
I followed directions rather closely from here and here. As well I had scoured the web prior to painting and felt her directions were very clear and matched my cabinet type most closely. I made a few alterations, including the fact that I painted on two layers of primer {Zinser 123 Primer} and then two layers of Behr flat enamel paint from Home Depot. Then I then followed all of this painting with a rub-on polyurethane in Satin Clear to add strength and a slight gloss to the cabinets. I love how the elevated finish turned out and would absolutely do it again. Additionally, I did not distress my cabinets at all, as the tutorial shows but may try it in the future on bathroom cabinets. The real key to this whole process is patience! This is a tough step for me but it is important to let each paint layer dry thoroughly {I allowed a full week per side due to our humidity}.
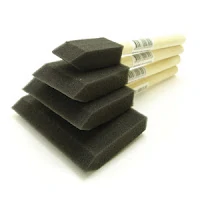
Supplies: I used foam paint brushes and foam paint rollers as I felt they left the least amount of streaks. I did not tap down the texture with a brush as the tutorials above suggest. I used the foam brushes to first go in the edges/cracks of the doors and then followed up with the roller everywhere else.

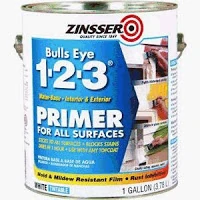
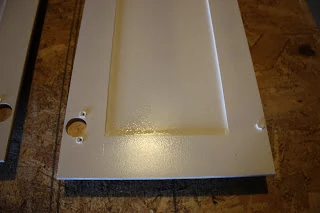
With the adhesive primer, you do NOT sand your cabinets first. This may be different if your cabinets are textured or you have wood such as oak. With our smooth maple cabinets, I only lightly sanded {with 400 grit sandpaper} after I applied both coats of primer but before I applied any paint. It is important to wipe them down thoroughly after sanding to ensure there are no particles left behind. I used less than a quart of this primer – it goes a long ways!
Looking a little scary after one coat of primer:


And if you are looking for cheap cabinet hardware check out Target! It was surprisingly the only place in Omaha I could find the pulls for the drawers on the island. And to top it off they were $19.99 for a SIX pack! Amazing. Usually cabinet pulls go for $4-7 a piece. They didn’t have a huge selection but the ones they had were all stylish.
If you have any questions about these steps, feel free to let me know! Not sure how good I am at this tutorial business so I may be missing some major steps. If something is unclear I will be happy to help out!
Leave a Reply